The church fall bazaar was in six hours and I’d completely forgotten my commitment to bring jars for the canned goods table. Everyone else would be bringing their grandmother’s heirloom recipes, fancy chutneys, and jewel-toned jams with hand-painted labels. I had a bushel of pears sitting on my counter that my neighbor had dropped off on Tuesday, threatening to go soft any minute. Honestly, I almost called to say I was sick. But then I spotted those pears and remembered a trick my aunt used to do, and I thought, maybe I can make something that looks like I planned it all along.
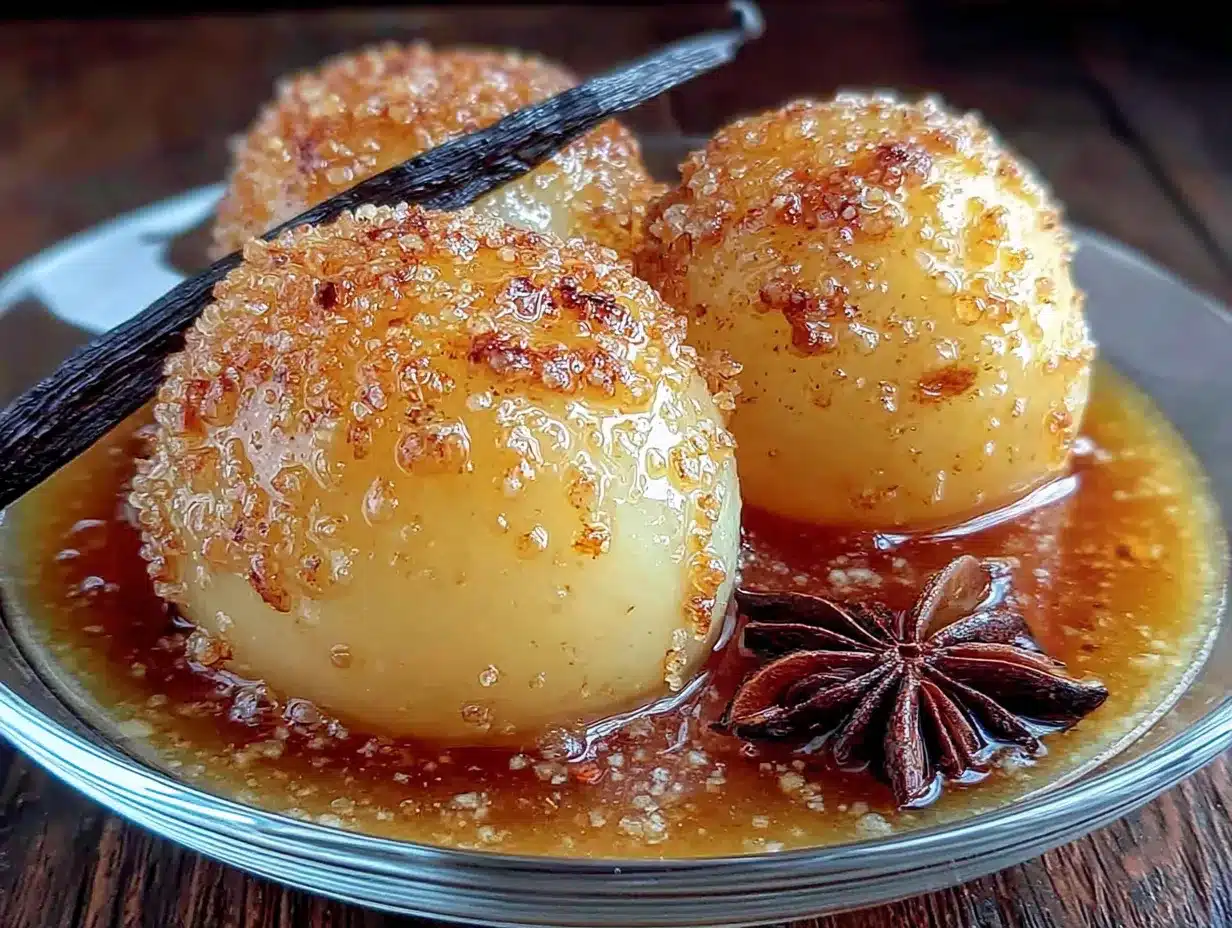
I won’t pretend I wasn’t frantically peeling while listening to a podcast and hoping for the best. The syrup came together in a pan while the jars were still warm from the dishwasher. I threw in a vanilla bean I’d been hoarding for a special occasion and some star anise because it sounded fancy. The whole kitchen smelled like a hug, and I thought, well, at least it smells good even if the texture is a disaster. But then I packed them into jars, processed them in the water bath, and watched the syrup turn that beautiful golden amber color. I actually said out loud, “Okay, that’s pretty.”
At the bazaar, my little table of spiced pear halves sold out in forty minutes. An older woman bought three jars and told me they looked like something from a magazine. I didn’t have the heart to tell her I made them in a panic between laundry loads. But honestly, that’s the thing about this recipe—it looks like you fussed, but you really just let the pears and the vanilla do the heavy lifting. Maybe you’ve been there, staring at a pile of fruit and wondering what to do before it all goes bad. Let me tell you, this is the move. It’s become my go-to for gift giving, holiday brunches, and quiet winter mornings when you want a taste of summer.
Why You’ll Love This Recipe
This is the kind of recipe that makes you feel like a domestic hero with very little actual effort. I’ve tested it with different pears, different syrups, and different spice combinations, and this version is the one that keeps getting requested by friends and family. It’s also the recipe I turn to when I want to preserve something beautiful without spending all day in the kitchen.
- Simple Ingredients : You only need pears, sugar, water, vanilla, and a few warm spices. No weird preservatives or complicated additives.
- Stunning Presentation : The vanilla syrup turns clear and golden, and the spices float inside the jar like edible art. They look incredible on a pantry shelf or in a gift basket.
- Perfect for Gifting : Homemade canned goods are the gift that keeps on giving. These pears are beautiful, practical, and show you put thought into something special.
- Versatile Uses : You can eat them straight from the jar, serve them over ice cream, pair them with cheese, or chop them up for a quick dessert topping.
- Beginner-Friendly Canning : If you’ve never canned anything before, this is a great starting point. The process is straightforward and forgiving.
What makes this recipe different from other canned pears is the vanilla and spice combination. Most recipes just do plain syrup, which is fine, but boring. The vanilla bean adds a floral sweetness that regular extract just can’t match, and the star anise and cinnamon give it a warm, cozy depth. It’s not your grandmother’s pear recipe—it’s better. I mean, the first time I opened a jar in January, the smell alone transported me back to that fall afternoon. It’s comfort food in a jar, honestly.
This recipe isn’t just good, it’s the kind that makes you close your eyes after the first bite. It’s preserving at its most rewarding, with results that feel luxurious without the stress. Perfect for impressing guests, spoiling yourself, or turning a simple pear into something memorable.
What Ingredients You Will Need
This recipe uses simple, wholesome ingredients to deliver bold flavor and satisfying texture without the fuss. Most of these are pantry staples, and the few special ones are worth tracking down for the incredible result.
- Pears (about 4-5 pounds, firm and slightly underripe) – Bosc or Bartlett pears work best because they hold their shape during processing. Look for pears that are firm with no soft spots. If they’re too ripe, they’ll turn to mush in the jar.
- Granulated Sugar (2 cups) – Regular white sugar creates a clear, clean syrup. You can use organic sugar if you prefer, but avoid brown sugar as it will darken the syrup and change the flavor profile.
- Water (4 cups) – Filtered water is best if your tap water has a strong taste. It makes a difference in the final syrup clarity.
- Vanilla Bean (1 whole bean, split lengthwise) – This is the star of the show. I prefer Madagascar vanilla beans for their rich, creamy flavor. You can use 2 teaspoons of vanilla extract in a pinch, but the bean gives you those beautiful black specks and a deeper taste.
- Star Anise (2 whole pods) – Adds a subtle licorice note that pairs beautifully with pears. Don’t skip this if you can find it—it’s what makes the recipe feel special.
- Cinnamon Stick (1 whole stick) – Adds warmth without being overpowering. I use Ceylon cinnamon for its milder, sweeter flavor, but cassia works too.
- Whole Cloves (4-6 whole cloves) – Just a few for a hint of spice. Be careful not to overdo it, as cloves can quickly take over.
- Lemon Juice (2 tablespoons, fresh squeezed) – Helps preserve the color of the pears and balances the sweetness. Bottled lemon juice works, but fresh tastes better.
- Salt (a pinch) – Enhances all the flavors without making the syrup salty. Trust me on this one.
For the best texture, I recommend using Bosc pears if you can find them. They have a firmer flesh that holds up beautifully during canning. Bartlett pears are sweeter and softer, so they’re better if you prefer a more tender result. Either way, make sure they’re not overly ripe. A good test is to gently press the neck of the pear—if it yields slightly, it’s ready. If it’s mushy, save it for eating fresh.
If you don’t have a vanilla bean, you can substitute with 2 teaspoons of pure vanilla extract added to the syrup after it’s removed from heat. The flavor won’t be quite as complex, but it’s still delicious. For the spices, feel free to adjust based on what you have. A piece of fresh ginger or a cardamom pod would also work nicely.
Equipment Needed
You don’t need a fancy canning setup to make these pears, but a few key tools will make the process smoother and safer. Here’s what you’ll need:
- Water Bath Canner or a large, deep pot with a rack – You need something big enough to hold your jars covered by at least an inch of water. A stockpot works if you have a rack or a folded kitchen towel at the bottom to prevent jars from rattling.
- Canning Jars (4-5 pint-sized jars) – Wide-mouth jars are easier to pack with pear halves. Make sure they’re free of cracks or chips.
- New Lids and Bands – Always use new lids for a proper seal. Bands can be reused as long as they’re not rusty.
- Jar Lifter – This is non-negotiable for safety. Trying to lift hot jars with tongs is a disaster waiting to happen. I learned that the hard way.
- Wide-Mouth Funnel – Makes filling jars with syrup much less messy. A regular funnel works, but the wide mouth is better for packing fruit.
- Bubble Remover or a thin spatula – For removing air bubbles before sealing. A chopstick works perfectly too.
- Kitchen Towels – For wiping jar rims and catching spills. I keep a stack handy because things get sticky.
- Peeler and Paring Knife – A good peeler makes quick work of the pears. I prefer a Y-peeler for its ergonomic grip.
If you don’t have a water bath canner, you can use a large pot with a lid. Just make sure the jars are fully submerged and have enough room to boil without touching each other. A rack is ideal, but a folded dish towel on the bottom works in a pinch.
Preparation Method
This process takes about two hours from start to finish, including processing time. Most of that is hands-off, so you can multitask while the jars are in the water bath. Here’s how to do it:
- Prepare your jars and lids. Wash the jars, lids, and bands in hot, soapy water. Rinse thoroughly. Place the jars in your water bath canner, cover with water, and bring to a simmer. Keep them hot until you’re ready to fill. Place the lids in a small saucepan of hot water (not boiling) and keep them warm. This helps create a good seal.
- Make the vanilla spice syrup. In a large saucepan, combine 4 cups of water and 2 cups of granulated sugar. Stir over medium heat until the sugar dissolves completely. Add the split vanilla bean, star anise pods, cinnamon stick, whole cloves, and a pinch of salt. Bring the mixture to a gentle boil, then reduce the heat and let it simmer for 10 minutes while you prepare the pears. The syrup should be fragrant and slightly thickened.
- Prepare the pears. While the syrup simmers, peel the pears using a vegetable peeler. Cut each pear in half lengthwise and use a melon baller or small spoon to scoop out the core and seeds. As you finish each pear half, drop it into a bowl of water mixed with the lemon juice to prevent browning. Work quickly but carefully—bruised pears won’t look as pretty in the jar.
- Blanch the pears. Bring a large pot of water to a boil. Drain the pears from the lemon water and add them to the boiling water. Blanch them for 2-3 minutes, just until they’re slightly tender but still firm. This step softens them enough to pack into jars without breaking. Drain the pears and set them aside on a clean kitchen towel.
- Pack the jars. Remove the hot jars from the canner using your jar lifter. Place them on a clean kitchen towel. Using your wide-mouth funnel, pack the pear halves tightly into the jars, cut side down. You want them snug but not crushed. Leave about 1/2 inch of headspace at the top.
- Add the syrup. Remove the vanilla bean and spices from the syrup (or leave a star anise pod in each jar for decoration). Ladle the hot syrup over the pears, covering them completely while maintaining the 1/2 inch headspace. Use your bubble remover to gently release any trapped air bubbles. Add more syrup if needed.
- Wipe and seal. Wipe the rim of each jar with a clean, damp towel to remove any syrup residue. Place a warm lid on each jar, then screw on the band until it’s fingertip-tight—don’t overtighten, or air can’t escape during processing.
- Process the jars. Using your jar lifter, carefully lower the jars into the water bath canner. Make sure they’re covered by at least 1 inch of water. Bring the water to a rolling boil, then process for 20 minutes (adjust for altitude if needed). Start the timer when the water reaches a full boil.
- Cool and check seals. After processing, turn off the heat and let the jars sit in the water for 5 minutes. Then, use your jar lifter to transfer them to a towel-lined counter. Let them cool completely, undisturbed, for 12-24 hours. You should hear the satisfying “pop” of the lids sealing as they cool. After they’re cool, press the center of each lid—if it doesn’t flex up and down, it’s sealed. Store any unsealed jars in the refrigerator and use within a few weeks.
One thing I learned the hard way: don’t skip the blanching step. The first time I made these, I packed raw pears directly into the jars, and they came out with a weird, mealy texture. Blanching them first keeps them firm but tender, which is exactly what you want.
Cooking Tips & Techniques
I’ve made this recipe more times than I can count, and I’ve definitely made my share of mistakes along the way. Here are the tips I wish someone had told me before I started:
Choose the right pears. This is the most important tip. If your pears are too ripe, they’ll turn into pear sauce in the jar. If they’re too hard, they’ll never soften properly. Look for pears that are firm but yield slightly when you press the neck. Bosc pears are my favorite because they hold their shape beautifully.
Don’t skip the lemon water. Pears brown faster than apples, and that lemon water bath is your best defense. I once got distracted by a phone call and left my pears sitting out for twenty minutes. They were brown and sad, and I had to start over. Keep them submerged until you’re ready to blanch.
Use a melon baller for coring. A paring knife works, but a melon baller makes quick, clean work of removing the core and seeds. It also gives you a nice, round cavity that looks pretty in the jar. I found mine at a thrift store for a dollar, and it’s become my favorite kitchen tool.
Leave headspace for a reason. I know it’s tempting to fill the jar to the brim, but that 1/2 inch of headspace is crucial for creating a vacuum seal. I learned this when I overfilled a batch and ended up with syrup leaking everywhere during processing. It was a sticky mess.
Process time matters. If you live at a high altitude, you need to adjust your processing time. Add 5 minutes for every 1,000 feet above sea level. I live at 3,000 feet, so I process for 35 minutes instead of 20. Check your local extension office for specific recommendations.
Give them time to develop. These pears taste good right away, but they’re amazing after a month. The flavors meld together, the vanilla deepens, and the spices mellow into something truly special. I try to hide a few jars in the back of my pantry so I don’t eat them all in the first week.
Variations & Adaptations
This recipe is wonderfully adaptable, and I’ve tried several variations over the years. Here are some of my favorites:
Spiced Apple Variation: Swap the pears for firm apples like Granny Smith or Honeycrisp. The process is exactly the same, but you might want to add a tablespoon of lemon juice to the syrup to balance the sweetness. These are incredible served warm with a scoop of vanilla ice cream.
Low-Sugar Option: You can reduce the sugar to 1 cup without affecting the safety of the recipe. The syrup will be thinner and less sweet, but the pears will still be delicious. I’ve also used honey instead of sugar—use 1 1/2 cups of honey for every 2 cups of sugar called for. The flavor is different but lovely.
Boozy Pears: For a grown-up version, add 1/4 cup of bourbon, brandy, or rum to the syrup after it’s removed from heat. The alcohol will partially cook off during processing, leaving behind a warm, complex flavor. These are amazing over pound cake or cheesecake.
Citrus Twist: Add a strip of orange or lemon zest to each jar along with the syrup. The citrus brightens the flavor and adds a beautiful visual element. I did this for a holiday gift basket, and everyone asked for the recipe.
Savory Pairing: Use these pears on a cheese board. The sweetness and spice pair beautifully with sharp cheddar, creamy brie, or tangy blue cheese. I’ve also chopped them up and added them to a green salad with walnuts and goat cheese.
If you have dietary restrictions, this recipe is naturally gluten-free, dairy-free, and vegan. Just make sure your sugar is certified vegan if that’s important to you.
Serving & Storage Suggestions
These pears are incredibly versatile, and I love finding new ways to use them. Here are some of my favorite serving ideas:
Serve them chilled or at room temperature. Straight from the jar, they’re a simple, elegant dessert. I like to serve them in a small bowl with a little of the syrup drizzled over the top. A dollop of whipped cream or a scoop of vanilla ice cream takes them to the next level.
Pair with cheese and crackers. This is my go-to appetizer for parties. Arrange the pear halves on a platter with slices of aged gouda, sharp cheddar, or creamy brie. Add some crackers, a few walnuts, and a drizzle of honey. It’s beautiful and effortless.
Use in baking. Chop the pears and fold them into muffin or cake batter for a moist, flavorful treat. They’re also amazing in a simple pear crisp or cobbler. Just drain them well and reduce the sugar in your recipe since the pears are already sweet.
Top your morning oatmeal or yogurt. A few spoonfuls of these pears turn a boring breakfast into something special. The spices and vanilla complement the creaminess of yogurt or the heartiness of oatmeal perfectly.
Storage instructions: Store sealed jars in a cool, dark place like a pantry or basement. They’ll keep for up to a year, though I doubt they’ll last that long. Once opened, refrigerate the jar and use the pears within 2-3 weeks. The flavor actually improves over time, so don’t be afraid to let them sit for a few months before opening.
Reheating tips: If you want to serve them warm, simply spoon the pears and syrup into a small saucepan and heat gently over low heat. Don’t boil them, or they’ll break apart. You can also microwave them in a bowl for 30-60 seconds.
Nutritional Information & Benefits
While this is a sweet treat, it’s made with whole fruit and simple ingredients. Here’s a general nutritional breakdown for one serving (about 1/2 cup of pears with syrup):
- Calories: 180
- Total Fat: 0g
- Sodium: 5mg
- Total Carbohydrates: 45g
- Dietary Fiber: 4g
- Sugars: 38g
- Protein: 1g
- Vitamin C: 8% of Daily Value
- Potassium: 6% of Daily Value
Pears are a good source of dietary fiber, which supports digestive health and helps you feel full longer. They also contain vitamin C, which is important for immune function, and potassium, which helps regulate blood pressure. The spices in this recipe—cinnamon, star anise, and cloves—have anti-inflammatory properties and add flavor without extra sugar or salt.
This recipe is naturally gluten-free, dairy-free, and vegan, making it suitable for a wide range of dietary needs. If you’re watching your sugar intake, you can reduce the sugar in the syrup or use a sugar substitute like monk fruit. Just keep in mind that the texture and shelf life may change slightly.
I personally love that this recipe lets me enjoy fruit in the middle of winter when fresh pears aren’t in season. It’s a small taste of summer that feels indulgent but is still made from whole, real ingredients.
Conclusion
If you’ve never tried canning before, this recipe is the perfect place to start. It’s forgiving, beautiful, and incredibly rewarding. The first time you open a jar in the middle of January and smell those warm spices and vanilla, you’ll understand why people have been preserving food for centuries. It’s like capturing a moment and saving it for later.
I love that this recipe feels both special and approachable. You don’t need to be an expert canner or spend a fortune on ingredients. Just good pears, a vanilla bean, and a little bit of patience. The result is something you’ll be proud to share with friends and family, or keep all to yourself on a quiet winter evening.
So go ahead and give it a try. Grab some pears, dig out your canning pot, and let the kitchen fill with that amazing vanilla-spice aroma. And when you open your first jar a few months from now, come back and tell me how it turned out. I’d love to hear about your own pear adventures, your variations, and your happy accidents. Because honestly, the best recipes are the ones we make our own.
Happy canning, friend!
Frequently Asked Questions
Can I use vanilla extract instead of a vanilla bean?
Absolutely. While a vanilla bean gives you those beautiful black specks and a more complex flavor, vanilla extract works perfectly fine. Add 2 teaspoons of pure vanilla extract to the syrup after it’s removed from heat. The flavor will still be delicious, just slightly less intense.
How long do these canned pears last?
Properly sealed jars will keep for up to a year in a cool, dark place. I’ve kept them for 18 months with no issues, but the quality starts to decline after about a year. Always check the seal before opening—if the lid flexes up and down when pressed, it’s not sealed and should be refrigerated and used within a few weeks.
Do I have to peel the pears?
Yes, peeling is essential for this recipe. The skin becomes tough and chewy during processing, and it also affects the texture of the syrup. Plus, peeled pears look much more elegant in the jar. A good vegetable peeler makes quick work of it.
Can I double this recipe?
Yes, you can easily double or triple the recipe. Just make sure your water bath canner is large enough to hold all the jars at once. If you’re processing multiple batches, keep the unprocessed jars warm in a low oven (200°F) while you wait for the canner to come back to a boil.
What if my pears float to the top of the jar?
This is normal and happens because the pears are slightly less dense than the syrup. It doesn’t affect the safety or quality of the finished product. To minimize floating, pack the pears tightly into the jars and make sure they’re fully submerged in syrup before processing.
Pin This Recipe!
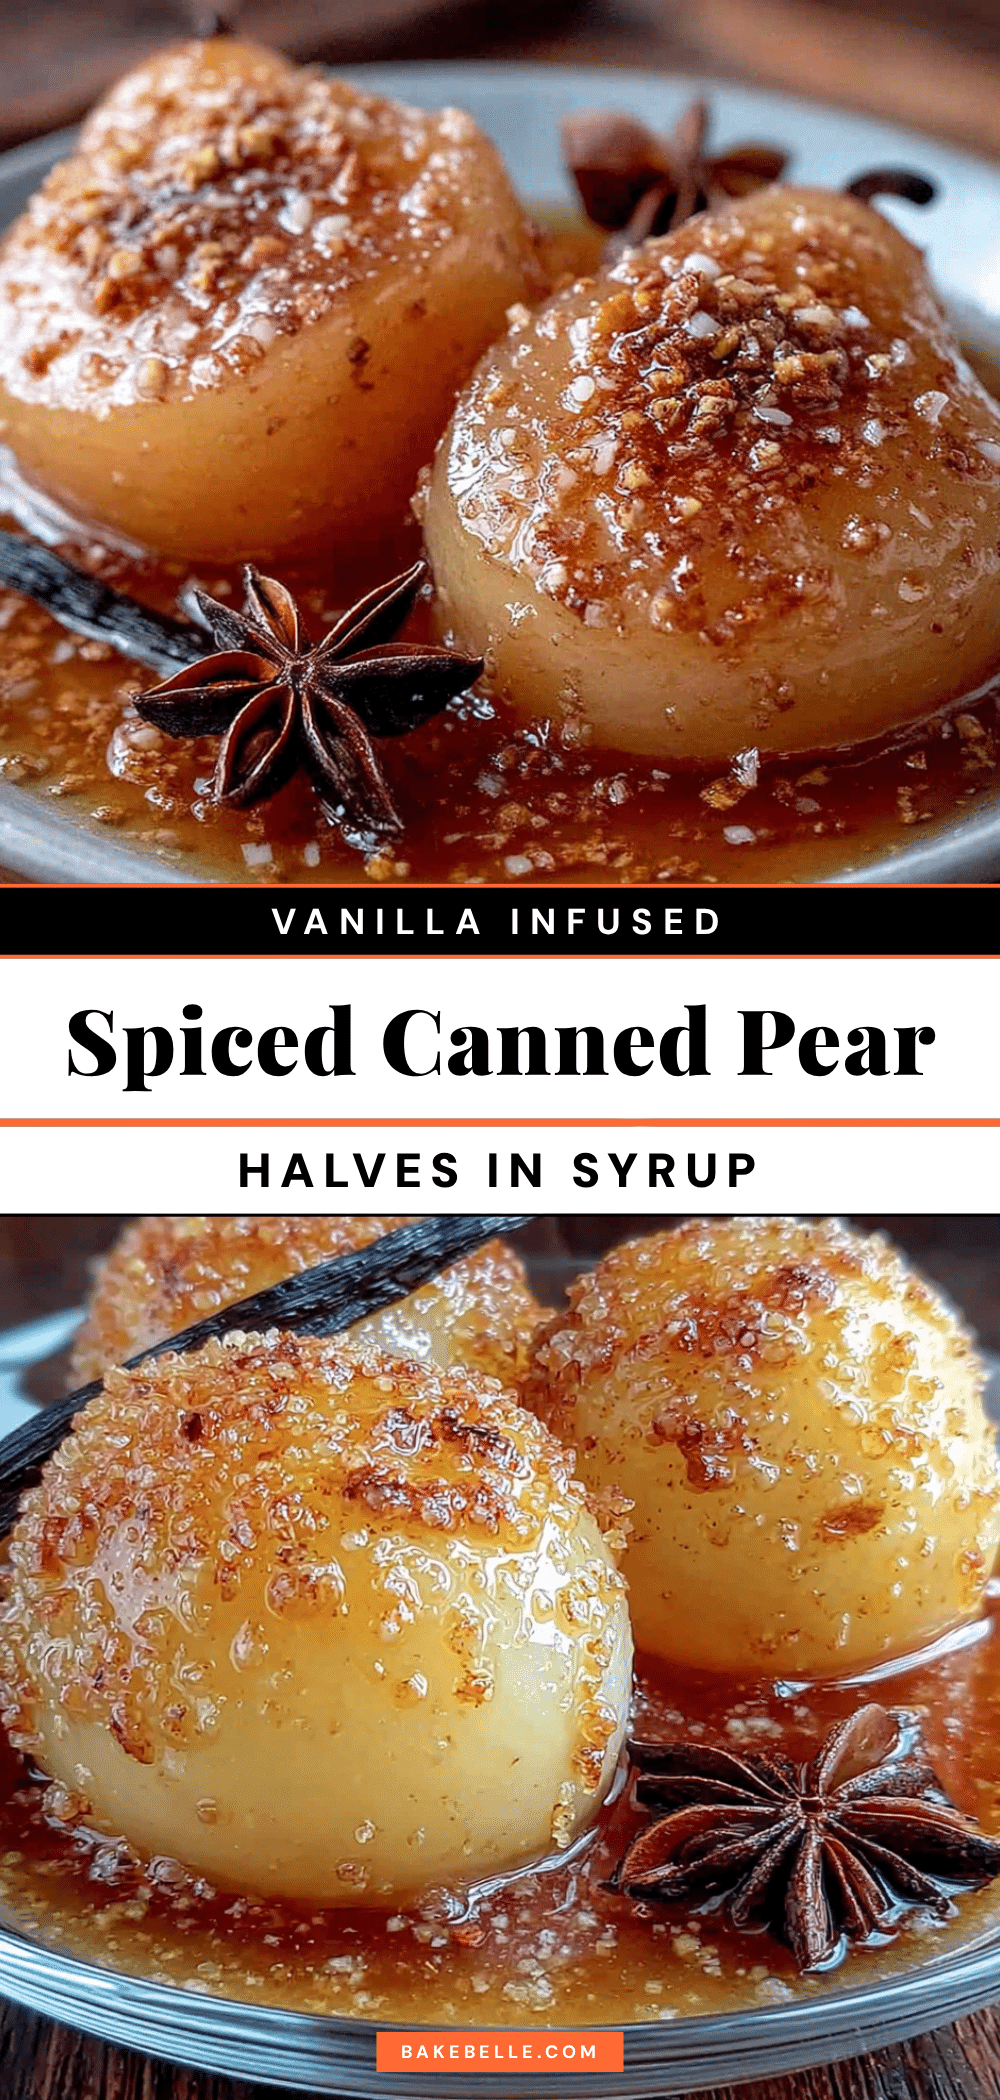
Homemade Spiced Vanilla Pear Halves in Easy Syrup
A simple yet elegant recipe for preserving pears in a vanilla-spiced syrup. Perfect for gifting, holiday brunches, or enjoying a taste of summer in winter.
- Prep Time: 30 minutes
- Cook Time: 20 minutes
- Total Time: 2 hours (including processing and cooling)
- Yield: 4-5 pint jars 1x
- Category: Preserves
- Cuisine: American
Ingredients
- 4–5 pounds firm, slightly underripe pears (Bosc or Bartlett)
- 2 cups granulated sugar
- 4 cups water
- 1 whole vanilla bean, split lengthwise
- 2 whole star anise pods
- 1 whole cinnamon stick
- 4–6 whole cloves
- 2 tablespoons fresh lemon juice
- a pinch of salt
Instructions
- Prepare your jars and lids. Wash jars, lids, and bands in hot, soapy water. Rinse thoroughly. Place jars in water bath canner, cover with water, and bring to a simmer. Keep hot until ready to fill. Place lids in a small saucepan of hot water (not boiling) and keep warm.
- Make the vanilla spice syrup. In a large saucepan, combine 4 cups water and 2 cups sugar. Stir over medium heat until sugar dissolves. Add split vanilla bean, star anise, cinnamon stick, cloves, and a pinch of salt. Bring to a gentle boil, then reduce heat and simmer for 10 minutes.
- Prepare the pears. Peel pears using a vegetable peeler. Cut each pear in half lengthwise and use a melon baller or small spoon to remove core and seeds. Drop pear halves into a bowl of water mixed with lemon juice to prevent browning.
- Blanch the pears. Bring a large pot of water to a boil. Drain pears from lemon water and add to boiling water. Blanch for 2-3 minutes until slightly tender but still firm. Drain and set aside on a clean kitchen towel.
- Pack the jars. Remove hot jars from canner using jar lifter. Place on a clean kitchen towel. Using a wide-mouth funnel, pack pear halves tightly into jars, cut side down, leaving 1/2 inch headspace.
- Add the syrup. Remove vanilla bean and spices from syrup (or leave a star anise pod in each jar for decoration). Ladle hot syrup over pears, covering completely while maintaining 1/2 inch headspace. Use a bubble remover to release trapped air bubbles. Add more syrup if needed.
- Wipe and seal. Wipe jar rims with a clean, damp towel. Place a warm lid on each jar, then screw on band until fingertip-tight.
- Process the jars. Using jar lifter, lower jars into water bath canner. Ensure jars are covered by at least 1 inch of water. Bring water to a rolling boil, then process for 20 minutes (adjust for altitude if needed). Start timer when water reaches a full boil.
- Cool and check seals. After processing, turn off heat and let jars sit in water for 5 minutes. Transfer to a towel-lined counter. Let cool completely, undisturbed, for 12-24 hours. Check seals by pressing center of each lid—if it doesn’t flex, it’s sealed. Store unsealed jars in refrigerator and use within a few weeks.
Notes
Choose firm, slightly underripe pears for best texture. Blanching pears before packing is essential to avoid mealy texture. For high altitude, add 5 minutes processing time per 1,000 feet above sea level. Flavors improve after a month of storage.
Nutrition
- Serving Size: 1/2 cup
- Calories: 180
- Sugar: 38
- Sodium: 5
- Carbohydrates: 45
- Fiber: 4
- Protein: 1
Keywords: canned pears, spiced pears, vanilla pears, homemade preserves, canning recipe, pear halves, gift jar recipe