I wasn’t trying to reinvent lunch, you know. It was a Tuesday, and I’d stopped by my sister-in-law’s place to drop off a book she’d lent me — the kind of mundane errand you squeeze in between school pickup and the afternoon chaos. The smell hit me before I even got past her front door. Buttery, savory, with that unmistakable warmth of something baking. I found her in the kitchen, flour on her jeans, casually flipping a baking sheet out of the oven like she’d just made toast. “Oh, those?” she said when I asked, barely looking up. “Just something for the kids’ lunchboxes.”
Let me tell you — those little spirals of ham and cheese, all golden and flaky, were anything but “just something.” I stood there eating one straight off the tray, burning my fingers and not caring one bit. She shrugged and told me the recipe like it was no big deal, like everyone had this trick up their sleeve. I scribbled it down on a napkin, and honestly, I’ve been making them ever since. Maybe you’ve been there — that moment when a recipe finds you, not the other way around.
These Easy Ham and Cheese Pinwheels for Lunchboxes are that recipe for me. They’re the kind of thing that makes you look like you spent hours in the kitchen when really, you just knew a good shortcut. And isn’t that the best kind of recipe? The one that saves your sanity and makes everyone happy?
Why You’ll Love This Recipe
I’ve tested this recipe more times than I can count — tweaking the dough, adjusting the filling ratio, even burning a batch or two when I got distracted. What I landed on is the perfect balance of simplicity and flavor. These pinwheels have become my secret weapon for busy mornings, and here’s why they’ll become yours too:
- Quick & Easy: From start to finish, you’re looking at about 20 minutes. That’s faster than a drive-through run, and way more satisfying.
- Simple Ingredients: You probably have everything in your fridge right now. No special trips to the store, no obscure ingredients you’ll never use again.
- Perfect for Lunchboxes: They hold up beautifully, taste great at room temperature, and kids actually get excited when they see them.
- Crowd-Pleaser: I’ve brought these to playdates, potlucks, and even a book club meeting. Adults gobble them up just as fast as the kids do.
- Unbelievably Delicious: The combination of flaky pastry, salty ham, and melty cheese is pure comfort food magic.
What makes these different from every other pinwheel recipe out there? It’s the technique. I use a specific cheese-to-ham ratio that keeps everything from getting soggy, and a little trick with the dough that gives you those perfect, tight spirals every single time. This isn’t just another version — it’s the one I’ve perfected through trial and error so you don’t have to.
These pinwheels are the kind of recipe that makes you close your eyes after the first bite. They’re lunchbox comfort food at its finest — simple, satisfying, and made with love even on your busiest mornings.
What Ingredients You Will Need
This recipe uses straightforward, pantry-friendly ingredients to create something genuinely special. The magic happens when simple things come together just right. Here’s what you’ll need:
For the Pinwheels
- 1 sheet puff pastry, thawed (I prefer Pepperidge Farm for consistent results — it’s reliably flaky)
- 6-8 slices deli ham, thinly sliced (look for honey ham or black forest for extra flavor)
- 1 cup shredded cheddar cheese (sharp cheddar gives the best flavor, but mild works too)
- 2 tablespoons cream cheese, softened (this is my secret ingredient — it binds everything and adds richness)
- 1 tablespoon Dijon mustard (optional, but it cuts through the richness beautifully)
- 1 egg, beaten (for the egg wash that gives that golden finish)
- 1 teaspoon poppy seeds or sesame seeds (optional, but they add a lovely crunch)
Ingredient Tips
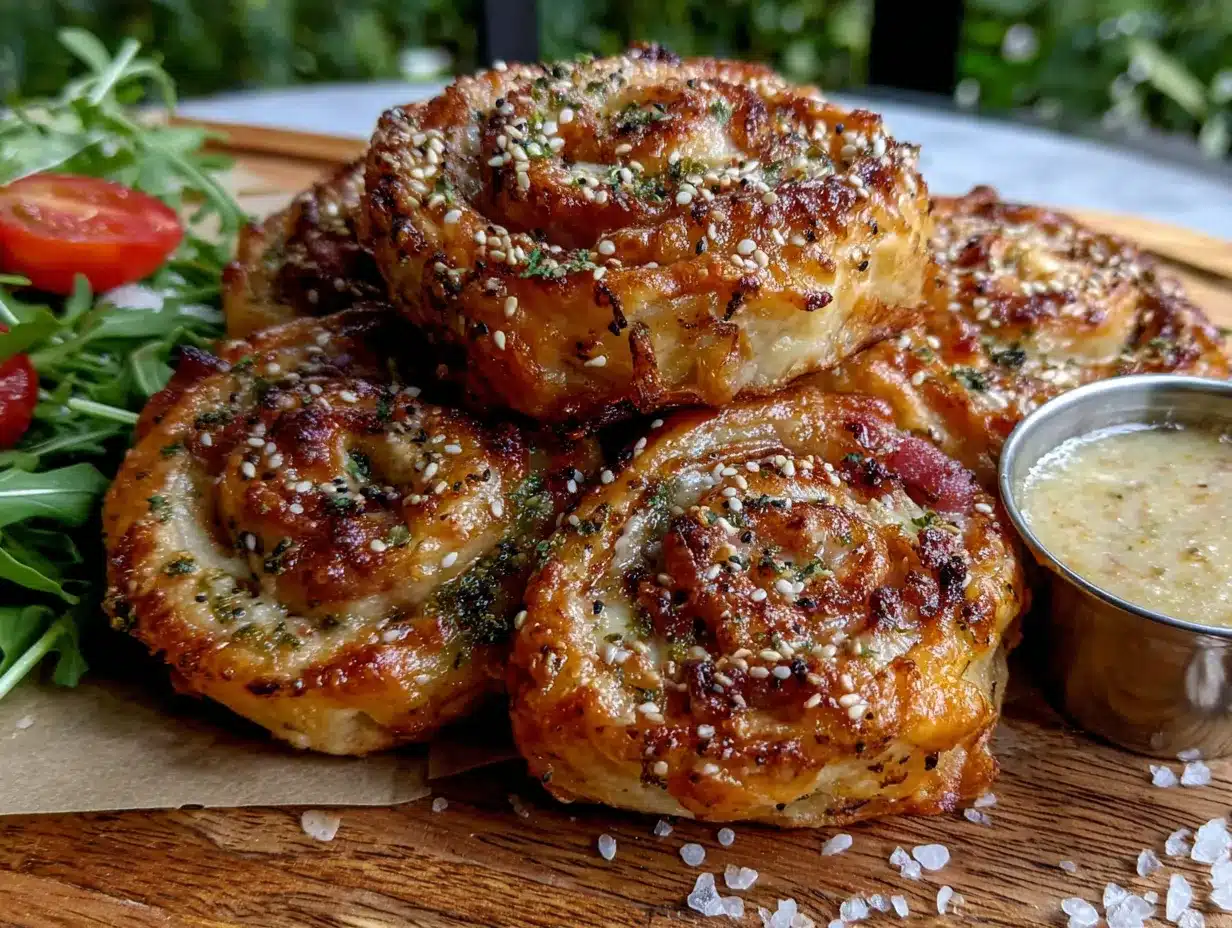
For the best texture, make sure your puff pastry is fully thawed but still cold. If it gets too warm, it becomes sticky and hard to work with. I usually take it out of the freezer and let it sit in the fridge overnight — that way it’s ready when I am.
The cream cheese is non-negotiable in my book. It adds a creamy tang that complements the ham and cheese perfectly. If you’re dairy-free, you can use a plant-based cream cheese, but look for one that’s thick and not too watery.
As for the ham, I recommend getting it sliced fresh from the deli counter rather than using pre-packaged slices. It’s thicker, has better flavor, and rolls up more nicely. That said, in a pinch, the pre-packaged stuff works fine — just pat it dry with a paper towel first to remove excess moisture.
Equipment Needed
You don’t need a fancy kitchen to make these pinwheels. Here’s what I use:
- Baking sheet — a standard half-sheet pan works perfectly
- Parchment paper — trust me on this, it makes cleanup so much easier
- Rolling pin — if you don’t have one, a wine bottle works in a pinch (I’ve done it!)
- Sharp knife — a serrated knife works best for cutting clean spirals without squishing them
- Pastry brush — for the egg wash; a clean silicone basting brush is my go-to
- Small bowl — for beating the egg
- Ruler or bench scraper — optional, but helps measure even slices
I’ve made these with a dull knife before, and let me tell you — it’s a mess. The pinwheels get squished, the layers stick together, and you lose that beautiful spiral shape. A sharp knife makes all the difference. If you’re investing in one kitchen tool, make it a good chef’s knife.
Preparation Method
Alright, let’s get rolling — pun absolutely intended. Here’s how I make these pinwheels step by step:
- Preheat your oven to 400°F (200°C). Line your baking sheet with parchment paper. This gives you time to prepare while the oven heats up.
- Prepare your work surface. Lightly flour your counter or a large cutting board. Unfold the thawed puff pastry sheet onto it. If there are any cracks or folds, gently press them back together with your fingers.
- Roll out the pastry slightly. Using your rolling pin, gently roll the pastry into a rectangle about 10×12 inches. Don’t go too thin — you want it about 1/8 inch thick. If the pastry starts sticking, add a tiny bit more flour underneath.
- Mix the cream cheese spread. In your small bowl, combine the softened cream cheese and Dijon mustard (if using). Mix until smooth and spreadable. This takes about 30 seconds with a fork.
- Spread the cream cheese mixture. Using a spatula or the back of a spoon, spread it evenly over the entire surface of the pastry. Leave a 1/2-inch border on one long edge — this helps seal the roll later.
- Layer the ham. Place the ham slices evenly over the cream cheese, overlapping them slightly. Make sure they cover the entire surface, including that border edge — the border is for sealing, not for leaving bare pastry.
- Sprinkle the cheese. Evenly distribute the shredded cheddar over the ham. Press it down gently with your hands so it sticks to the ham.
- Roll it up tightly. Starting from the long edge opposite your border, roll the pastry up like a jelly roll. Use both hands and roll slowly, keeping even pressure. The tighter you roll, the cleaner your spirals will be. When you reach the border edge, press it gently to seal the seam.
- Chill the log. Place the rolled log on a plate or cutting board and pop it in the freezer for 10 minutes. This step is crucial — it firms up the pastry so you get clean cuts. I learned this the hard way after making squished, messy pinwheels.
- Slice into pinwheels. Remove the log from the freezer. Using your sharp knife, slice into 1/2-inch thick rounds. You should get about 12-15 pinwheels. If they flatten slightly on the bottom, gently reshape them with your fingers.
- Arrange on baking sheet. Place the pinwheels on your prepared baking sheet, spacing them about 1 inch apart. They’ll puff up, so give them room to breathe.
- Apply the egg wash. Brush the tops of each pinwheel with the beaten egg. Sprinkle with poppy seeds or sesame seeds if using. The egg wash gives that gorgeous golden color — don’t skip it!
- Bake for 12-15 minutes. Bake until the pinwheels are puffed up and golden brown. The cheese should be bubbly and slightly browned around the edges. Let them cool on the baking sheet for 5 minutes before transferring to a wire rack.
Your kitchen will smell absolutely incredible at this point. Try not to eat them all before they make it into the lunchboxes — I speak from experience.
Cooking Tips & Techniques
I’ve made these pinwheels more times than I can count, and I’ve made every mistake in the book. Here’s what I’ve learned:
The biggest mistake? Not chilling the log before slicing. I was in a hurry one morning and skipped this step. The result was a sad, squished mess that looked nothing like the beautiful spirals I was going for. Ten minutes in the freezer makes all the difference — don’t skip it.
Another common issue is soggy pinwheels. This happens when there’s too much moisture in the filling. Pat your ham dry with paper towels before layering, and don’t go overboard with the cream cheese. A thin, even layer is all you need.
For the best texture, make sure your puff pastry is cold but not frozen when you start working with it. If it cracks at the edges while rolling, let it sit at room temperature for 5 minutes to soften slightly.
Multitasking tip: While the pinwheels are baking, I pack the rest of the lunchboxes. By the time they’re done and cooled slightly, everything is ready to go. It’s a beautiful, efficient system.
For consistent sizes, use a ruler to mark your slices before cutting. I use a bench scraper to make light indentations every half inch, then slice through. This gives you perfectly even pinwheels that bake uniformly.
Variations & Adaptations
One of the best things about this recipe is how adaptable it is. Here are some variations I’ve tried and loved:
Turkey and Swiss Pinwheels
Swap the ham for thinly sliced turkey breast and use Swiss cheese instead of cheddar. Add a thin layer of cranberry sauce for a Thanksgiving-inspired twist. These are amazing for fall lunchboxes.
Veggie and Cream Cheese Pinwheels
Skip the ham entirely and load up on thinly sliced bell peppers, cucumber, and spinach. Use herb and garlic cream cheese for extra flavor. My vegetarian friend requests these every time we get together.
Spicy Chorizo and Pepper Jack
For the adults in the house, try this version. Use crumbled cooked chorizo (drain the grease well) and pepper jack cheese. A smear of chipotle mayo instead of Dijon takes it to another level.
Gluten-Free Option
Look for gluten-free puff pastry — brands like Schar make a decent version. The technique is exactly the same, though the pastry might be a bit more delicate to work with. Handle it gently and don’t over-roll.
My personal favorite variation? I once made these with leftover holiday ham and added a sprinkle of everything bagel seasoning on top. They were gone before I could even photograph them. Sometimes the best recipes come from using what you have.
Serving & Storage Suggestions
These pinwheels are incredibly versatile when it comes to serving. Here’s how I handle them:
Serving Temperature: They’re delicious warm from the oven, but honestly, they’re just as good at room temperature. That’s what makes them perfect for lunchboxes — they don’t need reheating. If you’re serving them as an appetizer, arrange them on a platter with some grapes and cherry tomatoes for color.
What to Serve With Them: For lunchboxes, I pair them with apple slices, baby carrots, and a yogurt tube. For parties, they’re great alongside a simple green salad or a bowl of tomato soup for dipping.
Storage Instructions: Store leftover pinwheels in an airtight container in the refrigerator for up to 3 days. Layer them between sheets of parchment paper so they don’t stick together. I don’t recommend leaving them at room temperature for more than 2 hours, especially if they have cream cheese.
Reheating: To bring back that fresh-baked flakiness, pop them in a 350°F (175°C) oven for 3-5 minutes. The microwave works in a pinch, but they’ll lose their crispiness. For lunchboxes, I pack them cold straight from the fridge — they soften slightly by lunchtime and are perfectly delicious.
Freezer Instructions: These freeze beautifully! Place the baked and cooled pinwheels on a baking sheet in a single layer and freeze until solid (about 1 hour). Transfer to a freezer bag and store for up to 2 months. To serve, thaw in the refrigerator overnight and reheat in the oven. You can also freeze the unbaked, sliced pinwheels — just arrange them on a baking sheet, freeze, then transfer to a bag. Bake from frozen, adding 2-3 minutes to the baking time.
Nutritional Information & Benefits
Here’s the approximate nutritional breakdown for one pinwheel (based on 12 servings):
- Calories: 180-200
- Protein: 8g
- Carbohydrates: 12g
- Fat: 12g
- Saturated Fat: 5g
- Sodium: 350mg
These numbers will vary based on the specific brands and types of ingredients you use. The protein from the ham and cheese makes them a satisfying lunchbox option that keeps kids full through the afternoon.
Health Benefits: Ham provides a good source of protein and B vitamins, while cheese offers calcium for bone health. Using puff pastry keeps the portion size reasonable — one or two pinwheels is typically enough for a satisfying snack or light meal.
Dietary Considerations: This recipe contains gluten, dairy, and eggs. For a gluten-free version, use gluten-free puff pastry. For dairy-free, use dairy-free cream cheese, cheese, and skip the egg wash (brush with olive oil instead).
I personally love that these pinwheels feel indulgent but are actually quite balanced. They’re not health food, but they’re a far better choice than most packaged lunchbox snacks. And honestly, knowing exactly what’s in them gives me peace of mind.
Conclusion
These Easy Ham and Cheese Pinwheels have saved my sanity on more mornings than I can count. They’re the recipe I turn to when I need something reliable, something that makes everyone happy, and something that doesn’t require a trip to the grocery store. That’s the kind of recipe worth keeping close.
I hope you’ll make these your own — add your favorite cheese, swap in different meats, or let your kids help with the rolling. That’s the beauty of a simple recipe like this. It becomes yours the moment you make it your own.
When you try them — and I really hope you do — come back and let me know how they turned out. Did your kids love them? Did you discover a new favorite variation? Drop a comment below and share your pinwheel story. I read every single one, and honestly, your wins in the kitchen make my day.
Happy baking, friend. Your lunchboxes are about to get a whole lot more exciting.
Frequently Asked Questions
Can I make these pinwheels ahead of time?
Absolutely! You can assemble the log, wrap it tightly in plastic wrap, and refrigerate it for up to 24 hours before slicing and baking. You can also bake them fully and reheat as needed. They’re incredibly meal-prep friendly.
Why did my pinwheels unroll while baking?
This usually happens when the roll wasn’t sealed properly or the pastry was too warm when it went into the oven. Make sure to leave that half-inch border without filling, press it firmly to seal, and chill the log before slicing. A cold roll holds its shape much better.
Can I use crescent roll dough instead of puff pastry?
Yes, you can! Crescent roll dough will give you a softer, breadier texture rather than the flaky layers of puff pastry. The baking time will be slightly shorter — about 10-12 minutes at 375°F (190°C). Just make sure to press the seams together before adding your fillings.
How do I keep the pinwheels from getting soggy in lunchboxes?
Let them cool completely before packing, and make sure your ham is patted dry. If you’re packing them the night before, store them in a separate container from any fruits or vegetables that release moisture. A paper towel at the bottom of the container helps absorb any condensation.
Can I add vegetables to these pinwheels?
Definitely! Thinly sliced bell peppers, spinach leaves, or even roasted red peppers work well. Just make sure to pat them dry to remove excess moisture. I’d recommend keeping the vegetable layer thin so the pinwheels still roll up tightly.
Pin This Recipe!

Easy Ham and Cheese Pinwheels: Best Lunchbox Snack

These Easy Ham and Cheese Pinwheels are the perfect lunchbox snack—flaky, savory, and ready in about 20 minutes. Made with simple ingredients like puff pastry, ham, and cheese, they’re a crowd-pleaser that kids and adults love.
- Prep Time: 10 minutes
- Cook Time: 15 minutes
- Total Time: 25 minutes
- Yield: 12-15 pinwheels 1x
- Category: Snack
- Cuisine: American
Ingredients
- 1 sheet puff pastry, thawed
- 6–8 slices deli ham, thinly sliced
- 1 cup shredded cheddar cheese
- 2 tablespoons cream cheese, softened
- 1 tablespoon Dijon mustard (optional)
- 1 egg, beaten
- 1 teaspoon poppy seeds or sesame seeds (optional)
Instructions
- Preheat your oven to 400°F (200°C). Line your baking sheet with parchment paper.
- Lightly flour your work surface. Unfold the thawed puff pastry sheet onto it. Gently press any cracks back together.
- Roll out the pastry into a rectangle about 10×12 inches and 1/8 inch thick.
- In a small bowl, mix the softened cream cheese and Dijon mustard (if using) until smooth.
- Spread the cream cheese mixture evenly over the pastry, leaving a 1/2-inch border on one long edge.
- Layer the ham slices evenly over the cream cheese, overlapping slightly. Cover the entire surface including the border edge.
- Sprinkle the shredded cheddar evenly over the ham. Press down gently.
- Starting from the long edge opposite the border, roll the pastry up tightly like a jelly roll. Press the border edge to seal the seam.
- Place the rolled log on a plate or cutting board and freeze for 10 minutes.
- Remove from freezer. Using a sharp knife, slice into 1/2-inch thick rounds (about 12-15 pinwheels). Reshape if needed.
- Arrange pinwheels on the prepared baking sheet, spacing them about 1 inch apart.
- Brush the tops with beaten egg. Sprinkle with poppy seeds or sesame seeds if using.
- Bake for 12-15 minutes until puffed and golden brown. Let cool on the baking sheet for 5 minutes before transferring to a wire rack.
Notes
Chill the rolled log before slicing for clean spirals. Pat ham dry to avoid sogginess. For best results, use cold but not frozen puff pastry. These freeze well—bake from frozen adding 2-3 minutes.
Nutrition
- Serving Size: 1 pinwheel
- Calories: 190
- Sugar: 1
- Sodium: 350
- Fat: 12
- Saturated Fat: 5
- Carbohydrates: 12
- Protein: 8
Keywords: ham and cheese pinwheels, lunchbox snack, easy appetizer, puff pastry recipe, kid-friendly snack