My friend Jen asked why I couldn’t just use store-bought pudding cups instead of making pudding from scratch for a Fourth of July dessert. I started to explain why that wouldn’t work — then stopped. Honestly, I had no good reason. I was just being stubborn about homemade everything.
So I tried it. And let me tell you, it was a total game-changer. The texture was somehow creamier, the layers set up perfectly, and I saved myself a solid 20 minutes of stirring and waiting. I felt a little silly, honestly. Here I’d been making icebox cakes for years, convinced that from-scratch pudding was the only way to go. Jen, who barely cooks, had stumbled onto something brilliant with her simple suggestion.
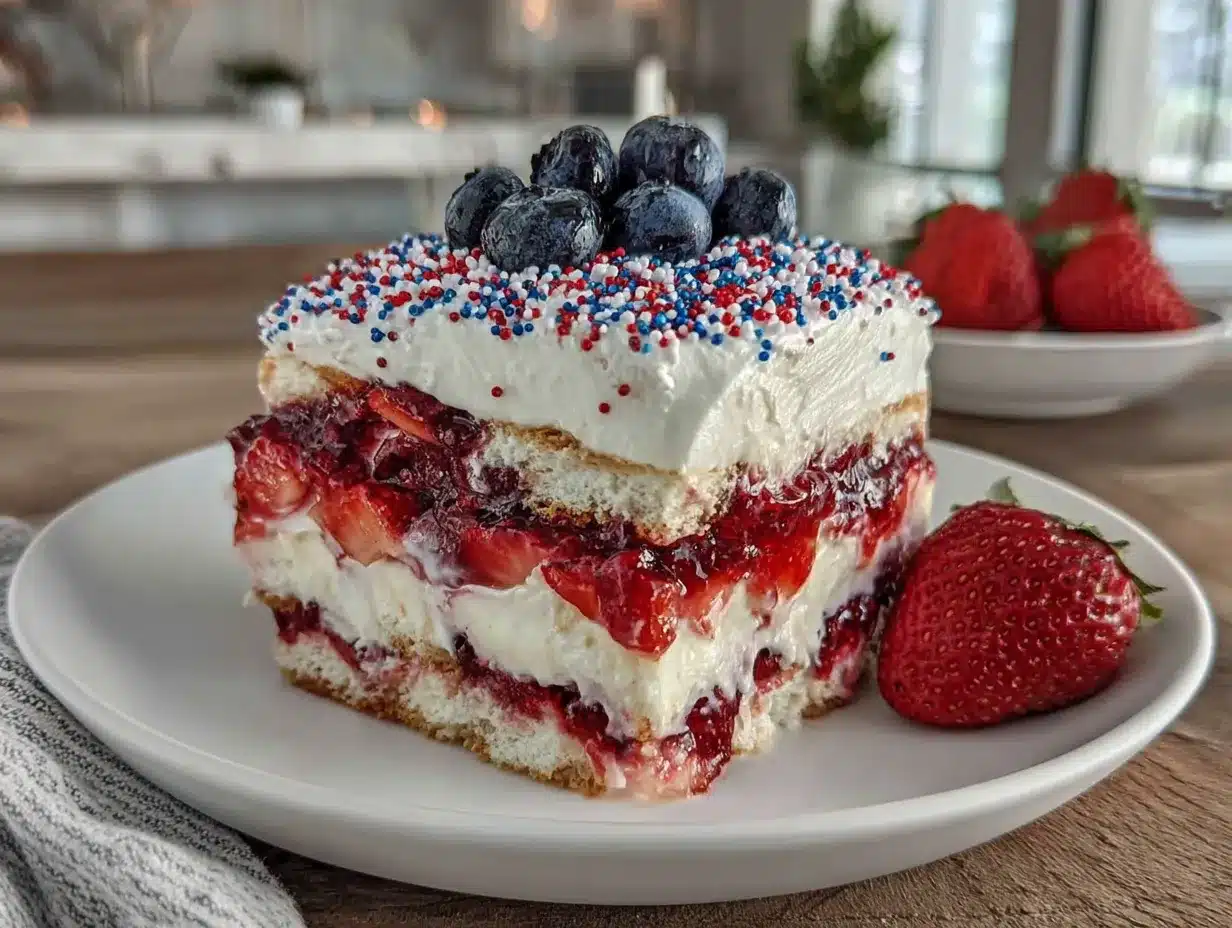
That’s how this Red, White, and Blue No-Bake Icebox Cake was born — or, more accurately, how it was simplified into something actually fun to make for a crowd. It’s the kind of dessert that looks impressive but takes almost zero effort. You layer graham crackers with a creamy vanilla filling, fresh berries, and a gorgeous swirl of red and blue. Then you let the fridge do all the work.
I’ve made this cake for three different cookouts now, and every single time, someone asks for the recipe. They can’t believe it’s no-bake. They can’t believe it uses pudding cups. And they really can’t believe how good it tastes after just a few hours in the fridge. Maybe you’ve been there — staring down a long ingredient list for a dessert that’s supposed to be “easy.” This one actually delivers on that promise.
The best part? It’s completely foolproof. You don’t need a mixer, a rolling pin, or any special skills. Just a dish, some layers, and a little patience while it chills. I keep coming back to this recipe because it’s the kind of thing you can throw together between running errands and still get compliments like you spent all day in the kitchen. And honestly? That’s my favorite kind of dessert.
Why You’ll Love This Recipe
This isn’t just another icebox cake recipe. After testing this version at four different gatherings — including a particularly picky family reunion — I can tell you it’s the one that disappears fastest. Here’s why this one stands out from the rest:
- No Oven Required: When it’s 90 degrees outside and you don’t want to heat up your kitchen, this cake is your best friend. The fridge does all the heavy lifting.
- Simple Ingredients: You only need seven ingredients, and most of them are probably in your kitchen right now. No hunting down specialty items or expensive extracts.
- Perfect for Patriotic Holidays: Whether it’s Memorial Day, the Fourth of July, or Labor Day, this red, white, and blue dessert fits right in. It’s also great for baby showers or birthday parties with a color theme.
- Crowd-Pleaser: Kids love the creamy texture and sweet berries. Adults love that it’s not too heavy. Everyone goes back for seconds.
- Make-Ahead Friendly: You can assemble this cake the day before your event. In fact, it tastes better after sitting overnight. One less thing to worry about on party day.
What makes this recipe different from other icebox cakes is the texture. Using instant pudding cups instead of homemade pudding gives you a lighter, fluffier filling that doesn’t get overly dense. The graham crackers soften just enough to become cake-like without turning into mush. And the fresh berries add bursts of tartness that cut through the sweetness perfectly.
This recipe isn’t just good — it’s the kind that makes people close their eyes after the first bite. I’ve seen it happen three times now. It’s comfort food reimagined for summer: cool, creamy, and bursting with fresh fruit flavor. Perfect for impressing guests without any stress, or turning a simple cookout into something memorable.
What Ingredients You Will Need
This recipe uses simple, store-bought ingredients to create something that tastes surprisingly homemade. The magic happens when the layers sit together in the fridge, letting everything meld into one cohesive, delicious cake.
For the Cake Layers
- 3 boxes (3.4 ounces each) instant vanilla pudding mix — I prefer Jell-O brand for consistent results, but store brands work fine too. Just make sure it’s instant, not cook-and-serve.
- 3 cups cold whole milk — Whole milk gives the richest, creamiest texture. You can use 2% in a pinch, but don’t go lower than that or the pudding won’t set up properly.
- 1 box (14.4 ounces) graham crackers — You’ll need about 36 full sheets. Honey or cinnamon flavor both work well. I’ve used both and honestly can’t pick a favorite.
- 2 cups heavy whipping cream — For the topping. You could use Cool Whip instead if you’re in a hurry, but homemade whipped cream is worth the extra two minutes.
- 2 tablespoons powdered sugar — Just enough to sweeten the cream without making it heavy.
- 1 teaspoon vanilla extract — Pure vanilla extract tastes noticeably better than imitation, but use what you have.
For the Berry Layer
- 2 cups fresh strawberries, hulled and sliced — Look for bright red berries that are firm but fragrant. If strawberries aren’t in season, frozen sliced strawberries work (just thaw and drain them first).
- 1 cup fresh blueberries — Wild blueberries are smaller and sweeter, but regular blueberries work great too. Pick out any squishy ones before using.
- 1 cup fresh raspberries — These add a nice tartness. If you can’t find good raspberries, you can use more strawberries and blueberries instead.
- Optional: 1 tablespoon sugar — Only if your berries are a little tart. Sprinkle it over the berries and let them sit for 10 minutes before layering.
For the Decoration (Optional but Fun)
- Extra berries for topping — A handful of each kind arranged on top makes the cake look gorgeous.
- Blue food coloring — Just a drop or two if you want the pudding layer to have a blue tint. I sometimes skip this and let the berries do the color work.
Ingredient Selection Tip: For the creamiest pudding, make sure your milk is really cold. I stick mine in the freezer for 10 minutes before mixing. And for the whipped cream, chill your bowl and beaters for 15 minutes beforehand — it makes a noticeable difference in how quickly it whips up.
Substitution Guidance: If you need this to be gluten-free, use gluten-free graham crackers (Kinnikinnick makes a good one) or substitute with gluten-free vanilla wafers. For a dairy-free version, use full-fat oat milk and dairy-free whipped topping. The texture will be slightly different, but still delicious.
Equipment Needed
One of the best things about this recipe is that you don’t need any fancy equipment. Here’s what you’ll need:
- 9×13-inch baking dish — Glass is ideal because you can see the layers, but metal or ceramic work fine. I’ve used my grandmother’s old Pyrex dish for years and it’s perfect.
- Large mixing bowl — For making the pudding and whipped cream. Any big bowl will do.
- Electric hand mixer or stand mixer — You can whisk the cream by hand if you want a workout, but a mixer makes it much easier. I’ve done both and the mixer wins every time.
- Rubber spatula — For spreading the pudding mixture evenly. A silicone spatula works best because it doesn’t scratch your dish.
- Sharp knife and cutting board — For slicing strawberries and any other prep.
- Measuring cups and spoons — For accurate measurements, especially for the milk and cream.
- Plastic wrap or aluminum foil — To cover the cake while it chills. Plastic wrap presses directly onto the surface to prevent a skin from forming.
Budget-Friendly Options: If you don’t have a hand mixer, you can use a whisk and some elbow grease. The cream will take about 8-10 minutes of steady whisking, but it’s totally doable. And if you don’t have a 9×13 dish, you can use two 8×8 dishes or even a deep pie plate — just adjust the layering accordingly.
Preparation Method
This recipe comes together in about 20 minutes of active time, then the fridge does the rest. Here’s how to make it:
- Make the pudding base: In a large mixing bowl, whisk together the instant vanilla pudding mix and cold milk. Whisk for about 2 minutes until it starts to thicken. It will be thin at first — don’t worry, that’s normal. Let it sit for 5 minutes to set up completely. The mixture should be thick but still pourable.
- Prep your berries: While the pudding sets, wash and dry all your berries. Hull the strawberries and slice them into even pieces, about ¼-inch thick. Pick through the blueberries and raspberries, discarding any that are mushy or moldy. Set the berries aside in separate bowls.
- Make the whipped cream: In a separate chilled bowl, pour the heavy whipping cream, powdered sugar, and vanilla extract. Beat on medium-high speed until soft peaks form — this takes about 3-4 minutes with a hand mixer. You’re looking for peaks that hold their shape but still look soft and billowy. Don’t overbeat or you’ll end up with butter. Trust me, I’ve done that before and it’s not pretty.
- Combine the pudding and cream: Gently fold the whipped cream into the set pudding using a rubber spatula. Fold until just combined — you want streaks of white and cream throughout. This creates a lighter, fluffier filling that’s perfect for layering.
- Start layering: Spread a thin layer of the pudding mixture (about ½ cup) on the bottom of your 9×13 dish. This helps the graham crackers stick and prevents them from sliding around. Arrange a single layer of graham crackers on top, breaking pieces as needed to fill any gaps. I usually need about 9 whole crackers per layer.
- Add the first filling layer: Spread about one-third of the remaining pudding mixture evenly over the graham crackers. Use your spatula to get it into all the corners. Sprinkle about one-third of the strawberries and one-third of the blueberries over the pudding. Press them in gently so they stick.
- Repeat the layers: Add another layer of graham crackers on top of the berries. Spread another third of the pudding mixture over the crackers. Top with another third of the berries. Repeat one more time — graham crackers, remaining pudding, remaining berries. You should end with a final layer of graham crackers on top.
- Add the final topping: Spread any remaining pudding mixture over the top layer of graham crackers. This gives you a smooth, finished look. Arrange your reserved berries on top in a decorative pattern — I like to do rows of red and blue for a patriotic look.
- Chill the cake: Cover the dish tightly with plastic wrap, pressing it directly onto the surface to prevent a skin from forming. Refrigerate for at least 6 hours, but overnight is better. The graham crackers need time to soften and absorb the creamy filling. I’ve made this mistake before — pulling it out after only 3 hours — and the crackers were still crunchy in places.
- Serve cold: When you’re ready to serve, remove the plastic wrap and cut the cake into squares. Use a sharp knife and wipe it clean between cuts for neat slices. Serve straight from the fridge — this cake doesn’t need to sit at room temperature.
Sensory Cues: When you press the graham crackers into the first thin layer of pudding, you should feel them stick slightly. The pudding mixture should be thick enough to spread but not so thick that it pulls up the crackers. When you fold the whipped cream into the pudding, look for a marbled effect — that’s how you know you’ve folded just enough. After chilling, the top should feel firm to the touch, and when you cut into it, the layers should hold together without sliding apart.
Cooking Tips & Techniques
After making this cake more times than I can count, I’ve picked up a few tricks that make a real difference:
Don’t rush the chilling time. I know it’s tempting to pull the cake out after 4 hours, but the texture won’t be right. The graham crackers need a full 6-8 hours to soften into cake-like layers. Overnight is truly best. One time I made this for a party and only gave it 5 hours — the center was still a bit crunchy. Learn from my impatience.
Press the graham crackers down gently. After each layer of crackers, use your palm to press them down just slightly. This helps them absorb the pudding mixture more evenly. Don’t press too hard or you’ll crack them into pieces.
Keep your berries dry. Wet berries release extra liquid that can make your cake soggy. After washing them, spread them on a paper towel-lined plate and pat them dry. Let them sit for a few minutes to air dry before adding them to the layers.
Use a serrated knife for cutting. A bread knife works beautifully for slicing this cake. It cuts through the softened graham crackers without squishing the layers. Wipe the blade clean between cuts for the prettiest presentation.
Make it the day before. This is one of those rare desserts that actually improves with time. The flavors meld together, the texture becomes perfectly uniform, and you get to relax on party day. I always make mine the night before and just add the decorative berries on top right before serving.
Common mistake alert: Don’t use fat-free milk or skim milk. The pudding won’t set up properly, and your cake will be runny. Whole milk is non-negotiable here. Also, don’t skip the step of spreading a thin layer of pudding on the bottom of the dish — without it, the bottom graham crackers slide around when you try to serve.
Variations & Adaptations
This recipe is surprisingly flexible. Here are some ways to change it up:
Berry Swap: Not a fan of blueberries? Use blackberries instead. Strawberries can be replaced with sliced peaches in summer or diced mango for a tropical twist. I tried it with raspberries and blackberries once when strawberries were out of season, and it was honestly just as good.
Dairy-Free Version: Use full-fat oat milk for the pudding and a dairy-free whipped topping like CocoWhip. The texture is slightly less rich, but still creamy and satisfying. I made this for a friend with dairy allergies and she said it was the best dessert she’d had in months.
Gluten-Free Option: Gluten-free graham crackers work perfectly here. Just make sure they’re the same size as regular graham crackers so your layers are even. Kinnikinnick brand is my go-to.
Different Pudding Flavors: Vanilla is classic, but cheesecake-flavored pudding gives this cake a tangy twist. White chocolate pudding makes it extra sweet and decadent. I tried lemon pudding once and it was incredible with the berries — bright and fresh tasting.
No-Bake Cheesecake Style: Add 8 ounces of softened cream cheese to the pudding mixture before folding in the whipped cream. Beat the cream cheese until smooth, then mix in the pudding. This gives the cake a cheesecake-like richness that’s absolutely divine.
Individual Servings: Instead of a 9×13 dish, make these in small mason jars or clear cups. Layer graham cracker pieces, pudding mixture, and berries in each cup. They’re perfect for parties and picnics, and everyone gets their own personal dessert.
Serving & Storage Suggestions
This cake is best served cold, straight from the fridge. The texture is firm but creamy, and the berries stay bright and fresh. Here’s how to serve and store it:
Serving Temperature: Take the cake out of the fridge about 10-15 minutes before serving. This takes the chill off just enough without letting it get warm. If it sits out longer than 30 minutes, the texture starts to soften too much.
Presentation Ideas: Cut the cake into clean squares and serve on white plates for maximum visual impact. Add a dollop of extra whipped cream on top and a few fresh berries on the side. For patriotic holidays, arrange the slices on a platter with extra strawberries and blueberries scattered around.
Complementary Dishes: This cake pairs beautifully with grilled meats and summer sides. Serve it after burgers, hot dogs, or barbecue chicken. It also goes well with lighter fare like chicken salad sandwiches or a fresh green salad. For drinks, iced tea, lemonade, or a crisp white wine complement the creamy sweetness perfectly.
Storage Instructions: Cover the dish tightly with plastic wrap or transfer leftovers to an airtight container. The cake will keep in the refrigerator for up to 3 days. After that, the graham crackers start to break down too much and the texture becomes mushy.
Freezer Instructions: You can freeze this cake for up to 1 month. Wrap the entire dish tightly in plastic wrap, then a layer of aluminum foil. Thaw in the refrigerator overnight before serving. The texture will be slightly icier than fresh, but still delicious. I’ve done this twice and it works great for planned-ahead parties.
Reheating Notes: Don’t reheat this cake. It’s meant to be served cold. If you want to take the chill off, let it sit at room temperature for 10 minutes, but no longer.
Nutritional Information & Benefits
Here’s the approximate nutritional breakdown for one serving (based on 12 servings):
| Nutrient | Amount Per Serving |
|---|---|
| Calories | 385 |
| Total Fat | 22g |
| Saturated Fat | 13g |
| Cholesterol | 75mg |
| Sodium | 410mg |
| Total Carbohydrates | 44g |
| Dietary Fiber | 3g |
| Sugars | 28g |
| Protein | 5g |
While this is definitely a treat, it does offer some nutritional benefits. The fresh berries are packed with antioxidants, vitamin C, and fiber. Blueberries are particularly high in anthocyanins, which support heart health. Strawberries provide a good dose of vitamin C and manganese. The milk and cream add calcium and protein, though they also contribute to the fat content.
Dietary Considerations: This recipe contains dairy and gluten (unless modified). It’s not suitable for vegans in its current form, but the substitutions listed above work well. If you’re watching your sugar intake, you can reduce the sugar in the whipped cream or use a sugar-free pudding mix — just know the texture will be slightly different.
I personally love that this dessert feels indulgent but still includes real, whole ingredients like fresh fruit. It’s not something I eat every day, but for a holiday celebration or special occasion, it feels like a worthwhile treat.
Conclusion
This Red, White, and Blue No-Bake Icebox Cake is the kind of dessert that makes summer entertaining feel effortless. It’s beautiful, delicious, and practically makes itself. You don’t need to be a skilled baker or own fancy equipment. You just need a few simple ingredients, a fridge, and a little patience while it chills.
What I love most about this recipe is how it brings people together. Every time I’ve made it, someone asks for the recipe. Someone else takes a second slice. And someone always says, “I can’t believe this is no-bake.” That never gets old.
I hope you’ll try this recipe for your next cookout, holiday gathering, or just because you want something sweet and cold on a hot day. Feel free to customize it with your favorite berries or pudding flavors. That’s the beauty of this cake — it’s forgiving, flexible, and always delicious.
If you make it, I’d love to hear how it turns out. Leave a comment below and let me know what variations you tried, or share a photo of your creation. And if you’re looking for more easy summer desserts, check out my no-bake strawberry cheesecake bites — they’re just as simple and just as good. Happy cooking, friends!
Frequently Asked Questions
Can I use frozen berries instead of fresh?
Yes, but you need to thaw and drain them first. Frozen berries release a lot of liquid as they thaw, which can make your cake watery. Thaw them in a colander set over a bowl, then pat them dry with paper towels before using. The texture won’t be quite as firm as fresh berries, but the flavor is still great.
How long does this cake need to chill?
At least 6 hours, but overnight is best. The graham crackers need time to absorb the pudding mixture and soften into cake-like layers. If you only give it 4 hours, the center might still be crunchy. I’ve learned this the hard way, so trust me on this one.
Can I make this cake in a different size dish?
Absolutely. You can use two 8×8 dishes, a deep pie plate, or even individual mason jars. Just adjust the layering to fit your dish. For individual servings, layer graham cracker pieces, pudding mixture, and berries in each jar. They’re perfect for picnics or parties.
Why did my cake turn out runny?
This usually happens for one of three reasons: you used low-fat or skim milk, you didn’t let the pudding set long enough, or your berries were too wet. Always use whole milk, let the pudding set for the full 5 minutes, and pat your berries dry before adding them. If your cake is already runny, try chilling it longer — sometimes it firms up after a full 24 hours.
Can I use Cool Whip instead of homemade whipped cream?
Yes, you can substitute 2 cups of Cool Whip for the homemade whipped cream. Just fold it into the set pudding the same way. The texture will be slightly lighter and less rich, but it still works well. I’ve done this when I was short on time and nobody noticed the difference.
Pin This Recipe!
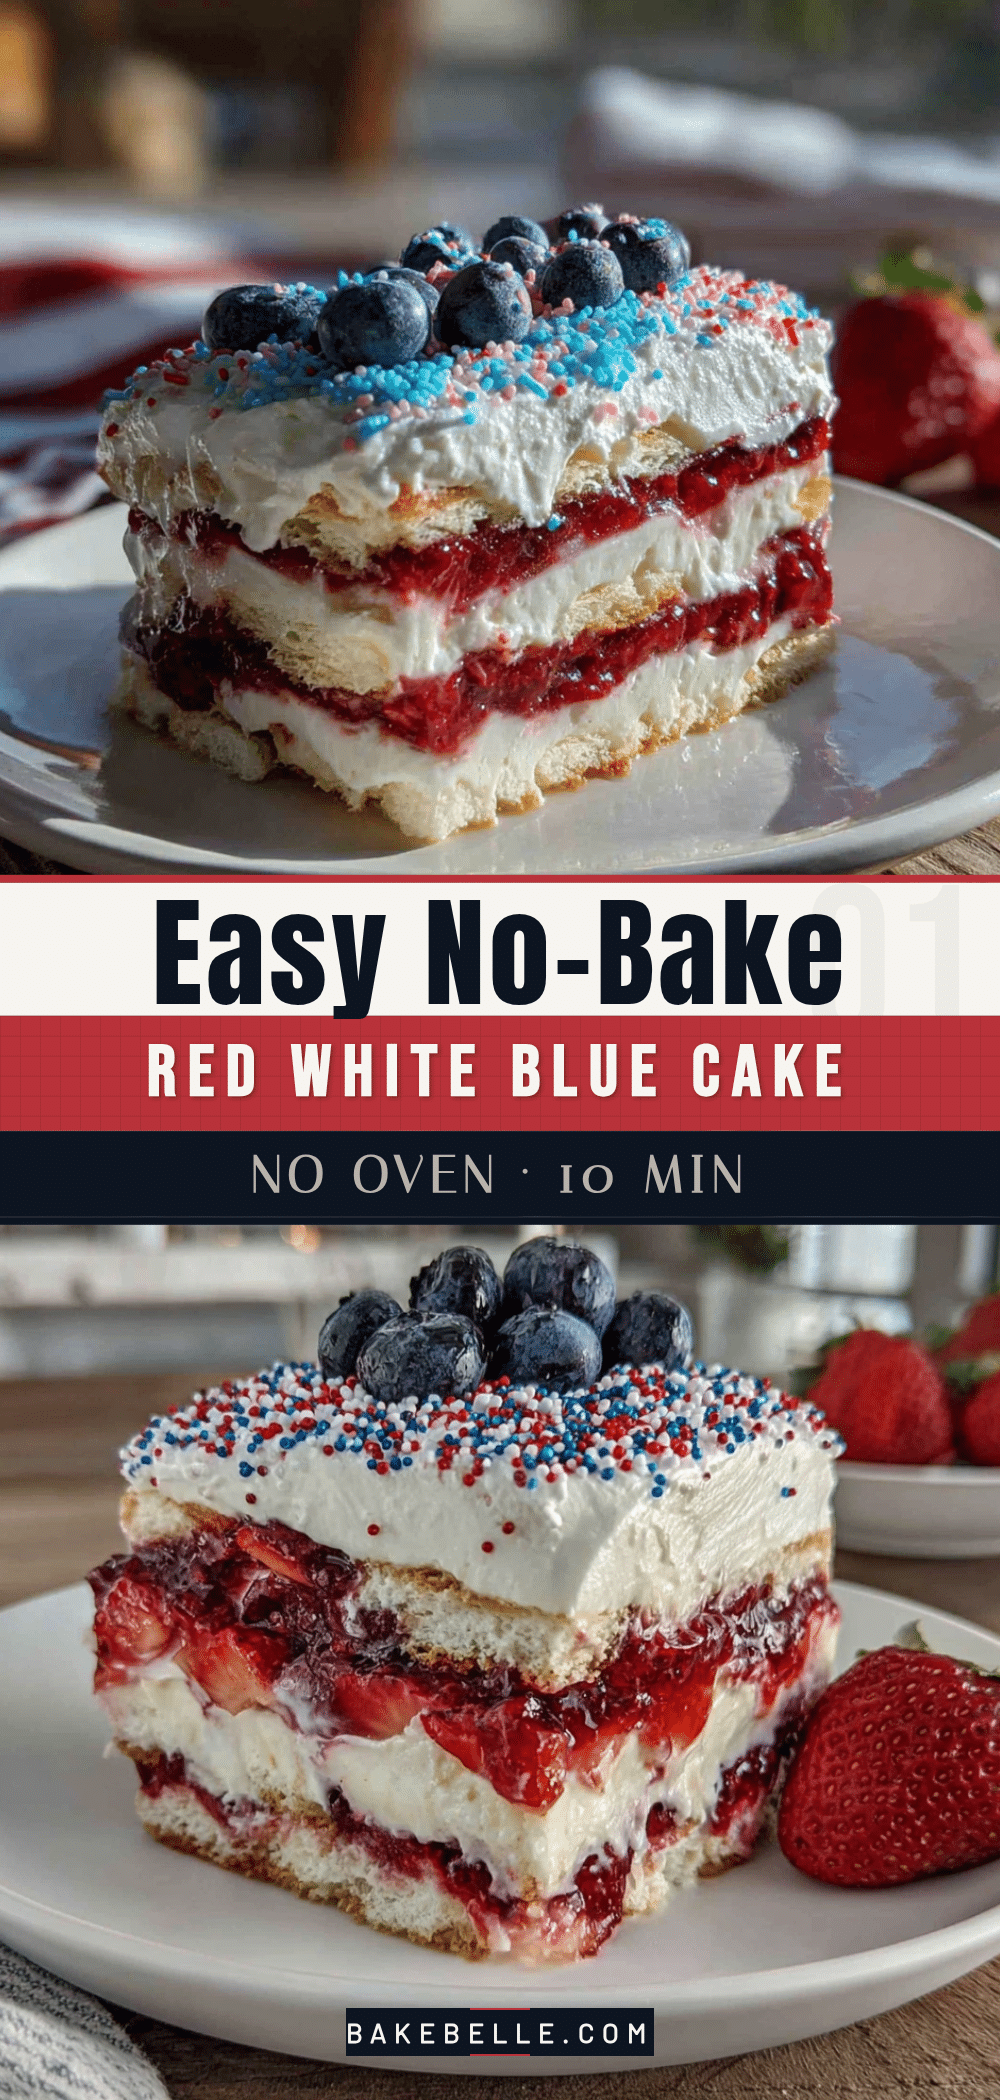
Best Red White and Blue No-Bake Icebox Cake Recipe

This no-bake icebox cake layers graham crackers with a creamy vanilla filling, fresh berries, and a gorgeous swirl of red and blue. It’s a foolproof, make-ahead dessert perfect for patriotic holidays and summer gatherings.
- Prep Time: 20 minutes
- Cook Time: 0 minutes
- Total Time: 6 hours 20 minutes (includes chilling)
- Yield: 12 servings 1x
- Category: Dessert
- Cuisine: American
Ingredients
- 3 boxes (3.4 ounces each) instant vanilla pudding mix
- 3 cups cold whole milk
- 1 box (14.4 ounces) graham crackers (about 36 full sheets)
- 2 cups heavy whipping cream
- 2 tablespoons powdered sugar
- 1 teaspoon vanilla extract
- 2 cups fresh strawberries, hulled and sliced
- 1 cup fresh blueberries
- 1 cup fresh raspberries
- Optional: 1 tablespoon sugar (for tart berries)
- Optional: Blue food coloring (a drop or two)
Instructions
- Make the pudding base: In a large mixing bowl, whisk together the instant vanilla pudding mix and cold milk. Whisk for about 2 minutes until it starts to thicken. Let it sit for 5 minutes to set up completely.
- Prep your berries: While the pudding sets, wash and dry all your berries. Hull the strawberries and slice them into even pieces, about ¼-inch thick. Pick through the blueberries and raspberries, discarding any that are mushy or moldy. Set aside.
- Make the whipped cream: In a separate chilled bowl, pour the heavy whipping cream, powdered sugar, and vanilla extract. Beat on medium-high speed until soft peaks form, about 3-4 minutes.
- Combine the pudding and cream: Gently fold the whipped cream into the set pudding using a rubber spatula until just combined.
- Start layering: Spread a thin layer of the pudding mixture (about ½ cup) on the bottom of a 9×13-inch dish. Arrange a single layer of graham crackers on top, breaking pieces as needed to fill gaps.
- Add the first filling layer: Spread about one-third of the remaining pudding mixture evenly over the graham crackers. Sprinkle about one-third of the strawberries and one-third of the blueberries over the pudding.
- Repeat the layers: Add another layer of graham crackers, another third of the pudding, and another third of the berries. Repeat one more time, ending with a final layer of graham crackers on top.
- Add the final topping: Spread any remaining pudding mixture over the top layer of graham crackers. Arrange reserved berries on top in a decorative pattern.
- Chill the cake: Cover tightly with plastic wrap, pressing it directly onto the surface. Refrigerate for at least 6 hours, but overnight is better.
- Serve cold: Remove plastic wrap, cut into squares, and serve straight from the fridge.
Notes
Don’t rush the chilling time; the graham crackers need a full 6-8 hours to soften. Press graham crackers down gently after each layer. Keep berries dry to avoid sogginess. Use a serrated knife for cutting. Make the day before for best results. Whole milk is non-negotiable for proper pudding set.
Nutrition
- Serving Size: 1 square (1/12 of ca
- Calories: 385
- Sugar: 28
- Sodium: 410
- Fat: 22
- Saturated Fat: 13
- Carbohydrates: 44
- Fiber: 3
- Protein: 5
Keywords: no-bake icebox cake, red white and blue dessert, Fourth of July dessert, patriotic dessert, summer dessert, berry dessert, graham cracker cake