This was supposed to be a calzone. A proper, folded-over, Italian-style calzone with ricotta and marinara, the kind that takes an afternoon to make. I had the dough proofing on the counter, the sauce simmering, and I was feeling pretty good about myself. Then my phone rang, the timer went off, and somewhere in that chaos, I grabbed the wrong package from the fridge. Instead of ricotta, I pulled out a block of cheddar. Instead of pepperoni, I found deli ham. I stared at the mismatched ingredients, the dough now threatening to over-proof, and honestly, I almost just ordered pizza. But the clock was ticking, lunchboxes needed packing, and I was already in too deep. So I slapped it all together, folded the dough into rough little pockets, and threw them in the pan. What came out of that skillet was nothing like the calzone I planned—and way, way better. The cheese got all crispy at the edges, the ham turned golden, and my kid ate three of them standing at the counter. I mean, I’ve made a lot of kitchen mistakes, but this one? This one I keep making on purpose.
These Crispy Ham and Cheese Lunchbox Pockets are now a weekly staple in my house, and they came from a moment of pure, distracted chaos. Maybe you’ve been there—staring at a recipe fail that turns into a win. That’s exactly what happened here. They’re quick, they’re forgiving, and they taste like you actually tried. Let me show you how to make them.
Why You’ll Love This Recipe
Let me tell you, after testing these pockets about a dozen times (in the name of “research,” obviously), I’ve never been more confident about a recipe. Here’s why these little guys are going to change your lunch game:
- Quick & Easy: From start to finish, you’re looking at 15 minutes. Seriously. That’s less time than it takes to decide what to order for delivery.
- Simple Ingredients: You probably have everything in your fridge right now. Flour, butter, ham, cheese—no fancy grocery trips required.
- Perfect for Lunchboxes: They hold up beautifully, don’t get soggy, and taste just as good at room temperature as they do hot out of the pan.
- Crowd-Pleaser: I’ve served these to picky kids, hungry adults, and skeptical in-laws. Empty plates every single time.
- Unbelievably Crispy: The secret is in the pan-frying technique—you get that golden, shatteringly crisp exterior without deep frying.
What makes these different from every other ham and cheese pocket out there? It’s the texture, honestly. Most recipes bake these pockets, and they end up soft and bread-like. By pan-frying them, you get that irresistible crunch that makes you close your eyes after the first bite. Plus, the cheese gets all caramelized and crispy at the edges—it’s pure comfort food magic.
This isn’t just another version of a ham and cheese pocket. It’s the version that makes you wonder why you ever bothered with the frozen ones. It’s healthier, faster, and has that soul-soothing satisfaction of something made with love—and a little bit of butter.
What Ingredients You Will Need
This recipe uses simple, everyday ingredients to deliver that perfect crispy-meets-gooey texture. Most of these are pantry staples, so you can whip these up anytime the craving hits.
For the Dough
- 2 cups all-purpose flour (plus extra for dusting) — I prefer Gold Medal for consistent results, but any brand works
- 1 teaspoon baking powder — this gives the pockets a light, fluffy interior
- 1/2 teaspoon salt — fine sea salt is best for even distribution
- 1/2 cup cold unsalted butter, cubed — Kerrygold is my go-to for its rich flavor and high butterfat content, which creates a flakier texture
- 1/2 cup cold water — ice cold water is key for a tender dough
For the Filling

- 8 slices deli ham — look for thick-cut ham for better texture; honey ham adds a nice sweetness
- 1 cup shredded cheddar cheese — sharp cheddar gives the best flavor, but mild works too
- 1/2 cup shredded mozzarella — this adds that perfect stretchy, gooey factor
- 1 tablespoon Dijon mustard (optional) — adds a tangy kick that cuts through the richness
For Cooking
- 2 tablespoons butter — for pan-frying; use clarified butter if you want an even crispier result
- 1 egg, beaten — for a golden, glossy finish (optional but recommended)
Ingredient Tips: For the best texture, make sure your butter is really cold. I like to pop it in the freezer for 10 minutes before cutting it into cubes. If you’re dairy-free, you can swap the butter for a plant-based version and use dairy-free cheese, though the texture will be slightly less crispy. For a gluten-free option, use a 1:1 gluten-free flour blend—I’ve had good luck with Bob’s Red Mill.
Equipment Needed
You don’t need fancy gadgets for these pockets, which is part of the beauty. Here’s what you’ll need:
- Large mixing bowl — for making the dough
- Pastry cutter or two forks — to cut the butter into the flour; you can also use a food processor if you’re in a hurry
- Rolling pin — a wine bottle works in a pinch, I’ve done it before
- Sharp knife or pizza cutter — for cutting the dough into squares
- Large non-stick skillet or cast iron pan — cast iron gives the best crispy crust, but non-stick is easier to clean
- Spatula — a thin metal spatula works best for flipping without breaking the pockets
- Baking sheet — to hold the assembled pockets before cooking
- Pastry brush — for the egg wash (a paper towel works too)
Honestly, I’ve made these with just a bowl, a fork, and a pan when my kitchen was half-packed during a move. They still turned out amazing. Don’t overthink the equipment.
Preparation Method
Alright, let’s get cooking. These pockets come together fast, so have everything ready before you start.
- Make the dough (5 minutes): In a large bowl, whisk together the flour, baking powder, and salt. Add the cold butter cubes and use a pastry cutter or two forks to cut the butter into the flour until it looks like coarse crumbs with some pea-sized butter pieces remaining. This is important—those little butter chunks create flaky layers. Drizzle in the cold water and stir with a fork until the dough just comes together. It should be shaggy, not smooth. Don’t overmix, or the pockets will be tough.
- Chill the dough (10 minutes): Turn the dough onto a lightly floured surface and gently bring it together into a ball. Flatten it into a disc, wrap it in plastic wrap, and pop it in the fridge for at least 10 minutes. This rest period relaxes the gluten and makes the dough easier to roll out. If you’re in a rush, 5 minutes works, but 10 is better.
- Prepare the filling (2 minutes): While the dough chills, shred your cheese if you haven’t already and lay out your ham slices. If you’re using Dijon mustard, mix it with a tablespoon of mayo for a creamier spread. Trust me on this one.
- Roll and cut the dough (3 minutes): On a floured surface, roll the dough out to about 1/8-inch thickness. Use a sharp knife or pizza cutter to cut it into 4×4-inch squares. You should get about 8 squares. Re-roll the scraps if needed—don’t waste that buttery goodness.
- Assemble the pockets (5 minutes): Place a slice of ham on each square, slightly off-center. Top with a generous pinch of both cheddar and mozzarella. If using the mustard spread, add a small dollop on the ham before the cheese. Fold the dough over to form a triangle or rectangle, and press the edges firmly to seal. Use a fork to crimp the edges—this not only looks pretty but also ensures they don’t burst open while cooking.
- Preheat the pan (2 minutes): Place your skillet over medium heat and add 1 tablespoon of butter. Let it melt and sizzle until it’s foamy but not brown. This is the sweet spot for crispy pockets.
- Cook the pockets (6-8 minutes): Carefully place 3-4 pockets in the pan, leaving space between them. Cook for 3-4 minutes on the first side, until deep golden brown and crispy. Flip carefully using a thin spatula and cook for another 3-4 minutes on the second side. The cheese should be melted and bubbling at the edges. If the pockets are browning too fast, lower the heat slightly—you want the cheese to melt fully without burning the exterior.
- Finish and serve (1 minute): Transfer the cooked pockets to a paper towel-lined plate to drain any excess butter. Let them rest for 2 minutes before serving—the cheese inside is molten hot and will burn your mouth if you’re not careful. Ask me how I know.
Pro tip: If you’re making these for lunchboxes, let them cool completely before packing. They’ll stay crispy for hours, unlike baked versions that get soggy.
Cooking Tips & Techniques
After making these pockets more times than I care to admit, I’ve picked up a few tricks that make a real difference.
Don’t overwork the dough. I learned this the hard way when my first batch came out tough and chewy instead of tender and flaky. Mix until it just comes together, and handle it as little as possible. The cold butter pieces are what create those flaky layers, and if you melt them with your hands, you lose that texture.
Seal those edges tight. My biggest failure was a pocket that burst open in the pan, leaking cheese everywhere and making a smoky mess. Now I always double-crimp the edges with a fork, and I make sure there’s no filling near the seal. Leave a 1/2-inch border around the filling for best results.
Watch your heat. Medium heat is your friend here. Too high, and the outside burns before the cheese melts. Too low, and the pockets absorb oil and turn greasy. If you see the butter starting to smoke, pull the pan off the heat for a minute to cool it down.
Batch cooking strategy: If you’re making a big batch, keep the cooked pockets warm in a 200°F oven on a baking sheet while you finish the rest. This keeps them crispy without drying them out. And don’t crowd the pan—work in batches of 3-4 pockets max.
My biggest lesson: I once tried to rush the chilling step and the dough was impossible to roll out—it kept tearing and sticking everywhere. That 10-minute chill is non-negotiable, I promise. Set a timer if you have to.
Variations & Adaptations
One of the best things about this recipe is how flexible it is. Here are some of my favorite twists:
Breakfast Pockets: Swap the ham for cooked breakfast sausage or bacon, add a scrambled egg, and use American cheese for that classic breakfast sandwich vibe. These are amazing for make-ahead breakfasts.
Veggie Version: Skip the ham and load up with sautéed mushrooms, spinach, and roasted red peppers. Use a mix of mozzarella and goat cheese for a tangy, creamy filling. My vegetarian friend requests these every time she visits.
Spicy Southwest: Use pepper jack cheese, add some chopped jalapeños, and spread a thin layer of refried beans on the dough before adding the ham. Serve with salsa for dipping—it’s a game-changer.
Air Fryer Adaptation: If you want to skip the pan-frying, these pockets work beautifully in an air fryer. Brush them with melted butter and cook at 375°F for 8-10 minutes, flipping halfway through. They won’t be quite as crispy, but they’re still delicious and a little lighter.
Sweet Version: Okay, this one’s a little wild, but hear me out—use Nutella and sliced bananas as the filling, dust with powdered sugar after cooking. My kids think I’m a genius. Don’t tell them it’s the same dough.
Serving & Storage Suggestions
These pockets are incredibly versatile when it comes to serving. Here’s how I like to enjoy them:
Serving Temperature: They’re amazing hot off the skillet, but honestly, they’re just as good at room temperature. That’s what makes them perfect for lunchboxes—no reheating needed. If you’re serving them for dinner, let them rest for 3-4 minutes before cutting them open to release some steam.
What to Serve With: I love these with a simple side salad dressed with lemon vinaigrette to cut through the richness. For dipping, try marinara sauce, honey mustard, or even a little ranch. My personal favorite is a mix of ketchup and sriracha—don’t judge until you try it.
Storage: Leftover pockets keep beautifully in the refrigerator for up to 3 days. Store them in an airtight container with a paper towel to absorb any moisture. To reheat, pop them in a skillet over medium heat for 2-3 minutes per side, or use an air fryer at 350°F for 4 minutes. The microwave works in a pinch, but you’ll lose that crispy exterior.
Freezer Tips: These freeze like a dream. Assemble the pockets completely, then freeze them on a baking sheet until solid. Transfer to a freezer bag and store for up to 3 months. Cook from frozen—just add 2-3 minutes to the cooking time. This is my secret weapon for crazy busy weeks.
Flavor Development: Here’s something interesting—the flavors actually meld together better the next day. The ham and cheese sort of marry in the fridge, and the pockets taste even more savory and satisfying. I sometimes make a double batch just for the leftovers.
Nutritional Information & Benefits
Let’s talk numbers. These pockets are indulgent, but they’re also made with real, whole ingredients. Here’s the approximate breakdown per pocket (based on 8 servings):
| Nutrient | Amount per Pocket |
|---|---|
| Calories | 320 |
| Total Fat | 18g |
| Saturated Fat | 10g |
| Cholesterol | 65mg |
| Sodium | 580mg |
| Total Carbohydrates | 28g |
| Dietary Fiber | 1g |
| Sugars | 1g |
| Protein | 14g |
Health Benefits: The ham provides a good amount of protein to keep you full and satisfied. The cheese offers calcium for bone health, and the butter, while rich, contains fat-soluble vitamins like A and D. If you’re looking to lighten things up, use reduced-fat cheese and swap half the butter for olive oil—it won’t be as crispy, but it’ll still be delicious.
Dietary Considerations: These pockets are naturally nut-free and can be made gluten-free with a 1:1 flour blend. For a lower-carb option, try using a keto-friendly dough made with almond flour and cream cheese—I’ve tested it, and it works surprisingly well.
Honestly, I don’t stress about the numbers too much. These are real food, made with love, and they bring a lot of joy to a lunchbox. That counts for something, right?
Conclusion
So there you have it—my accidental masterpiece turned lunchbox hero. These Crispy Ham and Cheese Lunchbox Pockets started as a kitchen disaster and ended up as one of my most-requested recipes. They’re proof that sometimes the best things in life come from happy accidents and a little bit of butter.
I love these pockets because they’re forgiving, flexible, and they make everyone who tries them smile. Whether you’re packing lunchboxes, feeding a hungry family, or just treating yourself to something crispy and cheesy, these pockets deliver every single time.
Now I want to hear from you—what’s your favorite filling combination? Have you tried any of the variations I mentioned? Drop a comment below and let me know how these turned out for you. And if you loved them, share this recipe with a friend who needs a little crispy comfort in their life. Happy cooking, friends!
Frequently Asked Questions
Can I use pre-made dough for these pockets?
Absolutely! Store-bought pie crust or even pizza dough works in a pinch. Just roll it out thin and follow the same assembly and cooking instructions. The texture will be slightly different, but it’s a great shortcut for busy days.
Why did my pockets burst open while cooking?
This usually happens when the edges aren’t sealed properly or there’s too much filling. Make sure to leave a 1/2-inch border around the filling and crimp the edges firmly with a fork. Also, don’t overstuff—less is more here.
Can I bake these instead of pan-frying?
Yes, but they won’t be as crispy. Bake at 400°F for 15-18 minutes, brushing with butter halfway through. They’ll be golden and delicious, just with a softer crust. I prefer pan-frying for that shatteringly crisp texture.
How do I keep these from getting soggy in lunchboxes?
Let them cool completely before packing. Place a paper towel in the container to absorb any moisture, and don’t seal the container until they’re fully cool. They’ll stay crispy for hours this way.
Can I make these ahead of time for a party?
Definitely! Assemble the pockets up to 24 hours in advance and keep them covered in the fridge. Cook them just before serving, or cook them earlier and reheat in a 350°F oven for 5 minutes. They’re perfect for entertaining.
Pin This Recipe!
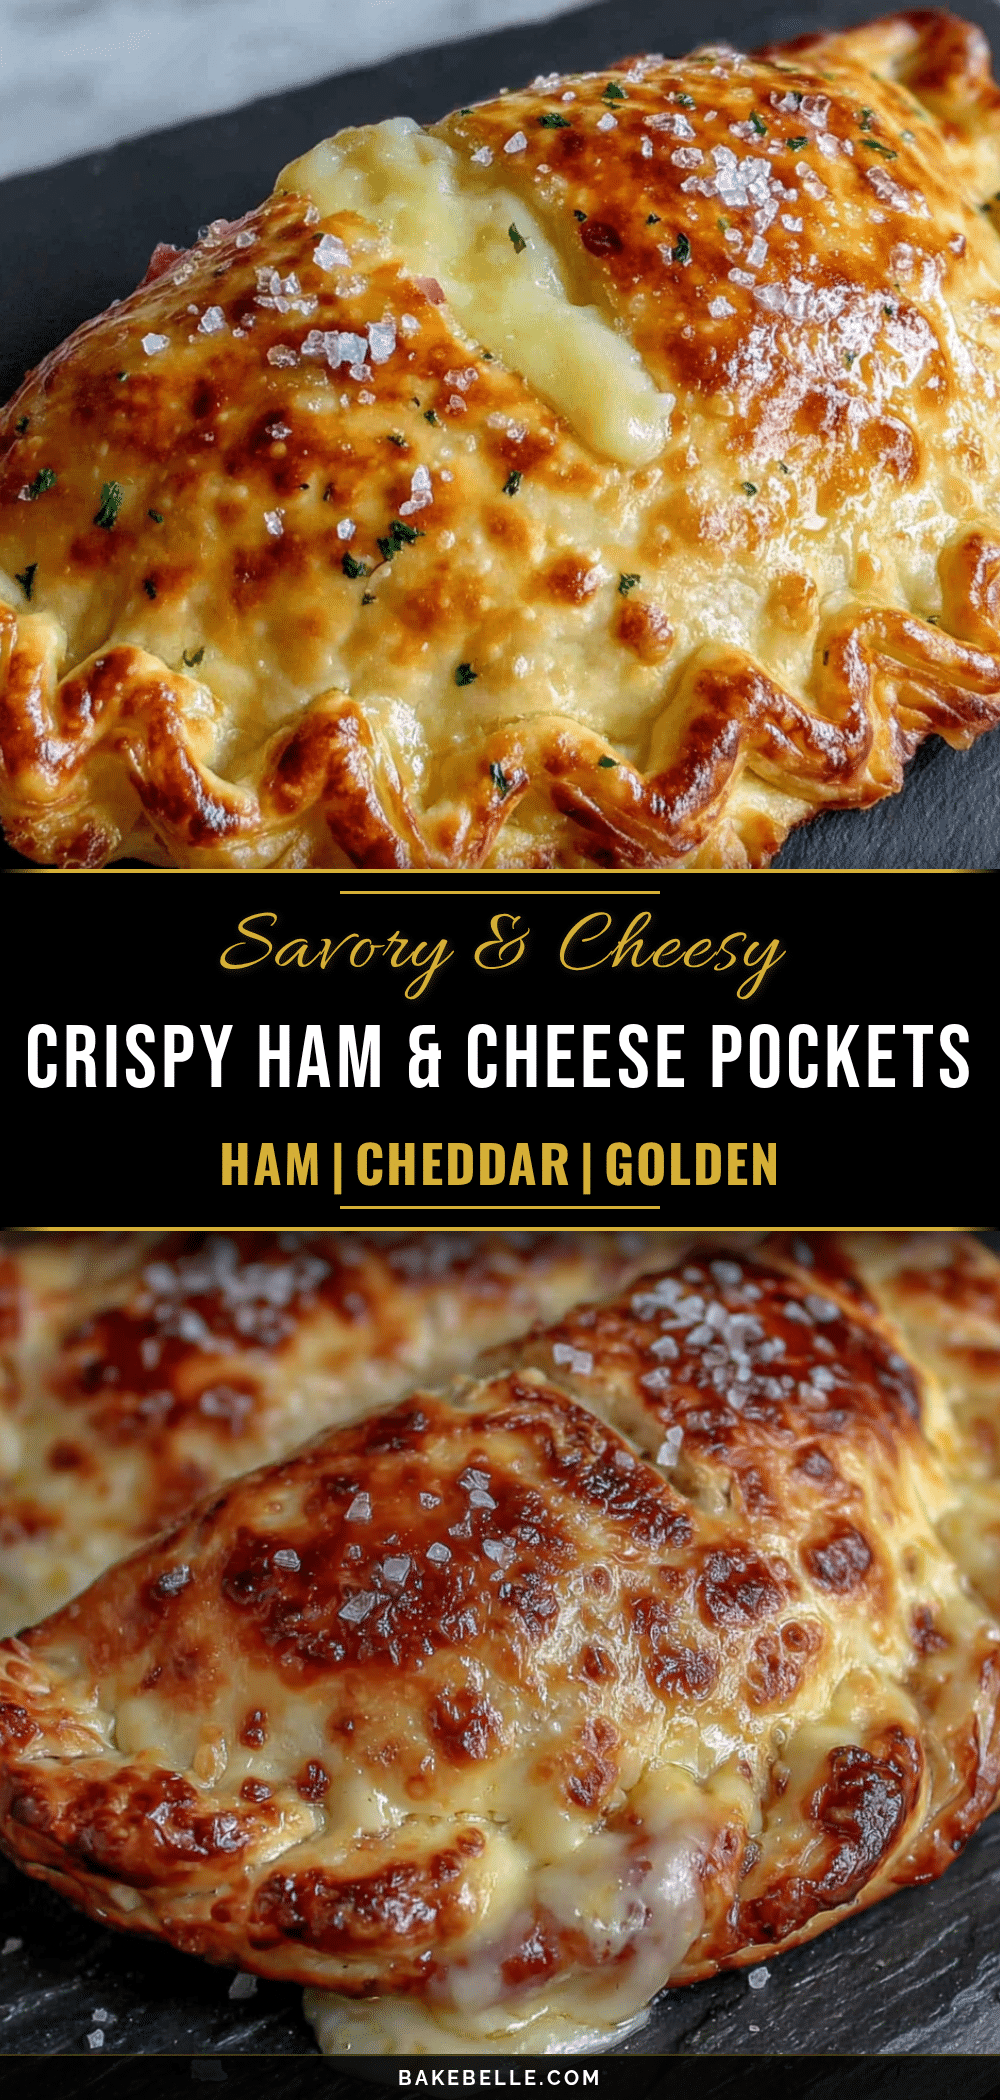
Crispy Ham and Cheese Lunchbox Pockets

These crispy ham and cheese pockets are a quick and easy 15-minute recipe perfect for lunchboxes. Made with simple ingredients and pan-fried to golden perfection, they’re a crowd-pleasing twist on a classic calzone.
- Prep Time: 15 minutes
- Cook Time: 8 minutes
- Total Time: 23 minutes
- Yield: 8 servings 1x
- Category: Main Course
- Cuisine: American
Ingredients
- 2 cups all-purpose flour (plus extra for dusting)
- 1 teaspoon baking powder
- 1/2 teaspoon fine sea salt
- 1/2 cup cold unsalted butter, cubed
- 1/2 cup cold water
- 8 slices deli ham (thick-cut recommended)
- 1 cup shredded cheddar cheese (sharp preferred)
- 1/2 cup shredded mozzarella cheese
- 1 tablespoon Dijon mustard (optional)
- 2 tablespoons butter (for pan-frying)
- 1 egg, beaten (for egg wash, optional)
Instructions
- Make the dough: In a large bowl, whisk together flour, baking powder, and salt. Add cold butter cubes and cut into flour using a pastry cutter or two forks until mixture resembles coarse crumbs with some pea-sized butter pieces. Drizzle in cold water and stir with a fork until dough just comes together (shaggy, not smooth). Do not overmix.
- Chill the dough: Turn dough onto a lightly floured surface, gently form into a ball, flatten into a disc, wrap in plastic wrap, and refrigerate for at least 10 minutes.
- Prepare the filling: While dough chills, shred cheese if needed and lay out ham slices. If using Dijon mustard, mix with 1 tablespoon mayo for a creamier spread.
- Roll and cut the dough: On a floured surface, roll dough to about 1/8-inch thickness. Cut into 4×4-inch squares (about 8 squares). Re-roll scraps if needed.
- Assemble the pockets: Place a slice of ham on each square, slightly off-center. Top with a generous pinch of cheddar and mozzarella. If using mustard spread, add a small dollop on ham before cheese. Fold dough over to form a triangle or rectangle, press edges firmly to seal, and crimp with a fork.
- Preheat the pan: Place a large non-stick skillet or cast iron pan over medium heat and add 1 tablespoon butter. Let it melt and sizzle until foamy but not brown.
- Cook the pockets: Carefully place 3-4 pockets in the pan, leaving space between them. Cook for 3-4 minutes on the first side until deep golden brown and crispy. Flip carefully and cook for another 3-4 minutes on the second side. Adjust heat if browning too fast.
- Finish and serve: Transfer cooked pockets to a paper towel-lined plate to drain excess butter. Let rest for 2 minutes before serving (filling is very hot).
Notes
For best texture, ensure butter is very cold (freeze for 10 minutes before cubing). Do not overwork the dough. Seal edges tightly to prevent bursting. Medium heat is key to avoid burning. Let pockets cool completely before packing for lunchboxes to maintain crispiness. Assemble pockets up to 24 hours ahead and refrigerate. Freeze assembled pockets for up to 3 months; cook from frozen adding 2-3 minutes.
Nutrition
- Serving Size: 1 pocket
- Calories: 320
- Sugar: 1
- Sodium: 580
- Fat: 18
- Saturated Fat: 10
- Carbohydrates: 28
- Fiber: 1
- Protein: 14
Keywords: ham and cheese pockets, lunchbox recipe, crispy pockets, easy 15-minute recipe, pan-fried pockets