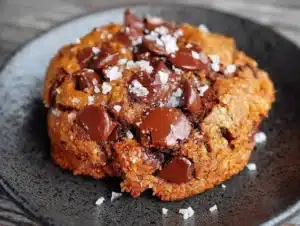
I was folding laundry last Tuesday—a truly mindless task—when the smell of browned butter drifted from my neighbor’s open kitchen window. And just like that, I was eight years old, standing on a step stool in my Aunt Lou’s tiny apartment, watching her swirl butter in a pan until it turned the color of hazelnuts. She’d let me stir, warning me not to burn it, and I’d breathe in that nutty, almost-toffee scent like it was magic. She’s been gone five years now, and I still can’t smell browned butter without thinking of her crooked smile and the way she’d sneak me a spoonful of dough before the cookies hit the oven.
I tried recreating her cookies a dozen times after she passed. They were always good, but never right. The texture was off, or the flavor was flat. Honestly, I’d almost given up. But last Tuesday, that smell from next door hit me like a freight train, and I marched straight into my kitchen determined to get it right. I pulled out my heaviest pan, grabbed a stick of butter, and decided I wasn’t leaving until I cracked the code. Maybe you’ve been there—chasing a taste from your past that feels just out of reach.
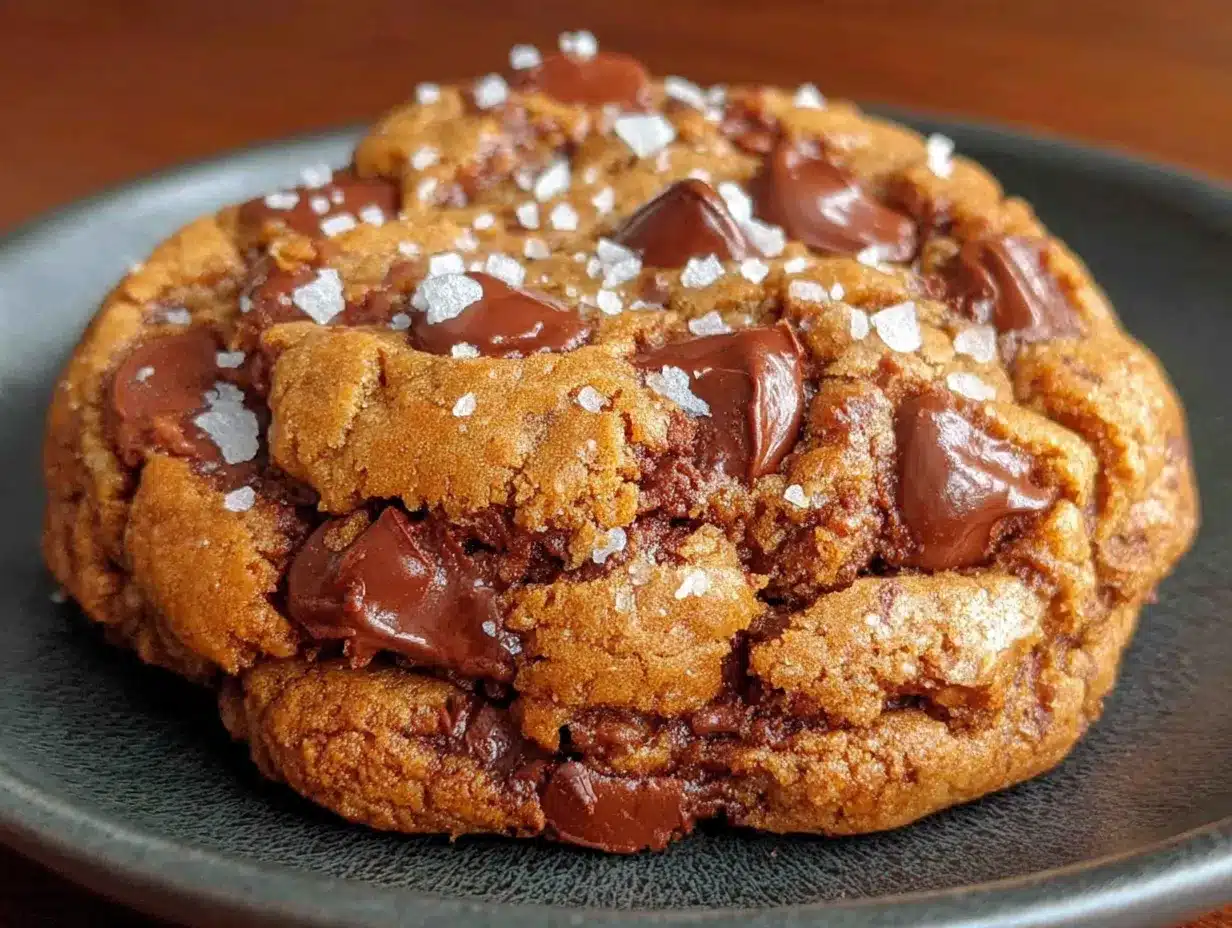
These Cozy Chewy Brown Butter Chocolate Chip Cookies are the result of that mission. They’re not a perfect replica of Aunt Lou’s—I’ve added my own little tweaks—but they capture the spirit of that moment. The warmth, the nuttiness, the way the edges get slightly crisp while the center stays soft and almost fudgy. It’s the kind of cookie that makes you close your eyes on the first bite. And honestly? That’s exactly what I was after.
Why You’ll Love This Recipe
Let me tell you, these aren’t your average chocolate chip cookies. I’ve tested this recipe more times than I care to admit—burned batches, flat batches, batches that were more like cookie crackers. But this version? It’s the one I keep coming back to. Here’s why you’ll love it too:
- Quick & Easy: From start to finish, these come together in about 30 minutes. No complicated techniques or fancy equipment—just a bowl, a whisk, and a little patience.
- Simple Ingredients: You probably have almost everything already. Butter, sugar, eggs, flour, chocolate chips. The secret is in how you treat them, not what you buy.
- Perfect for Cozy Nights: Whether it’s a rainy Sunday, a cold winter evening, or just a Tuesday that needs fixing, these cookies deliver that warm, nostalgic comfort.
- Crowd-Pleaser: I’ve brought these to potlucks, family dinners, and neighbor meet-and-greets. They disappear fast. Kids and adults alike go back for seconds (and thirds).
- Unbelievably Delicious: The browned butter adds this deep, nutty, almost caramel-like flavor that regular cookies just can’t touch. The texture is chewy in the center with slightly crisp edges—exactly what a chocolate chip cookie should be.
What makes this recipe different? It’s the browned butter, sure, but it’s also the way I handle the dough. I let it rest for just a few minutes after mixing, which lets the flour fully hydrate and the flavors meld. It’s a small step, but it makes a big difference. This isn’t just another cookie recipe—it’s the one I make when I need a hug in food form.
What Ingredients You Will Need
This recipe relies on simple, pantry-friendly ingredients to create something truly special. Each one plays a role in building that perfect chewy texture and rich, nutty flavor. Here’s what you’ll need:
- 1 cup (226g) unsalted butter — This is the star of the show. Browning it transforms the flavor completely. I recommend using a good-quality butter like Kerrygold for the best results—it has a higher fat content, which means better browning and richer taste.
- 1 ½ cups (300g) packed light brown sugar — Brown sugar adds moisture and that deep, molasses-like sweetness that pairs perfectly with the nutty butter. Don’t substitute granulated here; the texture won’t be the same.
- ¼ cup (50g) granulated sugar — Just a little bit helps with spreading and gives the edges a slight crispness.
- 2 large eggs, room temperature — Room-temperature eggs incorporate more easily into the batter, creating a smoother dough. Cold eggs can make the butter seize up.
- 2 teaspoons vanilla extract — Use pure vanilla extract if you can—it makes a difference in the overall warmth of the flavor. I’m a fan of Nielsen-Massey.
- 2 ¼ cups (280g) all-purpose flour — Spoon and level your flour for accuracy. Scooping directly from the bag can pack in too much and make the cookies dry.
- 1 teaspoon baking soda — This gives the cookies lift and helps them spread just the right amount.
- ½ teaspoon salt — Salt balances the sweetness and enhances the browned butter flavor. I use fine sea salt.
- 2 cups (340g) semi-sweet chocolate chips — I prefer Ghirardelli or Guittard for their rich flavor and good melt. You can also chop up a high-quality chocolate bar for bigger pools of chocolate.
- Flaky sea salt (optional, for finishing) — A sprinkle on top right out of the oven takes these cookies to another level. Don’t skip it if you have it!
Substitution Note: If you need a dairy-free option, you can use a high-quality vegan butter stick (like Miyoko’s) for browning. The texture will be slightly different, but the flavor will still be fantastic. For a gluten-free version, swap the all-purpose flour with a 1:1 gluten-free baking flour blend that contains xanthan gum.
Equipment Needed
You don’t need a lot of fancy gear for these cookies, but a few key tools make the process smoother. Here’s what I use:
- Heavy-bottomed saucepan or skillet — A light-colored pan is best for browning butter because you can see the color change. I use a stainless steel skillet, but a light-colored nonstick works too.
- Large mixing bowl — Any bowl will do, but a wider one makes mixing easier.
- Whisk — For combining the wet ingredients smoothly.
- Rubber spatula — For folding in the chocolate chips and scraping every last bit of dough.
- Baking sheets — I like using light-colored aluminum sheets for even browning. Dark sheets can cause the bottoms to burn.
- Parchment paper or silicone baking mat — Parchment is my go-to for easy cleanup and consistent baking.
- Cookie scoop (about 1.5 tablespoons) — This ensures evenly sized cookies. I lost my favorite scoop once and used a spoon—total chaos. Get a scoop.
- Cooling rack — Letting cookies cool on a rack prevents soggy bottoms.
If you don’t have a cookie scoop, just use two spoons to portion the dough. And if your baking sheets are dark, reduce the oven temperature by 25°F to prevent burning. I learned that the hard way—burnt cookie bottoms are a tragedy.
Preparation Method
Alright, let’s get baking. I’ve broken this down step by step so you can follow along without any hiccups. Trust me, I’ve made every mistake possible, so I’m including all the little warnings and tips I wish I’d had.
- Brown the butter: Place the 1 cup of unsalted butter in a light-colored saucepan or skillet over medium heat. Let it melt completely, then continue cooking, swirling the pan occasionally. The butter will foam up, then settle down. Watch closely—it will go from golden to amber to a deep nutty brown pretty quickly. Once you see brown specks forming at the bottom and it smells like toasted nuts, remove it from the heat immediately. Pour it into a heatproof bowl (including all those brown bits—that’s pure flavor) and let it cool for about 10-15 minutes. Don’t skip the cooling step, or you’ll end up with melted butter cookies instead of chewy ones.
- Mix the sugars and butter: In a large mixing bowl, combine the cooled browned butter with the 1 ½ cups packed light brown sugar and ¼ cup granulated sugar. Whisk vigorously until the mixture looks like wet sand and is well combined. It should be smooth and slightly shiny. This takes about a minute of good whisking.
- Add the eggs and vanilla: Crack the 2 room-temperature eggs into the butter-sugar mixture, then add the 2 teaspoons of vanilla extract. Whisk until everything is fully incorporated and the mixture looks smooth and glossy. If it looks a little separated, keep whisking—it will come together. This is where the magic starts.
- Combine the dry ingredients: In a separate small bowl, whisk together the 2 ¼ cups all-purpose flour, 1 teaspoon baking soda, and ½ teaspoon salt. Make sure there are no lumps—baking soda clumps can cause bitter spots in your cookies.
- Add the dry ingredients to the wet: Pour the flour mixture into the wet mixture. Use a rubber spatula to fold everything together gently. Stir just until no streaks of flour remain. Overmixing will develop gluten and make your cookies tough. You want a soft, slightly sticky dough.
- Fold in the chocolate chips: Add the 2 cups of semi-sweet chocolate chips to the dough. Fold them in using the spatula until they’re evenly distributed. Don’t be shy—make sure every bite will have chocolate.
- Rest the dough (this is important!): Let the dough sit at room temperature for 10 minutes. This gives the flour time to fully absorb the moisture, which helps create that chewy texture. I know it’s tempting to skip, but don’t. Use this time to preheat your oven and line your baking sheets.
- Preheat the oven: Set your oven to 350°F (175°C). Line two baking sheets with parchment paper or silicone mats.
- Scoop the dough: Using a 1.5-tablespoon cookie scoop, portion out the dough into balls. Place them about 2 inches apart on the prepared baking sheets. They will spread, so give them room. I usually fit 8-9 per sheet.
- Bake: Bake one sheet at a time on the center rack for 10-12 minutes. The cookies should look golden brown around the edges but still slightly soft and puffy in the center. They will continue to set as they cool, so don’t overbake. I take mine out at 11 minutes for that perfect chewy center.
- Cool: Let the cookies cool on the baking sheet for 5 minutes. This allows them to firm up enough to transfer. Then, move them to a wire rack to cool completely. If you’re using flaky sea salt, sprinkle it on top right after they come out of the oven while they’re still warm.
Sensory Cue: When the cookies are done, the edges should be a deep golden brown and the centers should look slightly underdone and puffy. The kitchen will smell like toasted butter and vanilla—pure heaven.
Cooking Tips & Techniques
I’ve made more batches of these cookies than I can count, and I’ve learned a few things along the way. Here are my best tips for getting them perfect every time:
- Don’t rush the browning: The biggest mistake I made early on was taking the butter off the heat too soon. The color change from “nice and golden” to “perfectly browned” happens fast. Wait until you see those brown specks and smell that nutty aroma. It’s worth the extra 30 seconds.
- Cool the butter completely: I once added the sugars to hot browned butter, and the sugar started melting, making the cookies spread into flat, greasy pucks. Let the butter cool until it’s warm but not hot—about 10-15 minutes.
- Use room-temperature eggs: Cold eggs can cause the butter to seize up and create a lumpy dough. If you forget to take them out ahead of time, place them in a bowl of warm water for 5 minutes.
- Measure flour correctly: Spoon the flour into your measuring cup and level it off with a knife. Scooping directly from the bag can add up to 25% more flour, resulting in dry, cakey cookies.
- Chill if you have time: While this recipe works without chilling, if you have an extra 30 minutes, pop the scooped dough balls in the fridge. Chilled dough spreads less and develops even more flavor. I do this when I’m not in a rush.
- Bake one sheet at a time: I know it’s tempting to cram two sheets in the oven, but they’ll bake unevenly. The bottom sheet will get too much heat from the bottom element, and the top sheet might burn on the edges. Just be patient—it’s worth it.
Variations & Adaptations
These cookies are wonderful as-is, but sometimes you want to mix things up. Here are a few variations I’ve tried and loved:
- Dark Chocolate & Sea Salt: Swap the semi-sweet chips for dark chocolate chunks (60-70% cocoa) and double down on the flaky sea salt. The bitterness of the dark chocolate pairs beautifully with the sweet, nutty cookie base. This is my personal favorite.
- Toasted Nut Delight: Fold in ½ cup of toasted pecans or walnuts along with the chocolate chips. Toast them in a dry skillet over medium heat for 3-4 minutes until fragrant, then let them cool before adding. The crunch adds a lovely contrast to the chewy texture.
- Gluten-Free Option: Use a 1:1 gluten-free baking flour blend that contains xanthan gum (I like King Arthur’s Measure for Measure). The texture will be slightly more delicate, but the flavor is still spot-on. Add an extra tablespoon of milk if the dough seems too dry.
- White Chocolate & Cranberry: Replace the semi-sweet chips with white chocolate chips and add ½ cup of dried cranberries. The tartness of the cranberries cuts through the sweetness beautifully. Great for holiday baking!
- M&M Fun: Swap the chocolate chips for a cup of M&Ms. This is my go-to for bake sales and kids’ parties. The colorful candies stay intact and add a fun pop of color.
Serving & Storage Suggestions
These cookies are best served warm, when the chocolate is still slightly melty and the edges are crisp. If you can wait, let them cool for about 10 minutes after baking—they’ll be perfectly chewy. Serve them with a cold glass of milk, a hot cup of coffee, or a mug of spiced chai for the ultimate cozy treat.
Storage: Keep the cookies in an airtight container at room temperature for up to 5 days. Place a slice of bread in the container—it will absorb excess moisture and keep the cookies soft. Replace the bread every other day if you’re storing them longer.
Freezing: These freeze beautifully. You can freeze the baked cookies in a zip-top bag for up to 3 months. Thaw at room temperature for about 15 minutes, then pop them in a 300°F oven for 5 minutes to refresh. Alternatively, freeze the scooped dough balls on a baking sheet, then transfer them to a bag. Bake from frozen, adding 2-3 minutes to the baking time. I always keep a batch in the freezer for emergencies—you know, the kind that involves a bad day and a need for warm cookies.
Flavor Development: Honestly, these cookies taste even better the next day. The flavors meld and deepen overnight, and the texture becomes even chewier. If you can resist eating them all on day one, you’re in for a treat on day two.
Nutritional Information & Benefits
Let’s be real—these are cookies, not health food. But they do have some redeeming qualities! Here’s the estimated nutritional breakdown per cookie (based on 24 cookies):
- Calories: ~220
- Fat: 12g
- Carbohydrates: 28g
- Protein: 3g
- Fiber: 1g
- Sugar: 18g
The browned butter adds a rich flavor that allows you to use slightly less sugar than some recipes, and the dark chocolate provides a small amount of antioxidants. Plus, there’s something to be said for the mental health benefits of a warm, homemade cookie on a tough day. I’m a firm believer that food made with love and shared with others is good for the soul. So go ahead, enjoy one (or two).
Dietary Considerations: This recipe contains gluten, dairy, and eggs. For a dairy-free version, use a high-quality vegan butter stick. For gluten-free, use a 1:1 gluten-free flour blend. These adaptations will change the texture slightly, but the flavor will still be wonderful.
Conclusion
These Cozy Chewy Brown Butter Chocolate Chip Cookies are more than just a recipe—they’re a little piece of comfort you can create in your own kitchen. They’re the cookies I make when I need to feel close to Aunt Lou, when the weather turns cold, or when I just want to fill my home with that incredible nutty, vanilla scent. They’re forgiving, adaptable, and absolutely delicious.
I hope you give them a try and make them your own. Maybe you’ll add extra chocolate, or swap in white chips, or sprinkle them with sea salt until they’re just right. That’s the beauty of a good cookie recipe—it’s a starting point for your own memories. I’d love to hear how they turn out for you. Drop a comment below and let me know your favorite variation, or tag me in your photos. Happy baking, friends!
Frequently Asked Questions
Can I use salted butter instead of unsalted?
You can, but reduce the added salt in the recipe to ¼ teaspoon. Salted butter varies in salt content between brands, so it’s safer to start with unsalted and control the salt yourself.
Why did my cookies turn out flat?
Flat cookies usually mean the butter was too warm when mixed, or the dough wasn’t chilled enough. Make sure your browned butter has cooled to room temperature before adding the sugars. If your kitchen is warm, chill the scooped dough balls for 20-30 minutes before baking.
Can I make the dough ahead of time?
Absolutely! You can refrigerate the dough in an airtight container for up to 3 days. Let it sit at room temperature for 10 minutes before scooping and baking. The flavor actually improves with time.
My cookies are too dry. What went wrong?
Dry cookies are usually the result of overmeasuring flour or overbaking. Make sure you’re spooning and leveling your flour, not scooping it. And pull the cookies out when the edges are golden but the centers still look slightly soft—they’ll continue to set on the hot baking sheet.
Can I use margarine instead of butter?
I wouldn’t recommend it. Margarine has a higher water content and won’t brown the same way. The flavor and texture will be noticeably different. Stick with real butter for the best results.
Pin This Recipe!
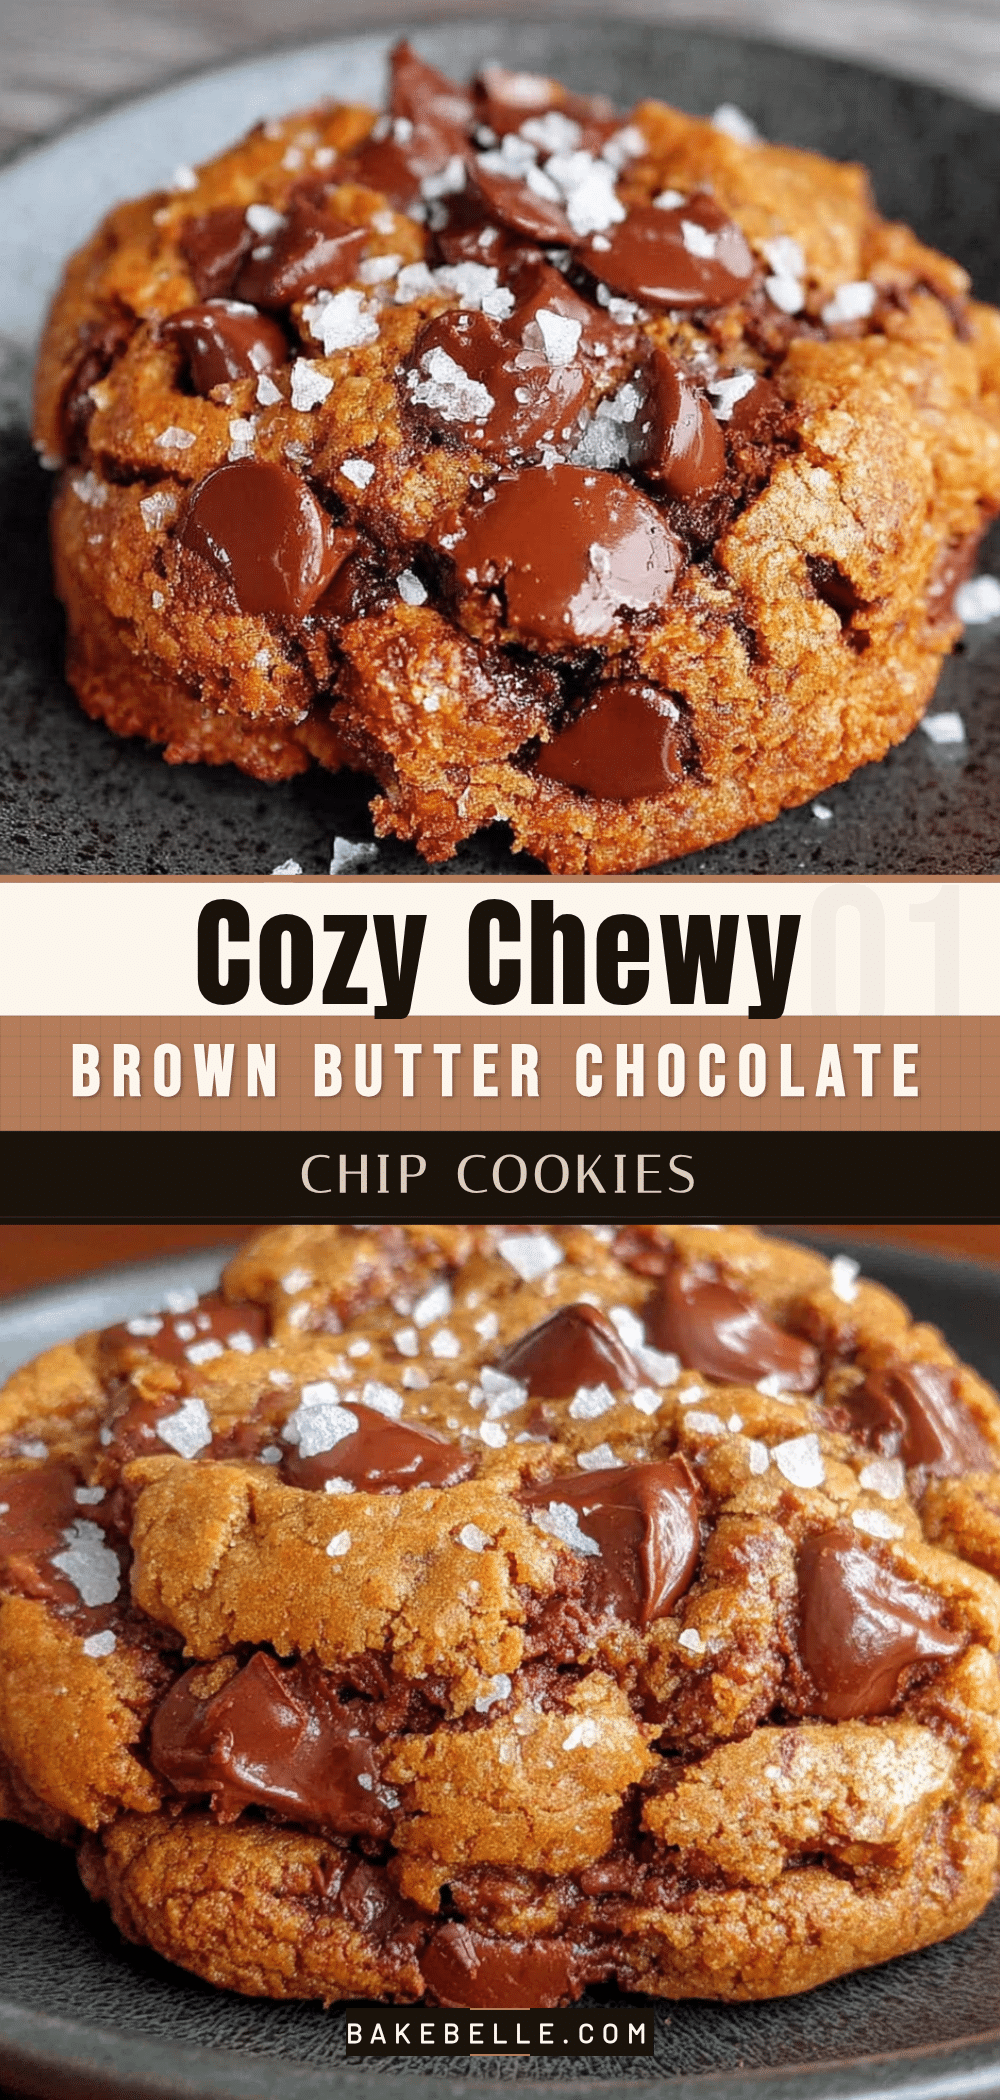
Cozy Chewy Brown Butter Chocolate Chip Cookies

These Cozy Chewy Brown Butter Chocolate Chip Cookies capture the warmth and nostalgia of a beloved family recipe. With nutty browned butter, a soft and fudgy center, and slightly crisp edges, they’re the ultimate comfort cookie.
- Prep Time: 15 minutes
- Cook Time: 12 minutes
- Total Time: 27 minutes
- Yield: 24 servings 1x
- Category: Dessert
- Cuisine: American
Ingredients
- 1 cup (226g) unsalted butter
- 1 ½ cups (300g) packed light brown sugar
- ¼ cup (50g) granulated sugar
- 2 large eggs, room temperature
- 2 teaspoons vanilla extract
- 2 ¼ cups (280g) all-purpose flour
- 1 teaspoon baking soda
- ½ teaspoon salt
- 2 cups (340g) semi-sweet chocolate chips
- Flaky sea salt (optional, for finishing)
Instructions
- Brown the butter: Place the 1 cup of unsalted butter in a light-colored saucepan or skillet over medium heat. Let it melt completely, then continue cooking, swirling the pan occasionally. The butter will foam up, then settle down. Watch closely—it will go from golden to amber to a deep nutty brown pretty quickly. Once you see brown specks forming at the bottom and it smells like toasted nuts, remove it from the heat immediately. Pour it into a heatproof bowl (including all those brown bits—that’…
- Mix the sugars and butter: In a large mixing bowl, combine the cooled browned butter with the 1 ½ cups packed light brown sugar and ¼ cup granulated sugar. Whisk vigorously until the mixture looks like wet sand and is well combined. It should be smooth and slightly shiny. This takes about a minute of good whisking.
- Add the eggs and vanilla: Crack the 2 room-temperature eggs into the butter-sugar mixture, then add the 2 teaspoons of vanilla extract. Whisk until everything is fully incorporated and the mixture looks smooth and glossy.
- Combine the dry ingredients: In a separate small bowl, whisk together the 2 ¼ cups all-purpose flour, 1 teaspoon baking soda, and ½ teaspoon salt. Make sure there are no lumps.
- Add the dry ingredients to the wet: Pour the flour mixture into the wet mixture. Use a rubber spatula to fold everything together gently. Stir just until no streaks of flour remain.
- Fold in the chocolate chips: Add the 2 cups of semi-sweet chocolate chips to the dough. Fold them in using the spatula until they’re evenly distributed.
- Rest the dough: Let the dough sit at room temperature for 10 minutes. This gives the flour time to fully absorb the moisture, which helps create that chewy texture.
- Preheat the oven: Set your oven to 350°F (175°C). Line two baking sheets with parchment paper or silicone mats.
- Scoop the dough: Using a 1.5-tablespoon cookie scoop, portion out the dough into balls. Place them about 2 inches apart on the prepared baking sheets.
- Bake: Bake one sheet at a time on the center rack for 10-12 minutes. The cookies should look golden brown around the edges but still slightly soft and puffy in the center.
- Cool: Let the cookies cool on the baking sheet for 5 minutes. Then, move them to a wire rack to cool completely. If you’re using flaky sea salt, sprinkle it on top right after they come out of the oven while they’re still warm.
Notes
For best results, use room-temperature eggs and let the browned butter cool completely before mixing. Chilling the dough for 30 minutes before baking can enhance flavor and reduce spreading. Store cookies in an airtight container at room temperature for up to 5 days; freeze baked cookies or dough balls for longer storage.
Nutrition
- Serving Size: 1 cookie
- Calories: 220
- Sugar: 18
- Sodium: 120
- Fat: 12
- Saturated Fat: 7
- Carbohydrates: 28
- Fiber: 1
- Protein: 3
Keywords: brown butter chocolate chip cookies, chewy cookies, easy cookie recipe, homemade cookies, comfort food