I was standing in my kitchen last Tuesday, staring at the half-eaten box of cheese crackers and wondering where the morning had gone, when a tiny fist tugged on my shirt. “Mama, I hungry.” It was 9:47 AM. We had already been through a diaper change, a lost shoe, and a meltdown over the wrong color cup. The snack I’d mentally planned? Completely forgotten. That’s when I grabbed a block of cheddar, a bag of baby carrots, and started chopping like my sanity depended on it. And honestly? It kind of did.
Let me tell you, those early preschool years are a blur of chaos and tiny demands. You know that feeling when you’re running on three hours of sleep and coffee that’s gone cold twice? Yeah, that was me. But here’s the thing I’ve learned after three years of this parenting gig: the secret isn’t having more time—it’s having a system. And these easy make-ahead preschool snack boxes with cheese cubes became my system. They saved my mornings, my kitchen counters, and probably my marriage.
I started making these on Sunday evenings while listening to a podcast. It takes maybe twenty minutes, tops. And then, for the rest of the week, I just grab a box and hand it over. No negotiating, no searching for a clean container, no crying over a missing snack cup. It sounds too simple to be life-changing, but I mean it when I say these little boxes brought a weird kind of peace to our chaotic mornings. Maybe you’ve been there, standing in front of an open fridge at 8 AM, praying for inspiration. This is for you.
Why You’ll Love These Preschool Snack Boxes
These aren’t just any snack boxes. They’re the result of trial and error, a few Pinterest fails, and one memorable incident involving a smashed banana that I’m still finding in crevices. Here’s why they work so well:
- Quick & Easy: You can prep a whole week’s worth in under 20 minutes. Seriously. I timed myself last week while my toddler “helped” by eating a few cheese cubes.
- Simple Ingredients: No fancy grocery trips. You probably have most of this stuff already—cheese, crackers, fruit, maybe some yogurt or veggies. I use whatever I have on hand, and it always works.
- Perfect for Busy Mornings: Whether you’re rushing to preschool, heading to the park, or just trying to survive until nap time, these boxes are a lifesaver. No prep, no mess, no stress.
- Crowd-Pleaser: My picky three-year-old actually eats these without complaint. And I’ve packed them for playdates where other kids devoured them too. That’s a win in my book.
- Unbelievably Delicious: Okay, “delicious” might be a stretch for a snack box, but there’s something about that combination of salty cheese, sweet fruit, and crunchy crackers that hits just right. Even I sneak one sometimes.
What makes these different from just throwing snacks in a bag? It’s the balance. I’ve tested different ratios of protein, carbs, and fun. Too much fruit and my kid crashes. Too many crackers and she’s hungry in an hour. These boxes have that sweet spot—enough protein from the cheese cubes to keep her full, enough variety to keep her interested, and just a touch of something special (like a few chocolate chips or a tiny cookie) to make it feel like a treat.
This recipe isn’t just good—it’s the kind that makes you close your eyes after the first bite of that perfectly cold cheese cube. It’s comfort food for parents, reimagined as a grab-and-go solution. Healthier, faster, but with the same soul-soothing satisfaction of knowing your kid is fed and happy.
What Ingredients You Will Need
These snack boxes use simple, wholesome ingredients that you can mix and match based on what you have in your fridge. The key is variety—a little protein, some fruit, something crunchy, and a tiny treat to make it fun.
- Cheese cubes: About 1/2 cup per box. I use sharp cheddar because it holds up well and has bold flavor, but colby jack, mozzarella, or even gouda work great. Pre-cut cubes from the store are fine, but I find block cheese cut into 1/2-inch cubes is cheaper and stays fresher. (Pro tip: use a sharp knife, not a cheese slicer—it makes cleaner cubes.)
- Whole-grain crackers: About 8-10 per box. I love Annie’s bunny crackers or simple whole-wheat squares. They add crunch and fiber. If you’re gluten-free, try rice crackers or seed-based crisps.
- Fresh fruit: About 1/2 cup per box. Grapes (halved lengthwise for safety), apple slices (tossed in lemon juice to prevent browning), or berries work best. Avoid super juicy fruits like watermelon that can make everything soggy.
- Vegetable sticks: Optional but recommended. Baby carrots, cucumber spears, or bell pepper strips add color and nutrition. My kid actually eats carrots when they’re in a fun box.
- Yogurt pouch or applesauce cup: One per box. These are great for extra protein and hydration. I buy the unsweetened ones and add a dash of cinnamon for flavor.
- Small treat: A few dark chocolate chips, a mini cookie, or a single date. This is the “surprise” element that makes the box exciting. Keep it small—you want the cheese cubes to be the star.
- Optional add-ins: Hard-boiled egg (sliced), turkey roll-ups, nut-free seed butter packet, or a handful of low-sugar cereal. I rotate these based on what I have and what my kid’s been into.
I recommend using block cheese from a brand like Tillamook or Cabot for the best texture—pre-shredded or pre-diced cheese often has a powdery coating that doesn’t taste as fresh. For fruit, go with whatever is in season. In summer, swap in fresh peaches or plums; in winter, clementines and pears are perfect.
Equipment Needed
You don’t need much for these snack boxes, which is part of the beauty. Here’s what I use:
- A sharp chef’s knife and cutting board: For cubing the cheese and cutting fruit. A dull knife makes a mess of soft cheese.
- Small compartment containers: I use Bento-style boxes with 3-4 sections. They keep everything separate and prevent sogginess. The ones with silicone lids are great for little hands.
- Measuring cups: For portioning out fruit and crackers. Once you get the hang of it, you’ll just eyeball it.
- Optional: A small cookie cutter: If you want to get fancy, cut cheese or fruit into star or heart shapes. My toddler loses her mind over star-shaped cheese.
- A damp paper towel: For wiping down counters—because let’s face it, cheese dust gets everywhere.
I bought my containers at Target for about $10 for a 4-pack. They’re dishwasher-safe and have lasted over a year. If you’re on a budget, you can use small mason jars or even repurpose takeout containers. Just make sure they have lids that seal well.
Preparation Method
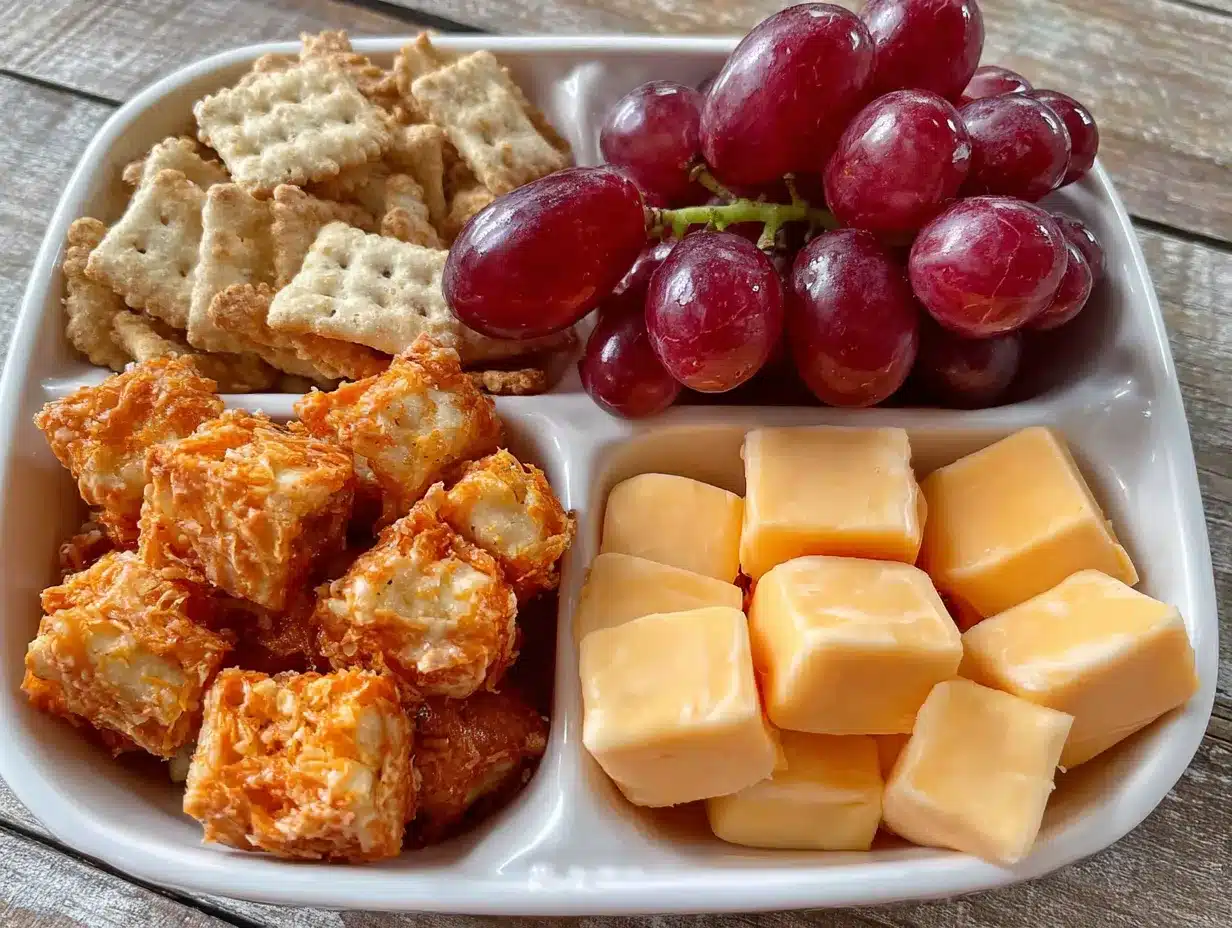
Making these snack boxes is almost embarrassingly easy. But there’s a rhythm to it that makes it go faster. Here’s my process:
- Prep your workspace: Wash your hands, set out your cutting board, and arrange all your ingredients on the counter. I like to do this while my kid is napping or watching a show—it takes about 5 minutes to gather everything.
- Cut the cheese: Take your block of cheese and slice it into 1/2-inch thick slabs. Then cut those slabs into 1/2-inch strips, and finally into cubes. You should get about 20-25 cubes per 8-ounce block. (If you’re using pre-cut cheese, skip this step and just count out 12-15 cubes per box.)
- Wash and cut the fruit: Rinse your grapes, berries, or apples under cold water. For grapes, slice them in half lengthwise—this prevents choking and makes them easier to eat. For apples, cut into thin wedges and toss with a squeeze of lemon juice so they don’t turn brown. For berries, just leave them whole if they’re small.
- Prep the veggies: If using carrots, peel them and cut into sticks about 2 inches long. Cucumber spears should be about the same size. Bell peppers can be sliced into thin strips.
- Assemble the boxes: Place the cheese cubes in the largest compartment. Add crackers to another compartment. Fill the remaining space with fruit and veggies. If you’re including a yogurt pouch or applesauce, place it on top or in a separate spot.
- Add the treat: Tuck a few chocolate chips or a mini cookie into a corner. This is the “surprise” that makes the box feel special.
- Seal and store: Put the lids on tight and stack them in the fridge. They’ll keep for up to 5 days, though the fruit might get a little soft by day 4. I usually make 5 boxes on Sunday and we’re good through Thursday.
- Grab and go: In the morning, just pull a box out of the fridge. If your kid likes things at room temperature, let it sit for 5 minutes before serving. Otherwise, straight from the fridge is fine—my toddler doesn’t care.
A note on timing: The first time you make these, it might take 25 minutes. By the third week, you’ll be done in 12 minutes flat. I’ve gotten so efficient that I can do it while listening to a podcast and drinking my coffee. That’s the dream, right?
Cooking Tips & Techniques
I’ve made a lot of mistakes with these snack boxes. Here’s what I’ve learned:
- Don’t overfill the compartments: If you cram too much in, the lid won’t seal properly and everything gets mixed up. Leave a little breathing room.
- Keep wet and dry separate: This is crucial. If you put wet fruit next to crackers, you’ll end up with soggy snacks. Use those compartment dividers wisely.
- Use a melon baller for fruit: If you’re feeling fancy, a melon baller makes perfect little spheres of cantaloupe or honeydew. My kid thinks they’re “dinosaur eggs.”
- Batch prep ingredients: On Sunday, I cube all the cheese for the week and store it in a bag. I also wash and cut all the fruit at once. Then assembly takes 2 minutes per box.
- Rotate the treats: If you give a cookie every day, it loses its magic. I mix it up—one day chocolate chips, next day a single date, next day a tiny marshmallow. Keeps it exciting.
- Label the boxes: If you have multiple kids, use a dry-erase marker to write their names on the lids. Or just use different colored containers. Trust me, you don’t want the toddler meltdown that comes from giving the wrong box.
- Let the cheese breathe: If you seal cheese cubes in a container for too long, they can get sweaty and slimy. I pat them dry with a paper towel before adding them to the box. It makes a difference.
Variations & Adaptations
These snack boxes are endlessly customizable. Here are some of my favorite variations:
- Dairy-Free Version: Swap cheese cubes for hummus or guacamole in a small container. Add seed crackers and veggie sticks for dipping. My dairy-sensitive niece loves this version.
- Low-Carb Option: Skip the crackers and double up on cheese and veggies. Add a handful of nuts (if no allergies) or a boiled egg for extra protein.
- Seasonal Switch-Up: In fall, use diced apple and cheddar with a few dried cranberries. In summer, go for melon balls and mozzarella pearls. In winter, clementine segments and gouda are a dream combo.
- Protein Boost: Add a few slices of turkey or chicken roll-ups. Or include a hard-boiled egg cut into quarters. My kid calls them “dinosaur eggs” and eats them first.
- Sweet Tooth Version: If your kid is in a sweet phase, swap crackers for a few animal crackers and add a tablespoon of yogurt-covered raisins. Still balanced, but feels like dessert.
- No-Container Method: If you’re out of containers, use a bento-style lunch bag with reusable silicone cups. Or just put everything in a small paper bag—it’s less organized but works in a pinch.
I once made a “rainbow box” where I used red bell peppers, orange cheddar, yellow squash, green cucumber, and blueberries. My toddler was so excited she actually ate the vegetables. That was a parenting win I’m still riding.
Serving & Storage Suggestions
These boxes are designed to be eaten cold or at room temperature. Here’s how I serve and store them:
- Serving temperature: Straight from the fridge is fine, but if you have a sensitive kid, let the box sit on the counter for 5-10 minutes before serving. The cheese softens slightly and the fruit warms up a bit.
- Pairing suggestions: Serve with a small water bottle or a sippy cup of milk. For a more filling meal, add a half sandwich or a yogurt tube on the side.
- Storage: Keep assembled boxes in the refrigerator for up to 5 days. I store them on a shelf where I can see them, not in a drawer where they get forgotten. (Yes, I’ve found a 2-week-old box before. Don’t judge.)
- Freezing: You can freeze these, but only certain components. Cheese cubes freeze well for up to 3 months. Fruit gets mushy when thawed, so I only freeze boxes with cheese and crackers, then add fresh fruit in the morning.
- Reheating: These are meant to be eaten cold. If you want a warm snack, microwave the cheese cubes for 10 seconds (yes, it’s weird but good) or serve with warm soup.
- Flavor development: Honestly, these taste best on days 1-3. By day 4, the crackers might be a little soft and the fruit a bit weepy. I still eat them, but I’m not picky.
Nutritional Information & Benefits
Here’s a rough estimate for one snack box (based on cheddar, crackers, grapes, and carrots):
- Calories: 250-300
- Protein: 10-12g (from cheese and any added protein)
- Carbohydrates: 25-30g (from fruit and crackers)
- Fat: 12-15g (mostly from cheese)
- Fiber: 3-5g (from fruit and veggies)
- Sugar: 10-15g (natural from fruit)
The cheese cubes provide calcium and protein for growing bones and muscles. The fruit offers vitamins and antioxidants—grapes have resveratrol, berries are packed with vitamin C. The whole-grain crackers add fiber and complex carbs for steady energy. And that tiny treat? It’s good for the soul. I believe in balanced eating, not deprivation. These boxes give my kid nutrients she needs while still feeling like a fun snack.
For dietary considerations: These are vegetarian-friendly. To make them gluten-free, use rice crackers or veggie sticks instead of wheat crackers. For nut allergies, avoid any nut-based treats and check your cracker labels. The cheese is dairy, so this isn’t vegan, but you can swap for plant-based cheese alternatives if needed.
Conclusion
Look, I know snack boxes aren’t going to win any cooking awards. But they’ve honestly changed my mornings. No more frantic searching for a clean container at 8 AM. No more negotiating with a tired toddler over what to eat. Just grab, go, and watch them happily munch on cheese cubes while you drink your coffee. That’s a small victory, but in the chaos of preschool years, small victories are everything.
I really hope you give these a try. Start with whatever cheese and fruit you have in your fridge. Don’t overthink it. The beauty of these boxes is that they’re forgiving—you can’t really mess them up. And if your kid decides they only want to eat the cheese cubes and ignore the carrots? That’s okay. They ate something. You fed them. You’re doing great.
I’d love to hear how your snack boxes turn out! Drop a comment below with your favorite cheese and fruit combos, or share a photo on social media and tag me. And if you have a picky eater who surprised you, definitely tell me about it—I need that hope. Until next time, happy prepping, and may your mornings be just a little bit easier.
Frequently Asked Questions
How long do these snack boxes last in the fridge?
They stay fresh for up to 5 days. The crackers might get a bit soft by day 4, but the cheese and fruit are usually fine. I recommend making them on Sunday for the week ahead.
Can I use pre-shredded cheese instead of cubes?
You can, but pre-shredded cheese has a coating that prevents clumping, which also means it doesn’t taste as fresh. Cubed cheese from a block has better texture and flavor. Plus, cubes are easier for little hands to pick up.
What if my child has a dairy allergy?
Swap the cheese cubes for hummus, guacamole, or a dairy-free cheese alternative. You can also use seed butter (like sunflower seed butter) in a small container for dipping. Just make sure to check labels for cross-contamination risks.
Can I pack these for school lunch?
Absolutely! These are perfect for preschool lunch boxes. Just make sure the container is leak-proof and that any yogurt pouches are sealed. If your school has nut-free policies, skip any nut-based treats and check your cracker ingredients.
My toddler only wants the cheese. How do I get them to eat the fruit?
I feel this in my soul. Try cutting the fruit into fun shapes with a small cookie cutter, or let them dip apple slices in yogurt. Sometimes I hide berries under the cheese cubes so they discover them by accident. And honestly? If they only eat the cheese, that’s still protein and calcium. You’re winning.
Pin This Recipe!
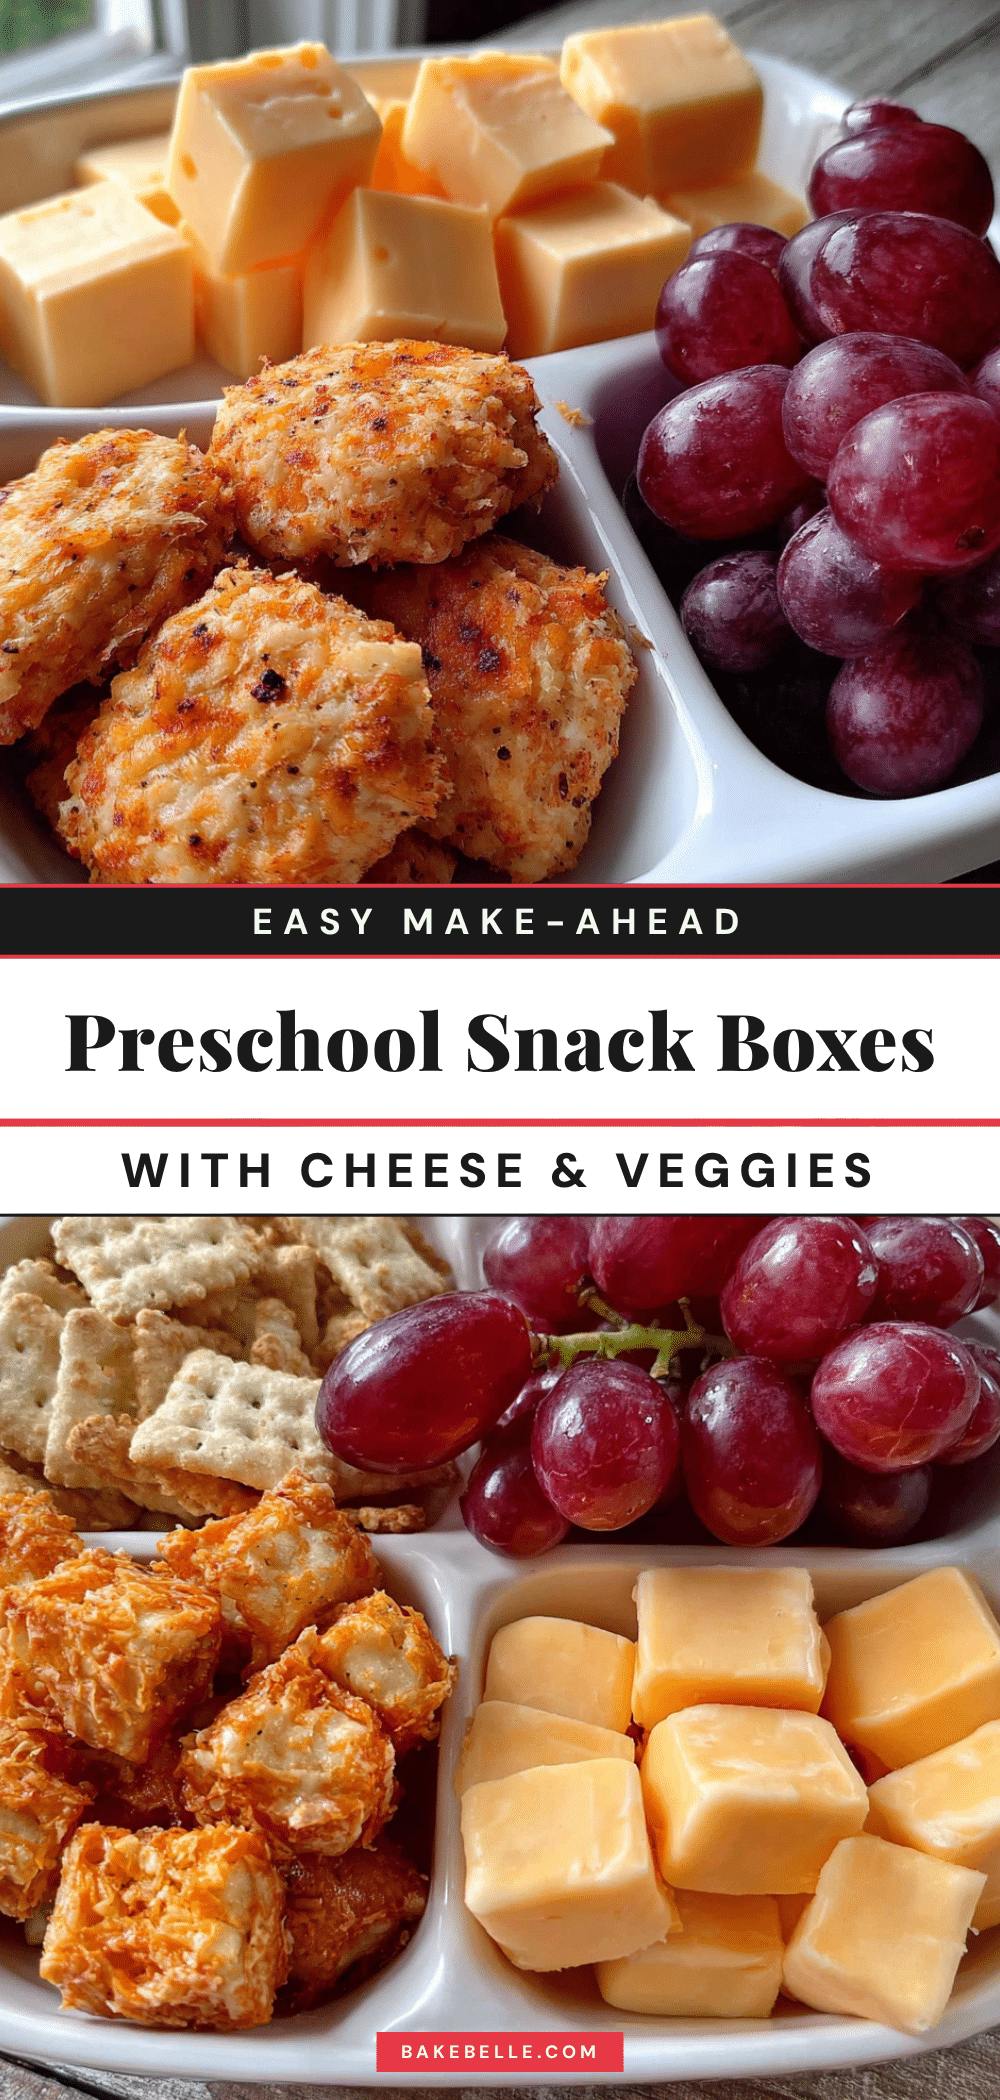
Easy Make-Ahead Preschool Snack Boxes with Cheese Cubes
These easy make-ahead preschool snack boxes with cheese cubes are a lifesaver for busy mornings. Prep a week’s worth in under 20 minutes for a balanced, grab-and-go snack that kids love.
- Prep Time: 20 minutes
- Cook Time: 0 minutes
- Total Time: 20 minutes
- Yield: 5 servings
- Category: Snack
- Cuisine: American
Ingredients
- Cheese cubes (sharp cheddar, colby jack, mozzarella, or gouda), about 1/2 cup per box
- Whole-grain crackers, about 8-10 per box
- Fresh fruit (grapes halved lengthwise, apple slices tossed in lemon juice, or berries), about 1/2 cup per box
- Vegetable sticks (baby carrots, cucumber spears, or bell pepper strips), optional
- Yogurt pouch or applesauce cup, 1 per box
- Small treat (dark chocolate chips, mini cookie, or single date), a few per box
- Optional add-ins: hard-boiled egg (sliced), turkey roll-ups, nut-free seed butter packet, or low-sugar cereal
Instructions
- Prep your workspace: Wash your hands, set out your cutting board, and arrange all ingredients on the counter.
- Cut the cheese: Slice the block of cheese into 1/2-inch thick slabs, then into 1/2-inch strips, and finally into cubes. You should get about 20-25 cubes per 8-ounce block. If using pre-cut cheese, count out 12-15 cubes per box.
- Wash and cut the fruit: Rinse grapes, berries, or apples under cold water. For grapes, slice in half lengthwise. For apples, cut into thin wedges and toss with lemon juice to prevent browning. Leave small berries whole.
- Prep the veggies: If using carrots, peel and cut into 2-inch sticks. Cut cucumber spears to the same size. Slice bell peppers into thin strips.
- Assemble the boxes: Place cheese cubes in the largest compartment. Add crackers to another compartment. Fill remaining space with fruit and veggies. If including a yogurt pouch or applesauce, place it on top or in a separate spot.
- Add the treat: Tuck a few chocolate chips or a mini cookie into a corner.
- Seal and store: Put lids on tight and stack boxes in the fridge. They will keep for up to 5 days.
- Grab and go: In the morning, pull a box out of the fridge. If desired, let it sit for 5 minutes before serving.
Notes
Don’t overfill compartments to ensure lids seal properly. Keep wet and dry ingredients separate to prevent sogginess. Batch prep ingredients on Sunday for quicker assembly. Rotate treats to keep boxes exciting. Label boxes if making for multiple kids. Pat cheese cubes dry with a paper towel before adding to boxes to prevent sliminess.
Nutrition
- Serving Size: 1 snack box
- Calories: 250300
- Sugar: 1015
- Sodium: 300400
- Fat: 1215
- Saturated Fat: 79
- Carbohydrates: 2530
- Fiber: 35
- Protein: 1012
Keywords: preschool snack, make-ahead snack, cheese cubes, snack boxes, kid-friendly, easy snack, lunch box idea