Linda wasn’t trying to be the star of the cookie swap. Honestly, I’d stopped by her house to pick up a book I’d lent her, and the smell—warm vanilla and sweet butter—hit me before I even got through the front door. She was standing at her kitchen island, flour dusting her favorite jeans, completely nonchalant about the fact that she was creating what I would later call the perfect sugar cookie. She just shrugged and said, “Oh, it’s the same old recipe. My mom used to make them.”
But it wasn’t the same old recipe. Let me tell you, I’ve tried a dozen versions of Christmas sugar cookie cutouts. Some taste like cardboard, some spread out in the oven and lose their shape, and some are just too sweet. This batch? They had a crisp edge, a soft center, and a flavor that made you close your eyes for a second. She handed me a star-shaped cookie with a smear of royal icing, and I think I mumbled something unintelligent. I was too busy trying to figure out how she made them look so effortless.
That’s the thing about the best recipes—they come from people who don’t think they’re doing anything special. Linda was just making cookies for her kids’ school party, not trying to win a prize. But I watched her roll the dough, cut the shapes, and ice them with a calm that I definitely don’t have when I’m hosting a holiday gathering. You know that feeling when you’re trying to impress your guests and everything feels chaotic? She had none of that. She was just… making cookies. And they were perfect.
I asked her for the recipe, and she scribbled it on a sticky note. It was basic, honestly. But the technique—the way she chilled the dough, the consistency of her icing—that was the secret. Since that day, I’ve made these cookies for every Christmas party, potluck, and festive get-together. They’re the ones that disappear first. And every time I roll out that dough, I think about Linda and her flour-dusted jeans. This is the recipe that made me feel like I could actually be a host who has it together, even when I’m just faking it.
Why You’ll Love This Recipe
Let’s be real for a second. Hosting during the holidays can feel like a marathon. You’ve got decorations to hang, gifts to wrap, and a whole menu to plan. The last thing you need is a cookie recipe that fights you every step of the way. These Christmas sugar cookie cutouts are the opposite of that. They’re the kind of recipe that makes you look like you spent all day in the kitchen, even if you prepped them while binge-watching a cheesy holiday movie.
Here’s what makes these cookies stand out from the rest:
- Holds Its Shape Perfectly: No more blobby reindeer or melted snowmen. This dough is stiff enough to hold the sharpest edges, meaning your Christmas tree cutouts will actually look like trees.
- Simple, Pantry-Friendly Ingredients: You probably already have butter, sugar, flour, and eggs in your kitchen. No weird extracts or specialty flours required. This is a recipe you can make on a whim.
- Perfect for a Crowd: The recipe scales beautifully. You can easily double or triple it for a cookie swap or a big family gathering. I’ve made four batches in one day, and the dough didn’t complain.
- The Royal Icing is Foolproof: I’ve had royal icing disasters before—runny, lumpy, you name it. This version is forgiving. It dries hard, so you can stack the cookies for gifting, but it’s easy enough to pipe for beginners.
- Make-Ahead Friendly: The dough freezes like a dream. You can roll it out, cut the shapes, and freeze them on a baking sheet. Then, when your guests are on their way, you just pop them in the oven. Fresh cookies with zero last-minute stress.
This isn’t just another sugar cookie recipe. It’s the one that will make your friends ask, “Can I get this recipe?” when they see your dessert table. It’s the one that gives you that little boost of confidence when you’re hosting. I mean, honestly, if Linda can make them look like nothing while wearing flour-dusted jeans, you can absolutely nail them for your holiday party.
What Ingredients You Will Need
This recipe uses simple, wholesome ingredients to deliver that classic buttery flavor and a texture that’s sturdy enough for decorating but tender enough to melt in your mouth. Here’s what you’ll need to grab from your pantry.
For the Sugar Cookie Dough
- Unsalted butter, softened (1 cup / 226g): I always use unsalted so I can control the salt level. Let it sit out for about an hour until it’s soft to the touch but not melty. Land O’Lakes is my go-to brand for consistent results.
- Granulated sugar (1 cup / 200g): Regular white sugar is perfect here. It gives the cookies that slight crunch on the edge.
- Large egg (1, room temperature): A room-temperature egg incorporates into the creamed butter and sugar much better than a cold one. Just set it on the counter with your butter.
- Vanilla extract (1 teaspoon / 5ml): Pure vanilla extract is worth the splurge here. Imitation vanilla can taste a little flat in a simple cookie like this. I’m partial to Nielsen-Massey.
- Almond extract (½ teaspoon / 2.5ml): This is the secret ingredient. Don’t skip it! It adds a subtle, nutty warmth that makes these cookies taste “bakery quality.” Trust me on this one.
- All-purpose flour (2 ½ cups / 312g): Spoon and level your flour—don’t scoop directly from the bag. Scooping packs the flour and can make your cookies tough.
- Baking powder (1 teaspoon / 4g): This gives the cookies a tiny bit of lift without making them puff up and lose their shape.
- Salt (½ teaspoon / 3g): Fine sea salt is best. It balances the sweetness.
For the Royal Icing

- Powdered sugar (4 cups / 480g): Sift it if it’s lumpy. There’s nothing worse than trying to pipe lumpy icing.
- Meringue powder (3 tablespoons / 24g): This is the backbone of royal icing. I use Wilton brand, but any brand works. It gives the icing that hard, glossy finish.
- Warm water (5-6 tablespoons / 75-90ml): Start with 5 tablespoons and add more if needed. The consistency should be thick enough to hold a peak but fluid enough to flatten out after a few seconds.
- Vanilla extract (½ teaspoon / 2.5ml): Optional, but I like a hint of vanilla in the icing too.
- Gel food coloring (assorted colors): Gel is better than liquid because it doesn’t thin out the icing. I use AmeriColor for vibrant shades that don’t bleed.
Ingredient Selection Tips
When you’re buying butter for this recipe, look for blocks that are pale yellow and firm. Avoid “spreadable” butter blends, as they have added water and oils that can change the texture of your dough. For the meringue powder, I’ve found that the cheaper, no-name brands sometimes don’t whip up as stiffly. Stick with a trusted brand like Wilton or CK Products for the best royal icing consistency. If you’re in a pinch, you can substitute the meringue powder with 3 pasteurized egg whites, but the shelf life of the cookies will be shorter.
Equipment Needed
You don’t need a professional bakery setup to make these cookies shine. Here’s what I use and what you can swap in if you’re short on gear.
- Electric stand mixer or hand mixer: A stand mixer with a paddle attachment makes creaming the butter and sugar a breeze. If you’re using a hand mixer, just be prepared to hold it for a few extra minutes. Honestly, I’ve made this dough by hand with a wooden spoon when my mixer was broken, and it works—it just takes some elbow grease.
- Rolling pin: A standard rolling pin is fine. I prefer a French rolling pin (the tapered kind) because it gives me more control over the pressure. If you don’t have one, a wine bottle works in a pinch.
- Christmas cookie cutters: This is where you can have fun. I have a set of basic shapes—stars, trees, snowmen, and gingerbread men. I bought mine at a craft store for under $10.
- Baking sheets: Light-colored, rimmed baking sheets are best. Dark sheets can cause the bottoms of the cookies to brown too quickly.
- Parchment paper or silicone baking mats: Parchment paper is non-negotiable for me. It prevents sticking and makes cleanup a breeze. Silicone mats work too, but the cookies might spread slightly more.
- Piping bags and tips: For the royal icing, you’ll need a few piping bags (disposable or reusable) and a small round tip (size #2 or #3). If you don’t have piping bags, a sturdy zip-top bag with a tiny corner snipped off works perfectly.
- Cooling rack: A wire rack is essential for letting the cookies cool completely before icing. If you ice them while they’re warm, the icing will melt and slide right off.
Preparation Method
Alright, let’s get to the fun part. This method is broken down into steps that are easy to follow, even if you’re multitasking between greeting guests and checking on the turkey. I’ve added some sensory cues so you know exactly what to look for.
Step 1: Cream the Butter and Sugar
In the bowl of your stand mixer fitted with the paddle attachment, beat the softened butter and granulated sugar together on medium speed for about 3 minutes. You’re looking for a light, fluffy texture that’s pale yellow in color. It should look like a thick paste and smell heavenly. Scrape down the sides of the bowl halfway through. If you’re using a hand mixer, this might take closer to 4 minutes.
Step 2: Add the Egg and Extracts
Add the room-temperature egg, vanilla extract, and almond extract. Beat on low speed until just combined. Don’t overmix here—you don’t want to incorporate too much air. The mixture might look slightly curdled for a second, but that’s okay. It will come together once you add the flour.
Step 3: Combine the Dry Ingredients
In a separate bowl, whisk together the all-purpose flour, baking powder, and salt. This ensures the baking powder is evenly distributed. With the mixer on low speed, gradually add the dry ingredients to the wet mixture. Mix until the dough just comes together. It will look crumbly at first, but give it a few seconds and it will form a cohesive ball. Don’t keep mixing once it comes together, or the gluten will develop and make the cookies tough.
Step 4: Chill the Dough
Divide the dough into two equal disks. Wrap each disk tightly in plastic wrap. Refrigerate for at least 2 hours, or up to overnight. This is the most important step. Chilling the dough solidifies the butter, which prevents the cookies from spreading in the oven. If you’re in a rush, you can pop the disks in the freezer for 30 minutes, but the fridge is better for even chilling.
Step 5: Roll and Cut
Preheat your oven to 350°F (175°C). Line your baking sheets with parchment paper. Lightly flour your work surface and rolling pin. Take one disk of dough out of the fridge (keep the other one cold). Roll the dough to about ¼-inch (6mm) thickness. If the dough starts to crack at the edges, let it sit for 2 minutes to warm up slightly. Use your Christmas cookie cutters to cut out shapes. Re-roll the scraps once—if you re-roll them more than that, the cookies will get tough.
Step 6: Bake
Place the cut-out cookies about 1 inch apart on the prepared baking sheets. Bake for 8-10 minutes, rotating the sheet halfway through. The cookies are done when the edges are just barely golden. The centers should look set but not brown. Let them cool on the baking sheet for 5 minutes, then transfer to a cooling rack to cool completely. This is crucial—if you move them too soon, they’ll break.
Step 7: Make the Royal Icing
In a clean mixing bowl, combine the powdered sugar and meringue powder. Add 5 tablespoons of warm water and the vanilla extract. Beat on low speed for 4 minutes. The icing should be thick and glossy. If it’s too thick, add water one teaspoon at a time. If it’s too thin, add more powdered sugar. To test the consistency, lift the whisk—the ribbon of icing should disappear back into the bowl after about 10 seconds.
Step 8: Decorate
Divide the icing into small bowls and color with gel food coloring. Transfer to piping bags fitted with small round tips. Outline each cookie first, then flood the inside with a slightly thinner icing. Use a toothpick to spread the icing into the corners. Let the cookies dry at room temperature for at least 4 hours, or overnight. The icing should be completely hard to the touch before you stack them.
Cooking Tips & Techniques
I’ve made these cookies more times than I can count, and I’ve learned a few things the hard way. Here are my best tips to make sure your Christmas sugar cookie cutouts turn out perfect every time.
- Don’t skip the chill time. I once thought I could rush it and chilled the dough for only 30 minutes. The cookies spread into weird, flat blobs. The cold butter is what keeps the shapes sharp. Trust the process.
- Use a light hand with the flour. When you’re rolling out the dough, use just enough flour to prevent sticking. Too much flour will dry out the dough and make the cookies crumbly. I keep a small bowl of flour on the counter and dip my rolling pin in it lightly.
- Rotate your baking sheets. Every oven has hot spots. Halfway through baking, rotate the sheet 180 degrees and swap the top and bottom racks if you’re baking multiple sheets at once. This ensures even browning.
- Let the cookies cool completely. I know it’s tempting to start decorating right away, but warm cookies will melt the icing into a puddle. I usually bake the cookies one day and decorate them the next day. It makes the process feel less rushed.
- The icing consistency is everything. For outlining, you want a stiff icing that holds a sharp peak. For flooding, you want a “10-second icing”—drizzle a spoonful back into the bowl, and the surface should smooth out in about 10 seconds. If it takes longer, it’s too thick. If it smooths out immediately, it’s too thin.
One time, I tried to speed things up by using a hairdryer to dry the icing. Don’t do that. It created tiny cracks in the surface. Patience is the secret ingredient here.
Variations & Adaptations
Hosting a crowd means you might have a few different dietary needs or flavor preferences. Here are some ways to adapt this recipe without losing the magic.
- Gluten-Free Version: Substitute the all-purpose flour with a 1:1 gluten-free baking flour blend that contains xanthan gum. I’ve used Bob’s Red Mill with great results. The dough will be slightly more fragile, so handle it gently when transferring the cutouts to the baking sheet.
- Lemon or Orange Sugar Cookies: Add 1 tablespoon of finely grated lemon or orange zest to the sugar before creaming it with the butter. This infuses the cookies with a bright, citrusy flavor that pairs beautifully with the royal icing. It’s a great option if you want a less traditional holiday cookie.
- Spiced Version: Add 1 teaspoon of ground cinnamon, ½ teaspoon of ground ginger, and ¼ teaspoon of ground nutmeg to the dry ingredients. This turns your sugar cookies into a snickerdoodle-inspired cutout that’s perfect for fall gatherings or a cozy winter night.
- Dairy-Free Adaptation: Use a high-quality vegan butter stick (like Miyoko’s or Earth Balance) in place of the unsalted butter. Make sure it’s cold and firm, not the spreadable kind from a tub. The texture will be slightly different, but they still taste fantastic.
- Chocolate-Dipped Cutouts: Skip the royal icing and dip half of each cooled cookie in melted dark chocolate. Sprinkle with crushed candy canes or sea salt before the chocolate sets. This is my go-to when I’m short on time but still want something that looks impressive on the dessert table.
Serving & Storage Suggestions
These cookies are made for sharing, and they hold up beautifully for days. Here’s how to make them shine at your gathering and keep them fresh afterward.
Serving Temperature & Presentation: Serve the cookies at room temperature. Arrange them on a large platter or a tiered stand for a stunning visual display. I like to group them by color or shape—all the stars together, all the trees together. It looks intentional and polished. For a potluck, stack them in a clear glass jar tied with a festive ribbon. They’re a gift in themselves.
Complementary Dishes & Beverages: These cookies are perfect alongside a warm mug of hot chocolate, spiced apple cider, or a peppermint latte. If you’re serving them as part of a dessert spread, pair them with a rich chocolate tart or a light lemon sorbet for contrast. They also make a great addition to a holiday brunch table next to a baked brie and some fresh fruit.
Storage Instructions: Store the decorated cookies in an airtight container at room temperature. Place a sheet of parchment paper between layers to prevent the icing from sticking. They will stay fresh for up to 2 weeks. Do not refrigerate them—the moisture in the fridge can make the icing sticky and dull.
Freezer Instructions: You can freeze the undecorated baked cookies for up to 3 months. Wrap them tightly in plastic wrap and then in foil. When you’re ready to decorate, let them thaw at room temperature for about an hour. The royal icing will adhere perfectly. I always keep a batch of undecorated cookies in the freezer for unexpected guests.
Flavor Development: Interestingly, these cookies taste even better the day after baking. The flavors meld together, and the texture softens just a touch. So don’t stress about making them the day of your party—making them a day ahead is actually the secret to a more flavorful cookie.
Nutritional Information & Benefits
I’m not going to pretend these are health food—they’re a holiday treat, after all. But I do think it’s helpful to know what’s in them, especially if you’re serving a crowd with different dietary considerations.
| Nutrient | Per Cookie (approx., with icing) |
|---|---|
| Calories | 120-140 |
| Total Fat | 5-6g |
| Saturated Fat | 3-4g |
| Carbohydrates | 18-20g |
| Sugar | 12-14g |
| Protein | 1-2g |
| Sodium | 45-55mg |
Health Benefits of Key Ingredients: Butter provides fat-soluble vitamins like A and D, which are important for immune function and bone health. Eggs are a great source of high-quality protein and choline, which supports brain health. While these cookies are a treat, using real ingredients means you’re avoiding the preservatives and artificial additives found in many store-bought versions.
Dietary Considerations: This recipe contains gluten, dairy, and eggs. For a gluten-free option, see the variations section. For a dairy-free option, use vegan butter. The royal icing is naturally gluten-free and dairy-free.
Personal Wellness Perspective: I believe in the “everything in moderation” approach. These cookies are a celebration food. They’re meant to be enjoyed with loved ones, not as an everyday snack. So go ahead, have two. Life is short.
Conclusion
These Christmas sugar cookie cutouts with royal icing are more than just a recipe—they’re a little piece of holiday magic that you can create in your own kitchen. They’re the cookies that make your house smell like Christmas morning. They’re the ones that your guests will hover around, trying to sneak one before the party even starts. And honestly, they’re the ones that will make you feel like a rockstar host, even if you’re running on three hours of sleep and a cup of cold coffee.
What I love most about this recipe is how forgiving it is. It doesn’t demand perfection. It just asks for a little patience and a lot of love. Whether you’re decorating them with your kids, gifting them to neighbors, or setting them out on a fancy platter for your dinner party, these cookies deliver. They’re the kind of treat that makes people stop and say, “Wow, you made these?” And you can honestly say yes.
So go ahead—prep that dough, break out the cookie cutters, and pour yourself a glass of eggnog. You’ve got this. And when you make them, I’d love to hear how they turned out. Did you try a variation? Did your kids eat more sprinkles than they put on the cookies? Drop a comment below and share your story. Let’s make this holiday season a little sweeter, one cookie at a time.
Frequently Asked Questions
Can I freeze the royal icing?
Yes, you can! Place leftover royal icing in an airtight container and refrigerate for up to 2 weeks. When you’re ready to use it, let it come to room temperature and whisk it vigorously to bring back the smooth consistency. You might need to add a drop or two of water if it’s too thick.
Why did my cookies spread in the oven?
The most common reason is that the dough wasn’t chilled long enough. Make sure you chill the dough for at least 2 hours. Another culprit is using butter that’s too soft or melted. If your kitchen is warm, pop the cut-out cookies on the baking sheet into the fridge for 10 minutes before baking.
Can I use liquid food coloring instead of gel?
You can, but I don’t recommend it for royal icing. Liquid food coloring adds extra moisture, which can thin out the icing and make it runny. Gel food coloring is more concentrated and won’t affect the consistency. If you only have liquid, use it sparingly and add a little extra powdered sugar to compensate.
How do I get the royal icing to dry faster?
The best way is to let it dry naturally at room temperature. If you’re in a humid climate, use a fan to circulate the air around the cookies. Avoid putting them in the fridge or using a hairdryer—both can cause the icing to crack or become sticky. Patience is key here.
Can I make the dough ahead of time?
Absolutely! The dough can be refrigerated for up to 3 days. Just wrap it tightly in plastic wrap. You can also freeze the dough disks for up to 3 months. Thaw them in the fridge overnight before rolling out. This is a great way to get ahead of the holiday chaos.
Pin This Recipe!
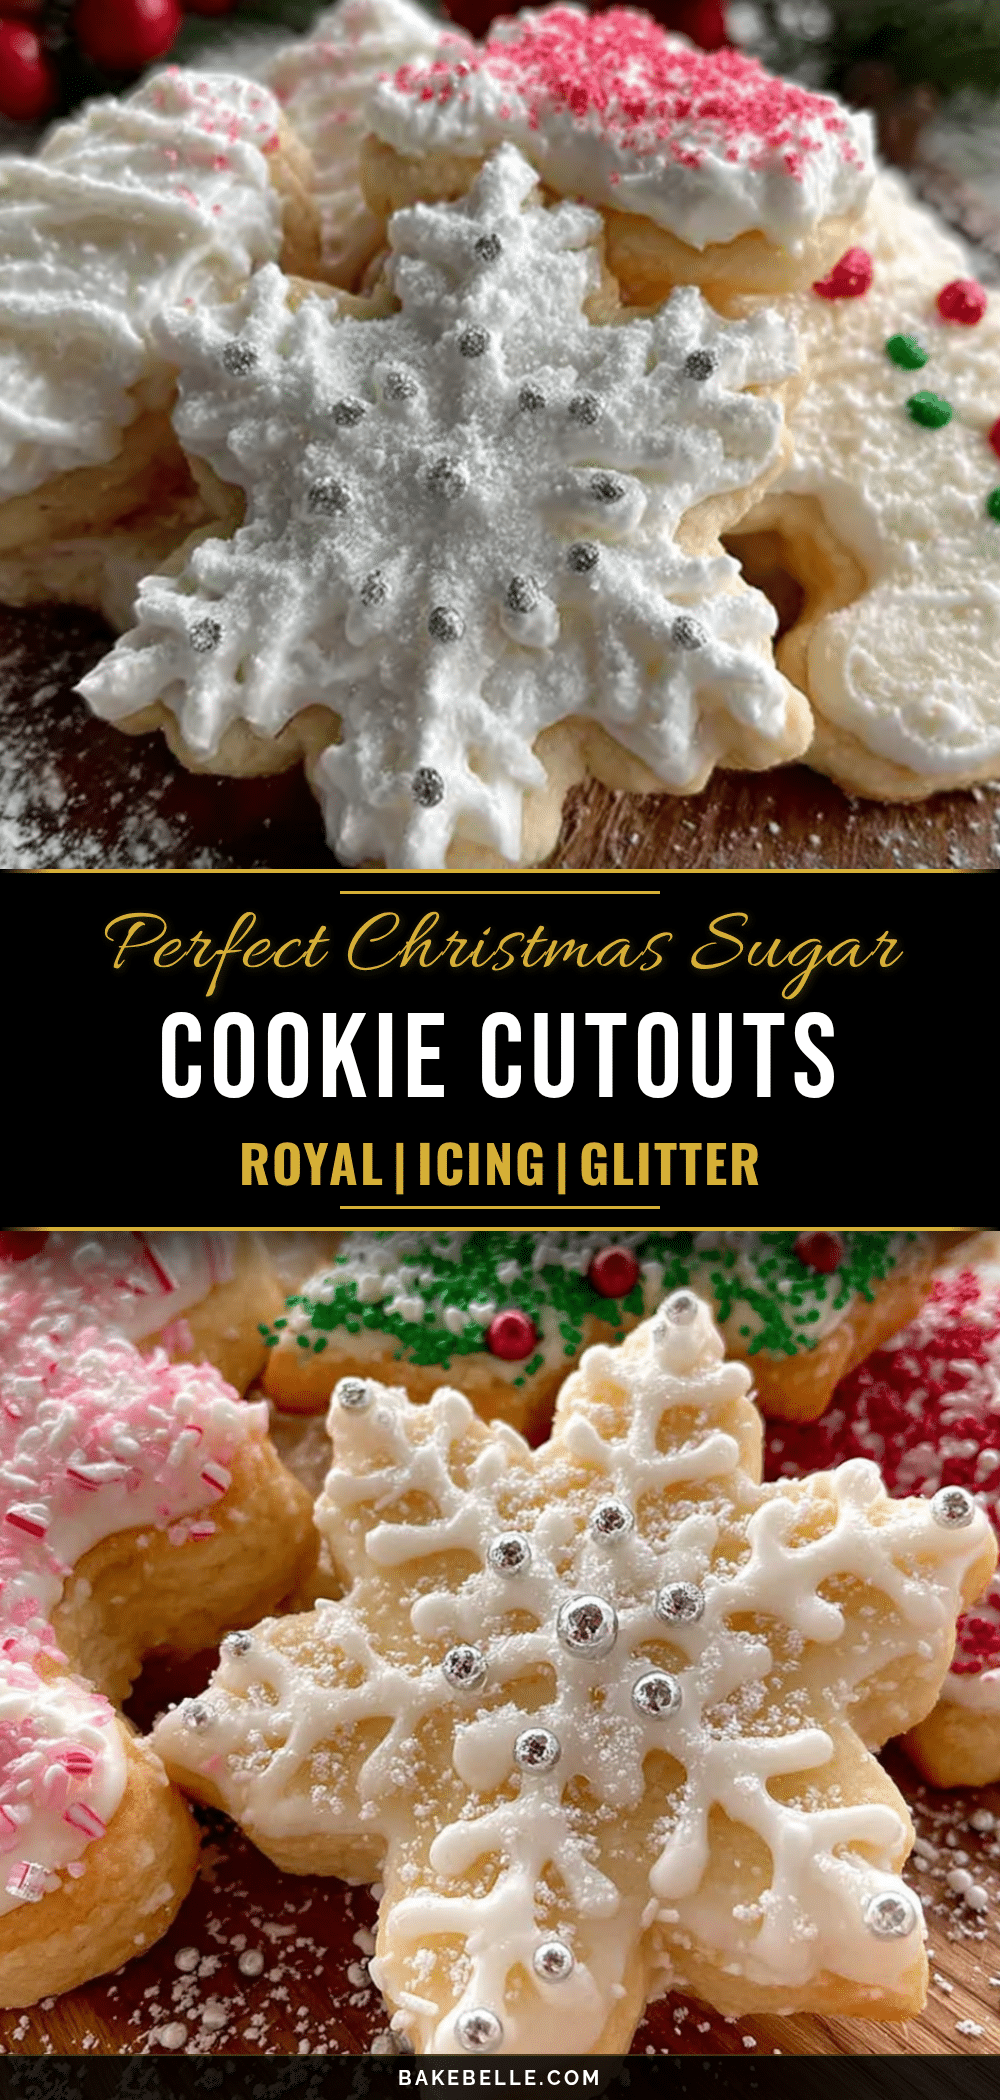
Easy Christmas Sugar Cookie Cutouts with Royal Icing

These Christmas sugar cookie cutouts are the perfect holiday treat—crisp edges, soft centers, and a foolproof royal icing that dries hard for stacking and gifting. A simple, pantry-friendly recipe that holds its shape beautifully and is make-ahead friendly.
- Prep Time: 30 minutes
- Cook Time: 10 minutes
- Total Time: 2 hours 40 minutes (includes 2 hours chilling)
- Yield: 24-36 cookies (depending on cutter size) 1x
- Category: Dessert
- Cuisine: American
Ingredients
- 1 cup (226g) unsalted butter, softened
- 1 cup (200g) granulated sugar
- 1 large egg, room temperature
- 1 teaspoon (5ml) vanilla extract
- ½ teaspoon (2.5ml) almond extract
- 2 ½ cups (312g) all-purpose flour
- 1 teaspoon (4g) baking powder
- ½ teaspoon (3g) fine sea salt
- 4 cups (480g) powdered sugar
- 3 tablespoons (24g) meringue powder
- 5–6 tablespoons (75-90ml) warm water
- ½ teaspoon (2.5ml) vanilla extract (optional, for icing)
- Gel food coloring (assorted colors)
Instructions
- Cream the butter and sugar: In a stand mixer fitted with the paddle attachment, beat the softened butter and granulated sugar on medium speed for about 3 minutes until light, fluffy, and pale yellow. Scrape down the sides halfway through.
- Add the egg and extracts: Add the room-temperature egg, vanilla extract, and almond extract. Beat on low speed until just combined. Do not overmix.
- Combine dry ingredients: In a separate bowl, whisk together the all-purpose flour, baking powder, and salt. With the mixer on low, gradually add the dry ingredients to the wet mixture. Mix until the dough just comes together—do not overmix.
- Chill the dough: Divide the dough into two equal disks, wrap each tightly in plastic wrap, and refrigerate for at least 2 hours or up to overnight.
- Roll and cut: Preheat oven to 350°F (175°C). Line baking sheets with parchment paper. Lightly flour your work surface and rolling pin. Roll one disk of dough to about ¼-inch (6mm) thickness. Cut out shapes with Christmas cookie cutters. Re-roll scraps only once.
- Bake: Place cut-out cookies about 1 inch apart on prepared baking sheets. Bake for 8-10 minutes, rotating the sheet halfway through, until edges are just barely golden. Let cool on the baking sheet for 5 minutes, then transfer to a cooling rack to cool completely.
- Make the royal icing: In a clean mixing bowl, combine powdered sugar and meringue powder. Add 5 tablespoons of warm water and vanilla extract. Beat on low speed for 4 minutes until thick and glossy. Adjust consistency with additional water or powdered sugar as needed.
- Decorate: Divide icing into small bowls and color with gel food coloring. Transfer to piping bags fitted with small round tips. Outline each cookie, then flood the inside with slightly thinner icing. Use a toothpick to spread icing into corners. Let dry at room temperature for at least 4 hours or overnight until hard.
Notes
Chill the dough for at least 2 hours to prevent spreading. Use gel food coloring for vibrant colors without thinning the icing. Let cookies cool completely before icing. For best flavor, make the cookies a day ahead.
Nutrition
- Serving Size: 1 cookie
- Calories: 130
- Sugar: 13
- Sodium: 50
- Fat: 5.5
- Saturated Fat: 3.5
- Carbohydrates: 19
- Protein: 1.5
Keywords: Christmas sugar cookies, cutout cookies, royal icing, holiday cookies, easy sugar cookies, cookie decorating