It was 11:47 PM on a random Thursday, and I had a sudden, almost desperate need for birthday cake. Not just any birthday cake—the kind that makes people stop mid-conversation and just stare at their plate for a second. The problem? It was the middle of the night, my kitchen was a disaster zone from dinner, and I definitely didn’t have the ingredients for the fancy bakery-style cake I was picturing. I didn’t have buttermilk, I didn’t have the right food coloring, and honestly, I was too tired to even think about a proper frosting.
But I did have a box of black cocoa powder I’d bought on a whim months ago, a half-used tub of sour cream, and a very specific, slightly unhinged idea. What if I could make a birthday cake that looked like it belonged at a goth rock concert but tasted like the most comforting, tender vanilla-adjacent dream? I mean, let’s be real, black velvet cake is just red velvet’s mysterious cousin, right? I grabbed my trusty mixing bowl, cracked an egg with one hand while holding my phone with the other (don’t judge), and started experimenting. The kitchen was silent except for the whisk scraping against the bowl and my own quiet muttering. I forgot to set a timer at one point and had to guess by smell. Honestly, it was a mess.
But then I pulled it out of the oven. The smell alone was intoxicating—deep, dark, almost smoky chocolate mixed with something warm and familiar. The first bite, eaten straight off the spatula at midnight, was a revelation. It was tender, it was rich, it was exactly what I needed. That accidental, late-night experiment became my secret weapon. Now, I make this crowd-pleasing black velvet birthday cake for every gathering, every potluck, every “I need to impress people without losing my mind” occasion. It’s the cake that steals the show, and I think you’re going to love it. You know that feeling when a recipe just works? This is that recipe.
Why You’ll Love This Recipe
This isn’t just another chocolate cake recipe. After testing this about seven times (my neighbors were very happy participants), I can confidently say this is the version you want in your back pocket for hosting. I’ve learned that the key to a great cake for a crowd is a balance of bold flavor and foolproof technique, and this one nails both.
- Perfect for a Crowd: This recipe scales beautifully. Whether you’re feeding eight or eighteen, it holds up without getting dry or dense. It’s my go-to for birthday parties and holiday dinners.
- Simple Ingredients: You likely have most of these in your pantry. No weird, hard-to-find items—just good, honest ingredients that work together.
- Unbelievably Moist: The combination of sour cream and oil creates a crumb that stays tender for days. I’ve had people ask if I used a box mix because it’s that soft.
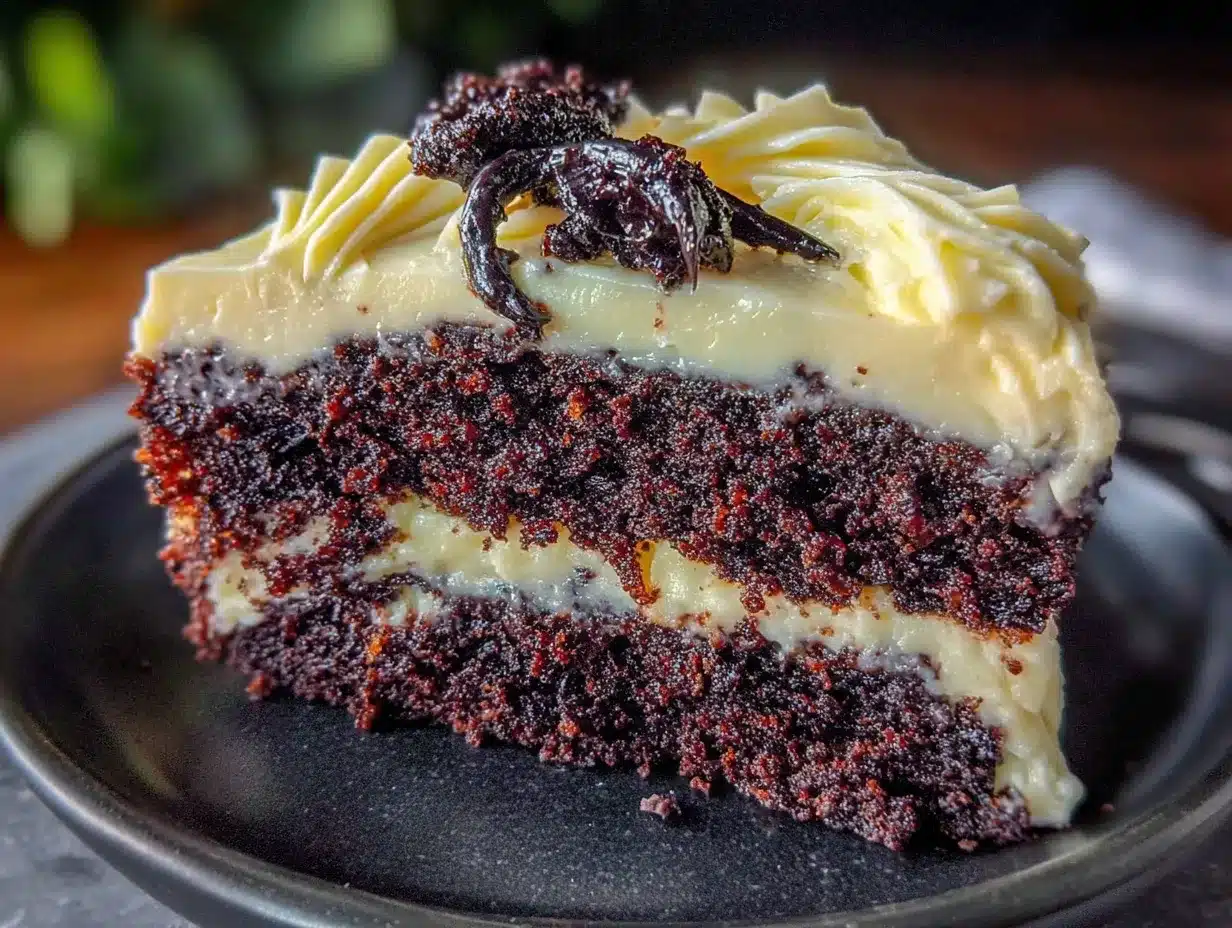
- Show-Stopping Look: The deep black color is dramatic and fun. It looks like you spent hours at a fancy bakery, but it’s surprisingly simple to achieve.
- Stress-Free Hosting: You can make the layers a day ahead. This is a lifesaver when you’re trying to clean the house and prep appetizers before guests arrive.
This recipe is the result of my own late-night tinkering and a few happy accidents. It’s comfort food with a dark, dramatic twist—perfect for making any gathering feel a little more special without the stress. It’s the kind of cake that makes you close your eyes after the first bite.
What Ingredients You Will Need
This recipe uses simple, wholesome ingredients to deliver that signature deep flavor and incredibly tender texture. Most of these are pantry staples, which makes this perfect for a last-minute celebration.
For the Cake
- All-Purpose Flour (2 ½ cups / 315g): Spoon and level it for the best results. Too much flour will make the cake dense.
- Granulated Sugar (2 cups / 400g): Adds sweetness and helps create a tender crumb.
- Black Cocoa Powder (¾ cup / 75g): This is the star. I prefer Hershey’s Special Dark or Rodelle Gourmet Black Cocoa for the deepest color and a subtle Oreo-like flavor. Regular cocoa won’t give you the same dramatic look.
- Baking Soda (1 ½ tsp) & Baking Powder (1 tsp): The double action gives the cake a perfect lift.
- Salt (1 tsp): Balances the sweetness and enhances the chocolate flavor.
- Vegetable Oil (1 cup / 240ml): Keeps the cake incredibly moist. You can use canola or melted coconut oil in a pinch.
- Large Eggs (3, at room temperature): Room temperature eggs emulsify better, creating a smoother batter.
- Sour Cream (1 cup / 240g, full-fat): This is my secret for a super tender crumb. Don’t use low-fat if you can help it.
- Buttermilk (1 cup / 240ml, at room temperature): Reacts with the baking soda for a light texture. If you don’t have buttermilk, add 1 tablespoon of lemon juice to regular milk and let it sit for 5 minutes.
- Vanilla Extract (2 tsp): Adds warmth and depth to the chocolate.
- Hot Water or Coffee (1 cup / 240ml): Hot liquid blooms the cocoa powder, deepening the flavor. Coffee enhances the chocolate without making it taste like coffee.
For the Cream Cheese Frosting
- Cream Cheese (16 oz / 450g, softened): Use full-fat blocks, not the spreadable kind from a tub. Let it sit out for at least an hour.
- Unsalted Butter (½ cup / 113g, softened): Adds stability and richness to the frosting.
- Powdered Sugar (4-5 cups / 480-600g): Sifted to avoid lumps.
- Vanilla Extract (1 tbsp): For flavor.
- Pinch of Salt: Balances the sweetness.
Equipment Needed
You don’t need a professional kitchen to pull this off. Here’s what you’ll need:
- Three 8-inch or 9-inch Round Cake Pans: I prefer Fat Daddio’s for even baking. If you only have two, you can bake the layers in batches.
- Stand Mixer or Hand Mixer: A hand mixer works fine, but a stand mixer makes the frosting a breeze.
- Large Mixing Bowls: One for dry ingredients, one for wet.
- Whisk and Rubber Spatula: For mixing and scraping down the bowl.
- Parchment Paper: Cut circles for the bottom of the pans to prevent sticking.
- Cooling Rack: Essential for cooling the cakes evenly.
- Offset Spatula: Makes frosting the cake much easier and cleaner.
- Cake Stand or Plate: For the final presentation.
Preparation Method
- Preheat and Prep (10 minutes): Preheat your oven to 350°F (175°C). Grease three 8-inch round cake pans with butter or non-stick spray, then line the bottoms with parchment paper circles. Grease the parchment too. This is my favorite trick—the cakes release perfectly every time.
- Mix Dry Ingredients (5 minutes): In a large bowl, whisk together the all-purpose flour, sugar, black cocoa powder, baking soda, baking powder, and salt. Make sure there are no lumps of cocoa. If there are, sift the mixture.
- Combine Wet Ingredients (5 minutes): In a separate large bowl, whisk together the vegetable oil, eggs, sour cream, buttermilk, and vanilla extract until smooth. It should look a little like a milkshake at this point.
- Combine Wet and Dry (3 minutes): Pour the wet ingredients into the dry ingredients. Mix on low speed with your mixer or by hand with a whisk until just combined. Do not overmix! A few small lumps are okay.
- Add Hot Liquid (2 minutes): Slowly pour in the hot water or coffee while mixing on low speed. The batter will be very thin—this is normal! It should look like a dark, runny chocolate milk. Scrape the bottom of the bowl to make sure everything is incorporated.
- Bake the Layers (25-30 minutes): Divide the batter evenly between the three prepared pans. Bake for 25-30 minutes, or until a toothpick inserted into the center comes out with just a few moist crumbs. The edges will pull away from the pan slightly. Let the cakes cool in the pans for 10 minutes, then turn them out onto a cooling rack to cool completely. Warning: Do not try to frost them while they are even slightly warm, or the frosting will slide right off.
- Make the Frosting (10 minutes): While the cakes cool, beat the softened cream cheese and butter together in a large bowl with an electric mixer until smooth and creamy, about 2 minutes. Gradually add the sifted powdered sugar, one cup at a time, mixing on low speed. Add the vanilla and a pinch of salt, then increase the speed to medium-high and beat for 2-3 minutes until light and fluffy.
- Assemble the Cake (15 minutes): Place one cake layer on your serving plate. Spread about ¾ cup of frosting evenly on top. Repeat with the second and third layers. Apply a thin “crumb coat” of frosting all over the cake to seal in any loose crumbs. Refrigerate for 15-20 minutes to set the crumb coat, then apply the final thick layer of frosting. Use an offset spatula for a smooth finish or create swirls for a rustic look.
Cooking Tips & Techniques
I’ve learned a few things the hard way so you don’t have to. Here are my best tips for cake success:
- Room Temperature is Non-Negotiable: Your eggs, sour cream, and buttermilk need to be at room temperature. Cold ingredients won’t emulsify properly, leading to a denser cake. Just pull them out of the fridge an hour before you start.
- Don’t Overmix the Batter: Once you add the flour, mix only until it disappears. Overmixing develops gluten, which makes the cake tough. A few lumps are your friend.
- The Hot Water Trick: Don’t skip the hot water or coffee. It seems weird to add liquid to an already wet batter, but it “blooms” the cocoa powder, unlocking a deeper, richer flavor. I once forgot the hot water and the cake was noticeably less flavorful.
- Level Your Cakes: Even the best-baked cakes often have a dome. Use a serrated knife to level the tops before assembling. This gives you a professional-looking, even cake that won’t wobble.
- Chill Before Slicing: After frosting, refrigerate the finished cake for at least 30 minutes before slicing. This sets the frosting and makes for much cleaner, prettier slices. Trust me on this one.
Variations & Adaptations
This recipe is a fantastic base for customization. Here are a few ways I’ve adapted it for different crowds and occasions:
- Gluten-Free Version: Substitute the all-purpose flour with a 1:1 gluten-free baking flour blend (like King Arthur or Bob’s Red Mill). The texture will be slightly more delicate, but it still tastes amazing. I made this for a friend’s birthday and nobody knew the difference.
- Dairy-Free Adaptation: Use a high-quality dairy-free butter (like Miyoko’s) for the frosting and substitute the buttermilk with almond milk mixed with 1 tablespoon of apple cider vinegar. Use a dairy-free sour cream alternative like Tofutti.
- Flavor Twist – Mint Chocolate: Add 1 teaspoon of peppermint extract to the cake batter. For the frosting, fold in ½ cup of finely crushed chocolate mint cookies (like Andes). It’s a refreshing, crowd-pleasing combo.
- Layer it with Ganache: For an extra-decadent version, skip the cream cheese frosting between the layers and use a simple chocolate ganache (1 cup heavy cream + 8 oz dark chocolate). The contrast of the dark cake, dark ganache, and white frosting on the outside is stunning.
Serving & Storage Suggestions
This cake is a showstopper at room temperature. Take it out of the fridge about 30 minutes before serving to let the flavors soften and the texture become perfectly tender.
For a birthday party, I love serving it with a scoop of vanilla bean ice cream or a dollop of lightly sweetened whipped cream. It also pairs beautifully with a cup of strong coffee or a cold glass of milk. If you’re hosting a dinner party, consider serving it alongside fresh raspberries—the tartness cuts through the richness perfectly.
Storage: Store any leftover cake in an airtight container in the refrigerator for up to 5 days. The cake actually gets more moist and flavorful on the second day! To freeze: Wrap unfrosted cake layers tightly in plastic wrap and then aluminum foil. Freeze for up to 3 months. Frosted cake can also be frozen, but it’s best to freeze it uncovered for an hour first to harden the frosting, then wrap it well.
Reheating: For a warm, gooey slice, microwave an individual piece for 15-20 seconds. It’s a completely different, equally delicious experience.
Nutritional Information & Benefits
Let’s be honest, this is a celebration cake, not a health food. But knowing what’s in it can help you enjoy it mindfully. Per slice (based on 16 servings):
- Calories: Approximately 480-520 kcal
- Fat: 28g
- Carbohydrates: 60g
- Protein: 6g
- Sugar: 45g
Ingredient Benefits: The black cocoa powder is rich in antioxidants (flavonoids) which can support heart health. The sour cream and buttermilk provide calcium and probiotics. And honestly, the biggest benefit? The joy and connection this cake brings to a gathering. That’s good for the soul.
Dietary Considerations: This recipe contains gluten, dairy, and eggs. See the variations section above for substitutions.
Conclusion
This crowd-pleasing black velvet birthday cake is more than just a recipe—it’s a conversation starter, a celebration centerpiece, and a testament to the magic that can happen in a late-night kitchen experiment. It’s rich, it’s dramatic, and it’s surprisingly easy to pull off, even when you’re juggling a dozen other hosting tasks.
I encourage you to make this your own. Play with the frosting, add your favorite sprinkles, or serve it with a drizzle of caramel. The best recipes are the ones that feel like yours. I’d love to hear how it turns out for you! Leave a comment below and tell me about the crowd you served it to, or tag me in your photos on social media. Happy baking, and here’s to making every birthday (or random Thursday) feel special!
Frequently Asked Questions
Can I make this cake a day ahead of time?
Absolutely! In fact, I recommend it. Bake the cake layers, let them cool completely, and wrap them tightly in plastic wrap. Store them at room temperature overnight. The flavors meld and the texture becomes even more moist. Just make the frosting and assemble the cake the next day.
Why did my cake turn out dry?
The most common culprit is overbaking. Check your cake at the 25-minute mark. It should spring back when lightly touched and a toothpick should come out with moist crumbs, not clean. Another reason could be overmixing the batter, which develops too much gluten.
Can I use regular cocoa powder instead of black cocoa?
You can, but the cake won’t be black. It will be a dark chocolate color. Black cocoa powder has a distinct flavor—think Oreo cookies—that regular cocoa doesn’t have. For the true “black velvet” experience, I recommend seeking out black cocoa powder online or at specialty baking stores.
How do I get my frosting perfectly smooth?
The key is the crumb coat! Apply a very thin layer of frosting to seal in all the crumbs, then refrigerate the cake for 15-20 minutes. Once that’s set, apply your final, thicker layer. Use a bench scraper or a large offset spatula for the smoothest finish. Dip your spatula in hot water and wipe it dry for an even smoother glide.
Can I bake this as a sheet cake instead of layers?
Yes, this works beautifully as a sheet cake. Pour the batter into a greased and floured 9×13-inch pan. Bake at 350°F (175°C) for 35-40 minutes, or until a toothpick comes out clean. Let it cool completely before frosting. This is a fantastic option for a potluck or a large party where you want to simplify serving.
Pin This Recipe!
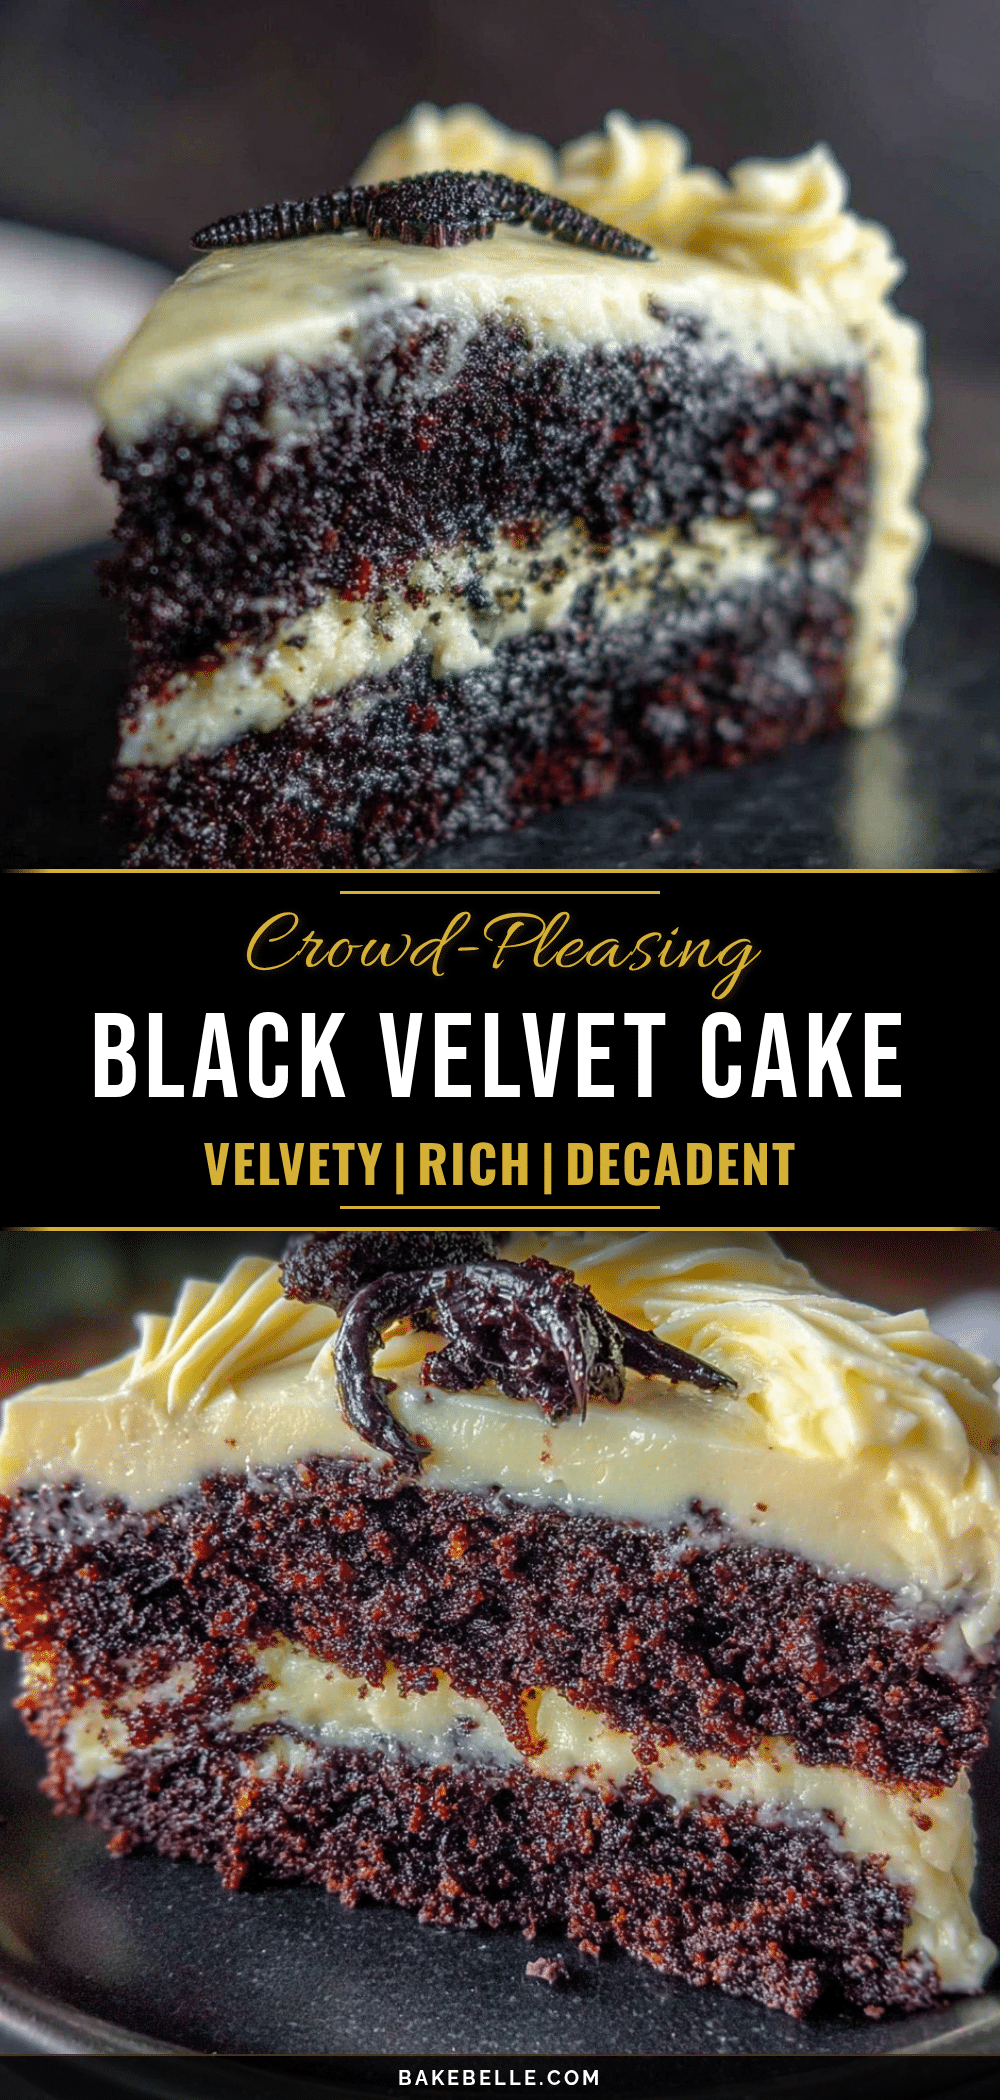
The Best Black Velvet Birthday Cake for a Crowd
A dramatic, deeply chocolate black velvet cake with cream cheese frosting that’s perfect for feeding a crowd. This foolproof recipe yields an incredibly moist, tender crumb and a show-stopping dark color, ideal for birthdays and special gatherings.
- Prep Time: 30 minutes
- Cook Time: 30 minutes
- Total Time: 1 hour 30 minutes
- Yield: 16 servings 1x
- Category: Dessert
- Cuisine: American
Ingredients
- 2 ½ cups (315g) all-purpose flour
- 2 cups (400g) granulated sugar
- ¾ cup (75g) black cocoa powder (e.g., Hershey’s Special Dark or Rodelle Gourmet Black Cocoa)
- 1 ½ tsp baking soda
- 1 tsp baking powder
- 1 tsp salt
- 1 cup (240ml) vegetable oil (or canola or melted coconut oil)
- 3 large eggs, at room temperature
- 1 cup (240g) full-fat sour cream, at room temperature
- 1 cup (240ml) buttermilk, at room temperature
- 2 tsp vanilla extract
- 1 cup (240ml) hot water or hot coffee
- 16 oz (450g) cream cheese, softened
- ½ cup (113g) unsalted butter, softened
- 4–5 cups (480-600g) powdered sugar, sifted
- 1 tbsp vanilla extract
- Pinch of salt
Instructions
- Preheat oven to 350°F (175°C). Grease three 8-inch round cake pans, line bottoms with parchment paper, and grease the parchment.
- In a large bowl, whisk together flour, sugar, black cocoa powder, baking soda, baking powder, and salt until no lumps remain.
- In a separate large bowl, whisk together vegetable oil, eggs, sour cream, buttermilk, and vanilla extract until smooth.
- Pour wet ingredients into dry ingredients. Mix on low speed or by hand until just combined (a few lumps are okay). Do not overmix.
- Slowly pour in hot water or coffee while mixing on low speed. Batter will be very thin.
- Divide batter evenly among prepared pans. Bake for 25-30 minutes, until a toothpick inserted in center comes out with a few moist crumbs. Cool in pans for 10 minutes, then turn out onto a cooling rack to cool completely.
- For frosting: Beat softened cream cheese and butter together until smooth and creamy, about 2 minutes. Gradually add sifted powdered sugar, one cup at a time, mixing on low. Add vanilla and salt, then beat on medium-high for 2-3 minutes until light and fluffy.
- Assemble cake: Place one layer on serving plate, spread about ¾ cup frosting on top. Repeat with remaining layers. Apply a thin crumb coat over entire cake, refrigerate 15-20 minutes, then apply final thick layer of frosting.
Notes
Room temperature ingredients are crucial for proper emulsification. Do not overmix the batter. The hot water/coffee blooms the cocoa for deeper flavor. Chill the cake before slicing for cleaner pieces. Store leftovers in the refrigerator for up to 5 days; cake layers can be frozen for up to 3 months.
Nutrition
- Serving Size: 1 slice
- Calories: 500
- Sugar: 45
- Sodium: 380
- Fat: 28
- Saturated Fat: 12
- Carbohydrates: 60
- Fiber: 2
- Protein: 6
Keywords: black velvet cake, birthday cake, chocolate cake, cream cheese frosting, crowd-pleasing, black cocoa, moist cake