My neighbor wasn’t trying to impress anyone. I’d stopped by to borrow a pie plate—completely mundane, right?—and the smell hit me before I even got through the screen door. It was rich and savory, something deeply meaty but with a brightness that cut through the usual heavy holiday air. I stood there in her foyer, holding my empty pie plate, and honestly forgot why I’d come over.
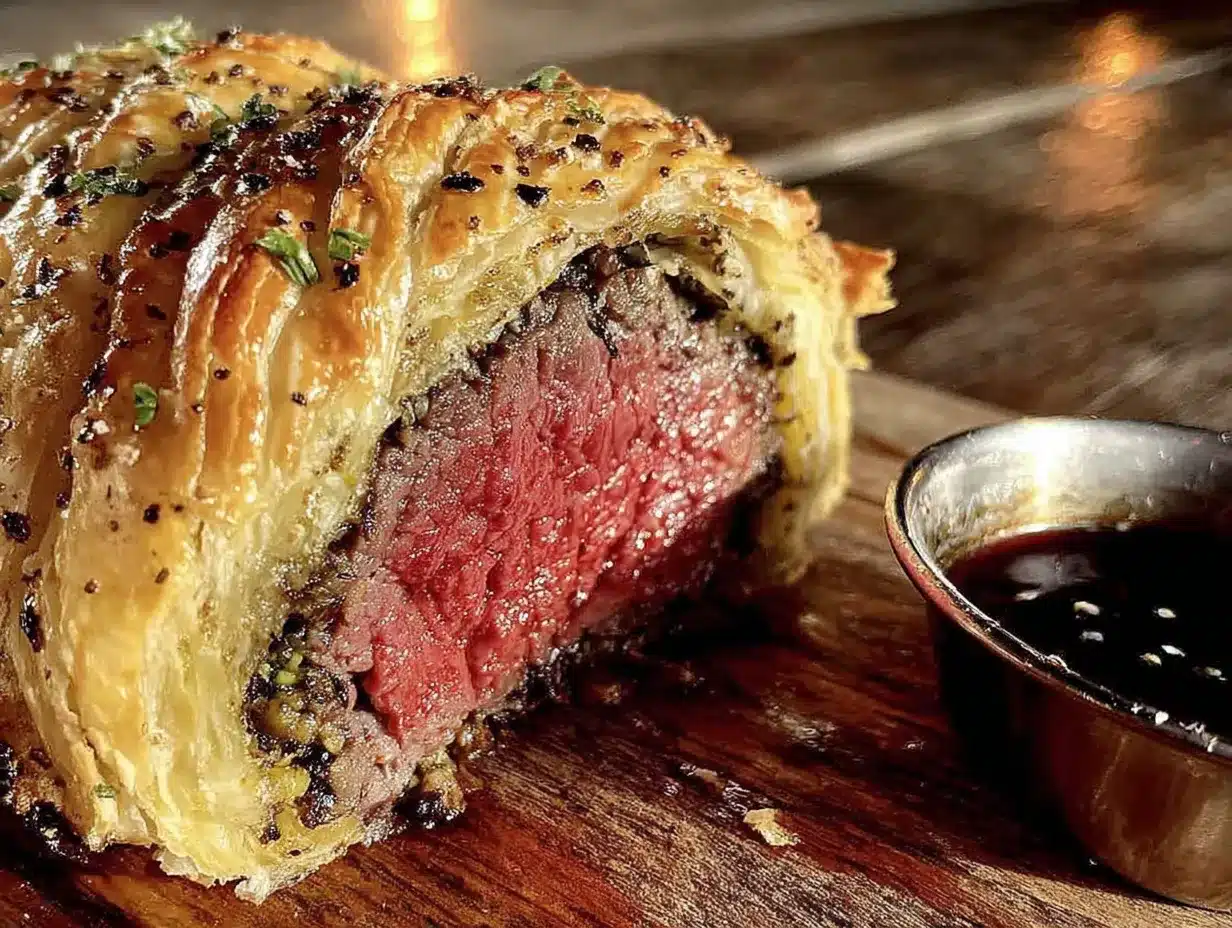
“Oh, that’s just a beef Wellington I’m testing for Thanksgiving,” she said, wiping her hands on her jeans. Just a beef Wellington. Like it was nothing special. Like she hadn’t just stopped me cold in my tracks. She was completely nonchalant about it—this gorgeous, golden pastry-wrapped roast sitting on her counter like it was a Tuesday night meatloaf.
Maybe you’ve been there, standing in someone else’s kitchen, watching them casually create something you’d assumed was impossible without a culinary degree and a week off work. That moment completely changed how I thought about holiday cooking. I mean, a classic Wellington is this whole production—all that butter, all that puff pastry, all that rich pâté. But what if you could have the same show-stopping centerpiece without feeling like you needed a nap and a bigger pair of pants afterward?
That’s how this lighter Thanksgiving beef Wellington was born. I went home, called my sister who’s a dietitian, and started messing around with the recipe until it felt doable for a regular home cook who still wants to feel good after dinner. It’s been my go-to holiday dish for three years now, and honestly? It’s the one thing my family requests above the turkey.
Why You’ll Love This Lighter Thanksgiving Beef Wellington
This isn’t your grandmother’s Wellington—and I say that with all the love in the world. We’re keeping the drama, the wow factor, and that incredible first slice moment, but we’re ditching the stuff that makes you regret that second helping. Here’s why this recipe has become my holiday MVP:
- Surprisingly Light: We’re swapping heavy butter-laden duxelles for a mushroom filling that’s pure umami magic without the extra fat. You get all the flavor, half the guilt.
- Simple Ingredients: No truffle oil, no foie gras, no ingredient that requires a special trip to a fancy market. Everything here is findable at your regular grocery store.
- Perfect for Thanksgiving: It’s the centerpiece that actually lets you enjoy the sides. A leaner beef tenderloin means you can save your calorie budget for mashed potatoes and pie.
- Crowd-Pleaser: I’ve served this to die-hard turkey fans and beef lovers alike, and it disappears every single time. There’s something about slicing into that golden pastry that makes people lose their minds.
- Unbelievably Delicious: The texture combination is honestly next-level. That flaky, buttery crust giving way to tender, perfectly cooked beef with that savory mushroom layer? It’s comfort food that feels special without feeling heavy.
The secret here is a technique I stumbled on after a few too many soggy-bottomed disasters. Instead of the traditional method that leaves you with a sad, wet crust, we’re doing a quick pre-sear on the beef and letting the mushroom filling dry out properly before assembly. It makes all the difference between a Wellington that’s gorgeous and one that’s just… okay.
This recipe is for anyone who wants a show-stopping holiday meal but doesn’t want to spend the next day in a food coma. It’s for the person who loves cooking for their family but also loves feeling good after dinner. It’s for the Thanksgiving where you want something different—something memorable—without the stress.
What Ingredients You Will Need
This recipe keeps things refreshingly straightforward. No hunting down obscure ingredients or spending a fortune on specialty items. Here’s what you’ll need to pull off this lighter, more elegant holiday centerpiece.
For the Beef
- Beef tenderloin (center-cut), 2 to 2.5 pounds – Look for a uniformly thick piece. The center cut is ideal because it cooks more evenly. I prefer getting mine from a local butcher when possible, but a good grocery store cut works perfectly too.
- Salt and freshly ground black pepper – Don’t skimp here. A generous seasoning makes all the difference.
- Olive oil, 2 tablespoons – For searing the beef. Use a good quality one, but nothing so fancy you’d cry if it smokes a little.
- Dijon mustard, 2 tablespoons – This is our secret weapon for keeping the beef moist and adding a subtle tang that cuts through the richness.
For the Lighter Mushroom Duxelles
- Cremini mushrooms, 1 pound – These have more flavor than white button mushrooms but are still budget-friendly. You could also use a mix of cremini and shiitake for extra depth.
- Shallots, 2 medium – Finely chopped. They add a mild, sweet onion flavor that complements the mushrooms beautifully.
- Garlic, 3 cloves – Minced. Because everything is better with garlic.
- Fresh thyme, 2 teaspoons – Leaves only, stems discarded. If you only have dried, use 1 teaspoon.
- Dry white wine, 1/4 cup – Something you’d actually drink, like a Sauvignon Blanc. The alcohol cooks off, leaving behind acidity and depth.
- Salt and pepper – To taste.
- Olive oil, 1 tablespoon – For sautéing.
For Assembly
- Puff pastry, 1 sheet (about 10×15 inches) – Store-bought is totally fine! I recommend the all-butter variety for the best flavor and flakiness. Thaw it in the fridge overnight before using.
- Prosciutto, 6 to 8 thin slices – This is our lighter alternative to the traditional pâté or foie gras. It adds a salty, savory layer that seals in moisture and prevents the dreaded soggy bottom.
- Egg wash (1 egg + 1 tablespoon water, beaten) – For that gorgeous golden-brown crust.
- Flaky sea salt (optional, for finishing) – A sprinkle right before baking adds a lovely crunch.
Ingredient Notes & Substitutions
- For a gluten-free version: Use a gluten-free puff pastry. The texture will be slightly different, but it still works beautifully.
- For a dairy-free option: Most store-bought puff pastry is made with butter, but there are vegan versions available. Just check the label.
- No prosciutto? You can use thinly sliced ham or even skip it altogether and just brush the pastry with a little extra Dijon before wrapping. The prosciutto helps create a barrier, but it’s not mandatory.
- Mushroom swap: Portobello mushrooms work great if you want a meatier texture in the duxelles. Just scrape out the gills first to avoid a dark, muddy color.
Equipment Needed
You don’t need a professional kitchen to pull this off. Here’s what you’ll actually use:
- Large cast-iron skillet or heavy-bottomed pan – For searing the beef. Cast iron is ideal because it holds heat beautifully, but any heavy pan works.
- Food processor – For finely chopping the mushrooms. You can do it by hand, but it takes forever and your arm will hate you.
- Plastic wrap – For wrapping the assembled Wellington before chilling. Helps it hold its shape.
- Baking sheet – Line it with parchment paper for easy cleanup.
- Sharp chef’s knife – For slicing the cooked Wellington. A dull knife will crush that beautiful pastry.
- Instant-read thermometer – Non-negotiable. This is how you nail the perfect doneness every single time.
- Pastry brush – For the egg wash. A silicone one is easiest to clean.
- Rolling pin – For gently rolling out the puff pastry if needed. Lightly flour your surface first.
If you don’t have a food processor, you can finely chop the mushrooms by hand. It’ll take about 15 minutes, but the texture will be a bit chunkier, which some people actually prefer. Just make sure you get them small enough that they cook down evenly.
Preparation Method
Alright, let’s get cooking. This looks fancy, but I promise—if you take it step by step, it’s totally doable. And the payoff? Absolutely worth it.
Step 1: Prepare the Beef
Take your beef tenderloin out of the fridge about 30 minutes before you start cooking. You want it to come up to room temperature slightly—this helps it cook more evenly. Pat it completely dry with paper towels. I mean really dry. Moisture is the enemy of a good sear. Season generously all over with salt and pepper.
Step 2: Sear the Beef
Heat your cast-iron skillet over medium-high heat with the olive oil. When the oil is shimmering—almost smoking—carefully place the beef in the pan. Sear for about 2 minutes per side, turning with tongs, until all sides are deeply browned. This should take about 8 to 10 minutes total. Don’t rush this step. That browning is flavor.
Once seared, transfer the beef to a plate. Let it cool for about 10 minutes. Brush it all over with the Dijon mustard. Set aside while you make the duxelles.
Step 3: Make the Lighter Duxelles
While the beef is cooling, wipe out your skillet (leave any browned bits—that’s flavor). Add the tablespoon of olive oil and heat over medium heat. Add the shallots and cook for 2 to 3 minutes until softened. Add the garlic and cook for another 30 seconds until fragrant.
Add the finely chopped mushrooms (if using a food processor, pulse them until they’re the size of small peas—don’t turn them into paste). Cook, stirring occasionally, for about 8 to 10 minutes. The mushrooms will release a lot of liquid. Keep cooking until that liquid has evaporated and the mixture looks dry and starts to stick together slightly. This is crucial! Wet duxelles = soggy Wellington.
Add the white wine and fresh thyme. Cook for another 2 minutes, stirring, until the wine has mostly evaporated. Season with salt and pepper. Remove from heat and let the mixture cool completely. You can spread it on a plate to speed this up.
Step 4: Assemble the Wellington
Lay a large piece of plastic wrap on your counter. Arrange the prosciutto slices on the plastic wrap, slightly overlapping, to form a rectangle about the same length as your beef tenderloin. Spread the cooled mushroom duxelles evenly over the prosciutto.
Place the mustard-coated beef in the center of the mushroom layer. Using the plastic wrap to help you, roll the prosciutto and mushroom mixture tightly around the beef, like you’re making a giant sushi roll. Twist the ends of the plastic wrap to seal it into a tight log. Refrigerate for at least 20 minutes (or up to 24 hours). This helps it hold its shape.
Step 5: Wrap in Pastry
Preheat your oven to 400°F (200°C). On a lightly floured surface, roll out your puff pastry sheet to about 1/8-inch thickness—just enough to make it slightly larger. Unwrap the beef log and place it in the center of the pastry.
Fold one side of the pastry over the beef, then the other. Tuck the ends under, like you’re wrapping a present. You want it snug but not tight. Place the wrapped Wellington seam-side down on a parchment-lined baking sheet.
Brush the entire surface with egg wash. If you’re feeling fancy, you can score the top with a knife in a decorative pattern—just don’t cut through to the meat. Sprinkle with flaky sea salt if using.
Step 6: Bake
Bake for 35 to 40 minutes, until the pastry is deep golden brown and puffed. Here’s the most important part: the internal temperature should reach 125°F (52°C) for medium-rare. An instant-read thermometer is your best friend here. Insert it through the side of the pastry into the center of the beef.
Let the Wellington rest on the baking sheet for at least 15 minutes before slicing. I know it’s hard to wait, but this step is non-negotiable. The juices need to redistribute, and the pastry needs to set up. If you slice too soon, you’ll have a beautiful mess.
Cooking Tips & Techniques
I’ve made this recipe more times than I can count, and I’ve definitely learned a few things the hard way. Here are my best tips for success:
Don’t skip the chilling step. I know, it’s an extra step, but it makes all the difference. Chilling the assembled Wellington before baking helps the pastry stay flaky and prevents it from sliding off the beef. Trust me on this one—I’ve had a Wellington that looked like a sad, collapsed tent because I was impatient.
Watch your oven temperature. Every oven runs differently. If your pastry is browning too quickly, tent it loosely with foil for the last 10 minutes. If it’s looking pale, give it a few more minutes. You want that deep golden color—not burnt, but definitely not pale and sad.
Let the duxelles cool completely. This is probably the most common mistake I see. If you spread warm mushroom mixture onto the prosciutto, it’ll steam the meat and make everything soggy. Patience, my friend. Let it cool to room temperature before assembly.
Use a sharp knife for slicing. A serrated knife works great, but a sharp chef’s knife is fine too. The key is to saw gently, not press down. Pressing will crush the pastry and squeeze out the juices. Slow and steady wins this race.
Multitasking is your friend. While the mushroom mixture is cooling, you can prep your pastry sheet and set up your assembly station. While the assembled Wellington is chilling in the fridge, you can clean up your kitchen and preheat the oven. Work smarter, not harder.
One more thing— if you’re making this for a crowd, you can absolutely prepare it a day ahead. Assemble the Wellington completely (through step 5), wrap it tightly in plastic wrap, and refrigerate. The next day, just brush with egg wash and bake. Add about 5 minutes to the baking time since it’s starting cold.
Variations & Adaptations
One of the best things about this recipe is how adaptable it is. Here are some of my favorite variations:
Herb-Crusted Version
Before wrapping the beef in prosciutto, roll it in a mixture of fresh chopped rosemary, thyme, and parsley. The herbs get trapped between the meat and the mushroom layer, infusing the whole thing with aromatic flavor. I did this for Easter last year, and it was a huge hit.
Individual Beef Wellington Bites
Cut the beef tenderloin into 2-inch thick medallions before searing. Assemble each piece individually with a small round of pastry. Bake for about 15 to 18 minutes instead of 35 to 40. These are perfect for parties or if you want to control portion sizes.
Vegetarian Mushroom Wellington
Swap the beef tenderloin for a large portobello mushroom cap or a roasted butternut squash wedge. Use the same duxelles and prosciutto (or skip the prosciutto for a fully vegetarian version). The cooking time will be shorter—about 20 to 25 minutes—so keep an eye on it.
Spicy Kick
Add a teaspoon of red pepper flakes to the duxelles while cooking, or spread a thin layer of harissa paste on the beef before adding the mustard. The heat cuts through the richness beautifully and adds an unexpected layer of complexity.
Low-Carb Option
Skip the puff pastry entirely. Instead, wrap the prosciutto-wrapped beef in a thin layer of parmesan cheese and almond flour “dough.” It’s not traditional, but it’s delicious and keto-friendly. Bake at 375°F (190°C) for about 20 minutes until the cheese crust is golden.
Serving & Storage Suggestions
This Wellington is stunning on its own, but the right sides and accompaniments can take it to the next level.
Serving Suggestions
Slice the Wellington into 1-inch thick rounds using that sharp knife I mentioned. Arrange on a warm platter. I love serving it with a simple arugula salad dressed with lemon and olive oil—the peppery greens cut through the richness perfectly.
For a classic holiday spread, pair it with roasted Brussels sprouts, creamy mashed potatoes, and a bright cranberry sauce. The tartness of the cranberries is a beautiful contrast to the savory beef and pastry.
If you’re feeling extra fancy, make a quick pan sauce while the Wellington rests. Deglaze the searing pan with a splash of red wine, add a pat of butter, and whisk until smooth. Drizzle over the sliced Wellington for an extra touch of elegance.
Storage Instructions
Leftover Wellington keeps surprisingly well. Store any unsliced portions (or individual slices) in an airtight container in the refrigerator for up to 3 days. The pastry will soften slightly, but it’s still delicious.
To reheat, place slices on a baking sheet in a 350°F (175°C) oven for about 10 minutes. This helps crisp up the pastry again. Avoid the microwave—it’ll turn the pastry into a sad, soggy mess.
Freezer Tips
You can freeze the fully assembled, unbaked Wellington for up to 3 months. Wrap it tightly in plastic wrap, then foil. To bake from frozen, add about 15 to 20 minutes to the baking time and check the internal temperature as usual.
Baked Wellington also freezes well. Let it cool completely, wrap tightly, and freeze. Thaw overnight in the fridge and reheat in a 350°F (175°C) oven until warmed through.
Nutritional Information & Benefits
This lighter version of a classic dish is designed to be more balanced than the original. Here’s a rough estimate per serving (based on 6 servings):
- Calories: Approximately 480
- Protein: 35g
- Fat: 28g (with less saturated fat than traditional Wellington)
- Carbohydrates: 20g
- Fiber: 2g
- Sugar: 3g
Health Benefits: Beef tenderloin is a lean cut of meat, rich in protein, iron, and B vitamins. Mushrooms are packed with antioxidants and are a good source of selenium and copper. By reducing the amount of butter and using prosciutto instead of pâté, we’ve significantly lowered the saturated fat content without sacrificing flavor.
Dietary Considerations: This recipe is naturally nut-free and can be made gluten-free with a simple substitution. It’s also lower in calories than traditional Wellington, making it a great option for those watching their intake without feeling deprived.
Potential Allergens: This recipe contains wheat (puff pastry), eggs (egg wash), and dairy (butter in pastry). For dairy-free, use a vegan puff pastry. For egg-free, skip the egg wash and brush with milk or cream instead.
FAQs
Can I use a different cut of beef?
Beef tenderloin is ideal because it’s tender and cooks evenly. You could use a top sirloin or even a thick-cut filet mignon, but the texture won’t be quite as buttery. If you’re on a budget, a well-trimmed tri-tip can work, but adjust cooking times accordingly.
Why is my Wellington soggy on the bottom?
This usually happens for one of two reasons: the mushroom duxelles wasn’t cooked down enough (it needs to be very dry), or the beef wasn’t properly chilled before wrapping. Make sure you’re cooking the mushrooms until all the liquid evaporates, and don’t skip the 20-minute chill in the fridge.
Can I make this ahead of time?
Absolutely! You can assemble the Wellington completely (through step 5) up to 24 hours in advance. Keep it wrapped in plastic wrap in the fridge. When you’re ready to bake, just brush with egg wash and pop it in the oven. Add about 5 minutes to the baking time since it’s starting cold.
How do I know when the beef is done?
An instant-read thermometer is your best bet. For medium-rare, aim for 125°F (52°C) at the center. For medium, go to 135°F (57°C). Remember, the temperature will rise about 5 degrees while resting, so pull it out a little early if you’re aiming for a specific doneness.
What can I serve with this for a complete holiday meal?
Think simple, elegant sides that don’t compete with the Wellington. Roasted green beans with almonds, creamy mashed potatoes, a bright citrus salad, and a tart cranberry sauce are all excellent choices. Keep the flavors clean and let the Wellington be the star.
Conclusion
This lighter Thanksgiving beef Wellington has seriously changed how I think about holiday cooking. It’s proof that you can have something that looks like it belongs on the cover of a food magazine without spending three days in the kitchen or feeling like you need a nap after dinner.
I love that this recipe feels special—it’s not something you make every Tuesday night—but it also doesn’t feel like a punishment. The lighter duxelles, the prosciutto instead of heavy pâté, the leaner cut of beef—it all comes together to create something that’s genuinely delicious and genuinely good for you.
Honestly, the best part is watching people’s faces when you bring it to the table. That first slice, when the pastry flakes and the steam rises and everyone leans in? That’s the moment. And knowing that you made it yourself, in your own kitchen, with ingredients you found at your regular grocery store? That’s the real magic.
I’d love to hear how yours turns out! Leave a comment below and let me know if you tried any variations or if this became your new holiday tradition. And if you’re looking for more lighter holiday inspiration, check out our collection of healthier holiday recipes that still feel indulgent.
Happy cooking, friend. You’ve got this!
Pin This Recipe!
Lighter Thanksgiving Beef Wellington
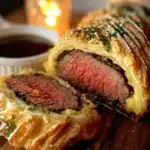
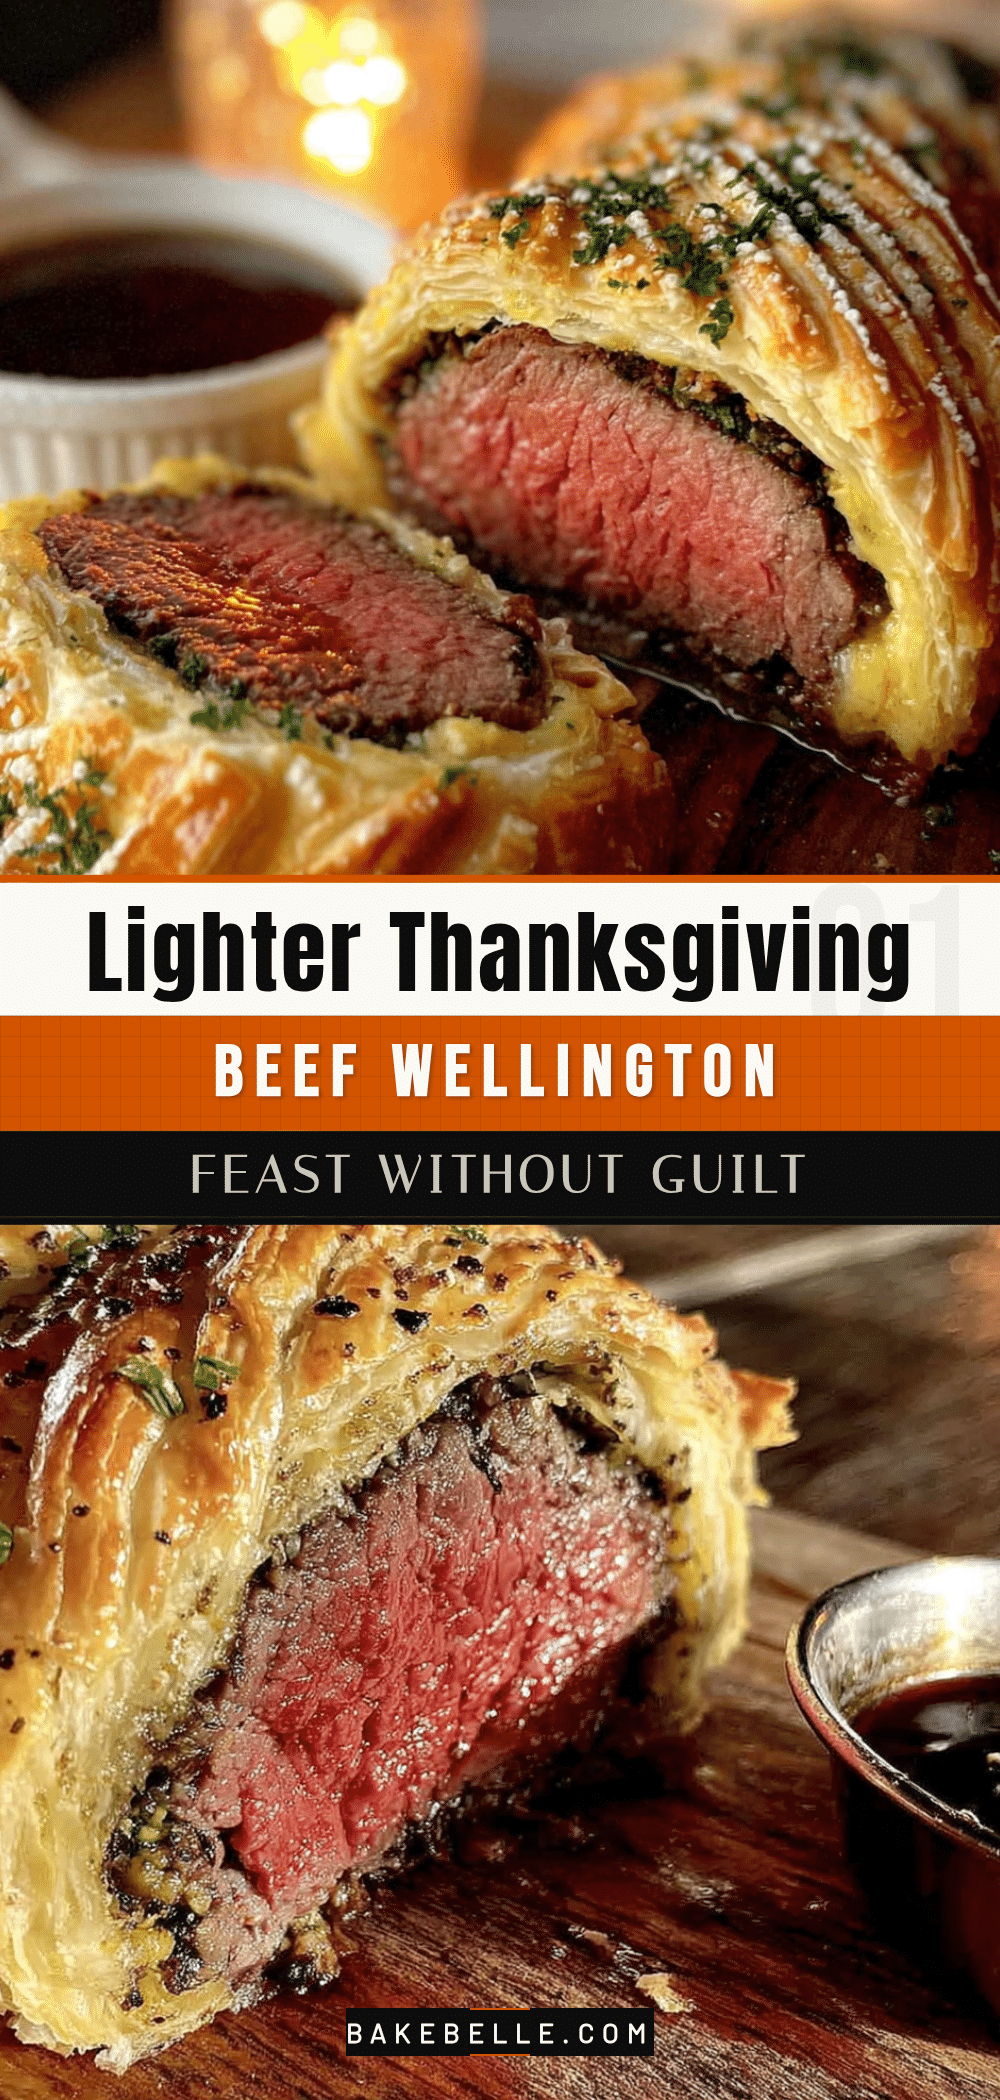
A lighter version of the classic Beef Wellington, perfect for Thanksgiving. This recipe uses leaner beef tenderloin, a lighter mushroom duxelles, and prosciutto instead of pâté, resulting in a show-stopping centerpiece that’s surprisingly light and easy to make.
- Prep Time: 30 minutes
- Cook Time: 40 minutes
- Total Time: 1 hour 10 minutes
- Yield: 6 servings 1x
- Category: Main Course
- Cuisine: British
Ingredients
- Beef tenderloin (center-cut), 2 to 2.5 pounds
- Salt and freshly ground black pepper
- Olive oil, 2 tablespoons
- Dijon mustard, 2 tablespoons
- Cremini mushrooms, 1 pound
- Shallots, 2 medium, finely chopped
- Garlic, 3 cloves, minced
- Fresh thyme, 2 teaspoons (leaves only)
- Dry white wine, 1/4 cup
- Salt and pepper, to taste
- Olive oil, 1 tablespoon (for sautéing)
- Puff pastry, 1 sheet (about 10×15 inches)
- Prosciutto, 6 to 8 thin slices
- Egg wash (1 egg + 1 tablespoon water, beaten)
- Flaky sea salt (optional, for finishing)
Instructions
- Take the beef tenderloin out of the fridge about 30 minutes before cooking. Pat it completely dry with paper towels. Season generously all over with salt and pepper.
- Heat a large cast-iron skillet over medium-high heat with 2 tablespoons olive oil. When the oil is shimmering, sear the beef for about 2 minutes per side until all sides are deeply browned (about 8-10 minutes total). Transfer to a plate and let cool for 10 minutes. Brush all over with Dijon mustard.
- While the beef cools, wipe out the skillet. Add 1 tablespoon olive oil and heat over medium heat. Add shallots and cook for 2-3 minutes until softened. Add garlic and cook for 30 seconds until fragrant.
- Add the finely chopped mushrooms (pulsed in a food processor to the size of small peas). Cook, stirring occasionally, for 8-10 minutes until the liquid has evaporated and the mixture is dry. Add white wine and fresh thyme, cook for another 2 minutes until wine mostly evaporates. Season with salt and pepper. Let cool completely.
- Lay a large piece of plastic wrap on the counter. Arrange prosciutto slices slightly overlapping to form a rectangle about the length of the beef. Spread the cooled mushroom duxelles evenly over the prosciutto.
- Place the mustard-coated beef in the center of the mushroom layer. Using the plastic wrap, roll the prosciutto and mushroom mixture tightly around the beef. Twist the ends of the plastic wrap to seal into a tight log. Refrigerate for at least 20 minutes (or up to 24 hours).
- Preheat oven to 400°F (200°C). On a lightly floured surface, roll out puff pastry to about 1/8-inch thickness. Unwrap the beef log and place it in the center of the pastry.
- Fold one side of the pastry over the beef, then the other. Tuck the ends under. Place seam-side down on a parchment-lined baking sheet.
- Brush the entire surface with egg wash. Score the top decoratively if desired (do not cut through to the meat). Sprinkle with flaky sea salt if using.
- Bake for 35-40 minutes until the pastry is deep golden brown and puffed. The internal temperature should reach 125°F (52°C) for medium-rare. Let rest on the baking sheet for at least 15 minutes before slicing.
Notes
Don’t skip the chilling step; it helps the pastry stay flaky. Let the duxelles cool completely before assembly to avoid a soggy Wellington. Use a sharp knife for slicing to prevent crushing the pastry. The Wellington can be assembled a day ahead and refrigerated; add about 5 minutes to baking time if starting cold.
Nutrition
- Serving Size: 1 slice (1/6 of Well
- Calories: 480
- Sugar: 3
- Sodium: 600
- Fat: 28
- Saturated Fat: 10
- Carbohydrates: 20
- Fiber: 2
- Protein: 35
Keywords: beef Wellington, lighter beef Wellington, Thanksgiving recipe, holiday recipe, beef tenderloin, mushroom duxelles, puff pastry, prosciutto