Three winters ago, I was housesitting for my friend Maria and found myself staring at a pile of bananas that had gone from spotty to practically black. Maria had left me a note that said, “Please use these before they turn into science experiments.” I laughed, but I also panicked a little—I didn’t have a mixer with me, and every banana bread recipe I knew required one.
That afternoon, I called my neighbor across the hall, an older gentleman named Mr. Chen who always smelled like cinnamon and cardamom. I asked if he had a hand mixer I could borrow. He didn’t. But he did something better—he showed up at my door with a fork, a wooden spoon, and a worn-out index card covered in grease stains. “You don’t need a machine,” he said, handing me the card. “You need patience and a good arm.”
I’ll be honest—I was skeptical. But I mashed those bananas with the fork, stirred everything together in one bowl, and slid the loaf into the oven. Twenty minutes later, the whole apartment smelled like the bakery I wished I lived above. When I pulled that golden loaf out, with its crackly top and impossibly tender crumb, I actually teared up a little. It was that good.
That index card is now framed in my kitchen. And this cozy one-bowl banana bread has become my go-to for cold evenings, rough days, and any time I need a little warmth without a lot of fuss. Maybe you’ve been there—standing in your kitchen, craving something homemade but not wanting to drag out every appliance you own. This recipe is for those moments. Honestly, it might just become your favorite banana bread too.
Why You’ll Love This Recipe
Let me tell you why this banana bread has earned a permanent spot in my weekly rotation. I’ve tested it at least a dozen times—sometimes with overripe bananas, sometimes with barely ripe ones, once with frozen bananas I forgot to thaw (don’t do that, by the way). Every single time, it delivered.
- No Mixer Needed : You literally need one bowl, a fork, and a spatula. That’s it. No stand mixer, no hand mixer, no food processor. Just your own two hands and a little elbow grease.
- Simple Ingredients : Everything is probably in your pantry right now. Flour, sugar, eggs, butter, baking soda, salt, and those sad bananas sitting on your counter. No weird specialty items.
- Perfect for Cozy Evenings : This is the kind of baking you do when it’s raining outside, you’re wearing your softest sweater, and you just want something warm to go with your tea. It’s comfort food in loaf form.
- Crowd-Pleaser : I’ve brought this to potlucks, book club meetings, and neighborly drop-offs. It disappears fast. Kids love it, adults love it, even my picky aunt who “doesn’t like banana bread” asked for the recipe.
- Unbelievably Moist : The secret is using very ripe bananas and melted butter. The combination creates a texture that’s almost pudding-like in the center but perfectly firm around the edges. It’s the kind of bread that makes you close your eyes after the first bite.
What makes this recipe different from the dozens of banana bread recipes out there? It’s the technique. By mashing the bananas thoroughly and mixing the wet and dry ingredients by hand, you avoid overmixing—which is the number one reason banana bread turns out tough. This method guarantees a tender, melt-in-your-mouth crumb every single time. Plus, it’s nearly impossible to mess up. I mean, I’ve made it while half-asleep and it still came out perfect.
What Ingredients You Will Need
This recipe uses simple, wholesome ingredients that work together to create something truly special. Most of these are pantry staples, so you probably don’t need to make a special trip to the store.
- 3 large ripe bananas (the spotty ones are best—they’re sweeter and easier to mash)
- ⅓ cup unsalted butter, melted (I use Kerrygold for the rich flavor, but any good butter works)
- ¾ cup granulated sugar (you can reduce to ½ cup if your bananas are very sweet)
- 1 large egg, room temperature (cold eggs can seize the butter, so let it sit out for 15 minutes)
- 1 teaspoon vanilla extract (pure vanilla, not imitation, if you can swing it)
- 1 ½ cups all-purpose flour (spoon and level it—don’t scoop directly from the bag)
- 1 teaspoon baking soda (make sure it’s fresh—test it by dropping a bit in vinegar; it should fizz)
- ¼ teaspoon salt (I use fine sea salt)
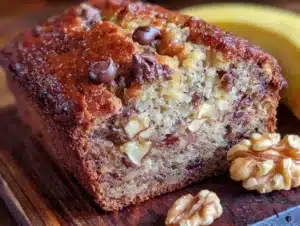
- Optional mix-ins : ½ cup chocolate chips, chopped walnuts, or dried cranberries
For the best texture, use bananas that are heavily spotted or even mostly brown. They should be soft enough to mash with a fork easily. If your bananas aren’t ripe enough, you can speed things up by placing them on a baking sheet in a 300°F oven for 15-20 minutes until the skins turn black. Let them cool before using.
I recommend using unbleached all-purpose flour for the best structure. King Arthur Flour is my go-to brand because it has a consistent protein content that gives reliable results. If you’re using a different brand, just be aware that the texture might vary slightly.
For substitutions, you can use coconut oil instead of butter for a dairy-free version, though the flavor will be slightly different. You can also swap the granulated sugar for coconut sugar or brown sugar—brown sugar will give you a deeper, more caramel-like flavor. If you’re gluten-sensitive, use a 1:1 gluten-free baking flour blend. I’ve tested this with Bob’s Red Mill and it worked beautifully.
Equipment Needed
The beauty of this recipe is that you don’t need much. Here’s what you’ll need:
- One large mixing bowl (any size works, but a 4-quart bowl gives you room to stir without spilling)
- A fork (for mashing bananas)
- A wooden spoon or rubber spatula (for mixing—I prefer a silicone spatula because it scrapes the sides clean)
- A 9×5-inch loaf pan (if you don’t have one, an 8×4-inch pan works too—just bake a little longer)
- Parchment paper (optional but highly recommended for easy removal)
- Cooling rack (or just a cutting board if you’re impatient like me)
If you don’t have a loaf pan, you can bake this in an 8×8-inch square pan for about 25-30 minutes, or even in a muffin tin for banana bread muffins (bake for 18-22 minutes). I’ve also made it in a cast iron skillet, which gives it a gorgeous crispy edge—just reduce the oven temperature to 325°F and bake for 40-45 minutes.
A note on parchment paper: I used to skip it and just grease the pan, but I kept losing the bottom crust to the pan. Now I always line the pan with a parchment sling—it makes lifting the bread out so much easier, and cleanup is a breeze.
Preparation Method
- Preheat your oven to 350°F (175°C). Position the rack in the center of the oven. While it’s heating, grease your loaf pan with butter or non-stick spray, or line it with parchment paper, leaving some overhang on the long sides for easy lifting.
- Mash the bananas. In your large mixing bowl, add the three ripe bananas. Use a fork to mash them until they’re mostly smooth—a few small lumps are fine, but try to get rid of the big chunks. The smoother you mash them, the more evenly they’ll incorporate into the batter.
- Add the melted butter. Pour the melted butter over the mashed bananas and stir until combined. The mixture will look a little separated at first—that’s normal. Keep stirring until it comes together into a pale, creamy mixture.
- Stir in the sugar, egg, and vanilla. Add the granulated sugar and stir vigorously for about 30 seconds until the sugar starts to dissolve. Then crack in the room-temperature egg and add the vanilla extract. Mix until everything is well combined and the batter looks smooth and glossy.
- Add the dry ingredients. Sprinkle the flour, baking soda, and salt over the wet mixture. Use your spatula to fold everything together gently. Stir just until you can’t see any more streaks of flour—about 10 to 12 strokes. Overmixing at this stage will develop gluten and make your banana bread tough. A few small lumps are perfectly fine.
- Fold in any mix-ins. If you’re using chocolate chips, walnuts, or dried fruit, gently fold them in now. I usually reserve a handful to sprinkle on top for a prettier presentation.
- Pour the batter into the prepared loaf pan. Use your spatula to spread it evenly. Give the pan a gentle tap on the counter to release any air bubbles. If you want a bakery-style crack down the middle, you can run a butter knife lengthwise through the batter about an inch deep—this encourages the bread to split evenly as it rises.
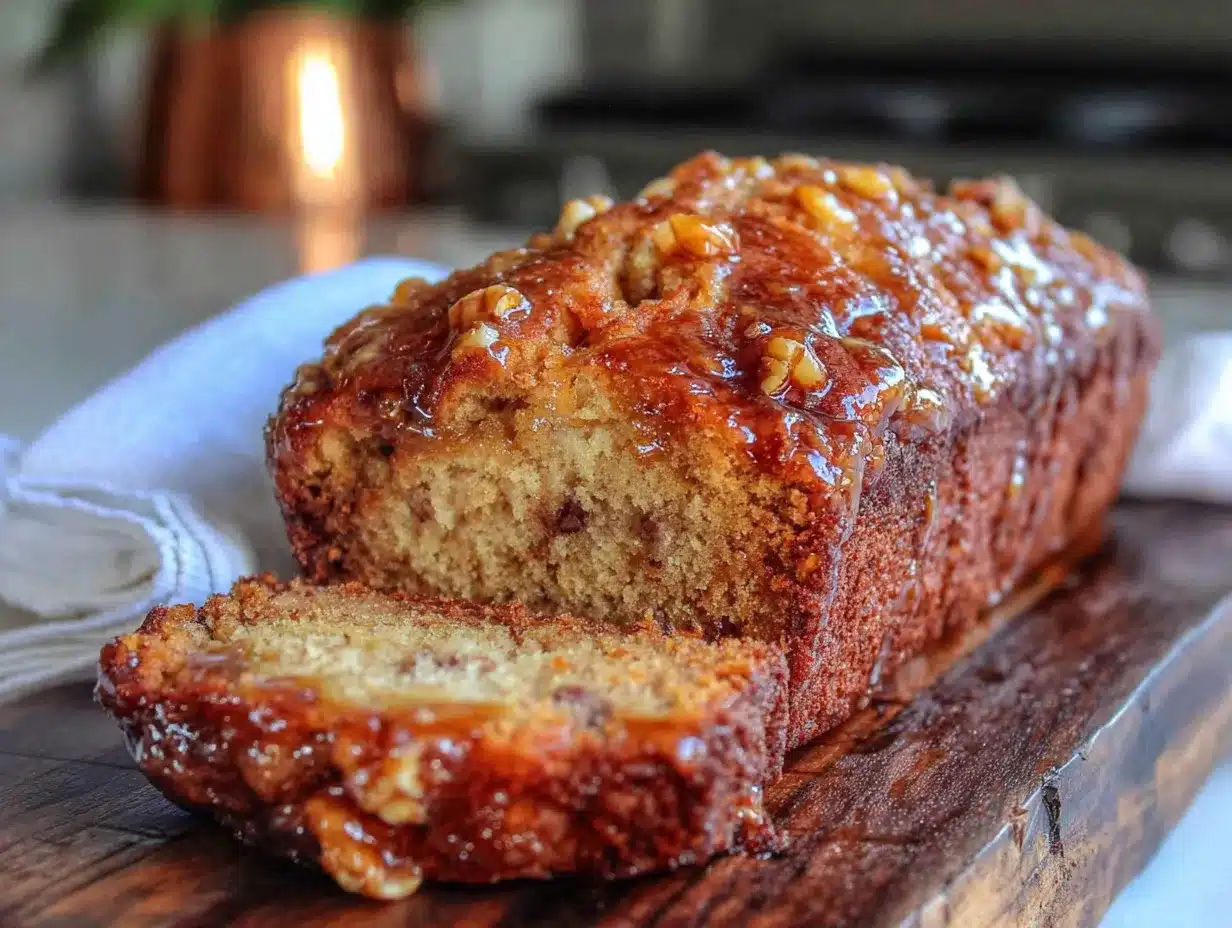
- Bake for 55-65 minutes. Start checking at 55 minutes by inserting a toothpick into the center. If it comes out clean or with just a few moist crumbs, it’s done. The top should be deep golden brown and spring back when lightly pressed. If the top is browning too quickly but the center isn’t done, tent the pan loosely with aluminum foil for the last 10-15 minutes.
- Cool in the pan for 10 minutes. Place the loaf pan on a cooling rack. After 10 minutes, use the parchment sling to lift the bread out and transfer it to the rack to cool completely. I know it’s tempting to slice into it right away, but letting it cool fully (at least an hour) allows the crumb to set. If you cut it too soon, it will be gummy and fall apart.
A sensory cue for doneness: your kitchen should smell like a bakery, the top should be a rich mahogany color, and when you tap the top of the loaf, it should sound hollow. If it sounds dense and thud-like, give it another 5 minutes.
Cooking Tips & Techniques
After making this recipe more times than I can count, I’ve learned a few things the hard way. Let me save you from my mistakes.
Don’t overmix the batter. This is the most important tip I can give you. When you add the flour, stir just until it disappears. Overmixing develops gluten, which makes your banana bread tough and rubbery instead of tender and cake-like. I learned this after making a loaf that could have doubled as a doorstop. Trust me, a few flour streaks are better than a dense brick.
Use room temperature ingredients. Cold eggs can cause the melted butter to seize up and create a lumpy batter. If you forgot to take the egg out ahead of time, place it in a bowl of warm water for 5 minutes. Same goes for the bananas—if they’re cold from the fridge, they won’t mash as smoothly.
Measure your flour correctly. Scooping flour directly from the bag compacts it, and you can end up with up to 25% more flour than the recipe calls for. Instead, use a spoon to fluff the flour in the bag, then spoon it into your measuring cup and level it off with a knife. This small step makes a huge difference in texture.
Let it cool completely. I know, I know—warm banana bread is heavenly. But if you cut into it while it’s still hot, the steam escapes too quickly and the bread deflates. The texture becomes gummy instead of tender. Give it at least an hour on the cooling rack. If you can wait that long.
Check your baking soda. Baking soda loses its potency over time. If your banana bread doesn’t rise properly, it might be because your baking soda is old. To test it, drop a teaspoon of baking soda into a small bowl of vinegar. If it fizzes vigorously, it’s good. If it barely bubbles, it’s time to buy a new box.
One more thing—if you’re baking at high altitude (above 3,500 feet), you may need to reduce the sugar by 2 tablespoons and increase the flour by 2 tablespoons. The lower air pressure causes baked goods to rise faster and set too quickly, so these adjustments help stabilize the structure.
Variations & Adaptations
This banana bread is incredibly forgiving and adaptable. Here are some of my favorite variations:
Chocolate Chip Banana Bread : Fold in ½ cup of semi-sweet or dark chocolate chips. I like to sprinkle a few extra on top before baking so the top looks studded with melty chocolate. For an extra indulgent version, swirl in 2 tablespoons of Nutella before baking.
Vegan Banana Bread : Replace the egg with a flax egg (1 tablespoon ground flaxseed mixed with 3 tablespoons water, let sit for 5 minutes). Use melted coconut oil or vegan butter instead of regular butter. The texture will be slightly denser but still delicious. I tested this for a friend who’s vegan, and she said it was the best banana bread she’d ever had.
Gluten-Free Banana Bread : Substitute the all-purpose flour with a 1:1 gluten-free baking blend that contains xanthan gum. I’ve had great results with Bob’s Red Mill 1-to-1 Baking Flour. Add an extra tablespoon of milk or yogurt to help with moisture, as gluten-free flours tend to absorb more liquid.
Spiced Banana Bread : Add 1 teaspoon of cinnamon, ½ teaspoon of nutmeg, and ¼ teaspoon of ground ginger to the dry ingredients. This gives the bread a warm, chai-like flavor that’s perfect for fall. I once made this version for a Thanksgiving brunch, and it was gone before the turkey came out of the oven.
Banana Nut Bread : Toast ½ cup of chopped walnuts or pecans in a dry skillet over medium heat for 3-4 minutes until fragrant. Fold them into the batter along with the flour. Toasting the nuts first brings out their oils and makes them crunchier. I prefer pecans because they’re sweeter, but walnuts are more traditional.
For a lower-sugar version, you can reduce the sugar to ¼ cup and rely on the natural sweetness of very ripe bananas. The bread won’t be as sweet, but it will still be moist and flavorful. I’ve also made it with ¼ cup of honey or maple syrup instead of granulated sugar—just reduce the milk by 2 tablespoons to compensate for the extra liquid.
Serving & Storage Suggestions
This banana bread is best served slightly warm, when the butter is still melty and the edges are a little crispy. Slice it thick—about 1-inch slices—and serve it plain or with a pat of salted butter. For an extra treat, toast the slices in a skillet with a little butter until golden brown on both sides.
It pairs beautifully with a hot cup of coffee, a chai latte, or a tall glass of cold milk. For a dessert-like presentation, drizzle slices with honey or maple syrup and add a dollop of whipped cream. I’ve also served it with a scoop of vanilla ice cream for a quick banana split-inspired dessert that always gets rave reviews.
Storage Instructions: Wrap the cooled loaf tightly in plastic wrap or aluminum foil and store at room temperature for up to 4 days. The moisture from the bananas keeps it soft, but after day 3, I recommend toasting slices to revive the texture.
For longer storage, wrap the loaf in plastic wrap, then in foil, and freeze for up to 3 months. To thaw, leave it on the counter overnight, or slice it while frozen and toast individual slices directly from the freezer. I always keep a loaf in my freezer for unexpected guests or late-night cravings.
Reheating: For a single slice, pop it in the toaster or microwave for 10-15 seconds. For a whole loaf, wrap it in foil and warm it in a 300°F oven for 10-15 minutes. The flavors actually deepen over time—I think day-old banana bread tastes even better than fresh because the spices and sweetness have had time to meld.
Nutritional Information & Benefits
Here’s the approximate nutritional breakdown per slice (based on 10 slices):
- Calories: 245
- Total Fat: 9g
- Saturated Fat: 5g
- Cholesterol: 45mg
- Sodium: 220mg
- Total Carbohydrates: 38g
- Dietary Fiber: 2g
- Sugars: 18g
- Protein: 4g
Bananas are a great source of potassium, which helps regulate blood pressure and supports muscle function. They also contain vitamin B6, vitamin C, and manganese. The butter provides a small amount of vitamin A and healthy fats that help your body absorb fat-soluble vitamins.
If you’re watching your sugar intake, you can reduce the sugar to ½ cup or use a sugar substitute like monk fruit sweetener. For a lower-fat version, substitute the butter with unsweetened applesauce—the texture will be slightly more cake-like but still delicious.
This banana bread is not gluten-free or dairy-free in its standard form, but as I mentioned in the variations section, it’s easy to adapt. It does contain eggs, so it’s not vegan unless you use the flax egg substitute.
From a wellness perspective, I love that this recipe uses real, whole ingredients. It’s not health food, but it’s honest food—the kind that nourishes you in more ways than one. Sometimes a slice of warm banana bread is exactly what your soul needs, and that counts for something too.
Conclusion
This cozy one-bowl banana bread has become more than just a recipe in my kitchen—it’s a ritual. It’s what I make when I need to slow down, when I want to fill my home with something warm and familiar, or when I just want to use up those bananas that are past their prime. It’s proof that you don’t need fancy equipment or complicated techniques to create something truly wonderful.
I hope you give this recipe a try, and I hope it brings you the same comfort it’s brought me. Make it your own—add chocolate chips if that’s your thing, throw in some nuts, or keep it simple and pure. There’s no wrong way to do this. And when you pull that golden loaf out of the oven and the smell fills your kitchen, I think you’ll understand why I keep coming back to it.
I’d love to hear how yours turns out! Leave a comment below and let me know what variations you tried, or tag me in your photos on social media. Happy baking, friends—here’s to warm slices, full bellies, and cozy evenings.
Frequently Asked Questions
Can I use frozen bananas for this recipe?
Absolutely! Thaw them first, then drain off any excess liquid before mashing. Frozen bananas are actually sweeter than fresh ones because the freezing process breaks down the starches into sugar. Just be aware that they’ll be mushier, so you might need slightly less mashing.
Why did my banana bread sink in the middle?
This usually happens for one of three reasons: the batter was overmixed, the oven door was opened too early, or the bananas were too wet. Make sure you’re not opening the oven for the first 30 minutes, and if your bananas are very ripe and watery, blot them with a paper towel before mashing.
Can I make this recipe into muffins instead of a loaf?
Yes! Grease a 12-cup muffin tin or line it with paper liners. Fill each cup about ⅔ full and bake at 350°F for 18-22 minutes, or until a toothpick inserted in the center comes out clean. This is great for portion control or for packing in lunchboxes.
How do I know when the banana bread is done baking?
Insert a toothpick or skewer into the center of the loaf. If it comes out clean or with just a few moist crumbs (not wet batter), it’s done. The top should be golden brown and spring back when gently pressed. If the top is browning too fast but the center is still raw, tent the pan with foil and continue baking.
Can I reduce the sugar in this recipe?
You can reduce the sugar to ½ cup without affecting the texture too much. If you reduce it further, the bread will be less sweet and might be slightly denser. I recommend using very ripe bananas if you’re cutting back on sugar, as they provide natural sweetness. You can also substitute half the sugar with mashed banana or unsweetened applesauce.
Pin This Recipe!
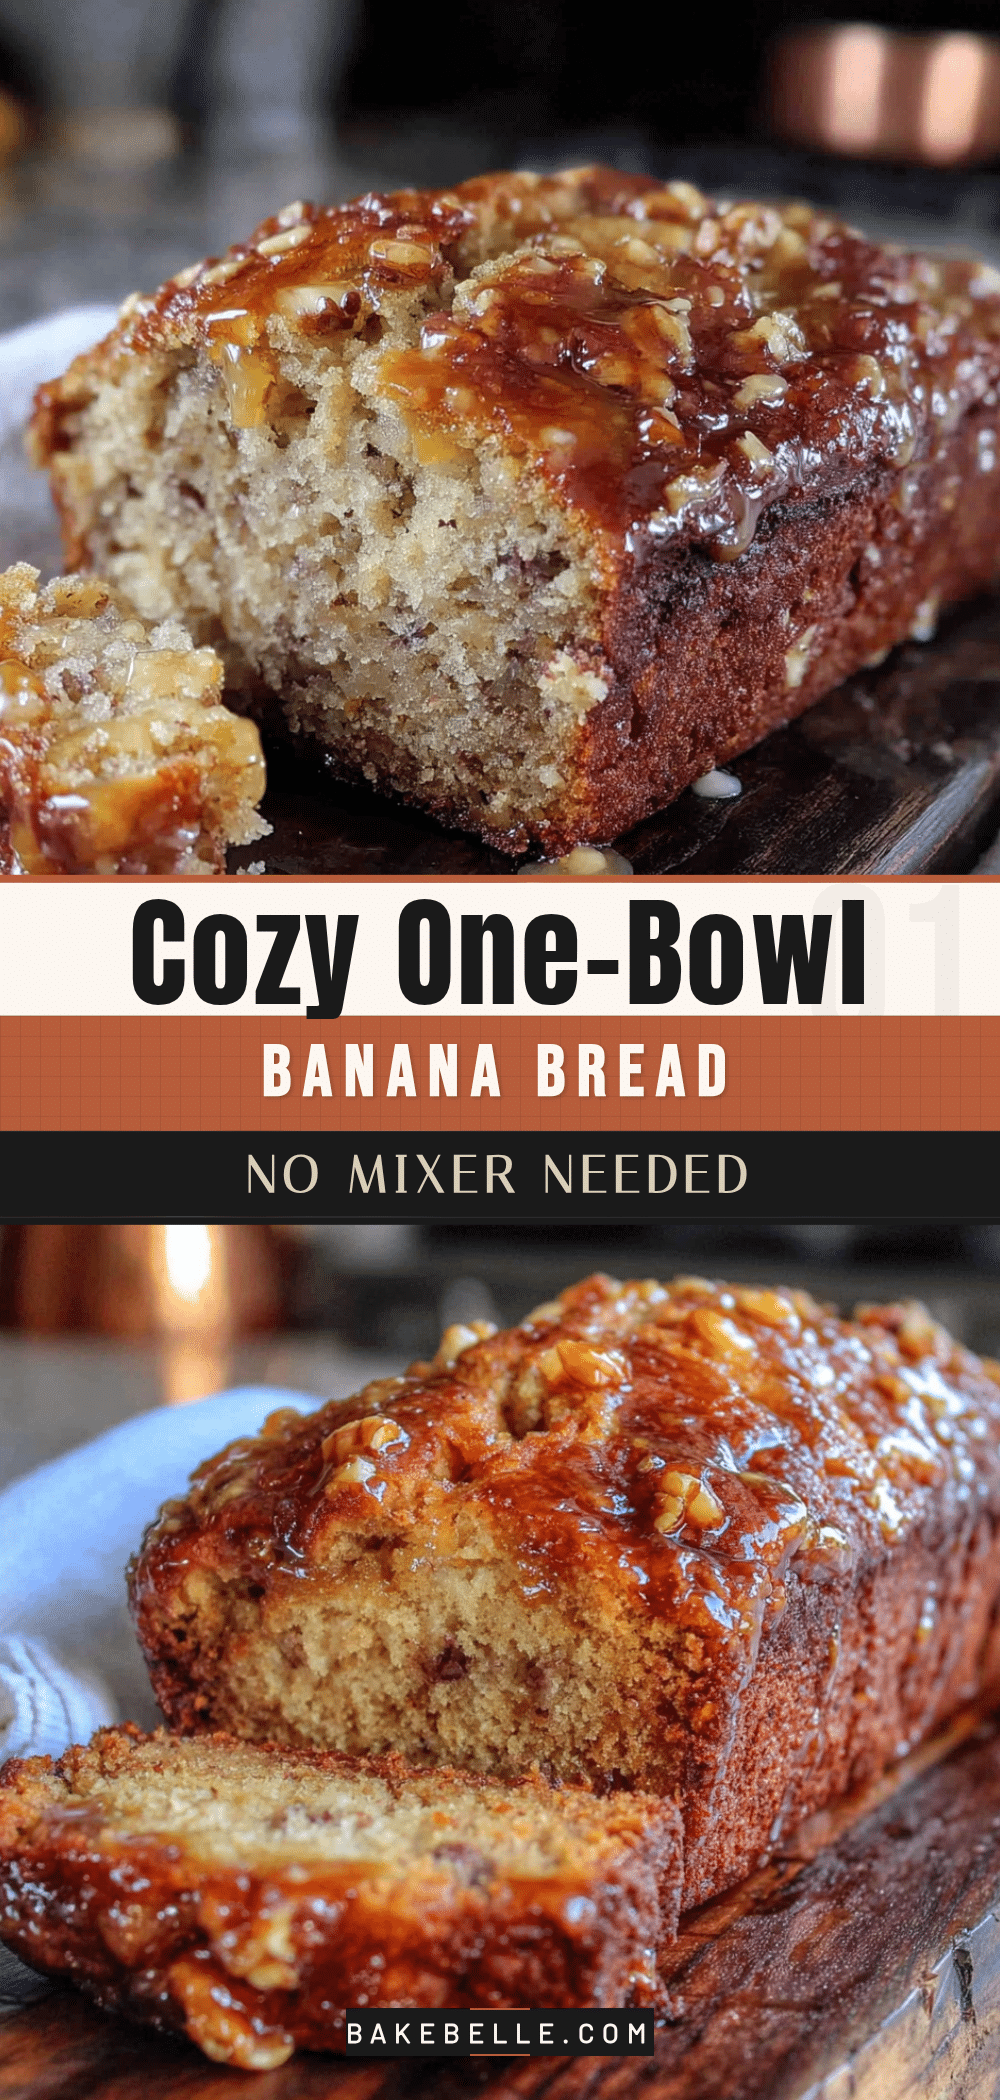
Cozy One-Bowl Banana Bread Recipe: No Mixer Needed
This cozy one-bowl banana bread requires no mixer and uses simple pantry ingredients. It’s unbelievably moist, perfect for cozy evenings, and guaranteed to be a crowd-pleaser with its tender, melt-in-your-mouth crumb.
- Prep Time: 15 minutes
- Cook Time: 55-65 minutes
- Total Time: 1 hour 10 minutes to 1 hour 20 minutes
- Yield: 10 servings 1x
- Category: Dessert
- Cuisine: American
Ingredients
- 3 large ripe bananas (spotty ones are best)
- ⅓ cup unsalted butter, melted
- ¾ cup granulated sugar (can reduce to ½ cup if bananas are very sweet)
- 1 large egg, room temperature
- 1 teaspoon vanilla extract (pure vanilla preferred)
- 1 ½ cups all-purpose flour (spooned and leveled)
- 1 teaspoon baking soda (fresh, test by dropping in vinegar)
- ¼ teaspoon fine sea salt
- Optional mix-ins: ½ cup chocolate chips, chopped walnuts, or dried cranberries
Instructions
- Preheat your oven to 350°F (175°C). Position the rack in the center of the oven. Grease your 9×5-inch loaf pan with butter or non-stick spray, or line it with parchment paper, leaving some overhang on the long sides for easy lifting.
- In your large mixing bowl, add the three ripe bananas. Use a fork to mash them until mostly smooth—a few small lumps are fine, but try to get rid of the big chunks.
- Pour the melted butter over the mashed bananas and stir until combined. The mixture will look a little separated at first; keep stirring until it comes together into a pale, creamy mixture.
- Add the granulated sugar and stir vigorously for about 30 seconds until the sugar starts to dissolve. Then crack in the room-temperature egg and add the vanilla extract. Mix until everything is well combined and the batter looks smooth and glossy.
- Sprinkle the flour, baking soda, and salt over the wet mixture. Use your spatula to fold everything together gently. Stir just until you can’t see any more streaks of flour—about 10 to 12 strokes. A few small lumps are fine.
- If using mix-ins (chocolate chips, walnuts, or dried fruit), gently fold them in now. Reserve a handful to sprinkle on top for a prettier presentation.
- Pour the batter into the prepared loaf pan. Use your spatula to spread it evenly. Give the pan a gentle tap on the counter to release any air bubbles. Optionally, run a butter knife lengthwise through the batter about an inch deep to encourage a crack down the middle.
- Bake for 55-65 minutes. Start checking at 55 minutes by inserting a toothpick into the center. If it comes out clean or with just a few moist crumbs, it’s done. The top should be deep golden brown and spring back when lightly pressed. If the top is browning too quickly, tent the pan loosely with aluminum foil for the last 10-15 minutes.
- Cool in the pan for 10 minutes. Then use the parchment sling to lift the bread out and transfer it to a cooling rack to cool completely (at least an hour) before slicing.
Notes
Don’t overmix the batter—stir just until flour disappears to avoid tough bread. Use room temperature ingredients for best results. Measure flour correctly by spooning and leveling. Let the bread cool completely before slicing to prevent a gummy texture. Check baking soda freshness by testing with vinegar. For high altitude (above 3,500 feet), reduce sugar by 2 tablespoons and increase flour by 2 tablespoons.
Nutrition
- Serving Size: 1 slice (1/10 of loa
- Calories: 245
- Sugar: 18
- Sodium: 220
- Fat: 9
- Saturated Fat: 5
- Carbohydrates: 38
- Fiber: 2
- Protein: 4
Keywords: banana bread, one-bowl banana bread, no mixer banana bread, easy banana bread, moist banana bread, cozy banana bread