I had a very firm position on Halloween treats for years. Store-bought candy only. No homemade stuff, no themed snacks, nothing that required more effort than tearing open a wrapper. It wasn’t laziness, honestly—it was efficiency. Halloween is chaotic enough without adding flour explosions to the mix. Then my niece showed up at my door last October, not for trick-or-treating, but because she’d heard I was “the aunt who makes everything from scratch.” I wasn’t. But she was standing there with hopeful eyes, and I had exactly fifteen minutes before I had to leave for a dinner thing.
I grabbed a bag of pretzel rods from the back of the pantry—you know, the ones you buy for parties and then forget about—and started melting almond bark in the microwave. The whole thing felt ridiculous. I mean, witch fingers? Out of pretzels? But there I was, dipping and decorating like some kind of last-minute Halloween wizard. The kitchen timer went off, and I slid the tray into the fridge to set. When I came back an hour later, those pretzel rods looked genuinely creepy. And delicious.
She ate three before I could even ask if she liked them. That’s the thing about this recipe—it doesn’t look like it should work, but it absolutely does. The salty-sweet combo hits exactly right, and the whole process takes less time than watching a single episode of your favorite show. Maybe you’ve been there, stuck with zero Halloween spirit and a bag of pretzels that needs using up. Trust me on this one.
Why You’ll Love This Recipe
Let me tell you why these witch finger pretzel rods have become my go-to Halloween trick. I’ve tested this recipe about seven times now, tweaking the chocolate-to-pretzel ratio and figuring out the fastest way to get that almond “fingernail” to stay put. Here is what makes it worth your time:
- Ready in 15 Minutes: From start to finish, you’re looking at a quarter of an hour. No oven preheating, no complicated steps, no waiting around. Perfect for those “I totally forgot about the class party” moments.
- Three Simple Ingredients: Pretzel rods, white melting chocolate, and sliced almonds. That’s it. You probably have at least two of these in your kitchen right now.
- Zero Baking Required: The microwave does all the heavy lifting here. No turning on the oven, no watching the temperature, no burnt edges to explain away.
- Kid-Friendly Activity: My neighbor’s kids came over last weekend and decorated their own batch. The mess was minimal, and they were so proud of their creepy creations.
- Surprisingly Addictive: The salt from the pretzel against the sweet white chocolate creates this combo that makes you reach for “just one more” every single time.
What makes these different from every other Halloween treat out there? It is the texture contrast. The crunch of the pretzel, the smoothness of the chocolate, and the slight chewiness of the almond—it all works together in a way that feels intentional, not thrown together. I’ve brought these to three different Halloween gatherings now, and every single time, someone asks for the recipe. One friend told me she’d rather have these than a full-sized candy bar, and I honestly believed her.
This recipe is the kind that makes you look like you planned ahead when you absolutely did not. It is Halloween magic in its purest form—no stress, no fuss, just really good food that happens to look like something out of a horror movie.
What Ingredients You Will Need
This recipe keeps things simple with just a handful of ingredients that work together to create something genuinely impressive. Here is what you will need and why each one matters:
- Pretzel Rods (12-15 rods): The foundation of our witch fingers. I recommend using thicker pretzel rods rather than the thin, delicate ones. The thicker rods hold up better to the chocolate coating and give you that satisfying crunch. I personally grab the store-brand rods from my local grocery—they work perfectly and save a few bucks. Look for rods that are mostly straight, not too curved, since they need to look like fingers.
- White Melting Chocolate or Almond Bark (12 ounces): This is your “skin” color. White melting chocolate gives that pale, slightly creepy witch finger look that makes these treats so convincing. I prefer almond bark over white chocolate chips because it melts smoother and sets up harder without any tempering fuss. Ghirardelli white melting wafers are my go-to, but the generic brand from the baking aisle works just fine. If you want a slightly different look, you can use milk chocolate for a more “dirt-covered” witch finger vibe.
- Sliced Almonds (about 30-40 slices): These become the fingernails. You want the sliced almonds, not slivered or whole. The flat, oval shape perfectly mimics a witch’s long, pointed nail. I look for bags where the slices are relatively uniform in size—not too tiny, not too broken. You will need one almond slice per pretzel rod, plus a few extras for breakage. Toasting them lightly in a dry pan for about two minutes adds a nice nutty flavor, but it is completely optional.
- Optional Decorations: A little green food coloring gel can be stirred into the melted white chocolate for an even more realistic witchy complexion. I’ve also used a tiny bit of black decorating gel to draw on knuckle lines and wrinkles. Red gel icing at the base of the almond creates a bloody cuticle effect that kids absolutely love (and adults pretend to hate).
- Coconut Oil (1 teaspoon, optional): If your white chocolate seems thick after melting, a tiny splash of coconut oil thins it out without affecting the flavor. This is more of a troubleshooting ingredient than a necessity.
The beauty of this ingredient list is that everything is shelf-stable and easy to find year-round. No hunting down specialty stores or spending a fortune. The total cost for a batch runs around eight dollars, and you will have leftover almonds for snacking and extra chocolate for another project.
Equipment Needed
You do not need a fancy kitchen setup for these witch finger pretzel rods. Here is what I use every time:
- Microwave-Safe Bowl: A medium glass or ceramic bowl works best for melting the chocolate. I use a Pyrex measuring cup because the spout makes dipping easier, but any microwave-safe bowl will do.
- Baking Sheet: A standard half-sheet pan lined with parchment paper or a silicone baking mat. The parchment is key—it prevents sticking and makes cleanup about thirty seconds long.
- Spatula or Spoon: For stirring the chocolate and helping coat the pretzels. A small offset spatula works beautifully, but a regular spoon is fine.
- Tweezers or Small Pliers: This sounds weird, I know, but hear me out. Placing those tiny almond fingernails onto the chocolate-coated pretzel rods can be fiddly. A pair of kitchen tweezers gives you precision without getting chocolate all over your fingers. I grabbed a cheap pair from the dollar store and they live in my baking drawer now.
- Piping Bag or Small Zip-Top Bag: If you decide to add knuckle details or veins, a tiny piping tip or a corner-snipped zip-top bag makes it easy. You can also just use a toothpick for fine details.
If you do not have a microwave, you can melt the chocolate in a double boiler on the stovetop. It takes about five minutes longer but works just as well. The rest of the equipment is pretty standard—nothing that requires a special trip to the store.
Preparation Method
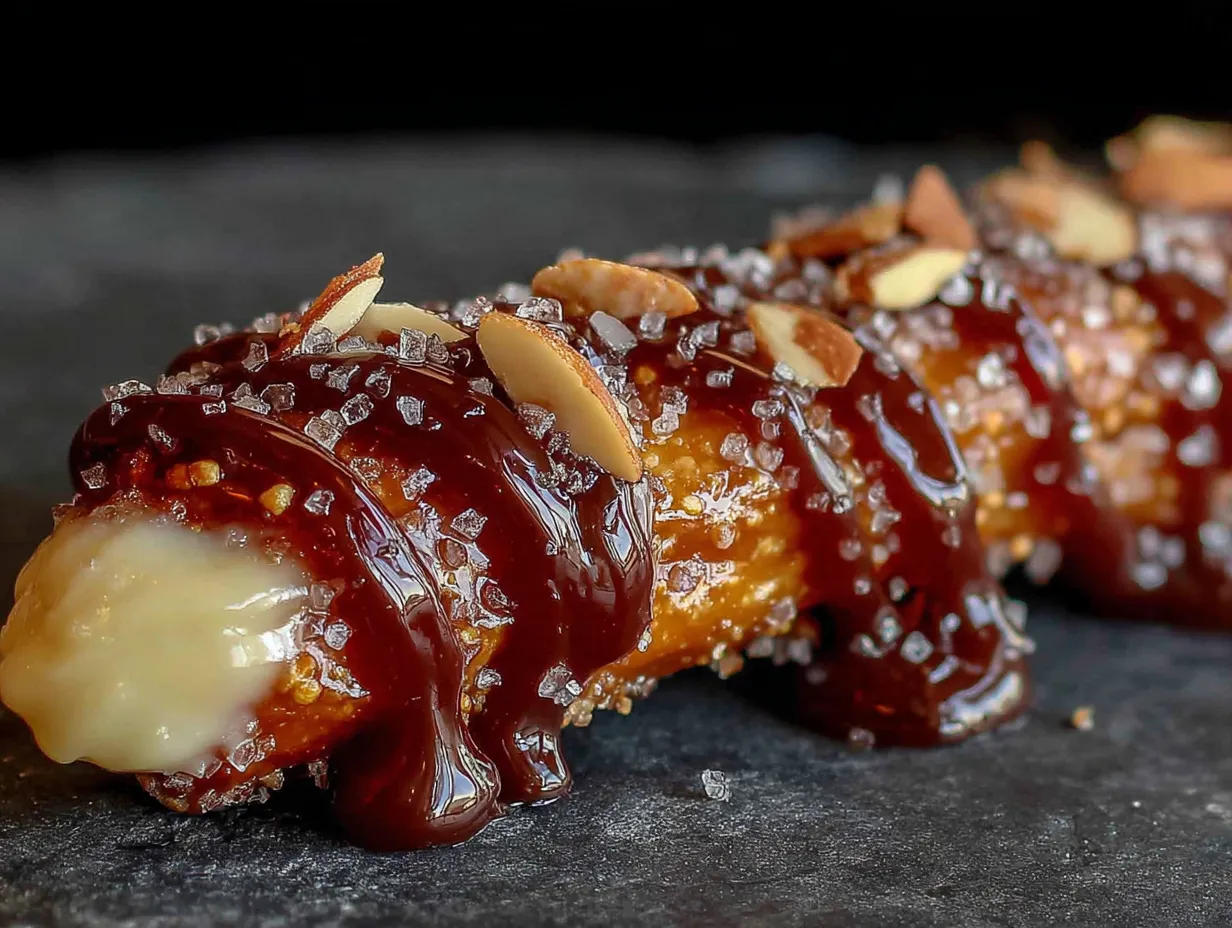
Follow these steps carefully, and you will have a tray of spooky witch fingers in no time. I have included all the little tricks I learned through trial and error so you can skip the frustrating parts.
- Set up your workspace. Line a baking sheet with parchment paper or a silicone mat. Make sure it fits in your refrigerator. Lay out your pretzel rods, sliced almonds, and any decorating tools you plan to use. Having everything within reach makes the process much smoother, especially since the chocolate sets quickly.
- Melt the white chocolate. Place your white melting chocolate or almond bark in a microwave-safe bowl. Microwave in 30-second intervals at 50% power, stirring thoroughly between each interval. This gentle approach prevents the chocolate from seizing or burning. It usually takes about 90 seconds total. The chocolate should be smooth and fully melted with no lumps. If it seems thick, stir in half a teaspoon of coconut oil.
- Optional: add color. If you want green witch fingers, stir in a tiny drop of green food coloring gel at this point. Use a toothpick to add just a smidge—you can always add more, but you cannot take it away. Stir until the color is evenly distributed. I once added too much and ended up with neon green fingers that looked more like alien digits than witch fingers. Learn from my mistake.
- Dip the pretzel rods. Hold a pretzel rod by one end and dip it into the melted chocolate, rotating to coat about two-thirds of the rod. Let the excess chocolate drip back into the bowl for a few seconds. You want a fairly thin, even coating—not a thick, gloppy mess. Place the coated pretzel onto the prepared baking sheet. Repeat with the remaining pretzels, working quickly before the chocolate starts to set.
- Add the fingernails. While the chocolate is still wet, press a sliced almond onto the tip of each pretzel rod. Position it so the pointed end of the almond extends past the end of the pretzel, like a fingernail extending past a fingertip. Gently press down to secure it. The chocolate should hold it in place. If the chocolate has started to set by the time you get to the last few pretzels, a tiny dab of fresh melted chocolate on the back of the almond helps it stick.
- Create the knuckle details. Using a toothpick or the tip of a small knife, gently press horizontal lines into the chocolate coating about halfway down the pretzel to create knuckle wrinkles. You can also add a few vertical lines near the “nail bed” for extra realism. Do not press too hard—you just want indentations, not exposed pretzel.
- Chill to set. Place the baking sheet in the refrigerator for about 10-15 minutes, or until the chocolate is completely firm to the touch. Do not skip this step. The chocolate needs to set fully before you try to move or serve the pretzels, or you will end up with chocolate fingerprints everywhere.
- Add final details (optional). Once the chocolate is set, you can add extra details. Melt a tiny amount of dark chocolate or use black decorating gel to draw small lines at the knuckles. A dot of red gel at the base of the almond creates a “cuticle” effect that really sells the finger illusion. Let any additional details set for another 5 minutes.
That is it. Eight steps, fifteen minutes of active work, and you have a batch of Halloween treats that look like they took hours.
Cooking Tips & Techniques
I have made these witch finger pretzel rods more times than I care to admit, and I have picked up a few tricks along the way. Here is what I wish someone had told me before my first attempt:
Work in small batches. Do not try to dip all twelve pretzels at once if you are new to this. Melt half the chocolate, dip six pretzels, add the almonds, and then melt the rest for the next batch. The chocolate thickens as it cools, and working in smaller batches keeps everything manageable. I learned this the hard way when my third batch of chocolate seized up and I had to start over.
Keep your hands clean. Chocolate-covered fingers are a real hazard here. Keep a damp paper towel nearby to wipe your hands between pretzels. Those chocolate smudges on the pretzel rods look messy, not witchy. If you have food-safe gloves, this is a great time to use them.
Watch the microwave carefully. White chocolate burns faster than you think. I scorched my first batch because I walked away for “just a second.” The smell is unmistakable, and there is no fixing burnt chocolate. Stay close, use low power, and stir often.
Temperature matters. If your kitchen is warm, the chocolate will take longer to set. Pop the baking sheet in the fridge immediately after decorating. If your kitchen is cold, the chocolate might start setting before you finish adding the almonds. In that case, warm the bowl of chocolate in the microwave for 10 seconds to loosen it up again.
Storage timing. These are best eaten within 24 hours. The pretzel stays crunchy for about a day, but after that, it starts absorbing moisture from the chocolate and gets slightly soft. Not terrible, but not as satisfying. If you need to make them further ahead, store them in an airtight container at room temperature for up to three days, but expect some texture change.
Variations & Adaptations
One of the best things about this recipe is how easy it is to customize. Here are some variations I have tried and loved:
Chocolate Witch Fingers: Swap the white chocolate for dark or milk chocolate. The result looks less like pale witch skin and more like chocolate-dipped pretzels with almond nails. Kids still love them, and the dark chocolate version is a hit with adults who find white chocolate too sweet. I used semisweet chips last year and added a sprinkle of sea salt—absolutely dangerous.
Monster Green Fingers: Add green food coloring to the white chocolate for a truly monstrous look. I used gel coloring from the baking aisle and achieved a perfect swampy green. You can also add a drop of orange coloring for a more autumnal vibe. My niece requested “poison green” this year, so that is what we are doing.
Zombie Fingers: After the white chocolate sets, drizzle a tiny bit of red gel or thinned strawberry jam over the “cuticle” area for a bloody zombie effect. These are not for the squeamish, but they are always the first to disappear at Halloween parties. I brought these to a work potluck and my coworker pretended to scream—then ate three.
Gluten-Free Option: Use gluten-free pretzel rods instead of regular ones. Most major brands offer a gluten-free version now. The rest of the ingredients are naturally gluten-free, so this is an easy swap. Just check the label on your white chocolate to be sure.
Vegan Adaptation: Look for vegan white chocolate or vegan melting wafers. Many brands now offer dairy-free options that melt and set just as well. The pretzel rods are typically vegan, and the almonds are obviously plant-based. This version works beautifully for school parties where dietary restrictions vary.
Serving & Storage Suggestions
These witch finger pretzel rods are at their absolute best when served chilled or at cool room temperature. The chocolate stays firm and the pretzel retains its satisfying crunch. Here is how I like to present them:
Arrange the pretzels standing upright in a tall glass jar or a small vase for maximum creep factor. The fingers sticking up look like something out of a witch’s kitchen. You can also lay them flat on a platter lined with black or orange napkins. For a truly dramatic presentation, place a small fake hand or skeleton hand in the center of the platter and arrange the pretzel fingers around it like they are reaching out.
These pair beautifully with other Halloween treats. Serve them alongside a bowl of caramel popcorn, some pumpkin-shaped cookies, or a pitcher of apple cider. The salty-sweet flavor profile complements almost any Halloween spread. I have also served them as a garnish for milkshakes—sticking a witch finger into a vanilla shake is surprisingly delightful.
For storage, keep the pretzels in an airtight container at room temperature for up to three days. Do not refrigerate them after the initial setting period unless your kitchen is very warm. The refrigerator can introduce moisture that softens the pretzel. If you must store them longer, layer them between sheets of parchment paper in a container and keep them in a cool, dry place. Freezing is not recommended—the texture suffers significantly.
The flavor actually improves slightly after about six hours. The chocolate sets fully and the salt from the pretzel melds with the sweetness in a way that is very satisfying. I made a batch for a Friday night party and snuck one the next morning—still delicious, just a tiny bit less crunchy.
Nutritional Information & Benefits
Let’s be honest—these are Halloween treats, not health food. But here is a rough breakdown for those who like to know what they are eating. Per pretzel rod (based on a standard 12-rod batch): approximately 180 calories, 9 grams of fat, 24 grams of carbohydrates, 3 grams of protein, and 14 grams of sugar.
The pretzel rods provide a small amount of iron and B vitamins from the enriched flour. Almonds are a good source of vitamin E, magnesium, and healthy monounsaturated fats. White chocolate contains calcium from the milk solids, though the amounts are modest given the serving size.
If you are watching your sugar intake, you can use sugar-free white chocolate or a sugar substitute designed for melting. The texture will be slightly different, but the overall effect remains the same. For a lower-carb option, look for low-carb pretzel rods or use thick veggie sticks like jicama or cucumber as the base instead. The flavor profile changes completely, but the visual effect is still impressive.
Potential allergens to note: these contain wheat (pretzels), dairy (white chocolate), and tree nuts (almonds). For nut-free versions, use a sunflower seed or a small piece of dried apricot for the fingernail instead of the almond.
Conclusion
These witch finger pretzel rods have earned a permanent spot in my Halloween rotation. They are quick enough for last-minute school parties, impressive enough for adult gatherings, and simple enough that kids can help make them. The combination of salty pretzel, sweet chocolate, and crunchy almond creates a treat that satisfies every craving at once.
I love that this recipe proves you do not need hours of effort or professional decorating skills to create something genuinely fun and delicious. It is the kind of recipe that makes people say, “Wait, you made these?” with genuine surprise. And honestly, that never gets old.
Try them this Halloween. Add your own twist—maybe green coloring, maybe bloody cuticles, maybe something I have not thought of yet. Tag me when you do, because I genuinely love seeing how people make recipes their own. And if you have a favorite Halloween treat that saves you in a pinch, I would love to hear about it in the comments. Happy haunting, friends.
Frequently Asked Questions
Can I use milk chocolate instead of white chocolate?
Absolutely. Milk chocolate gives a darker, more chocolatey look that still works for witch fingers. The visual effect is less “pale witch skin” and more “chocolate-covered treat,” but the taste is just as good. Dark chocolate also works well and adds a sophisticated flavor that adults appreciate.
How far in advance can I make these?
You can make them up to three days ahead if stored properly in an airtight container at room temperature. The pretzel will lose some crunch over time, so for best texture, make them within 24 hours of serving. If you need to prep further ahead, you can dip the pretzels and add the almonds, then add the knuckle details right before serving.
Can I use almond bark instead of white chocolate chips?
Yes, and I actually recommend it. Almond bark melts more smoothly and sets up harder than most white chocolate chips. It is more forgiving and less likely to seize. You will find it in the baking aisle near the chocolate chips, usually in a block or wafer form.
My chocolate seized up. What went wrong?
Seizing happens when even a tiny amount of moisture gets into the melted chocolate. Make sure your bowl and utensils are completely dry. Also, overheating can cause seizing. Always melt at 50% power in short intervals. If your chocolate does seize, you can sometimes rescue it by stirring in a teaspoon of coconut oil or vegetable shortening.
Can I make these without a microwave?
Definitely. Use a double boiler on the stovetop instead. Fill a small saucepan with an inch of water, bring it to a simmer, and place a heat-safe bowl on top. Make sure the bowl does not touch the water. Stir the chocolate until melted, then proceed with the recipe. It takes about five minutes longer but works perfectly.
Pin This Recipe!
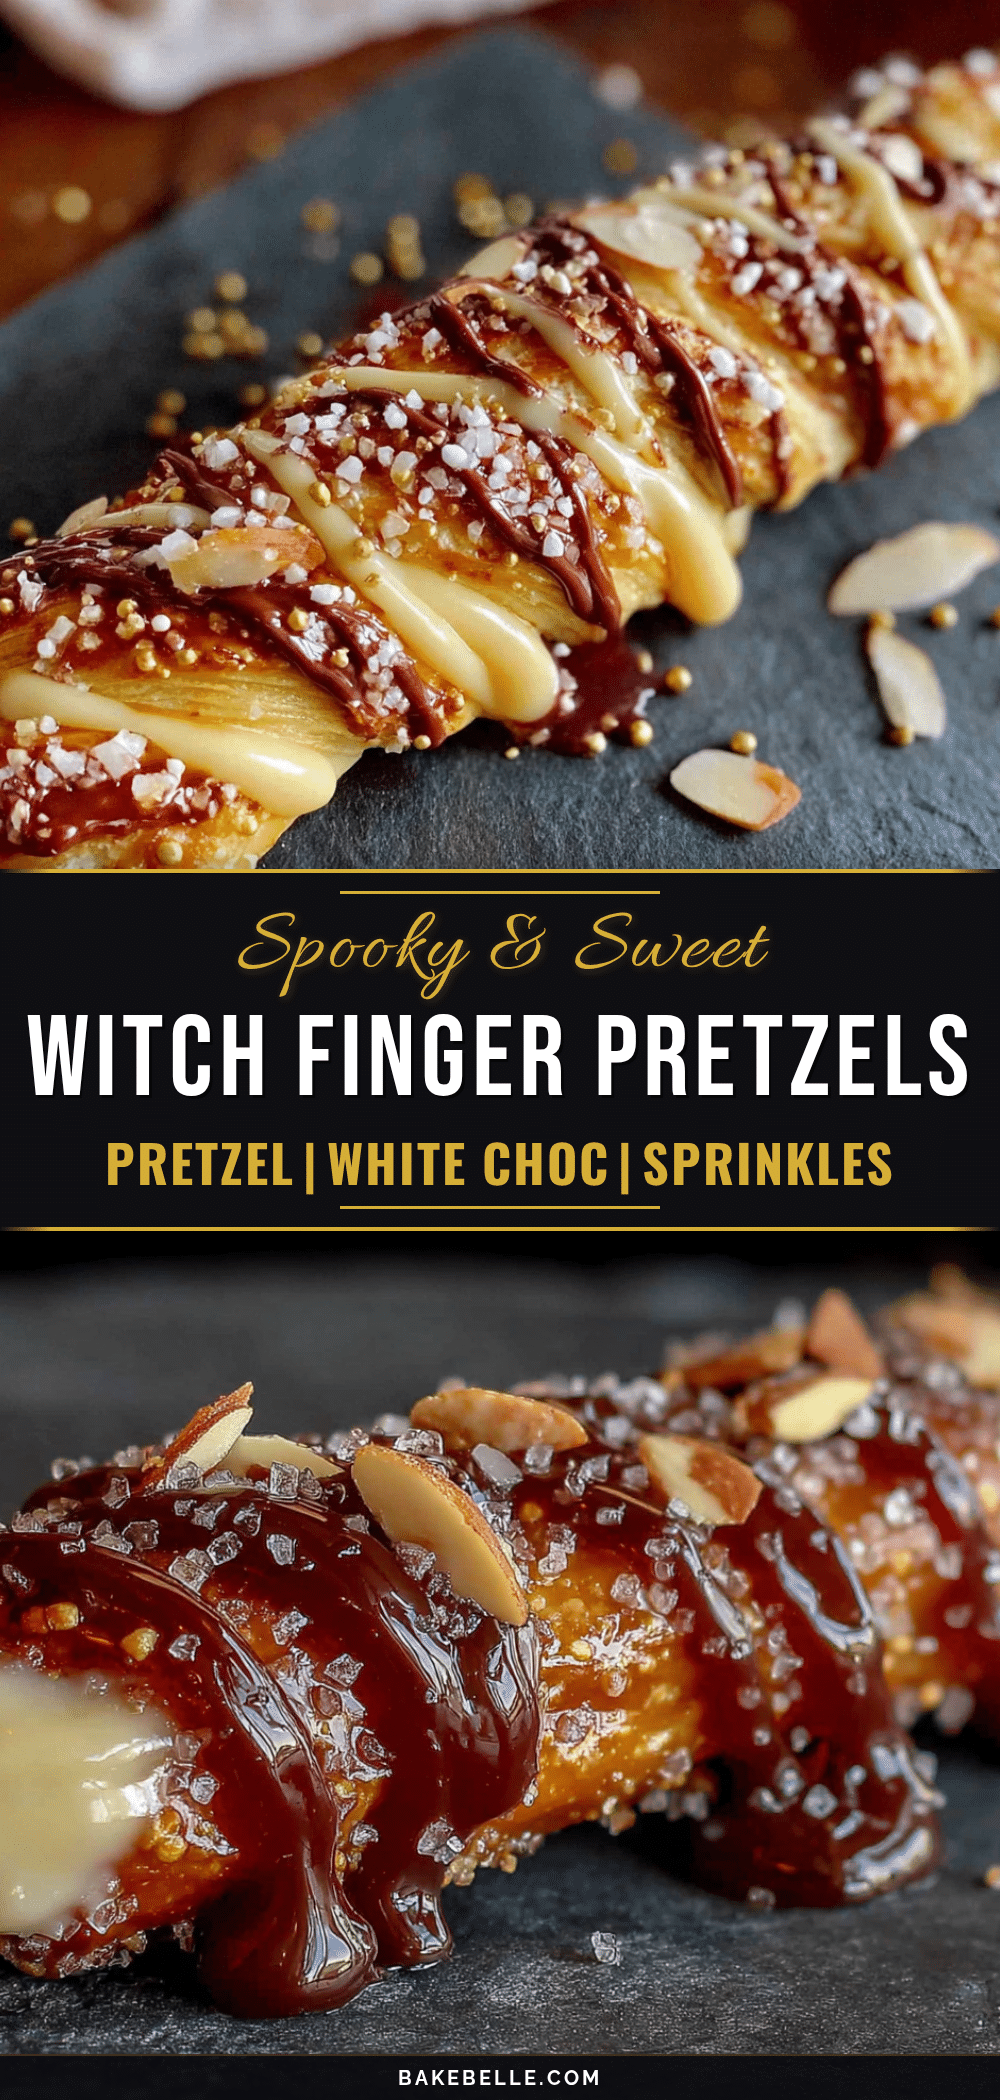
Easy Witch Finger Pretzel Rods in 15 Minutes

These spooky witch finger pretzel rods are ready in just 15 minutes with only three ingredients. The salty-sweet combo of pretzel, white chocolate, and almond creates a surprisingly addictive Halloween treat that looks like it took hours.
- Prep Time: 15 minutes
- Cook Time: 0 minutes
- Total Time: 15 minutes
- Yield: 12-15 servings 1x
- Category: Dessert
- Cuisine: American
Ingredients
- 12–15 pretzel rods (thicker ones recommended)
- 12 ounces white melting chocolate or almond bark
- 30–40 sliced almonds
- Green food coloring gel (optional)
- Black decorating gel (optional)
- Red gel icing (optional)
- 1 teaspoon coconut oil (optional, for thinning chocolate)
Instructions
- Line a baking sheet with parchment paper or a silicone mat. Lay out pretzel rods, sliced almonds, and any decorating tools.
- Place white melting chocolate or almond bark in a microwave-safe bowl. Microwave in 30-second intervals at 50% power, stirring between each, until smooth (about 90 seconds total). If thick, stir in 1/2 teaspoon coconut oil.
- Optional: Stir in a tiny drop of green food coloring gel for green witch fingers.
- Hold a pretzel rod by one end and dip into melted chocolate, coating about two-thirds. Let excess drip off, then place on prepared baking sheet. Repeat with remaining pretzels.
- While chocolate is still wet, press a sliced almond onto the tip of each pretzel rod, pointed end extending past the pretzel. Gently press to secure.
- Use a toothpick or small knife to press horizontal lines into the chocolate for knuckle wrinkles. Add vertical lines near the almond for realism.
- Place baking sheet in refrigerator for 10-15 minutes until chocolate is firm.
- Optional: Once set, add extra details with dark chocolate or black decorating gel for knuckle lines, and red gel at the base of the almond for a cuticle effect. Let set 5 minutes.
Notes
Work in small batches to prevent chocolate from thickening. Keep hands clean with a damp paper towel. White chocolate burns easily—use low power and stir often. Best eaten within 24 hours for maximum crunch. Store in an airtight container at room temperature for up to 3 days.
Nutrition
- Serving Size: 1 pretzel rod
- Calories: 180
- Sugar: 14
- Sodium: 200
- Fat: 9
- Saturated Fat: 5
- Carbohydrates: 24
- Fiber: 1
- Protein: 3
Keywords: Halloween treats, witch fingers, pretzel rods, easy Halloween recipe, no-bake dessert, white chocolate pretzels