I wasn’t trying to make the perfect pumpkin pie. Honestly, I’d stopped by my neighbor’s house on a random Tuesday afternoon to return a tupperware container she’d left at our place after a block party. She cracked the door open and this wave of warm, spiced air hit me—cinnamon, ginger, that deep earthy sweetness of roasting squash. I almost forgot why I was there. “Oh, I’m just testing out a pie for Thanksgiving,” she said, wiping flour on her jeans like it was no big deal. She wasn’t trying to impress anyone. She was just… making pie on a Tuesday. And I stood there in her doorway, completely frozen by the smell of something that felt like coming home.
That pie changed things for me. I mean, I’d had pumpkin pie before—canned filling, store-bought crust, the usual holiday table situation. But this was different. She’d roasted the pumpkin herself. She’d toasted the spices. The crust was this buttery, flaky thing that shattered when you pressed a fork into it. And she just shrugged and said, “It’s really not that hard.” Let me tell you, she was wrong about that part. It is that hard—if you’re aiming for perfection. But she made it look effortless, and that’s the kind of recipe you want in your back pocket.
So I went home, called her the next day, and begged for the method. She laughed and told me to just come over and watch next time. And I did. I sat on her kitchen stool, drinking coffee while she walked me through every step, not from a printed recipe card but from memory and feel. That’s the thing about the best recipes—they live in someone’s hands, not on a page. This homemade pumpkin pie from scratch is the one I’ve been making every fall since. It’s the one that makes people close their eyes when they take a bite. And yeah, maybe you’ve been there—standing in someone else’s kitchen, watching them do something ordinary that feels extraordinary, and thinking, I need to learn how to do that.
Why You’ll Love This Homemade Pumpkin Pie from Scratch
- Deep, Real Flavor: Roasting your own pumpkin and toasting fresh spices creates a flavor that canned filling just can’t touch. It’s richer, more complex, and honestly—more rewarding.
- Simple Ingredients, No Fuss: You don’t need anything weird. Butter, flour, sugar, eggs, cream, and a pumpkin. That’s basically it. Your pantry probably already has most of this.
- Perfect for Cozy Evenings: This pie is made for those nights when the weather turns cold, you’ve got a blanket wrapped around you, and you need something that feels like a hug on a plate.
- Impressive Without the Stress: People will think you spent hours slaving away. You’ll know the secret—it’s actually pretty straightforward once you get the hang of it.
- Customizable for Any Diet: Gluten-free crust? Dairy-free filling? No problem. I’ve tested those variations and they work beautifully.
What makes this recipe different from every other pumpkin pie out there is the technique. Most recipes skip the step of roasting the pumpkin and toasting the spices. That’s where the magic happens. The caramelization from roasting brings out the natural sugars in the pumpkin, and toasting the spices wakes up their essential oils. The result is a pie that tastes like fall distilled into a single bite. It’s not just another version of pumpkin pie—it’s the version you’ll want to make every single year.
What Ingredients You Will Need
This homemade pumpkin pie from scratch uses simple, honest ingredients to create something truly special. Most of these are pantry staples, but a few key items make all the difference in flavor and texture.
For the Pie Crust
- 1 ¼ cups all-purpose flour (160g) — I prefer King Arthur Flour for consistent results, but any brand works fine
- ½ teaspoon salt (3g) — fine sea salt, not kosher for this one
- 1 tablespoon granulated sugar (12g) — just a touch for tenderness
- ½ cup cold unsalted butter (113g), cut into small cubes — must be ice cold, straight from the fridge
- 3-4 tablespoons ice water (45-60ml) — add one tablespoon at a time, you might not need all of it
For the Pumpkin Filling
- 1 small sugar pumpkin (about 2-3 pounds) — look for pie pumpkins, not carving pumpkins; they’re sweeter and less watery
- ¾ cup packed light brown sugar (150g) — adds molasses notes and depth
- ¼ cup granulated sugar (50g) — balances the brown sugar’s intensity
- 2 large eggs, room temperature — cold eggs can seize the filling
- 1 large egg yolk — extra richness and a silky texture
- 1 ½ cups heavy cream (360ml) — don’t substitute milk here; the fat content is crucial for that velvety mouthfeel
- 1 teaspoon vanilla extract (5ml) — pure vanilla, not imitation
For the Spice Blend
- 1 ½ teaspoons ground cinnamon (3g) — I like to buy whole cinnamon sticks and grind them myself for the holidays
- ½ teaspoon ground ginger (1g) — adds warmth without heat
- ½ teaspoon freshly grated nutmeg (1g) — pre-ground is fine, but fresh makes a noticeable difference
- ¼ teaspoon ground cloves (0.5g) — go easy, cloves are potent
- ¼ teaspoon ground allspice (0.5g) — optional, but I love the extra layer it adds
- ¼ teaspoon salt (1.5g) — enhances all the other flavors
Equipment Needed
You don’t need a fancy kitchen to make this homemade pumpkin pie from scratch. Here’s what you’ll actually use:
- 9-inch pie dish — glass or ceramic works best for even heat distribution. I’ve got a Pyrex one that’s been in my family for years.
- Rolling pin — a French-style tapered pin gives you more control, but a standard rolling pin works fine. No rolling pin? A wine bottle works in a pinch—I’ve done it.
- Large mixing bowls — one for the crust, one for the filling
- Baking sheet — place the pie dish on this to catch any drips and help the bottom crust cook evenly
- Parchment paper — for blind baking the crust
- Pie weights or dried beans — I keep a bag of cheap dried beans just for this purpose
- Sharp knife or vegetable peeler — for prepping the pumpkin
- Food processor or pastry cutter — for making the crust. A food processor is faster, but a pastry cutter gives you more control
- Whisk — for smoothing out the filling
- Fine-mesh strainer — optional, but it catches any lumps in the filling for a perfectly smooth texture
- Cooling rack — lets air circulate around the pie so the bottom doesn’t get soggy
Preparation Method
Step 1: Roast the Pumpkin
Preheat your oven to 400°F (200°C). Cut the sugar pumpkin in half from stem to base. Scoop out the seeds and stringy pulp—save the seeds for roasting later if you want. Place the pumpkin halves cut-side down on a parchment-lined baking sheet. Roast for 35-45 minutes, until the flesh is tender when pierced with a fork. Let it cool until you can handle it, then scoop the flesh out. Puree it in a food processor until smooth. You’ll need about 1 ½ cups of puree for this recipe. Any extra freezes beautifully for later.
Step 2: Make the Pie Crust
In a food processor, pulse together the flour, salt, and sugar. Add the cold butter cubes and pulse until the mixture looks like coarse meal with some pea-sized butter pieces remaining. That’s important—those little butter chunks create flaky layers. Drizzle in 3 tablespoons of ice water and pulse until the dough just comes together when you squeeze it. If it’s too dry, add the remaining tablespoon of water. Turn the dough out onto a floured surface, shape it into a disk, wrap it in plastic, and refrigerate for at least 1 hour. I’ve skipped this step before and regretted it—the dough shrinks in the oven if it’s not properly chilled.
Step 3: Blind Bake the Crust
After the dough has chilled, roll it out on a floured surface to about 12 inches in diameter. Transfer it to your pie dish, gently pressing it into the corners. Trim the overhang to about ½ inch, then fold it under and crimp the edges. Prick the bottom of the crust all over with a fork. Line the crust with parchment paper and fill with pie weights or dried beans. Bake at 375°F (190°C) for 15 minutes. Remove the parchment and weights, then bake for another 8-10 minutes until the bottom looks dry and lightly golden. Set aside to cool slightly.
Step 4: Prepare the Filling
In a large bowl, whisk together the pumpkin puree, both sugars, eggs, and egg yolk until smooth. Add the heavy cream and vanilla, whisking gently—you don’t want to incorporate too much air. In a small bowl, mix together the cinnamon, ginger, nutmeg, cloves, allspice, and salt. Sprinkle the spice mixture over the pumpkin mixture and whisk until fully combined. The filling should be silky and fragrant. Taste it—yes, you can eat raw egg in small amounts—and adjust the spices if needed. I always add a pinch more cinnamon at this stage because I’m a sucker for it.
Step 5: Assemble and Bake
Reduce your oven temperature to 350°F (175°C). Place the blind-baked crust on a baking sheet. Pour the filling into the crust—it should come almost to the top edge. Carefully transfer the baking sheet to the oven. Bake for 50-60 minutes, until the edges are set but the center still jiggles slightly when you gently shake the pie. It will continue to set as it cools. If the crust edges are browning too quickly, loosely cover them with foil or a pie shield after about 30 minutes.
Step 6: Cool and Serve
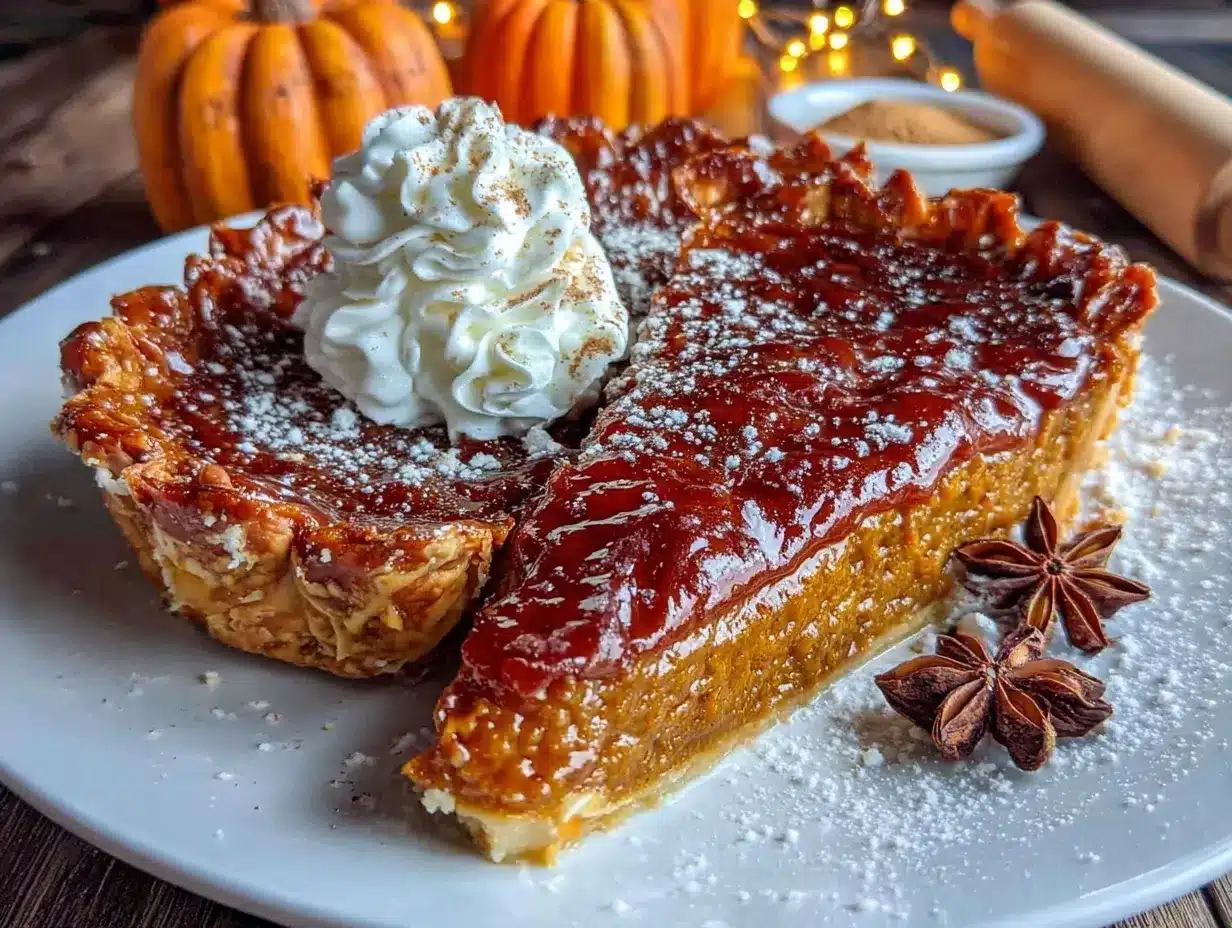
Let the pie cool on a wire rack for at least 2 hours at room temperature. Then refrigerate for at least 4 hours, preferably overnight. This step is non-negotiable—the filling needs time to fully set and develop its flavor. Serve cold or at room temperature, with a generous dollop of whipped cream.
Cooking Tips & Techniques
I’ve made this homemade pumpkin pie from scratch more times than I can count, and I’ve learned a few things the hard way. Here’s what I wish someone had told me:
Don’t skip roasting the pumpkin. I know it’s tempting to use canned puree—I’ve done it too. But roasting your own pumpkin concentrates the flavor and removes excess moisture. Canned pumpkin can sometimes be watery, which leads to a soggy pie. If you’re using canned, blot it with paper towels before mixing.
Keep everything cold for the crust. Warm butter melts into the flour instead of creating those flaky pockets. If your kitchen is warm, pop the flour and bowl in the freezer for 10 minutes before starting. I once made a crust on a hot August day and it turned into a greasy mess—lesson learned.
Watch the baking time carefully. Every oven is different. Start checking your pie at the 45-minute mark. The center should jiggle like Jell-O, not slosh like soup. Overbaking causes cracks and a rubbery texture. Underbaking leaves you with a runny filling. That gentle jiggle is your sweet spot.
Let it cool completely. I know the smell is intoxicating and you want to dig in immediately. But cutting into a warm pumpkin pie is a recipe for disaster—the filling will spill out and the structure collapses. Patience pays off here.
Variations & Adaptations
One of the best things about this homemade pumpkin pie from scratch is how adaptable it is. Here are some variations I’ve tried and loved:
Gluten-Free Version
Substitute the all-purpose flour with a 1:1 gluten-free baking flour blend. I’ve had great results with Bob’s Red Mill Gluten-Free 1-to-1 Baking Flour. The crust will be a bit more delicate, so handle it gently. Everything else stays the same.
Dairy-Free Version
Replace the butter in the crust with cold coconut oil or vegan butter. Use full-fat coconut cream instead of heavy cream in the filling. The coconut flavor is subtle and actually complements the pumpkin beautifully.
Spiced-Up Variation
Add ¼ teaspoon of cardamom and a pinch of black pepper to the spice blend. The pepper adds a subtle warmth that doesn’t read as spicy—it just makes the other spices pop. I tried this on a whim last Thanksgiving and it was a hit.
Maple Pumpkin Pie
Replace the brown sugar with ½ cup maple syrup and reduce the heavy cream to 1 cup. The maple flavor pairs gorgeously with the roasted pumpkin. Just note that the filling will be slightly softer, so bake it a few extra minutes.
Serving & Storage Suggestions
This homemade pumpkin pie from scratch is best served cold or at room temperature. I prefer it straight from the fridge with a mountain of lightly sweetened whipped cream. The contrast between the cold, creamy filling and the flaky crust is pure perfection.
For a truly cozy presentation, serve each slice with a drizzle of warm caramel sauce and a sprinkle of cinnamon. It turns an already comforting dessert into something downright decadent.
Storage: Cover the pie loosely with plastic wrap or foil and refrigerate for up to 4 days. The flavor actually improves after the first day as the spices meld together. I’ve never had leftovers last longer than that, but theoretically it keeps fine.
Freezing: You can freeze the fully baked and cooled pie for up to 2 months. Wrap it tightly in plastic wrap, then a layer of foil. Thaw overnight in the refrigerator before serving. Don’t freeze the unbaked filling—the texture changes and gets grainy.
Reheating: If you prefer warm pie, pop individual slices in a 300°F (150°C) oven for 10 minutes. The microwave works in a pinch but can make the crust soggy.
Nutritional Information & Benefits
Per slice (based on 8 servings): Approximately 380 calories, 22g fat, 42g carbohydrates, 6g protein, 28g sugar, 3g fiber. These are estimates and will vary based on specific ingredients used.
Pumpkin is packed with vitamin A (over 200% of your daily needs per serving), which supports eye health and immune function. The fiber in pumpkin also helps with digestion and keeps you feeling full longer. The spices—cinnamon, ginger, nutmeg—aren’t just for flavor; they have anti-inflammatory properties and can help stabilize blood sugar.
This recipe is naturally vegetarian and can be made gluten-free or dairy-free with the substitutions mentioned above. It contains dairy, eggs, and gluten in its standard form. If you’re serving guests with allergies, the variations section has you covered.
Conclusion
This homemade pumpkin pie from scratch is more than just a dessert—it’s a ritual. It’s the smell that fills your kitchen on a cold November afternoon. It’s the slice you save for yourself after everyone else has gone to bed. It’s the recipe that makes people ask, “Can you bring the pie this year?”
I’ve been making this pie every fall since that Tuesday afternoon in my neighbor’s kitchen, and it never gets old. Each time I roast a pumpkin and toast the spices, I feel connected to something bigger—generations of cooks who figured out that simple ingredients, treated with care, can become something extraordinary.
I’d love to hear how your pie turns out. Did you add your own twist? Did your family fight over the last slice? Drop a comment below and let me know. And if you’re looking for more cozy fall recipes, you might enjoy my maple pecan tart or apple cider donuts—both are perfect for those crisp autumn weekends.
Now go make some pie. You’ve got this.
Frequently Asked Questions
Can I use canned pumpkin instead of roasting a fresh one?
Absolutely. If you’re short on time, canned pumpkin puree works perfectly. Just make sure you’re buying 100% pure pumpkin, not pumpkin pie filling (which has sugar and spices already added). Blot the puree with paper towels to remove excess moisture before using.
Why did my pie crust shrink during baking?
This usually happens when the dough isn’t chilled enough before baking. The butter melts too quickly and the gluten tightens up. Make sure you refrigerate the dough for at least an hour, and don’t stretch it when fitting it into the pie dish—gently press it in instead.
How do I know when the pie is fully baked?
The edges should be set and slightly puffed, while the center should have a gentle jiggle when you shake the pie. A knife inserted near the center should come out mostly clean. The internal temperature should reach 175°F (80°C) if you’re using a thermometer.
Can I make this pie ahead of time?
Yes! In fact, I recommend it. The pie needs at least 4 hours to set in the fridge, but making it a day ahead is even better. The flavors meld and deepen overnight. Just cover it loosely and refrigerate until you’re ready to serve.
What’s the best way to get clean slices?
Use a sharp chef’s knife and wipe it clean between each cut. For the first slice, dip the knife in hot water and dry it off before cutting. This helps the knife glide through the crust without dragging the filling.
Pin This Recipe!
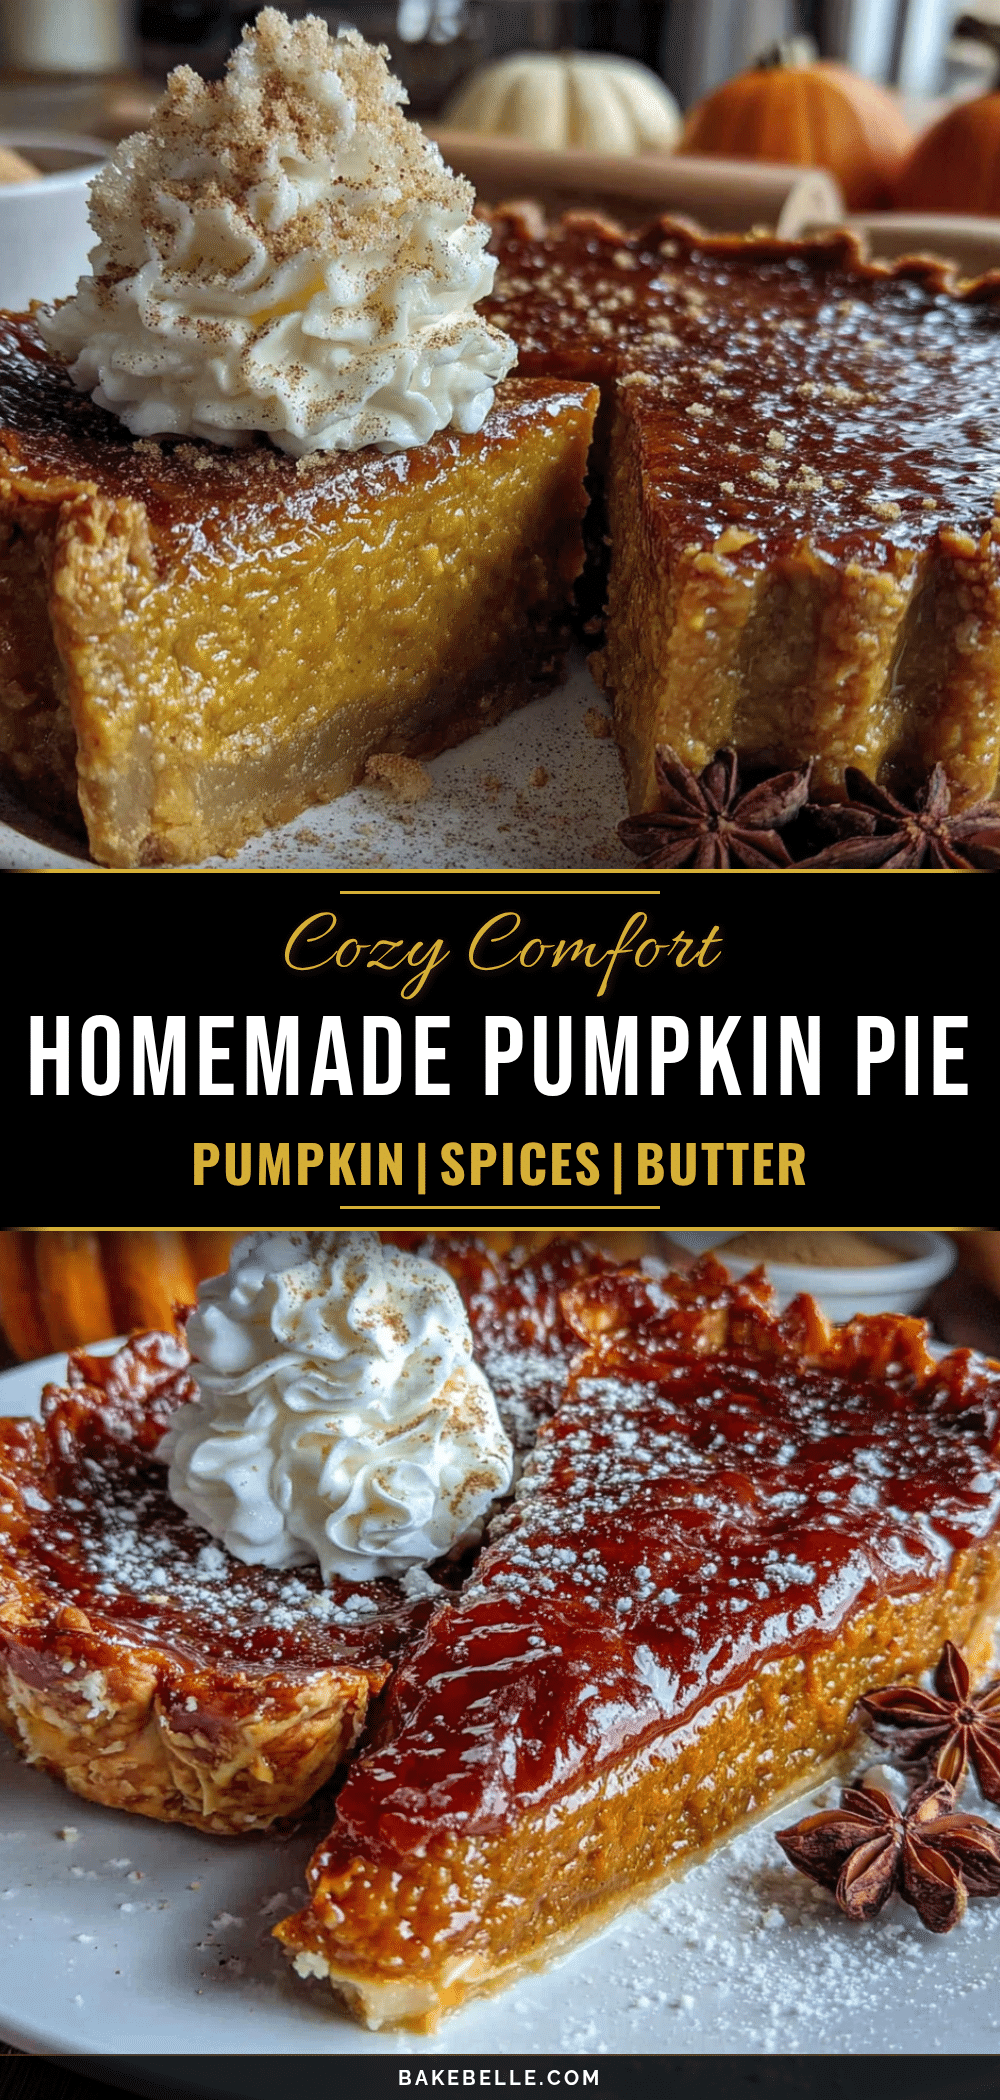
Homemade Pumpkin Pie from Scratch – Easy & Cozy
This homemade pumpkin pie from scratch features a roasted sugar pumpkin, toasted spices, and a buttery, flaky crust. It’s a cozy, impressive dessert that tastes like fall in every bite.
- Prep Time: 30 minutes
- Cook Time: 1 hour 35 minutes
- Total Time: 2 hours 5 minutes (plus chilling time)
- Yield: 8 servings 1x
- Category: Dessert
- Cuisine: American
Ingredients
- 1 ¼ cups all-purpose flour (160g)
- ½ teaspoon salt (3g)
- 1 tablespoon granulated sugar (12g)
- ½ cup cold unsalted butter (113g), cut into small cubes
- 3–4 tablespoons ice water (45-60ml)
- 1 small sugar pumpkin (about 2–3 pounds)
- ¾ cup packed light brown sugar (150g)
- ¼ cup granulated sugar (50g)
- 2 large eggs, room temperature
- 1 large egg yolk
- 1 ½ cups heavy cream (360ml)
- 1 teaspoon vanilla extract (5ml)
- 1 ½ teaspoons ground cinnamon (3g)
- ½ teaspoon ground ginger (1g)
- ½ teaspoon freshly grated nutmeg (1g)
- ¼ teaspoon ground cloves (0.5g)
- ¼ teaspoon ground allspice (0.5g)
- ¼ teaspoon salt (1.5g)
Instructions
- Preheat oven to 400°F (200°C). Cut sugar pumpkin in half, scoop out seeds and pulp. Place cut-side down on parchment-lined baking sheet. Roast 35-45 minutes until tender. Cool, scoop flesh, and puree in food processor until smooth. Measure 1 ½ cups puree.
- In a food processor, pulse flour, salt, and sugar. Add cold butter cubes and pulse until mixture resembles coarse meal with pea-sized butter pieces. Drizzle in 3 tablespoons ice water and pulse until dough comes together. Add more water if needed. Shape into a disk, wrap in plastic, and refrigerate at least 1 hour.
- Roll out chilled dough on floured surface to 12-inch diameter. Transfer to 9-inch pie dish, press into corners, trim overhang to ½ inch, fold under and crimp edges. Prick bottom with fork. Line with parchment and fill with pie weights. Bake at 375°F (190°C) for 15 minutes. Remove parchment and weights, bake 8-10 minutes more until lightly golden. Cool slightly.
- In a large bowl, whisk together pumpkin puree, both sugars, eggs, and egg yolk until smooth. Add heavy cream and vanilla, whisk gently. In a small bowl, mix cinnamon, ginger, nutmeg, cloves, allspice, and salt. Sprinkle over pumpkin mixture and whisk until combined.
- Reduce oven to 350°F (175°C). Place blind-baked crust on baking sheet. Pour filling into crust. Bake 50-60 minutes until edges are set but center jiggles slightly. If crust edges brown too quickly, cover with foil after 30 minutes.
- Cool pie on wire rack for at least 2 hours at room temperature. Refrigerate at least 4 hours, preferably overnight. Serve cold or at room temperature with whipped cream.
Notes
Don’t skip roasting the pumpkin—it concentrates flavor and removes excess moisture. Keep all crust ingredients cold for flaky results. Watch baking time carefully; the center should jiggle like Jell-O when done. Let pie cool completely before slicing to avoid runny filling. For gluten-free, use 1:1 gluten-free flour blend. For dairy-free, use cold coconut oil or vegan butter in crust and full-fat coconut cream in filling.
Nutrition
- Serving Size: 1 slice
- Calories: 380
- Sugar: 28
- Sodium: 300
- Fat: 22
- Saturated Fat: 13
- Carbohydrates: 42
- Fiber: 3
- Protein: 6
Keywords: pumpkin pie, homemade pumpkin pie, from scratch, fall dessert, Thanksgiving pie, roasted pumpkin pie