Introduction
My husband had claimed to hate pumpkin pie for our entire marriage. Twelve years. Every Thanksgiving, he’d politely pass the dessert plate with a tight smile and reach for the apple crisp instead. I never pushed it—honestly, I figured more pie for me. Then last October, I made a batch of these gluten-free pumpkin pie bars on a random Tuesday, mostly because I had half a can of pumpkin staring at me from the fridge and a kid begging for “something orange and sweet.” I slid the pan onto the counter to cool and walked away to answer the phone. When I came back ten minutes later, there he was. Standing at the counter. Fork in hand. Eating straight from the pan. “These aren’t pumpkin pie,” he said, mouth half-full. “These are better.” And that, my friends, is how a skeptic becomes a believer. Maybe you’ve got a pumpkin pie hater in your house too. These bars might just change their mind.
The best part? These bars came together in the chaos of a school night with a toddler clinging to my leg and the dog barking at the mailman. I forgot to grease the pan properly. I used the wrong measuring cup for the coconut oil. And they still turned out absolutely perfect. That’s the kind of recipe worth keeping around. The kind that forgives your mistakes and still delivers something beautiful.
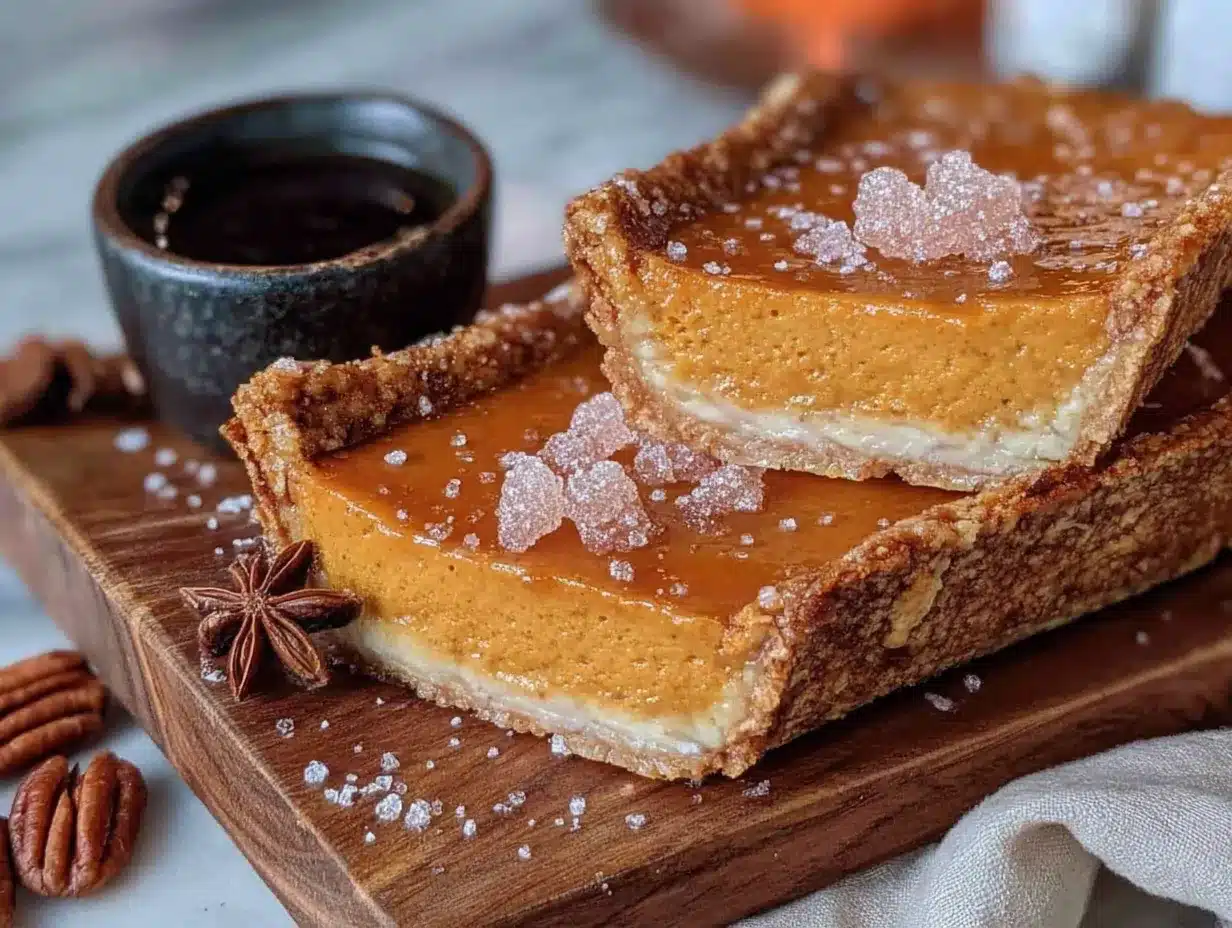
These gluten-free pumpkin pie bars have become our family’s official fall dessert. They show up at soccer parties, classroom celebrations, and cozy Sunday dinners. They travel well, freeze beautifully, and somehow manage to be both indulgent and made with ingredients I actually feel good about serving. The crust is buttery and crisp. The filling is silky and spiced just right. And the whole thing comes together in under an hour with zero special equipment. If you’ve been hunting for the perfect gluten-free pumpkin dessert that doesn’t taste like a compromise, you just found it.
Why You’ll Love This Recipe
Let me tell you why these bars have earned a permanent spot in my recipe binder. I tested six different versions before landing on this one. The first batch was too watery. The second had a crust that crumbled into dust. The third was actually pretty good, but my kids said it needed “more of the warm spice feeling.” So I went back to the kitchen and kept tweaking until every single person at my table—including that former pumpkin pie skeptic—asked for seconds.
- Quick & Easy: These bars come together in about 45 minutes, with only 10 minutes of active prep. The oven does most of the work while you handle the rest of your evening chaos.
- Simple Ingredients: You probably already have most of these in your pantry. No weird flours, no obscure extracts, no trips to three different stores.
- Perfect for Family Gatherings: These bars serve a crowd without any fuss. Cut them small for a buffet or generous for a proper dessert plate.
- Crowd-Pleaser: I’ve served these to gluten-free friends and gluten-loving relatives alike. The pan empties every single time. No one guesses they’re gluten-free unless I tell them.
- Kid-Approved: My own children beg for these bars. So do their friends. The texture is creamy and satisfying without being goopy, and the spice level is warm without being overwhelming.
- Budget-Friendly: Canned pumpkin is one of the most affordable ingredients in the baking aisle. These bars cost a fraction of what you’d pay for a specialty bakery dessert, and they taste better anyway.
What makes this version different from every other pumpkin bar recipe out there? It’s the crust-to-filling ratio. I spent a ridiculous amount of time getting this exactly right—enough buttery, slightly sweet crust to hold the filling without overwhelming it, and a filling that sets up firm enough to slice cleanly but stays luxuriously creamy on the tongue. The secret is a combination of coconut oil and butter in the crust, plus a touch of cornstarch in the filling that gives it that perfect sliceable texture without any weird aftertaste. This isn’t just another pumpkin bar recipe. This is the one you’ll make every single fall.
What Ingredients You Will Need
This recipe uses simple, honest ingredients to create something that tastes far more complicated than it actually is. Here’s what you’ll need to grab from your pantry:
For the Crust:
- 1 ½ cups gluten-free all-purpose flour blend (I recommend King Arthur Measure for Measure or Bob’s Red Mill 1-to-1)
- ½ cup unsalted butter, cold and cut into small cubes
- ¼ cup coconut oil, solid (adds flakiness and helps the crust hold together)
- ¼ cup granulated sugar
- ¼ teaspoon salt
- 2-3 tablespoons ice water
For the Pumpkin Filling:
- 1 can (15 ounces) pure pumpkin puree (not pumpkin pie filling—make sure you grab the plain stuff)
- ¾ cup packed brown sugar (light or dark both work; dark gives deeper flavor)
- 2 large eggs, room temperature
- 1 cup heavy cream (or full-fat coconut milk for dairy-free)
- 2 teaspoons pumpkin pie spice (or make your own: 1 teaspoon cinnamon, ½ teaspoon ginger, ¼ teaspoon nutmeg, ¼ teaspoon cloves)
- 1 teaspoon vanilla extract
- 2 tablespoons cornstarch (the secret to a sliceable filling)
- ¼ teaspoon salt
For Topping (Optional but Recommended):
- Whipped cream or coconut whipped cream
- Ground cinnamon for dusting
A few ingredient notes from my kitchen to yours. That gluten-free flour blend matters—I’ve tested this with three different brands, and the blends with xanthan gum built in work best. If your blend doesn’t include xanthan gum, add ¼ teaspoon to the crust mixture. For the pumpkin, stick with Libby’s or your store brand if it’s pure pumpkin. The texture varies slightly between brands, but any pure pumpkin puree will work here. And please don’t skip the cornstarch. I tried this with arrowroot powder once, and the filling never fully set. We ate it with spoons straight from the pan, which was actually delicious, but not exactly what I was going for.
Equipment Needed
You don’t need a fancy kitchen to make these bars. Here’s what I used:
- 9×9-inch square baking pan (an 8×8 works too, your bars will just be slightly thicker)
- Parchment paper (absolute lifesaver for easy removal)
- Mixing bowls (one medium, one large)
- Pastry cutter or two forks (for cutting butter into flour)
- Whisk
- Spatula
- Measuring cups and spoons
- Rolling pin (or a flat-bottomed glass works in a pinch)
If you don’t have a pastry cutter, honestly, just use your fingertips. Rub the butter and coconut oil into the flour mixture until it looks like coarse sand. It’s messy and satisfying and works just as well. For the pan, glass or metal both work fine. I actually prefer metal because it conducts heat more evenly for the crust, but my grandmother’s glass baking dish has never let me down either. Line that pan with parchment paper, leaving some overhang on two sides. You’ll thank me later when you lift the whole beautiful slab of bars out in one piece.
Preparation Method
Let me walk you through this step by step. I’ve made this recipe more times than I can count, so I know exactly where things can go sideways.
Step 1: Preheat and Prep
Preheat your oven to 350°F (175°C). Line your 9×9 baking pan with parchment paper, leaving about 2 inches of overhang on two opposite sides. This creates little handles for lifting the bars out later.
Step 2: Make the Crust
In a medium bowl, whisk together the gluten-free flour, sugar, and salt. Add the cold butter cubes and solid coconut oil. Using a pastry cutter or your fingertips, work the fats into the flour until the mixture looks like coarse meal with some pea-sized butter pieces remaining. Those little butter chunks are what create a flaky, tender crust—don’t overwork them.
Sprinkle the ice water over the mixture, one tablespoon at a time, stirring with a fork after each addition. Stop when the dough just holds together when you squeeze a handful. You might not need all the water. Gluten-free doughs can be finicky, so trust your hands more than the recipe here.
Step 3: Press and Par-Bake the Crust
Transfer the dough to your prepared pan. Press it evenly into the bottom and about ½ inch up the sides. I use the bottom of a measuring cup to get it really even. Prick the bottom all over with a fork (this prevents bubbles). Bake for 15 minutes until the edges are just starting to turn golden. Set aside to cool slightly while you make the filling.
Step 4: Make the Filling
In a large bowl, whisk together the pumpkin puree and brown sugar until smooth. Add the eggs one at a time, whisking well after each. Pour in the heavy cream and vanilla, whisking until everything is beautifully combined.
In a small separate bowl, stir together the pumpkin pie spice, cornstarch, and salt. This prevents clumps. Add the dry mixture to the wet mixture and whisk until smooth and glossy. The filling should be thick but pourable—if it looks too thick, add another tablespoon of cream.
Step 5: Assemble and Bake
Pour the filling over the par-baked crust. Spread it evenly with a spatula. Bake at 350°F for 30-35 minutes. The edges should be set and slightly puffed, but the center will still jiggle slightly when you gently shake the pan. That’s exactly what you want—it will continue to set as it cools.
Step 6: Cool and Chill
Place the pan on a wire rack and let it cool completely at room temperature, about 1 hour. Then transfer to the refrigerator and chill for at least 2 hours, preferably 4. This is the hardest part, I know. But this chilling time is what gives you those clean, beautiful slices. If you cut into them warm, you’ll get delicious pumpkin soup with crust croutons. Still tasty, but not the bar experience we’re after.
Step 7: Slice and Serve
Once completely chilled, use the parchment overhang to lift the entire slab out of the pan. Place on a cutting board and use a sharp knife to cut into squares. Wipe the knife clean between cuts for the prettiest bars. Serve cold or at room temperature with a dollop of whipped cream and a dusting of cinnamon.
Cooking Tips & Techniques
After making these bars more times than I care to admit, I’ve collected a few hard-won lessons. Let me save you some trouble.
Don’t Skip the Par-Bake. I learned this one the hard way. The first time I made these, I poured the filling directly over raw crust. The bottom turned into a soggy, sad mess. Par-baking gives the crust a head start so it stays crisp and sturdy under the weight of the filling. Fifteen minutes makes all the difference.
Room Temperature Eggs Matter. Cold eggs can seize up your filling and create a slightly lumpy texture. Leave your eggs on the counter for 30 minutes before starting, or place them in a bowl of warm water for 5 minutes. I usually forget until the last minute, so the warm water trick is my go-to.
Watch Your Oven. Every oven runs differently. My old oven would bake these in exactly 28 minutes. My new one takes 34. Start checking at the 25-minute mark. The edges should be set and the center should wobble like Jell-O, not slosh like soup. If the top starts browning too quickly, tent loosely with foil for the last 10 minutes.
Patience with Chilling. I know you want to eat these immediately. I know. But trust me on this. The filling needs time to fully set up. I once tried to speed things up with 30 minutes in the freezer and ended up with unevenly set bars that fell apart. The refrigerator is your friend here. Make these the day before you need them and you’ll be the hero of your own kitchen.
Clean Cuts. Use a sharp knife and wipe it clean between each cut. For the absolute prettiest bars, run the knife under hot water and dry it before slicing. The warmth helps the knife glide through the filling without dragging.
Variations & Adaptations
This recipe is wonderfully flexible. Here are some ways I’ve adapted it for different needs and cravings.
Dairy-Free Version: Substitute the butter in the crust with additional coconut oil (use ¾ cup total coconut oil, solid). Use full-fat canned coconut milk instead of heavy cream. The flavor changes slightly—more coconutty, which actually pairs beautifully with pumpkin—but the texture stays remarkably similar. My dairy-sensitive nephew devours these.
Lower Sugar Option: Reduce the brown sugar to ½ cup and add 2 tablespoons of maple syrup. The bars will be slightly less sweet but the maple adds a lovely depth that complements the pumpkin spice. My husband actually prefers this version now.
Spice It Up: Add ¼ teaspoon black pepper and a pinch of cayenne to the filling for a savory-sweet twist that adults love. It sounds strange, I know, but pepper has a way of making pumpkin flavor deeper and more complex. Try it once and you’ll understand.
Nutty Crust: Replace ¼ cup of the gluten-free flour with finely ground almond flour or pecans. Toast the nuts first for extra flavor. This adds richness and a slightly different texture to the crust. Just note that this version won’t be nut-free anymore, so keep that in mind for school events.
Mini Bar Bites: Press the crust into a mini muffin tin (greased well) and fill with about 1 tablespoon of filling each. Bake for 15-18 minutes. These are perfect for parties and lunchboxes. My kids call them “pumpkin bites” and they disappear in minutes.
Serving & Storage Suggestions
These bars are remarkably versatile when it comes to serving and storing. Here’s what I’ve learned from making them for every possible occasion.
Serving Temperature: I prefer these bars cold, straight from the fridge. The filling is firm and almost cheesecake-like in texture. But they’re also lovely at room temperature, especially if you’re serving them alongside hot coffee or apple cider. If you want to serve them warm, microwave individual bars for about 10 seconds—just enough to take the chill off without melting the structure.
Presentation Ideas: A dollop of whipped cream and a light dusting of cinnamon is classic and beautiful. For something fancier, drizzle with caramel sauce and sprinkle with toasted pepitas. For holiday gatherings, I arrange them on a wooden board with fresh cranberries and rosemary sprigs scattered around. It looks like a magazine spread with zero extra effort.
What to Serve Alongside: These bars pair beautifully with hot coffee, spiced chai, or a tall glass of cold milk. For a full fall dessert spread, serve them alongside apple crisp, pecan pie bars, or a simple vanilla ice cream.
Storage Instructions: Store leftover bars in an airtight container in the refrigerator for up to 5 days. Layer them with parchment paper between stacks to prevent sticking. The flavors actually deepen after a day or two, so these are a fantastic make-ahead dessert.
Freezer Instructions: These bars freeze like champions. Place the fully cooled and sliced bars on a baking sheet and freeze until solid, about 2 hours. Transfer to a freezer-safe container with parchment between layers. They’ll keep for up to 3 months. Thaw overnight in the refrigerator or at room temperature for about 30 minutes. I always keep a stash in my freezer for unexpected guests or those days when you just need something sweet.
Nutritional Information & Benefits
I’m not a nutritionist, but I can tell you what I know about these ingredients. One bar (based on 16 servings) contains approximately:
- Calories: 220
- Fat: 14g
- Carbohydrates: 24g
- Fiber: 2g
- Sugar: 14g
- Protein: 3g
Pumpkin is the real star here nutritionally. It’s packed with vitamin A (one serving gives you over 100% of your daily needs), fiber, and antioxidants. The beta-carotene in pumpkin supports eye health and immune function, which feels especially good during cold and flu season. The eggs add protein and healthy fats that help keep you satisfied.
These bars are naturally gluten-free (obviously), and can easily be made dairy-free with the substitutions I mentioned. They’re also nut-free if you stick with the original crust recipe, making them safe for school and party settings. If you’re watching your sugar intake, the lower sugar variation works beautifully without sacrificing flavor.
I love that I can serve these to my family and feel genuinely good about it. They’re a dessert, sure, but they’re made with real food ingredients that nourish as well as delight. That’s my sweet spot as a home cook—treats that don’t come with a side of guilt.
Conclusion
These gluten-free pumpkin pie bars have become more than just a recipe in my house. They’re the dessert that converted my pumpkin-pie-hating husband. They’re the treat I bring to soccer parties and potlucks. They’re the thing my kids request for their birthday celebrations instead of cake. And honestly? I get it. There’s something about that buttery crust, that silky spiced filling, that perfect ratio of crunch to creaminess that just works.
I hope you’ll make these bars your own. Maybe you’ll keep them exactly as written, or maybe you’ll try the dairy-free version, or add extra spice, or cut them into tiny bite-sized squares for a party. That’s the beauty of a good recipe—it gives you a solid foundation and then trusts you to make it yours. If you do try them, I’d love to hear how it goes. Drop a comment below and tell me about your pumpkin bar adventures. Did your family love them? Did you try a fun variation? Did you catch someone eating straight from the pan?
Happy baking, friends. Here’s to warm kitchens, full bellies, and the simple joy of a really good dessert.
Frequently Asked Questions
Can I use fresh pumpkin instead of canned?
You absolutely can, but you’ll need to cook and puree it first, then strain it to remove excess water. Fresh pumpkin tends to be more watery than canned, so spread the puree on a paper towel-lined plate for about 15 minutes to absorb some of that moisture. Otherwise, your filling might end up too loose. I’ve done it both ways, and honestly, canned pumpkin gives more consistent results. No shame in taking the easy route here.
Can I make these bars vegan?
I haven’t tested a fully vegan version, but I’d recommend using flax eggs (2 tablespoons ground flaxseed mixed with 6 tablespoons water, let sit for 5 minutes) instead of regular eggs, and full-fat coconut cream instead of heavy cream. The texture will be slightly different—a bit less firm—but the flavor should still be delicious. If you try it, let me know how it goes in the comments!
Why did my crust turn out soggy?
This usually happens for one of two reasons. Either the crust wasn’t par-baked long enough, or the filling was poured in while the crust was still hot. Let the par-baked crust cool for at least 10 minutes before adding the filling. Also, make sure your pumpkin puree isn’t too watery—if you see liquid pooling on top of your opened can, stir it back in thoroughly before measuring.
Can I use a different size pan?
Sure! A 9×13 pan will give you thinner bars that bake faster (check at 20 minutes). An 8×8 pan will give you thicker bars that need a few extra minutes in the oven. Just keep an eye on them and use the jiggle test to determine doneness. The filling amounts stay the same regardless of pan size.
How do I know when the bars are fully baked?
The edges should be set and slightly puffed, and the center should jiggle like firm Jell-O when you gently shake the pan. If the center sloshes like liquid, it needs more time. If the entire pan is firm and doesn’t jiggle at all, you’ve overbaked it (still delicious, just slightly denser). A toothpick inserted near the center should come out mostly clean with just a few moist crumbs attached.
Pin This Recipe!
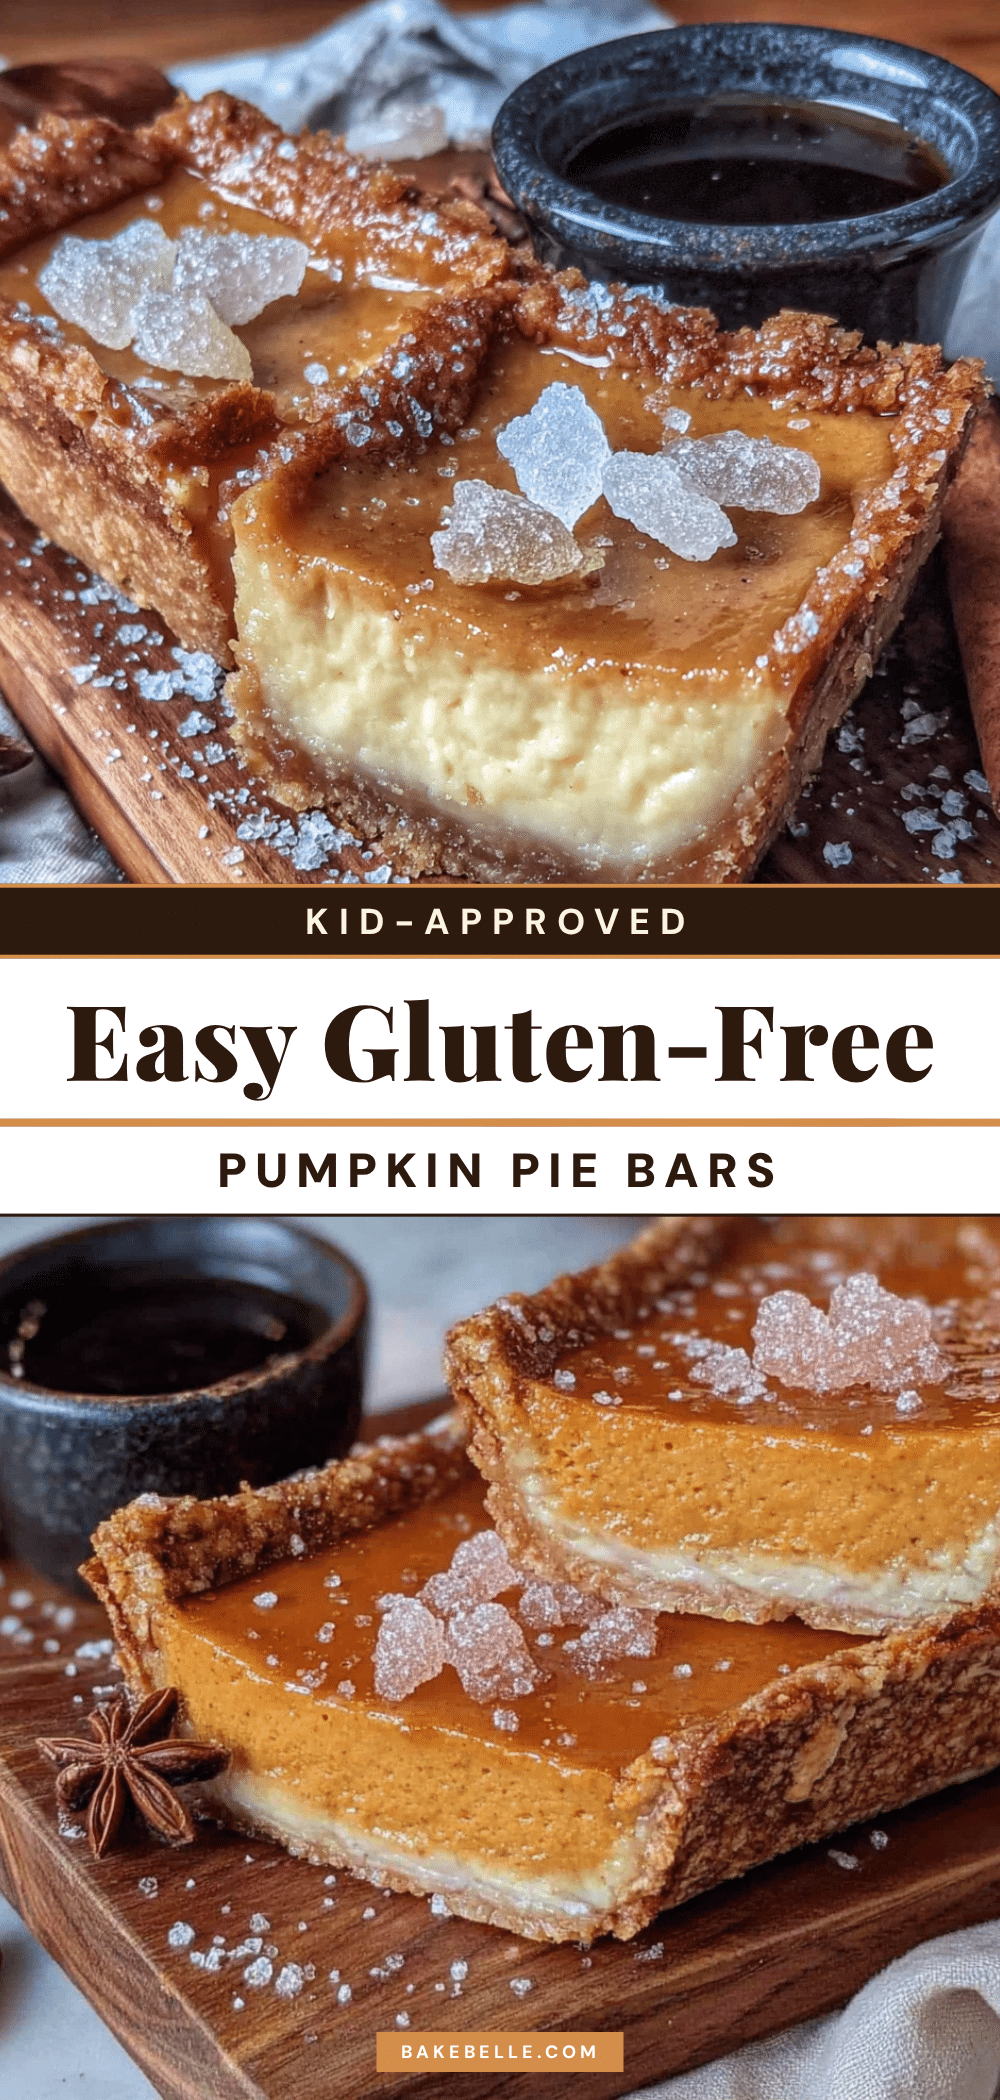
Best Easy Gluten-Free Pumpkin Pie Bars (Kid-Approved)
These gluten-free pumpkin pie bars feature a buttery, crisp crust and a silky, spiced filling that sets up perfectly for clean slices. They’re quick to make, kid-approved, and have converted even the biggest pumpkin pie skeptics.
- Prep Time: 10 minutes
- Cook Time: 30 minutes
- Total Time: 45 minutes
- Yield: 16 servings 1x
- Category: Dessert
- Cuisine: American
Ingredients
- 1 ½ cups gluten-free all-purpose flour blend (e.g., King Arthur Measure for Measure or Bob’s Red Mill 1-to-1)
- ½ cup unsalted butter, cold and cut into small cubes
- ¼ cup coconut oil, solid
- ¼ cup granulated sugar
- ¼ teaspoon salt
- 2–3 tablespoons ice water
- 1 can (15 ounces) pure pumpkin puree (not pumpkin pie filling)
- ¾ cup packed brown sugar (light or dark)
- 2 large eggs, room temperature
- 1 cup heavy cream (or full-fat coconut milk for dairy-free)
- 2 teaspoons pumpkin pie spice (or homemade: 1 tsp cinnamon, ½ tsp ginger, ¼ tsp nutmeg, ¼ tsp cloves)
- 1 teaspoon vanilla extract
- 2 tablespoons cornstarch
- ¼ teaspoon salt
- Whipped cream or coconut whipped cream (optional, for topping)
- Ground cinnamon for dusting (optional)
Instructions
- Preheat oven to 350°F (175°C). Line a 9×9-inch baking pan with parchment paper, leaving about 2 inches of overhang on two opposite sides.
- Make the crust: In a medium bowl, whisk together gluten-free flour, sugar, and salt. Add cold butter cubes and solid coconut oil. Using a pastry cutter or fingertips, work the fats into the flour until the mixture resembles coarse meal with some pea-sized butter pieces remaining.
- Sprinkle ice water over the mixture, one tablespoon at a time, stirring with a fork after each addition. Stop when the dough just holds together when squeezed.
- Transfer dough to the prepared pan. Press evenly into the bottom and about ½ inch up the sides. Prick the bottom all over with a fork. Bake for 15 minutes until edges are just starting to turn golden. Set aside to cool slightly.
- Make the filling: In a large bowl, whisk together pumpkin puree and brown sugar until smooth. Add eggs one at a time, whisking well after each. Pour in heavy cream and vanilla, whisking until combined.
- In a small bowl, stir together pumpkin pie spice, cornstarch, and salt. Add to the wet mixture and whisk until smooth and glossy.
- Pour the filling over the par-baked crust. Spread evenly with a spatula. Bake at 350°F for 30-35 minutes. The edges should be set and slightly puffed, but the center will still jiggle slightly when shaken.
- Place the pan on a wire rack and cool completely at room temperature, about 1 hour. Then refrigerate for at least 2 hours, preferably 4 hours.
- Once chilled, use the parchment overhang to lift the slab out of the pan. Place on a cutting board and cut into squares with a sharp knife, wiping the knife clean between cuts. Serve cold or at room temperature with whipped cream and a dusting of cinnamon.
Notes
Don’t skip the par-bake—it prevents a soggy crust. Room temperature eggs ensure a smooth filling. For clean cuts, use a sharp knife and wipe it clean between slices. The bars need at least 2 hours of chilling to set properly.
Nutrition
- Serving Size: 1 bar
- Calories: 220
- Sugar: 14
- Sodium: 180
- Fat: 14
- Saturated Fat: 8
- Carbohydrates: 24
- Fiber: 2
- Protein: 3
Keywords: gluten-free pumpkin bars, pumpkin pie bars, gluten-free dessert, fall dessert, pumpkin dessert, kid-approved, easy pumpkin bars