I wasn’t expecting cooking advice from my accountant, but there I was, hunched over my kitchen counter with a mound of receipts spread out like a weird paper tablecloth. Tax season is never fun, and I was grumbling about how long everything was taking. Mr. Henderson, a quiet man in his sixties who always smells faintly of peppermint, paused mid-calculation and said, “You look like you need a meal that doesn’t need babysitting. Something you can throw in one pan and forget about for a bit.” Then, completely out of the blue, he described this cheesy ground beef and rice skillet. He talked about the way the rice soaks up all the beefy, tomatoey goodness, and how the cheese on top gets all bubbly and golden. I honestly almost dropped my calculator. Who knew the man who does my taxes had such strong opinions about dinner?
I scribbled his instructions on the back of an envelope—right between “charitable donations” and “mileage.” That night, tired and hungry, I made it. And let me tell you, it was the best thing that happened to me all week. The whole house smelled incredible, like pure comfort. I mean, it wasn’t fancy, but it was exactly what I needed. Maybe you’ve been there, staring into your fridge with zero energy left to cook something complicated. This is the recipe for those nights. It’s the kind of meal that makes you feel like you have your life together, even when you’re surrounded by paperwork and last year’s W-2s. I’ve been making this cheesy ground beef and rice skillet ever since, tweaking it just a little, and it has never let me down.
Why You’ll Love This Recipe
This isn’t just another weeknight dinner idea. This is the one that gets written on a sticky note and stuck to your fridge. After testing this recipe more times than I can count (and serving it to a very critical group of friends), I can promise you it delivers on every single front. It’s the definition of a crowd-pleaser.
- One-Pan Wonder: Less cleanup means more time with your guests. Everything cooks in a single skillet, from browning the beef to simmering the rice to melting the cheese. Your sink will thank you.
- Simple, Budget-Friendly Ingredients: You likely have most of these in your pantry right now. Ground beef, rice, canned tomatoes, and cheese—no fancy grocery store trips required. It’s a lifesaver when you’re feeding a crowd on a budget.
- Perfect for Hosting: This dish is a showstopper for any gathering. It’s hearty, satisfying, and looks gorgeous straight from the skillet. Serve it at a casual dinner party, a game day potluck, or a festive get-together. It steals the table every single time.
- Crowd-Pleaser Guaranteed: Kids love the cheesy, mild flavor, and adults appreciate the comforting, savory depth. I’ve never had leftovers when I’ve served this at a party. It’s the first thing to disappear.
- Unbelievably Delicious: The rice gets perfectly tender, soaking up a rich, tomatoey sauce. The ground beef is seasoned just right, and that blanket of melted cheese? Pure magic. It’s comfort food at its finest.
What makes this version different from all the others? It’s the balance. I’ve perfected the ratio of liquid to rice so you never end up with mushy or crunchy grains. The seasoning blend is simple but punchy, and the technique for browning the beef adds a layer of flavor you just don’t get from a one-pot dump-and-stir. This isn’t just another recipe; it’s your new secret weapon for hosting without the stress.
What Ingredients You Will Need
This recipe relies on simple, wholesome ingredients to create a dish that’s bursting with flavor and incredibly satisfying. You’ll find that most of these are pantry staples, making this an easy choice for a last-minute get-together.
- 1 tablespoon olive oil: For browning the beef and aromatics. A good quality extra-virgin olive oil adds a nice depth, but any neutral oil will work.
- 1 large yellow onion, diced: The foundation of flavor. As it softens in the oil, it releases sweetness that builds the base of the dish.
- 3 cloves garlic, minced: A non-negotiable for that aromatic punch. Fresh is best here, but jarred minced garlic can work in a pinch.
- 2 pounds ground beef (80/20): I prefer 80/20 for this recipe. The extra fat renders out and adds incredible flavor to the rice as it cooks. You can drain some off if you like, but I usually leave a little in the pan. For a leaner option, use 90/10 ground beef or ground turkey.
- 1 ½ teaspoons salt: Essential for seasoning the beef and the entire dish. Adjust to your taste.
- 1 teaspoon black pepper: Adds a gentle warmth.
- 2 teaspoons smoked paprika: This is my secret ingredient. It adds a subtle, smoky depth that makes the dish feel more complex. Regular paprika works too, but smoked is worth seeking out.
- 1 teaspoon dried oregano: A classic herb that pairs beautifully with tomatoes and beef.
- ½ teaspoon red pepper flakes (optional): For a tiny kick of heat. Leave it out if you’re serving a crowd with sensitive palates.
- 1 (15-ounce) can fire-roasted diced tomatoes, undrained: Fire-roasted tomatoes add a lovely charred sweetness. If you can’t find them, regular diced tomatoes are fine. Do not drain them—the liquid is crucial for cooking the rice.
- 1 (8-ounce) can tomato sauce: This thickens the sauce and adds a rich tomato flavor without being too chunky.
- 2 cups beef broth: Use a good quality broth—it makes a difference. Low-sodium is a good choice so you can control the salt level. Chicken broth can be substituted if that’s what you have.
- 1 ½ cups long-grain white rice, uncooked: Long-grain rice like Jasmine or Basmati works best. It stays fluffy and separate. Do not use instant rice or brown rice without adjusting the liquid and cooking time.
- 2 cups shredded sharp cheddar cheese: Sharp cheddar provides the most flavor. Pre-shredded cheese is fine, but freshly shredded melts more smoothly because it doesn’t have anti-caking agents. You can also use a Mexican blend or Monterey Jack.
- Fresh parsley or cilantro, for garnish (optional): A sprinkle of fresh herbs adds a pop of color and freshness right before serving. It makes the dish look restaurant-worthy.
Equipment Needed
You don’t need a professional kitchen to pull this off. The beauty of this recipe is its simplicity. Here’s what you’ll need:
- A large, deep skillet or Dutch oven with a tight-fitting lid: This is the most important piece of equipment. A 12-inch skillet with high sides is perfect. A cast-iron skillet works beautifully, as does a stainless steel or non-stick pan. The lid needs to fit snugly to trap the steam for cooking the rice. If you don’t have a lid, a piece of heavy-duty aluminum foil can work in a pinch.
- A wooden spoon or spatula: For breaking up the ground beef and stirring everything together. A wooden spoon is my go-to because it’s sturdy and won’t scratch your pan.
- A sharp knife and cutting board: For dicing the onion and mincing the garlic.
- Measuring cups and spoons: For accuracy. I can’t stress this enough—measuring your liquid and rice precisely is the key to perfect texture.
- A box grater (optional): If you choose to shred your own cheese from a block, a box grater is your best friend. It takes an extra minute but the melt is worth it.
I’ve made this in my trusty old non-stick skillet and in my heavy cast-iron Dutch oven. Both work great. My personal preference is the cast-iron because it holds heat so evenly, but the non-stick is lighter and easier to clean. Go with what you have!
Preparation Method

This comes together in about 40 minutes, most of which is hands-off simmering time. It’s the perfect recipe to make while you’re tidying up or setting the table for your guests.
- Brown the beef and aromatics. Place your large skillet over medium-high heat and add the olive oil. Once it shimmers, add the diced onion. Cook for 3-4 minutes, stirring occasionally, until it becomes translucent and soft. Add the minced garlic and cook for another 30 seconds until fragrant. Then, add the ground beef. Break it up with your wooden spoon and cook until it’s nicely browned, about 6-8 minutes. Don’t rush this step—browning adds a ton of flavor. If there’s a lot of excess fat, you can spoon most of it out, leaving about a tablespoon in the pan.
- Season the meat. Sprinkle the salt, black pepper, smoked paprika, dried oregano, and red pepper flakes (if using) over the browned beef. Stir everything together and cook for another minute. This toasts the spices and wakes up their flavors. Your kitchen will start smelling amazing right about now.
- Add the liquids and rice. Pour in the undrained fire-roasted diced tomatoes, the tomato sauce, and the beef broth. Stir everything together, scraping up any browned bits from the bottom of the pan—that’s pure flavor. Add the uncooked long-grain white rice and stir until it’s evenly distributed throughout the liquid. Bring the mixture to a strong boil.
- Simmer and cook the rice. Once it’s boiling, reduce the heat to low. Cover the skillet tightly with the lid. Let it simmer gently for 18-20 minutes. Do not lift the lid during this time! The steam is what cooks the rice perfectly. Set a timer and walk away. I know it’s tempting to peek, but trust the process.
- Check the rice. After 18 minutes, carefully remove the lid (watch out for the steam). The rice should be tender and the liquid should be mostly absorbed. If the rice is still a little firm or there’s too much liquid, cover it again and cook for another 2-3 minutes. If it looks dry but the rice is still hard, add a splash more broth or water, cover, and cook for a few more minutes. Every stovetop is a little different.
- Add the cheese. Once the rice is perfectly cooked, remove the skillet from the heat. Sprinkle the shredded cheddar cheese evenly over the top of the beef and rice mixture. Don’t stir it in! Cover the skillet again with the lid and let it sit for 3-5 minutes. The residual heat will melt the cheese into a glorious, gooey blanket.
- Serve immediately. Uncover the skillet and admire your work. The cheese should be perfectly melted and bubbly. Garnish with a sprinkle of fresh parsley or cilantro for a pop of color. Serve it straight from the skillet for a rustic, family-style presentation, or spoon it onto individual plates. Watch it disappear.
Cooking Tips & Techniques
I’ve made this cheesy ground beef and rice skillet more times than I can count, and I’ve definitely learned a few things along the way. Here are my best tips to guarantee success every single time.
- The Rice Matters: I cannot stress this enough. Use long-grain white rice. Jasmine or Basmati are my favorites. Do not use instant rice, minute rice, or brown rice without adjusting the liquid and cooking time significantly. I learned this the hard way when I was in a hurry and grabbed the wrong box. The result was a mushy, unappealing mess. Stick with long-grain for perfect, fluffy results.
- Don’t Skip the Sear: Getting a good brown on the ground beef is non-negotiable. It creates the Maillard reaction, which is just a fancy term for flavor. Let the beef sit in the hot pan for a minute or two before you start breaking it up. You want those deep brown bits.
- Resist the Urge to Peek: When the rice is simmering, keep that lid on! Every time you lift it, you release precious steam and heat. This can mess with the cooking time and leave you with undercooked rice. Set a timer and walk away. Trust the steam.
- Toast Your Spices: Adding the spices to the browned beef and cooking them for a minute before adding the liquids is a game-changer. It blooms the spices, making them more aromatic and flavorful. It’s a small step that makes a huge difference.
- Make it Ahead for a Party: This dish is perfect for hosting because you can prep it in advance. Cook the entire recipe up to the point of adding the cheese. Let it cool completely, then cover and refrigerate. When you’re ready to serve, reheat it gently on the stovetop with a splash of broth, then add the cheese and let it melt. Your guests will think you slaved away all afternoon.
Variations & Adaptations
This recipe is incredibly flexible. Don’t be afraid to make it your own. Here are a few of my favorite variations.
- Make it a Veggie-Packed Skillet: Before adding the beef, sauté a diced bell pepper and a cup of sliced mushrooms along with the onion. You can also stir in a cup of frozen corn or peas during the last 5 minutes of cooking the rice. It’s an easy way to add more color and nutrients.
- Spice It Up: For a bolder, Southwestern flavor, add a drained can of black beans and a can of diced green chiles along with the tomatoes. Swap the cheddar for a pepper jack cheese and top with fresh jalapeños. This version is always a hit at game day parties.
- Go Low-Carb or Keto: This one is a little different, but it works. Substitute the rice with cauliflower rice. You’ll need to reduce the liquid significantly. Sauté the cauliflower rice in the pan after the beef is cooked, then add only the tomatoes and a half cup of broth. Simmer for about 10 minutes, then top with cheese. It’s not exactly the same, but it scratches the itch.
- Try a Different Protein: Ground turkey or ground chicken works beautifully. Because they are leaner, you might need to add an extra tablespoon of olive oil. Ground pork or Italian sausage (casings removed) would also be fantastic for a richer flavor profile.
- Cheese Swap: I love sharp cheddar, but this is your canvas. Try a smoked gouda for a deeper, smoky flavor. A Monterey Jack and cheddar blend is always a safe bet. For a more Italian vibe, use a mix of provolone and mozzarella.
Serving & Storage Suggestions
This dish is best served hot and fresh from the skillet. The cheese is at its peak meltiness, and the rice is perfectly tender. For a dinner party, I love to bring the whole skillet to the table—it makes a rustic, impressive presentation. Set it on a trivet and let everyone serve themselves family-style.
What to serve alongside? A simple green salad with a tangy vinaigrette is the perfect counterpoint to the richness of the skillet. I also love serving it with some crusty bread or garlic bread to soak up any extra sauce. For a lighter option, a side of steamed or roasted broccoli or green beans works wonderfully.
For storage, let the skillet cool completely. Transfer any leftovers to an airtight container. It will keep in the refrigerator for up to 4 days. The flavors actually meld together even more overnight, making it taste even better the next day.
To reheat, the stovetop is your best bet. Place the leftovers in a skillet with a splash of beef broth or water. Cover and warm over medium-low heat, stirring occasionally, until heated through. You can also use the microwave, but it might make the rice a little softer. If you have a lot of leftovers, this also freezes beautifully. Portion it into freezer-safe bags or containers and freeze for up to 3 months. Thaw overnight in the refrigerator before reheating.
Nutritional Information & Benefits
This is a hearty, satisfying meal. While it’s definitely comfort food, it does offer some good nutritional benefits. Here’s an approximate breakdown per serving (based on 8 servings):
- Calories: 480-520
- Protein: 32g
- Fat: 24g
- Carbohydrates: 35g
- Fiber: 3g
The ground beef is an excellent source of protein and iron, which is great for energy. The tomatoes are packed with lycopene, a powerful antioxidant. The onions and garlic also provide prebiotics, which are good for gut health. And of course, the cheese adds a good dose of calcium. This isn’t a diet food, but it’s a balanced meal that will keep you full and satisfied. If you want to lighten it up, use lean ground beef and reduce the amount of cheese, or add a side of vegetables to bulk it up.
Conclusion
This cheesy ground beef and rice skillet is more than just a recipe; it’s a solution. It’s the answer to the “what’s for dinner?” question when you’re tired, busy, and have a hungry crowd to feed. It’s the dish you can make without a recipe after the first time, because it’s just that simple and intuitive. It’s the meal that makes you look like a hero, even when you feel like you’re barely holding it together. Honestly, I make this at least once a month, and it never gets old. The smell of it simmering on the stove still makes me happy, reminding me of that unlikely conversation with my accountant. I really hope you give it a try. Make it your own, tweak the spices, pile on the cheese. I’d love to hear how it turns out for you! Leave a comment below and tell me about your own dinner party success story, or share a photo of your creation on social media. Happy cooking!
Frequently Asked Questions
Can I use brown rice instead of white rice?
You can, but you will need to adjust the cooking time and liquid. Brown rice takes much longer to cook. You’ll need to increase the broth to about 2 ½ cups and simmer for 40-45 minutes, or until the rice is tender. You may also need to add a little more liquid if it dries out before the rice is cooked.
Can I make this in a slow cooker or Instant Pot?
For a slow cooker, brown the beef and aromatics on the stovetop first, then transfer everything except the rice and cheese to the slow cooker. Cook on low for 4-6 hours, then stir in the rice and cook on high for another 30-45 minutes until the rice is tender. For an Instant Pot, use the sauté function to brown the beef, then add the liquids and rice. Pressure cook on high for 5 minutes, then do a natural release for 10 minutes. Add the cheese and let it melt.
How do I prevent the rice from getting mushy?
The key is using the right type of rice (long-grain white rice) and the correct liquid ratio. Do not stir the rice too much once it’s simmering, and absolutely do not lift the lid while it cooks. This traps the steam and allows the rice to cook evenly without becoming mushy.
Can I add vegetables to this dish?
Absolutely! This is a fantastic way to sneak in extra veggies. Diced bell peppers, zucchini, mushrooms, or spinach are all great additions. Sauté them with the onion and garlic before adding the beef. Frozen peas or corn can be stirred in during the last 5 minutes of cooking the rice.
What if my rice is still crunchy after 20 minutes?
Don’t panic! It happens to all of us. The most common reason is that the heat was too low or the lid wasn’t tight enough. Simply add another ¼ cup of beef broth or water, replace the lid tightly, and cook for another 5-7 minutes. Check again and repeat if necessary. Your rice will eventually get there.
Pin This Recipe!
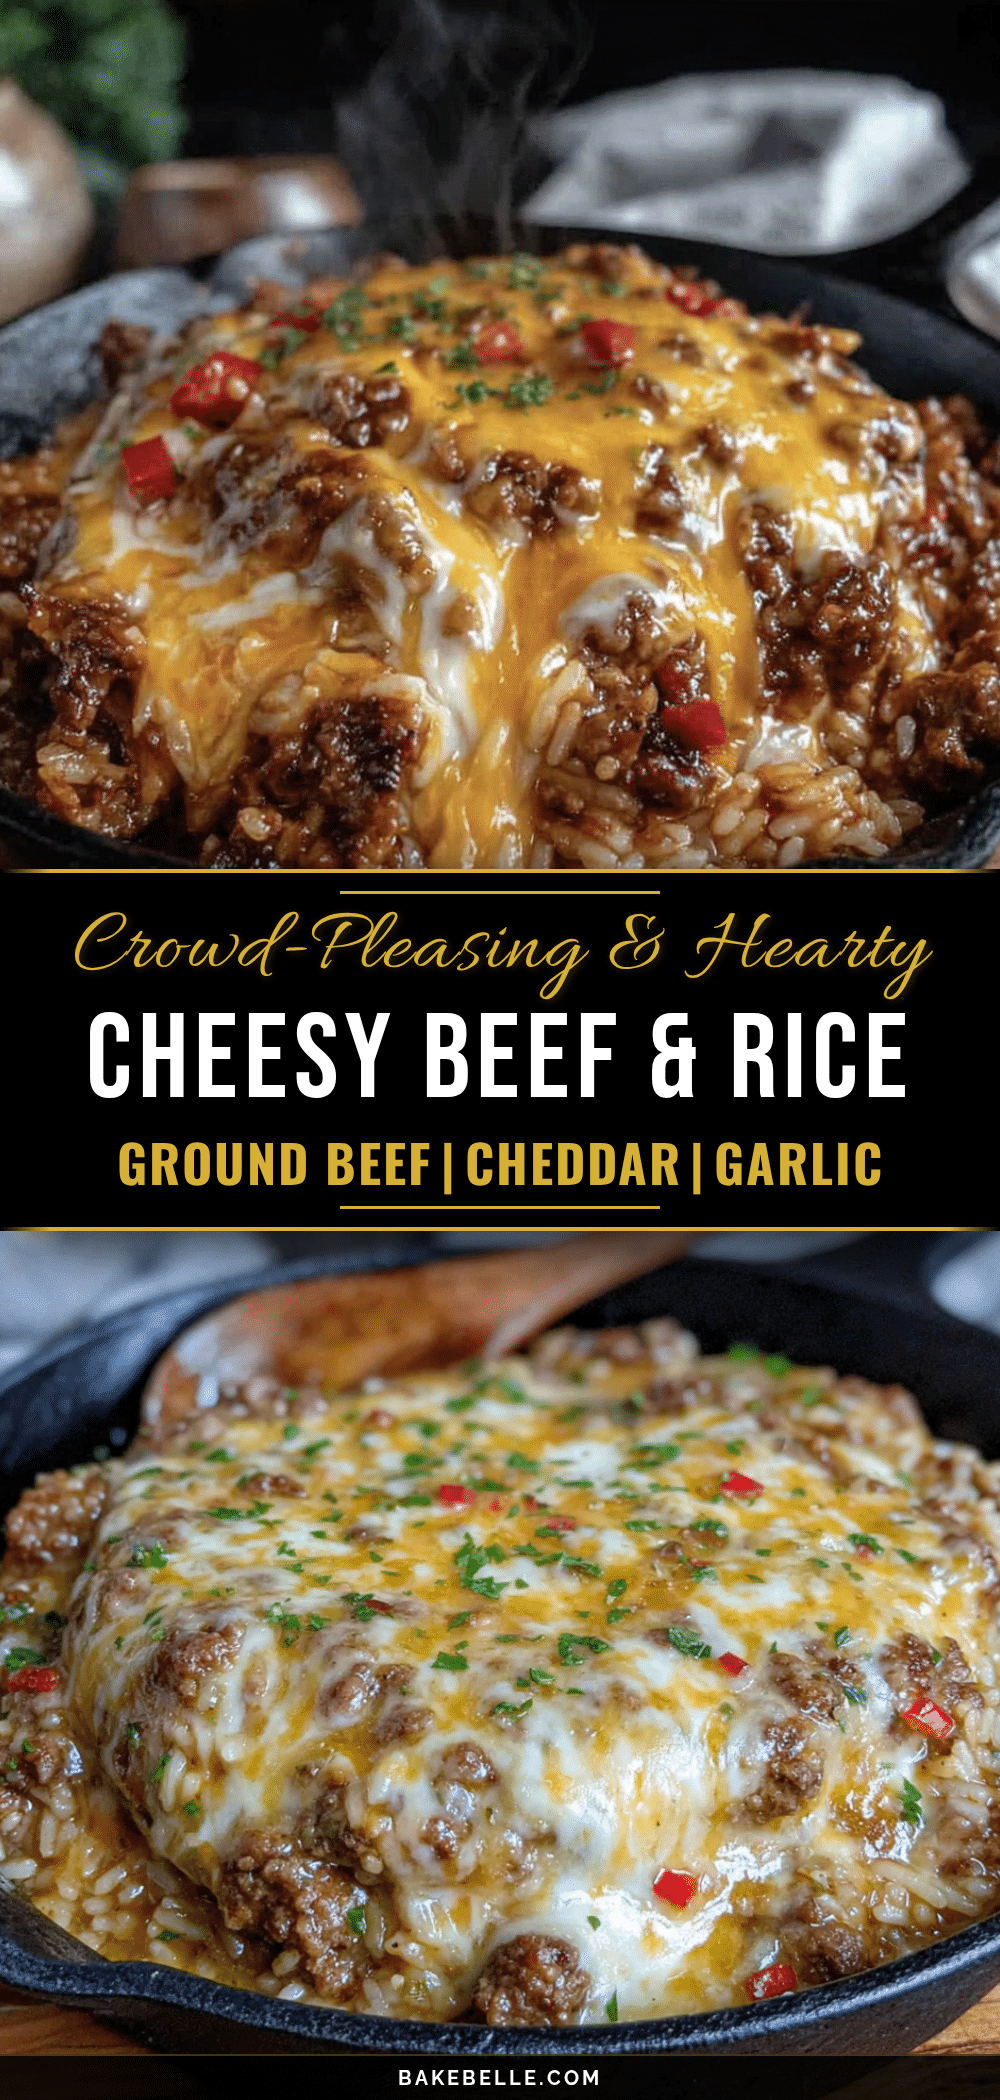
Best Cheesy Ground Beef and Rice Skillet: Easy One-Pan Dinner

This cheesy ground beef and rice skillet is a one-pan wonder that’s perfect for busy weeknights. It’s hearty, satisfying, and made with simple, budget-friendly ingredients.
- Prep Time: 10 minutes
- Cook Time: 30 minutes
- Total Time: 40 minutes
- Yield: 8 servings 1x
- Category: Main Course
- Cuisine: American
Ingredients
- 1 tablespoon olive oil
- 1 large yellow onion, diced
- 3 cloves garlic, minced
- 2 pounds ground beef (80/20)
- 1 ½ teaspoons salt
- 1 teaspoon black pepper
- 2 teaspoons smoked paprika
- 1 teaspoon dried oregano
- ½ teaspoon red pepper flakes (optional)
- 1 (15-ounce) can fire-roasted diced tomatoes, undrained
- 1 (8-ounce) can tomato sauce
- 2 cups beef broth
- 1 ½ cups long-grain white rice, uncooked
- 2 cups shredded sharp cheddar cheese
- Fresh parsley or cilantro, for garnish (optional)
Instructions
- Brown the beef and aromatics. Place your large skillet over medium-high heat and add the olive oil. Once it shimmers, add the diced onion. Cook for 3-4 minutes, stirring occasionally, until it becomes translucent and soft. Add the minced garlic and cook for another 30 seconds until fragrant. Then, add the ground beef. Break it up with your wooden spoon and cook until it’s nicely browned, about 6-8 minutes. If there’s a lot of excess fat, spoon most of it out, leaving about a tablespoon in the pa…
- Season the meat. Sprinkle the salt, black pepper, smoked paprika, dried oregano, and red pepper flakes (if using) over the browned beef. Stir everything together and cook for another minute.
- Add the liquids and rice. Pour in the undrained fire-roasted diced tomatoes, the tomato sauce, and the beef broth. Stir together, scraping up any browned bits from the bottom of the pan. Add the uncooked long-grain white rice and stir until evenly distributed. Bring the mixture to a strong boil.
- Simmer and cook the rice. Once boiling, reduce the heat to low. Cover the skillet tightly with the lid. Let it simmer gently for 18-20 minutes. Do not lift the lid during this time.
- Check the rice. After 18 minutes, carefully remove the lid. The rice should be tender and the liquid mostly absorbed. If the rice is still firm or there’s too much liquid, cover and cook for another 2-3 minutes. If dry but rice is hard, add a splash more broth or water, cover, and cook for a few more minutes.
- Add the cheese. Once the rice is perfectly cooked, remove the skillet from the heat. Sprinkle the shredded cheddar cheese evenly over the top. Do not stir it in. Cover the skillet again and let it sit for 3-5 minutes until the cheese is melted.
- Serve immediately. Uncover, garnish with fresh parsley or cilantro if desired, and serve straight from the skillet or on individual plates.
Notes
Use long-grain white rice (Jasmine or Basmati). Do not use instant or brown rice without adjusting liquid and time. Do not lift the lid while rice is simmering. For make-ahead, cook up to adding cheese, cool, refrigerate, then reheat with a splash of broth before adding cheese.
Nutrition
- Serving Size: 1 serving
- Calories: 500
- Sugar: 5
- Sodium: 800
- Fat: 24
- Saturated Fat: 10
- Carbohydrates: 35
- Fiber: 3
- Protein: 32
Keywords: cheesy ground beef and rice skillet, one-pan dinner, easy weeknight meal, ground beef recipe, cheesy rice skillet