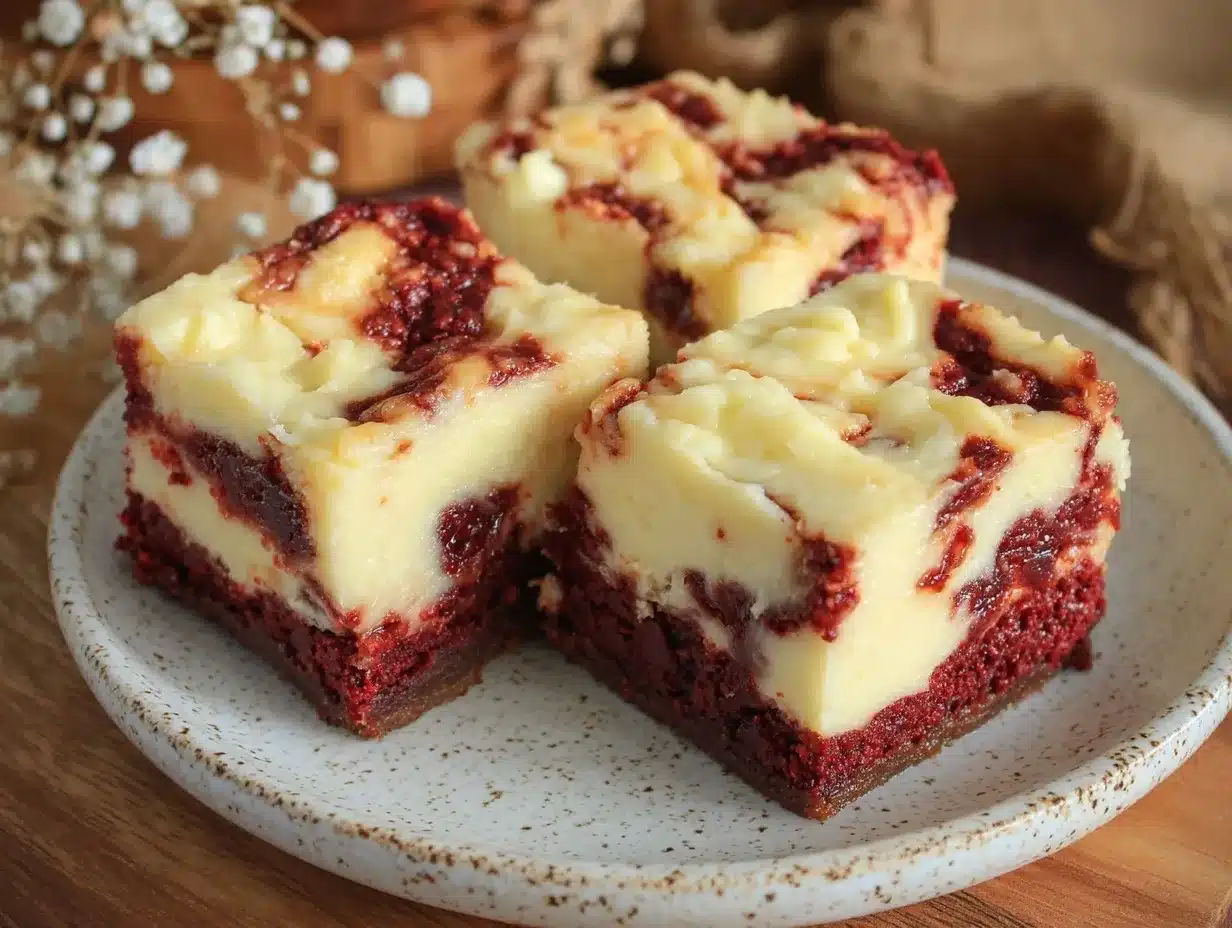
It was just past dinnertime when my neighbor popped in, unannounced, clutching a bottle of wine and that unmistakable grin that says, “I brought dessert!” Except, tonight, my fridge was a near desert, save for a small tub of cream cheese and a lonely box of red velvet cake mix sitting on the counter. No fancy frosting, no time to bake. Honestly, I almost told her I had nothing, but then a spark hit — what if I just whipped something up with what I had? The result? These creamy no-bake red velvet cheesecake bars with swirl that somehow landed perfectly between indulgent and effortless.
The kitchen smelled faintly of cocoa and cream, the texture was silky, the color a vibrant red that made the whole thing look fancy without fuss. What surprised me the most wasn’t just how quick it came together, but how it felt like a little victory — a last-minute rescue that turned into a crowd-pleaser. You know, sometimes the best recipes come from those chaotic moments when you’re scrambling, and honestly, that’s why this recipe stuck with me. It’s no-nonsense with a touch of elegance, and it’s become my go-to when I need to whip up something impressive but don’t want to spend hours in the kitchen. I guess that’s why I keep coming back to these no-bake bars — they’re proof that a little creativity and what’s on hand can make magic happen.
Why You’ll Love This Creamy No-Bake Red Velvet Cheesecake Bars Recipe
This recipe is truly a gem for anyone who loves dessert but hates the wait or the oven heat. I’ve tested this over countless get-togethers and quiet nights alike — it never fails to impress or satisfy. Here’s why it works so well:
- Quick & Easy: Ready in under 30 minutes, perfect when you’re short on time or want a fuss-free dessert.
- Simple Ingredients: Most of the ingredients are pantry staples or easy to find, so you can skip the extra grocery trip.
- Perfect for Any Occasion: Whether it’s a casual weekend treat or a surprise addition to a holiday spread, these bars fit right in.
- Crowd-Pleaser: The silky cream cheese and rich red velvet swirl get rave reviews from kids and adults alike.
- Unbelievably Delicious: The creamy texture combined with the subtle chocolate and tangy cream cheese swirl offers a delightful flavor balance.
What sets this recipe apart is the swirl technique — it’s not just about mixing ingredients, but creating that eye-catching marbled pattern that feels special without extra effort. Plus, I tweak the base crust just enough to add a bit of crunch that contrasts perfectly with the creamy top. Honestly, this isn’t just another no-bake cheesecake; it’s the one I reach for when I want a dessert that looks like I spent hours but tastes like pure comfort.
What Ingredients You Will Need
This recipe uses simple, wholesome ingredients to deliver bold flavor and satisfying texture without the fuss. Most of these are basics you probably already have in your kitchen, and a couple are specialty items that make all the difference.
- For the Crust:
- Chocolate wafer cookies or graham crackers, finely crushed (I like using Nabisco Famous Chocolate Wafers for a rich base)
- Unsalted butter, melted (helps bind the crust together)
- Granulated sugar (just a touch for sweetness)
- For the Cheesecake Filling:
- Cream cheese, softened (full-fat for best creaminess)
- Powdered sugar (smooth sweetness)
- Heavy cream, cold (whipped to give that airy texture)
- Vanilla extract (adds depth)
- For the Red Velvet Swirl:
- Red velvet cake mix (the boxed kind works perfectly here)
- Buttermilk or milk (to mix the cake batter)
- Cocoa powder (to enhance that classic red velvet flavor)
- Red food coloring (optional, for that vibrant pop if the mix isn’t bright enough)
If you want to swap out the heavy cream, coconut cream works well for a dairy-free alternative. And for the crust, crushed pretzels or pecans can add a fun twist. Just keep in mind that the key is a sturdy yet tender base to hold the creamy topping. This recipe’s charm lies in its balance — not too sweet, just right in texture.
Equipment Needed
- 8×8-inch (20×20 cm) square baking pan — I prefer glass for even chilling, but a metal pan works too.
- Mixing bowls — one large for the cheesecake filling, one small for the red velvet batter.
- Electric mixer or stand mixer — essential for getting that fluffy cream cheese texture without lumps.
- Spatula — for folding and spreading the batter evenly.
- Measuring cups and spoons — precision matters here for balance.
- Food processor or zip-top bag and rolling pin — for crushing cookies finely.
If you don’t have an electric mixer, a sturdy whisk works but expect a workout! Also, I keep a silicone spatula on hand to scrape every bit out of the bowl — nothing gets wasted. For budget-friendly options, even plastic mixing bowls and basic hand mixers do the job just fine.
Preparation Method
- Prepare the Crust (10 minutes): Crush 1 ½ cups (150g) of chocolate wafer cookies into fine crumbs using a food processor or by placing them in a zip-top bag and smashing with a rolling pin. Mix the crumbs with 5 tablespoons (70g) melted unsalted butter and 2 tablespoons (25g) granulated sugar until the mixture resembles wet sand.
- Press the Crust: Evenly press the crumb mixture into the bottom of your 8×8-inch pan. Use the back of a spoon or a flat-bottomed glass to compact it firmly. Pop it in the fridge while you prepare the filling — this helps it set nicely.
- Make the Cheesecake Filling (15 minutes): In a large bowl, beat 16 ounces (450g) softened cream cheese with ¾ cup (90g) powdered sugar until smooth and creamy. Add 1 teaspoon vanilla extract. In a separate bowl, whip 1 cup (240ml) cold heavy cream until stiff peaks form. Gently fold the whipped cream into the cream cheese mixture, preserving the airiness for that dreamy texture.
- Prepare the Red Velvet Swirl (5 minutes): In a small bowl, mix ½ cup (60g) red velvet cake mix with 2 tablespoons (30ml) buttermilk (or milk) and 1 tablespoon cocoa powder until smooth. Add a few drops of red food coloring if you want a more vibrant swirl.
- Assemble and Swirl (10 minutes): Spread about two-thirds of the cheesecake filling evenly over the chilled crust. Dollop spoonfuls of the red velvet batter over the surface. Finally, add the remaining cheesecake filling on top. Using a butter knife or skewer, gently swirl the layers to create a marbled effect — be careful not to overmix.
- Chill (at least 4 hours or overnight): Cover the pan with plastic wrap and refrigerate until fully set. This step is crucial for the bars to firm up and slice cleanly.
Quick tip: If your cream cheese feels too cold or stiff, microwave it for 10 seconds to soften. Also, when swirling, think gentle waves rather than stirring — the goal is a pretty pattern, not a uniform color. This method was a game-changer for me, especially when I made these for a last-minute gathering and wanted them to look as good as they tasted.
Cooking Tips & Techniques
One of the trickiest parts about no-bake cheesecakes is getting the texture just right. Honestly, I’ve had my share of dense or runny disasters before perfecting this recipe.
- Softening Cream Cheese: Always start with room temperature cream cheese. It blends more smoothly and avoids lumps.
- Whipping the Cream: Cold heavy cream whips better and holds peaks longer — I keep mine in the fridge until just before mixing.
- Swirling Technique: Use a light hand when swirling the red velvet batter into the cheesecake filling. Overmixing blends the colors too much and loses the beautiful marbled effect.
- Chilling Time: Don’t rush the chilling — the bars need at least 4 hours, preferably overnight. This helps the crust firm up and the filling set perfectly.
- Cutting Bars: Dip your knife in hot water and wipe clean between cuts for neat slices.
One lesson I learned the hard way: skipping the crust chilling step leads to crumbly bottoms. Also, while the red velvet batter looks thick, it’s meant to be slightly loose to swirl easily — adding a touch more milk if it seems dry is totally okay. These small adjustments were key to getting consistent results.
Variations & Adaptations
This recipe is pretty flexible, so it’s easy to customize depending on your taste or dietary needs. Here are some of my favorite tweaks:
- Gluten-Free: Swap the chocolate wafer cookies for gluten-free chocolate cookies or almond flour mixed with cocoa powder for the crust.
- Vegan Version: Use dairy-free cream cheese and coconut cream whipped for the filling, plus a red velvet mix that’s egg- and dairy-free.
- Flavor Twists: Add a teaspoon of espresso powder to the red velvet swirl for a mocha kick, or sprinkle white chocolate chips over the crust before adding the filling for extra sweetness.
- Seasonal Adaptation: In fall, add a pinch of cinnamon and nutmeg to the crust and swirl mixture for a cozy, spiced vibe reminiscent of pumpkin desserts.
- Personal Favorite: I sometimes fold in finely chopped pecans into the crust for a little crunch and nuttiness — it contrasts beautifully with the creamy layers.
For an alternative presentation, try these as mini bars in a muffin tin for easy portioning at parties. I also experimented with a maple pecan pumpkin pie bars recipe last fall — that one uses a similar no-bake technique but with autumn flavors, making it a nice seasonal companion to these red velvet bars.
Serving & Storage Suggestions
These cheesecake bars are best served chilled straight from the fridge, but if you’re like me, sometimes you want just a slight softening to unlock that creamy texture. Let them sit at room temperature for 10 minutes before slicing if you prefer a softer bite.
Presentation-wise, I like to dust a little cocoa powder or powdered sugar on top, or add a dollop of whipped cream and a fresh raspberry to each square for a pop of color. They pair wonderfully with a cup of coffee or a glass of chilled milk.
For storing, keep the bars covered tightly in the refrigerator — they’ll stay fresh for up to 5 days. You can also freeze them for up to 2 months; just thaw in the fridge overnight before serving. Reheating isn’t recommended as it changes the texture, but a few minutes at room temp brings them back to creamy perfection.
Fun fact: the flavors actually deepen after a day or two, making these bars even tastier when made ahead — perfect for prepping desserts for a dinner party or holiday gathering. If you want a drink to complement, try pairing these with a cozy fall cider sangria, like the one featured in the cozy spiced apple cider sangria recipe — the tartness cuts through the richness beautifully.
Nutritional Information & Benefits
While these bars are definitely a treat, they include some nutrient-rich ingredients like cream cheese, which provides protein and calcium, and cocoa powder, which contributes antioxidants. Here’s an approximate breakdown per serving (assuming 16 bars):
| Nutrient | Amount |
|---|---|
| Calories | 210 kcal |
| Fat | 15g |
| Carbohydrates | 16g |
| Protein | 3g |
| Sugar | 12g |
This recipe is gluten-friendly if you choose gluten-free cookies, and can be adapted to be dairy-free with suitable substitutions. It’s not low-carb, but the portion control of bars helps keep indulgence reasonable. I appreciate that it satisfies sweet cravings without overloading on sugar or artificial ingredients, especially compared to store-bought desserts.
Conclusion
These creamy no-bake red velvet cheesecake bars with swirl have become a staple in my kitchen, especially when life throws unexpected guests or I’m craving something sweet but don’t want to fuss. The balance of creamy texture, vibrant red velvet flavor, and that pretty marbled swirl is honestly hard to beat. What makes it even better is how easy it is to customize — from gluten-free tweaks to seasonal spices — so you can make it your own.
I love sharing this recipe because it’s proof that sometimes the best desserts come from improvisation and a little fridge creativity. If you try it, don’t hesitate to play around with the flavors or crust — there’s so much room for fun. And if you want to experiment further with no-bake treats, you might enjoy my recipe collection which has plenty of easy, comforting sweets.
Happy baking (or, well, no-baking)! I’d love to hear about your twists or how these bars turned out for you — drop a comment anytime.
Frequently Asked Questions
Can I make these bars ahead of time?
Yes! These cheesecake bars actually taste better after chilling overnight. Just keep them covered in the fridge until ready to serve.
What if I don’t have red food coloring?
You can skip the food coloring if your red velvet cake mix is already vibrant enough. The bars will still have that classic flavor and look beautiful with the natural cocoa and batter swirl.
Can I use a different type of crust?
Absolutely. Graham cracker, Oreo, or even nut-based crusts work well, depending on your taste preferences and dietary needs.
Is it possible to make this recipe vegan?
Yes, by using dairy-free cream cheese and coconut cream whipped for the filling, plus a vegan-friendly red velvet mix, you can enjoy a plant-based version of these bars.
How should I cut the bars for clean slices?
Use a sharp knife dipped in hot water and wiped dry between cuts — this prevents sticking and keeps edges clean.
Pin This Recipe!
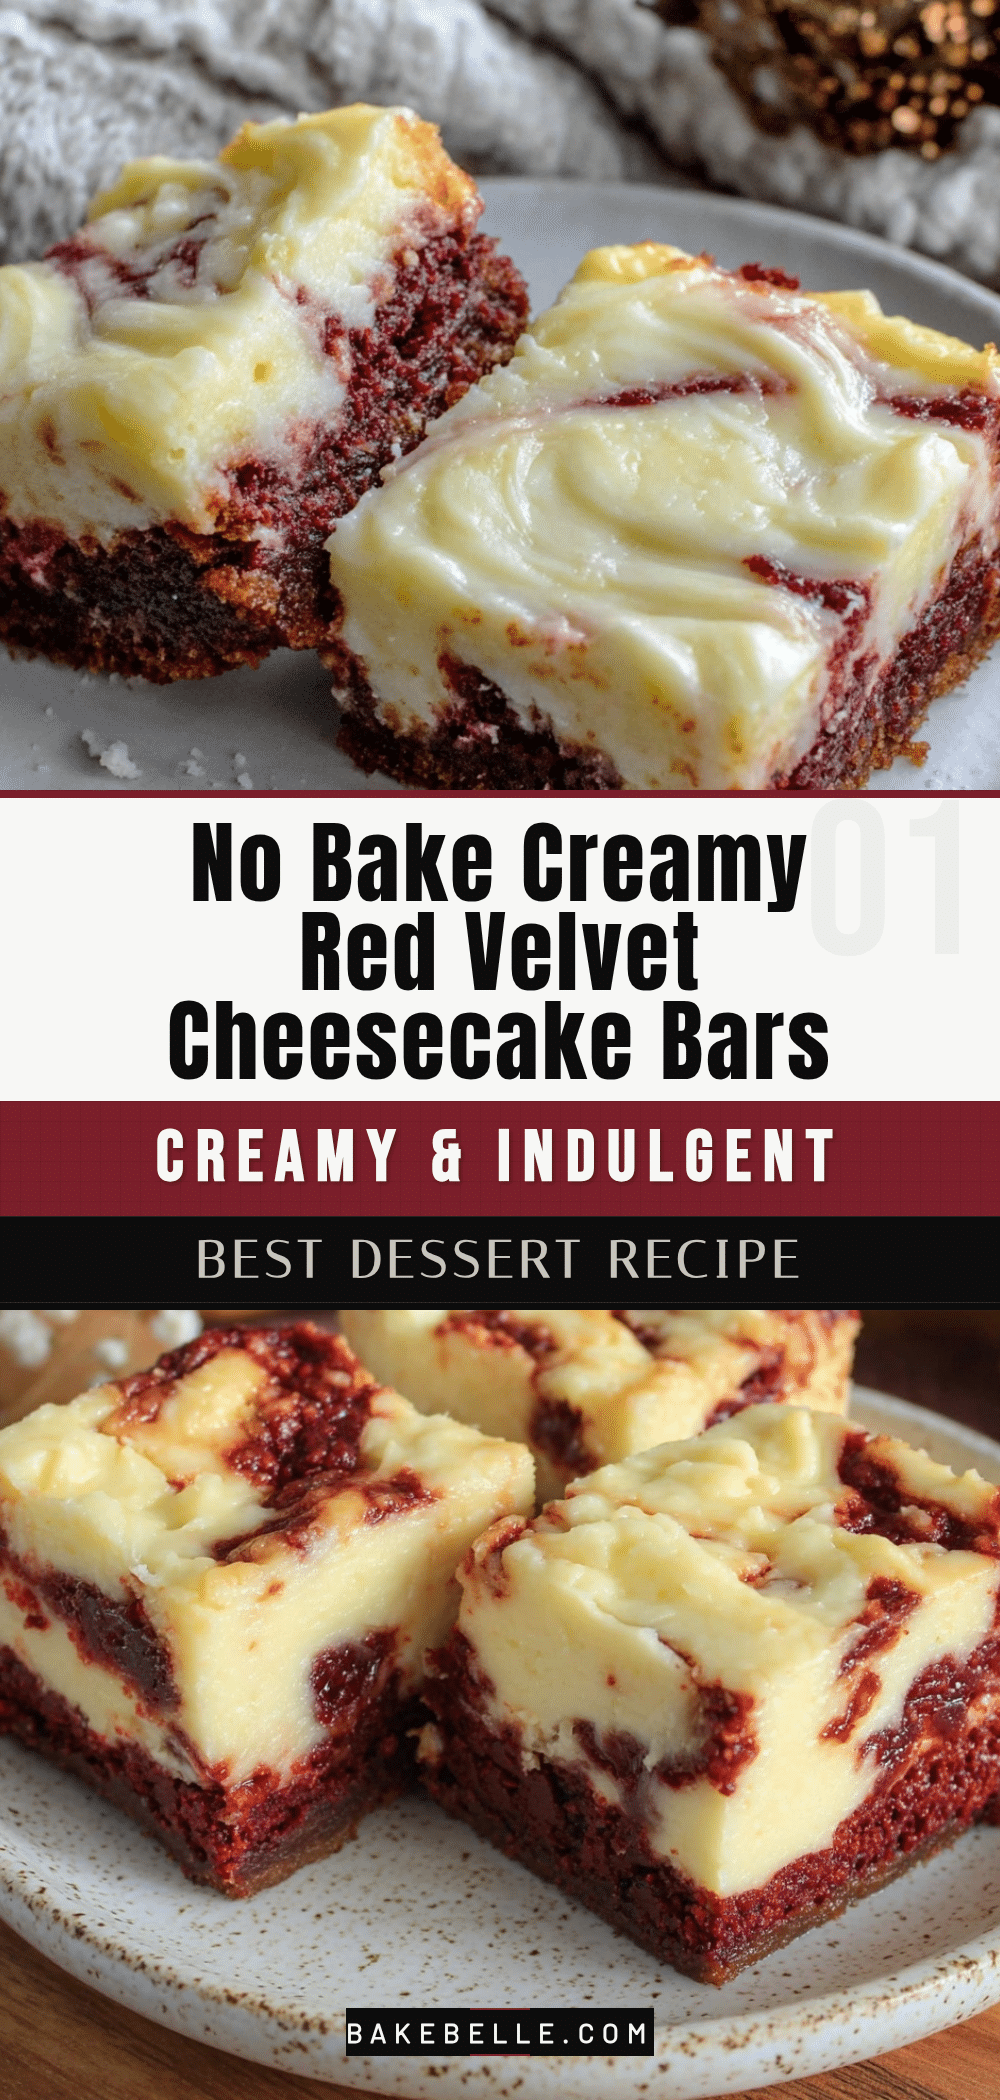
Creamy No-Bake Red Velvet Cheesecake Bars
These creamy no-bake red velvet cheesecake bars feature a silky cream cheese filling with a vibrant red velvet swirl and a crunchy chocolate wafer crust, perfect for a quick and impressive dessert.
- Prep Time: 30 minutes
- Cook Time: 0 minutes
- Total Time: 4 hours 30 minutes
- Yield: 16 bars 1x
- Category: Dessert
- Cuisine: American
Ingredients
- 1 ½ cups (150g) chocolate wafer cookies or graham crackers, finely crushed
- 5 tablespoons (70g) unsalted butter, melted
- 2 tablespoons (25g) granulated sugar
- 16 ounces (450g) cream cheese, softened (full-fat)
- ¾ cup (90g) powdered sugar
- 1 teaspoon vanilla extract
- 1 cup (240ml) cold heavy cream
- ½ cup (60g) red velvet cake mix
- 2 tablespoons (30ml) buttermilk or milk
- 1 tablespoon cocoa powder
- Red food coloring (optional)
Instructions
- Crush 1 ½ cups (150g) of chocolate wafer cookies into fine crumbs using a food processor or by placing them in a zip-top bag and smashing with a rolling pin.
- Mix the crumbs with 5 tablespoons (70g) melted unsalted butter and 2 tablespoons (25g) granulated sugar until the mixture resembles wet sand.
- Evenly press the crumb mixture into the bottom of an 8×8-inch pan. Use the back of a spoon or a flat-bottomed glass to compact it firmly. Refrigerate while preparing the filling.
- In a large bowl, beat 16 ounces (450g) softened cream cheese with ¾ cup (90g) powdered sugar until smooth and creamy. Add 1 teaspoon vanilla extract.
- In a separate bowl, whip 1 cup (240ml) cold heavy cream until stiff peaks form. Gently fold the whipped cream into the cream cheese mixture.
- In a small bowl, mix ½ cup (60g) red velvet cake mix with 2 tablespoons (30ml) buttermilk or milk and 1 tablespoon cocoa powder until smooth. Add a few drops of red food coloring if desired.
- Spread about two-thirds of the cheesecake filling evenly over the chilled crust.
- Dollop spoonfuls of the red velvet batter over the surface.
- Add the remaining cheesecake filling on top.
- Using a butter knife or skewer, gently swirl the layers to create a marbled effect without overmixing.
- Cover the pan with plastic wrap and refrigerate for at least 4 hours or overnight until fully set.
Notes
Use room temperature cream cheese for smooth blending. Whip cold heavy cream until stiff peaks form. Use a light hand when swirling to maintain the marbled effect. Chill bars for at least 4 hours or overnight for best results. Dip knife in hot water and wipe between cuts for clean slices. For dairy-free, substitute coconut cream and dairy-free cream cheese. For gluten-free, use gluten-free cookies or almond flour crust.
Nutrition
- Serving Size: 1 bar (1/16th of rec
- Calories: 210
- Sugar: 12
- Fat: 15
- Carbohydrates: 16
- Protein: 3
Keywords: no-bake, red velvet, cheesecake bars, easy dessert, quick dessert, no oven, creamy, swirl, chocolate crust