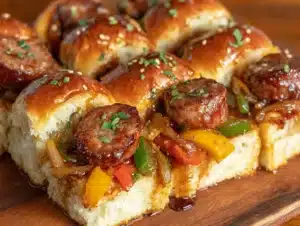
Last October, I was standing in a crowded parking lot outside our local high school, holding a lukewarm cup of coffee and trying not to shiver. It was homecoming weekend, and the air had that perfect crispness that makes you want to wrap your hands around something warm. Then it hit me — that smell of grilled peppers and sausage drifting from a nearby tailgate. And just like that, I was twelve years old again, standing on Uncle Mike’s driveway watching him flip sausages on a portable grill that smoked like a freight train.
Honestly, I hadn’t thought about those Saturday afternoon cookouts in years. Uncle Mike wasn’t the type to measure anything or follow a recipe — he just threw stuff on the grill and it somehow always turned out amazing. I tried recreating his sliders a few times after that parking lot moment, but something was always off. Either the peppers were too soggy or the sausages weren’t caramelized enough. It drove me crazy, you know?
Then it dawned on me — I was overcomplicating it. The magic wasn’t in some secret technique. It was in letting everything cook together on one pan, letting the juices mingle and get all friendly. So I grabbed a sheet pan, threw caution to the wind, and started testing. After about four tries (and one batch where I forgot the rolls entirely — classic me), these Easy Sheet Pan Sausage and Pepper Tailgate Sliders were born.
Now I make them for every game day, every backyard hangout, and honestly, sometimes just for a Tuesday night dinner when I need something that feels like a party. There’s something about biting into that soft roll with the smoky sausage and sweet peppers that just hits different. Maybe you’ve had that moment where a recipe just feels right? That’s this one.
Why You’ll Love This Recipe
Look, I’ve tested a lot of slider recipes over the years. Some are too fussy, some take forever, and some just don’t deliver on flavor. These Easy Sheet Pan Sausage and Pepper Tailgate Sliders are different. Here’s why they’ve become my go-to for game day:
- One Pan, Zero Fuss — Everything cooks on a single sheet pan. Less cleanup means more time enjoying the game.
- Ready in 30 Minutes — From fridge to table in half an hour. That’s faster than ordering delivery.
- Simple Ingredients — You probably already have most of these in your kitchen. No fancy grocery store runs required.
- Perfect for Tailgating — They travel well, hold up at room temperature, and everyone can grab one without plates or forks.
- Crowd-Pleaser — Kids devour them, adults go back for seconds, and I’ve never brought home leftovers.
- Customizable Heat Level — Want it mild? Skip the spicy sausage. Want a kick? Use hot Italian sausage and add some red pepper flakes.
What really sets these sliders apart is the cooking method. Instead of sautéing everything separately, you roast the sausages and peppers together on one pan. The sausages get beautifully browned while the peppers soften and caramelize in all those savory juices. Then you nestle the rolls right onto the pan to toast in the residual heat. It’s not just efficient — it creates this incredible depth of flavor that you just can’t get from stovetop cooking.
These aren’t just sliders. They’re the kind of food that makes people close their eyes after the first bite. The kind that turns a regular Sunday into something special. Trust me, once you make these once, they’ll become your new game day tradition.
What Ingredients You Will Need
This recipe uses simple, honest ingredients that work together beautifully. Most are pantry staples, but a few key choices make all the difference in flavor and texture.
For the Sausage and Peppers
- 2 pounds Italian sausage links — I prefer a mix of sweet and hot Italian sausage for balanced flavor. Johnsonville or your local butcher’s fresh sausages work great. If you can find them, look for sausages that are about 4-5 inches long — they fit perfectly on slider rolls.
- 3 bell peppers, sliced — Use a mix of colors for visual appeal. Red, yellow, and orange are sweeter; green adds a slightly bitter edge that some people love. Slice them into 1/2-inch strips so they cook evenly.
- 1 large yellow onion, sliced — Vidalia or sweet onions caramelize beautifully. Slice into half-rings about 1/4-inch thick.
- 3 tablespoons olive oil — Use a good quality extra virgin olive oil for roasting. It helps everything brown without burning.
- 2 cloves garlic, minced — Fresh garlic is non-negotiable here. The jarred stuff just doesn’t have the same punch.
- 1 teaspoon dried oregano — Italian seasoning works too, but oregano has that classic sausage-and-pepper flavor profile.
- 1/2 teaspoon salt — Kosher salt is best for even seasoning.
- 1/4 teaspoon black pepper — Freshly ground if you have it.
- 1/4 teaspoon red pepper flakes (optional) — For an extra kick. Leave it out if you’re serving a crowd with varying heat tolerance.
For the Sliders
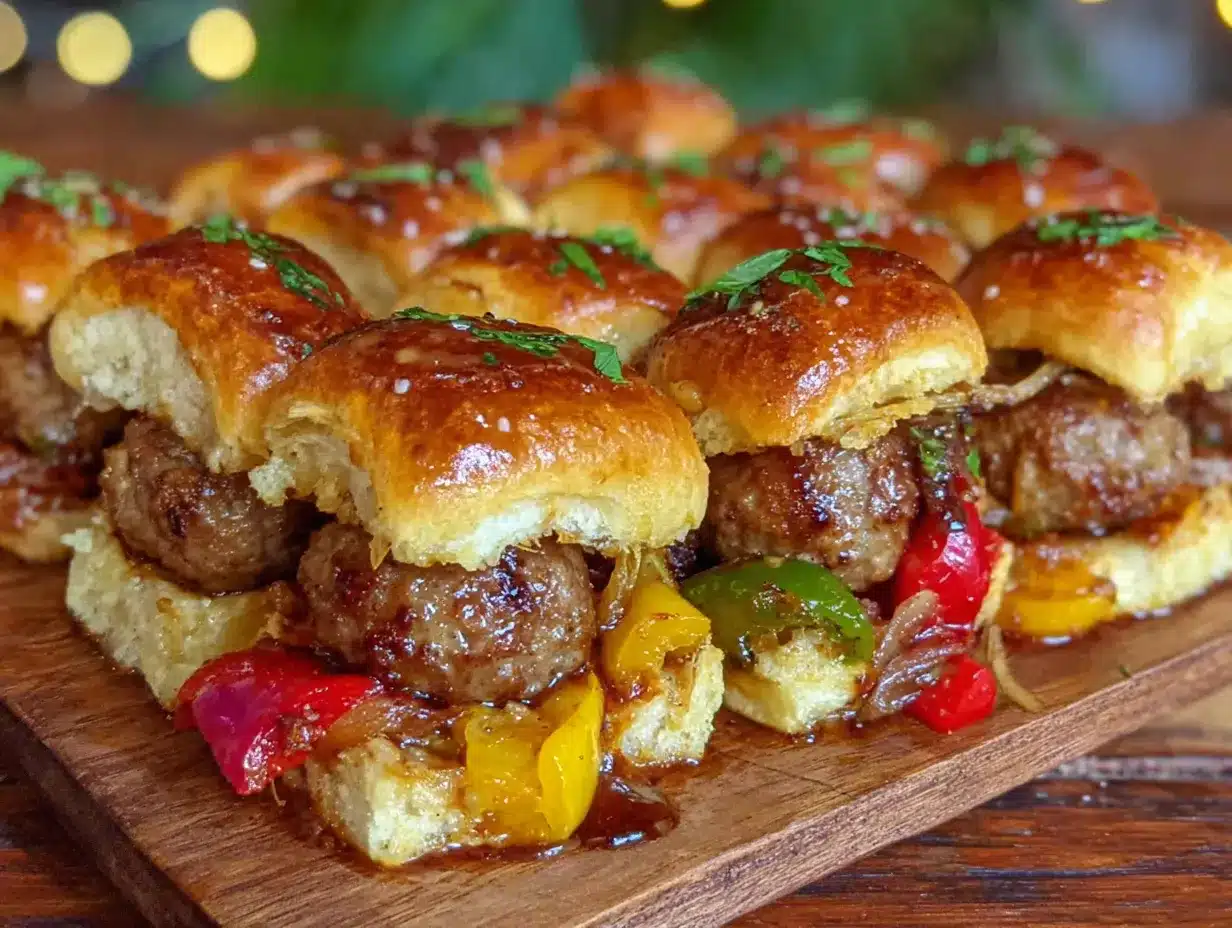
- 12 slider rolls — Hawaiian sweet rolls are my secret weapon here. The slight sweetness balances the savory sausage and peppers beautifully. Martin’s potato rolls are another excellent choice. Stay away from anything too crusty — you want soft rolls that can soak up the juices.
- 8 slices provolone cheese — Provolone melts like a dream without getting greasy. Mozzarella or fontina work great too. Avoid pre-shredded cheese — it doesn’t melt as smoothly.
- 2 tablespoons butter, melted — For brushing the tops of the rolls. It adds that golden, glossy finish that makes these look restaurant-worthy.
- 1 tablespoon sesame seeds (optional) — For that classic slider look. Poppy seeds work too.
Ingredient Selection Tips: When choosing bell peppers, look for ones that feel heavy for their size and have firm, glossy skin. Avoid peppers with soft spots or wrinkled skin — they’re past their prime. For the sausages, if you have a butcher you trust, ask for fresh Italian sausage links. They’re usually more flavorful and have better texture than pre-packaged options.
Substitution Guidance: Need a dairy-free option? Skip the cheese or use a plant-based provolone alternative. For a gluten-free version, use gluten-free slider rolls and check that your sausages are gluten-free (some brands use breadcrumbs as fillers). You can also swap the Italian sausage for chicken or turkey sausage to lighten things up — just watch the cooking time as leaner sausages cook faster.
Equipment Needed
One of the best things about this recipe is how little equipment it requires. Here’s what you’ll need:
- Large sheet pan — A half-sheet pan (18×13 inches) is ideal. It gives everything enough room to spread out without overcrowding. If you only have a smaller pan, use two or cook in batches.
- Sharp knife and cutting board — For slicing the peppers and onions. A good chef’s knife makes quick work of this.
- Mixing bowl — For tossing the peppers and onions with oil and seasonings.
- Tongs — For turning the sausages halfway through cooking and for assembling the sliders.
- Pastry brush — For brushing melted butter on the rolls. A silicone brush is easy to clean. If you don’t have one, just use a spoon.
- Aluminum foil or parchment paper — For lining the sheet pan. This makes cleanup even easier. I prefer parchment for non-stick results.
Budget-Friendly Tip: You don’t need fancy equipment for this recipe. I’ve made these sliders with a $10 sheet pan from the grocery store and they turned out just as good as with my fancy restaurant-grade pan. The key is giving everything enough space — cheap pans work fine as long as they’re not too small.
Maintenance Note: If you’re using a non-stick sheet pan, avoid using metal utensils that could scratch the surface. Stick to silicone or wooden tongs to keep your pan in good shape.
Preparation Method
Let me walk you through this step by step. I’ve made these sliders more times than I can count, so I’ve learned a few tricks along the way that make the process smoother.
- Preheat your oven to 400°F (200°C). Position the rack in the middle of the oven. Give it a full 15 minutes to come to temperature — a properly preheated oven is key for getting those sausages nicely browned.
- Prepare your sheet pan. Line it with aluminum foil or parchment paper. If you’re using foil, give it a quick spray of non-stick cooking spray. This makes cleanup practically effortless.
- Slice the peppers and onion. Cut the bell peppers in half, remove the stems and seeds, then slice into 1/2-inch strips. For the onion, cut off the root end, peel it, then slice into half-rings about 1/4-inch thick. Try to keep the slices uniform so they cook evenly.
- Season the vegetables. In a large mixing bowl, combine the sliced peppers, onions, minced garlic, olive oil, oregano, salt, black pepper, and red pepper flakes if using. Toss everything together until the vegetables are well coated. Don’t skip this step — the oil helps the vegetables caramelize instead of steam.
- Arrange on the sheet pan. Spread the seasoned peppers and onions in an even layer on the prepared pan. Nestle the sausage links on top of the vegetables, spacing them out evenly. Don’t worry if they’re touching a bit — they’ll shrink as they cook.
- Roast for 20 minutes. Place the pan in the preheated oven and roast for 20 minutes. Halfway through (at the 10-minute mark), use tongs to turn the sausages. This ensures even browning on all sides.
- Check for doneness. After 20 minutes, the sausages should be nicely browned and cooked through (internal temperature of 160°F/71°C for pork). The peppers should be tender and starting to caramelize at the edges. If the vegetables are browning too quickly but the sausages aren’t done yet, tent the pan loosely with foil for the last 5 minutes.
- Add the cheese and rolls. Remove the pan from the oven. Lay the provolone slices over the sausages — they’ll melt from the residual heat. If you want extra melty cheese, pop the pan back in the oven for 2 minutes. While the cheese melts, slice the slider rolls in half horizontally. Place them cut-side down on the pan around the sausages, nestling them into the juices. Let them sit for about 3 minutes to absorb some of that flavor.
- Toast the rolls (optional but recommended). If you want the rolls to have a bit of crunch, turn the oven to broil and place the pan on the top rack for 1-2 minutes. Watch them carefully — they can go from golden to burnt in seconds. I learned this the hard way.
- Assemble the sliders. Using tongs, place a sausage link (with melted cheese) on the bottom half of each roll. Top with a generous portion of the roasted peppers and onions. Place the top half of the roll on each slider.
- Brush with butter. In a small bowl, melt the butter. Using a pastry brush, brush the tops of the rolls with melted butter. Sprinkle sesame seeds on top if using. This final touch makes them look like they came from a fancy sports bar.
- Serve immediately. Arrange the sliders on a platter and serve while warm. The rolls should be soft, the sausages juicy, and the peppers perfectly tender.
Sensory Cues: When the peppers and onions are ready, they should smell sweet and slightly charred. The sausages should look glossy and browned, not pale and steamed. If you press a sausage gently with tongs, it should feel firm but give slightly — not rock hard or squishy.
Cooking Tips & Techniques
After making these sliders probably twenty times, I’ve picked up some tricks that make a real difference. Here are the things I wish someone had told me from the start.
Don’t overcrowd the pan. This is the number one mistake people make. If the sausages and peppers are piled on top of each other, they’ll steam instead of roast. You want that beautiful caramelization, not sad, soggy vegetables. If your sheet pan is small, use two pans or cook in batches.
Let the sausages rest before slicing. If you’re slicing the sausages (some people prefer them in chunks rather than whole), let them rest for 5 minutes after roasting. This keeps the juices inside instead of running all over your cutting board. I learned this after making a disastrous mess my first time.
Use room temperature rolls. Cold rolls straight from the fridge don’t toast as evenly. Let them sit on the counter while the sausages roast. Room temperature rolls absorb the pan juices better and toast more uniformly under the broiler.
Toast the rolls cut-side up for crunch. If you want that perfect texture contrast — soft interior with a slightly crisp exterior — toast the rolls cut-side up under the broiler for about a minute before assembling. Just keep an eye on them. I’ve burned more rolls than I’d like to admit.
Make the peppers and onions ahead. You can roast the peppers and onions up to 2 days in advance. Store them in an airtight container in the fridge. When you’re ready to serve, reheat them on a sheet pan at 350°F for about 10 minutes, then add the sausages and continue with the recipe. This is a game-changer for party prep.
Watch the salt. Italian sausages are already seasoned, so go easy on the salt when seasoning the vegetables. I usually skip adding extra salt entirely and just rely on the oregano and pepper for flavor. You can always add more salt at the table.
Variations & Adaptations
One of the best things about this recipe is how flexible it is. Here are some variations I’ve tried and loved.
Spicy Chorizo Version
Swap the Italian sausage for Mexican chorizo. The smoky, spicy flavor pairs beautifully with the sweet peppers. Use pepper jack cheese instead of provolone for extra heat. This version is perfect for those who like their tailgate food with a kick.
Veggie Lover’s Option
Replace the sausages with plant-based Italian sausages (I like Beyond Meat or Field Roast brands). Add some sliced mushrooms and zucchini to the pepper mix for extra vegetables. The cooking time stays about the same — just check the plant-based sausage package for specific instructions.
Low-Carb/Keto Adaptation
Skip the rolls entirely and serve the sausage and peppers over a bed of lettuce or in lettuce cups. You can also use portobello mushroom caps as the “buns.” The filling itself is naturally low-carb and keto-friendly.
Breakfast Sliders
Use breakfast sausage links instead of Italian sausage. Add some roasted potatoes to the sheet pan (toss them with oil and seasonings, add them at the same time as the peppers). Top with a fried egg for the ultimate breakfast slider. This is my personal favorite for Sunday mornings.
Cheese Variations
I’ve tried this with mozzarella, fontina, gouda, and even blue cheese crumbles. Each brings something different. Fontina is incredibly melty and nutty. Gouda adds a smoky sweetness. Blue cheese is bold and tangy — use it sparingly unless you’re a die-hard fan.
Serving & Storage Suggestions
These sliders are best served warm, right after assembly. The rolls are soft, the cheese is melty, and everything is at peak deliciousness. But I know life happens, so here’s how to handle leftovers.
Serving Temperature: These sliders are fantastic at room temperature, which makes them perfect for tailgating. If you’re serving them at a party, you can keep them warm in a slow cooker on low for up to 2 hours. Just place the assembled sliders in the slow cooker and cover with the lid slightly ajar to let steam escape.
What to Serve With Them: These sliders pair beautifully with a crisp coleslaw, potato salad, or a simple green salad with vinaigrette. For drinks, an ice-cold beer or a tangy lemonade cuts through the richness perfectly. If you’re feeling fancy, serve them with some pickled jalapeños or banana peppers on the side.
Storage Instructions: Store leftover sausage and pepper filling in an airtight container in the refrigerator for up to 4 days. Keep the rolls separate — they’ll get soggy if stored with the filling. Reheat the filling in a skillet over medium heat or in the microwave. Toast fresh rolls before assembling.
Freezer Instructions: You can freeze the cooked sausage and pepper filling for up to 3 months. Let it cool completely, then transfer to a freezer-safe bag or container. To reheat, thaw overnight in the refrigerator, then reheat in a skillet or oven. Make fresh rolls when you’re ready to serve.
Flavor Development: Honestly, the filling tastes even better the next day. The flavors have time to meld and deepen. I often make the filling a day ahead for parties — it saves time and tastes better. Just don’t assemble the sliders until you’re ready to serve.
Nutritional Information & Benefits
While these sliders are definitely a treat, they’re not as indulgent as you might think. Here’s a rough breakdown per slider (assuming 12 sliders total):
- Calories: Approximately 350-400 per slider
- Protein: 18-22 grams
- Fat: 20-25 grams
- Carbohydrates: 25-30 grams
- Fiber: 2-3 grams
- Sugar: 6-8 grams
- Sodium: 700-900 mg (varies by sausage brand)
Health Benefits: Bell peppers are packed with vitamin C — one serving provides more than 100% of your daily needs. They’re also rich in antioxidants like beta-carotene. Onions contain quercetin, a compound that supports heart health. Italian sausage provides protein and B vitamins, though it’s higher in saturated fat, so moderation is key.
Dietary Considerations: This recipe is naturally nut-free and egg-free. For gluten-free, use certified gluten-free rolls and check your sausage labels. For dairy-free, skip the cheese or use a plant-based alternative. The recipe can be made lower in sodium by using low-sodium sausage and reducing added salt.
I’m not a nutritionist, but I believe in balance. These sliders are perfect for game day or a special treat. Pair them with a big salad or some veggie sticks, and you’ve got a meal that feels indulgent but doesn’t completely derail your healthy eating goals.
Frequently Asked Questions
Can I make these sliders ahead of time for a party?
Absolutely! You can roast the sausages and peppers up to 2 days in advance. Store them in the fridge, then reheat on a sheet pan at 350°F for about 10 minutes before assembling. Toast the rolls fresh right before serving for the best texture.
What if I don’t have a sheet pan?
No problem! You can use a large baking dish or even a cast iron skillet. Just make sure everything has enough space to spread out in a single layer. If using a smaller pan, cook in batches to avoid steaming.
Can I use frozen peppers and onions?
You can, but fresh vegetables give much better results. Frozen peppers release a lot of water as they cook, which can make everything soggy instead of nicely caramelized. If you’re in a pinch, thaw and drain them well first, then pat dry with paper towels.
How do I keep the rolls from getting soggy?
The key is to toast the rolls before adding the filling. If you’re making these ahead, store the filling and rolls separately. Assemble right before serving. If you’re serving at a party, keep the assembled sliders in a warm oven (200°F) for no more than 30 minutes.
Can I grill these instead of roasting?
Definitely! Grilling adds a wonderful smoky flavor. Grill the sausages over medium heat for about 12-15 minutes, turning occasionally. Grill the peppers and onions in a grill basket or foil packet. Toast the rolls on the grill for the last minute. The flavors will be slightly different but equally delicious.
Conclusion
These Easy Sheet Pan Sausage and Pepper Tailgate Sliders have become a staple in my kitchen for good reason. They’re simple enough for a Tuesday night dinner but impressive enough for the biggest game day party. The combination of juicy sausage, sweet caramelized peppers, melty cheese, and soft rolls is honestly unbeatable.
What I love most about this recipe is how forgiving it is. You can swap ingredients, adjust the heat level, or make it ahead without stressing. It’s the kind of recipe that makes you look like a hero in the kitchen with minimal effort. And let’s be real — isn’t that what we all want?
I’d love to hear how these turn out for you. Did you try a variation? Did your family devour them? Drop a comment below and let me know. And if you’re looking for more game day inspiration, check out my crispy buffalo chicken dip or these loaded nacho bites for your next party spread.
Until next time, happy cooking! And remember — the best recipes are the ones you share with the people you love. These sliders are made for sharing.
Pin This Recipe!
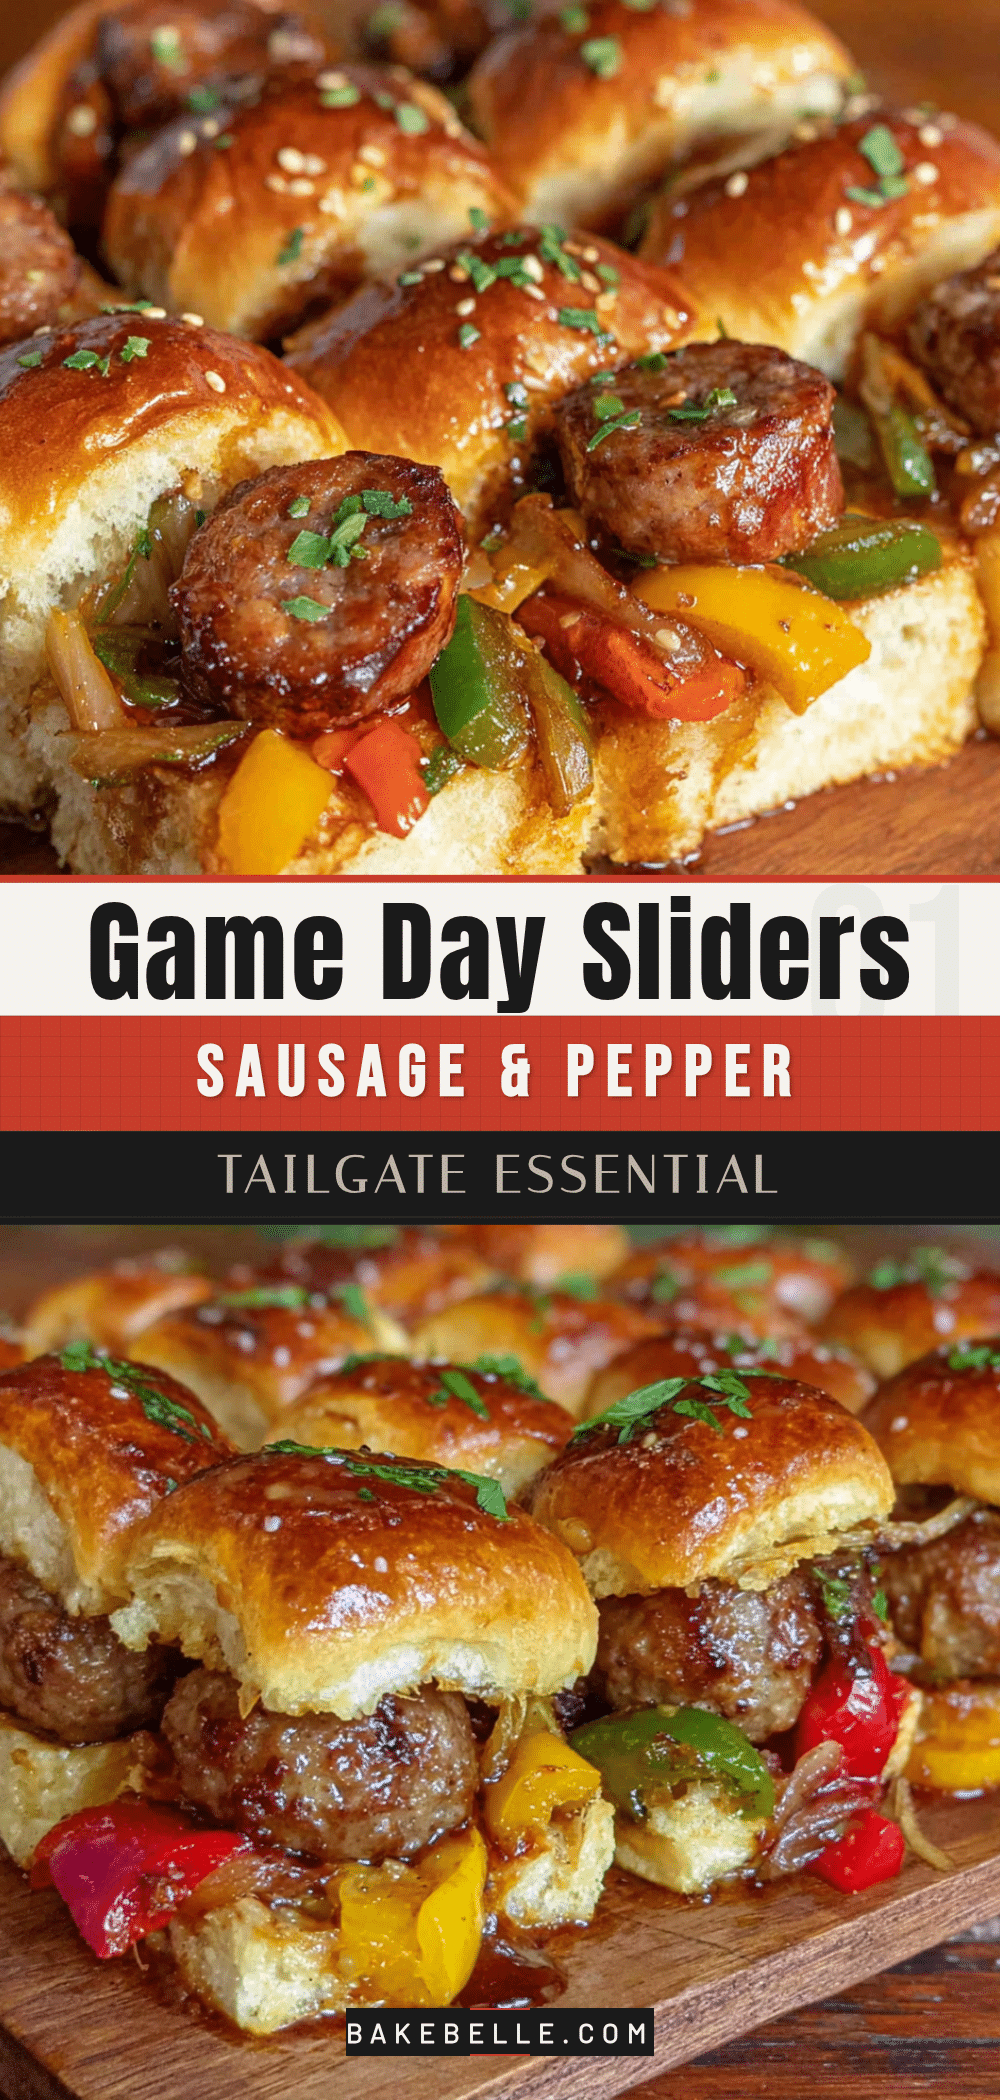
Easy Sheet Pan Sausage & Pepper Sliders: Perfect Tailgate Food
These Easy Sheet Pan Sausage and Pepper Tailgate Sliders are the ultimate game day food. Juicy Italian sausage, sweet caramelized peppers and onions, and melty provolone cheese are all roasted together on one pan for a crowd-pleasing meal ready in 30 minutes.
- Prep Time: 15 minutes
- Cook Time: 20 minutes
- Total Time: 35 minutes
- Yield: 12 sliders 1x
- Category: Main Course
- Cuisine: American
Ingredients
- 2 pounds Italian sausage links (mix of sweet and hot)
- 3 bell peppers (mix of colors), sliced into 1/2-inch strips
- 1 large yellow onion, sliced into 1/4-inch half-rings
- 3 tablespoons olive oil
- 2 cloves garlic, minced
- 1 teaspoon dried oregano
- 1/2 teaspoon kosher salt
- 1/4 teaspoon black pepper, freshly ground
- 1/4 teaspoon red pepper flakes (optional)
- 12 slider rolls (Hawaiian sweet rolls or potato rolls)
- 8 slices provolone cheese
- 2 tablespoons butter, melted
- 1 tablespoon sesame seeds (optional)
Instructions
- Preheat oven to 400°F (200°C). Position rack in the middle of the oven.
- Line a large sheet pan with aluminum foil or parchment paper. If using foil, spray with non-stick cooking spray.
- In a large mixing bowl, combine sliced peppers, onions, minced garlic, olive oil, oregano, salt, black pepper, and red pepper flakes (if using). Toss until well coated.
- Spread the seasoned peppers and onions in an even layer on the prepared sheet pan. Nestle the sausage links on top, spacing them evenly.
- Roast for 20 minutes. Halfway through (at 10 minutes), use tongs to turn the sausages for even browning.
- Check for doneness: sausages should be browned and cooked through (internal temperature 160°F/71°C for pork), peppers tender and caramelized at edges.
- Remove pan from oven. Lay provolone slices over the sausages. If desired, return to oven for 2 minutes for extra melty cheese.
- Slice slider rolls in half horizontally. Place them cut-side down on the pan around the sausages, nestling into the juices. Let sit for about 3 minutes to absorb flavor.
- Optional: For crunchier rolls, turn oven to broil and place pan on top rack for 1-2 minutes, watching carefully to avoid burning.
- Assemble sliders: Using tongs, place a sausage link with melted cheese on the bottom half of each roll. Top with roasted peppers and onions. Place top half of roll on each slider.
- Brush tops of rolls with melted butter. Sprinkle sesame seeds on top if using.
- Serve immediately while warm.
Notes
Don’t overcrowd the pan to ensure proper caramelization. Let sausages rest 5 minutes before slicing if desired. Use room temperature rolls for even toasting. Peppers and onions can be roasted up to 2 days ahead. Italian sausages are already seasoned, so go easy on added salt. For gluten-free, use certified gluten-free rolls and check sausage labels. For dairy-free, skip cheese or use plant-based alternative.
Nutrition
- Serving Size: 1 slider
- Calories: 375
- Sugar: 7
- Sodium: 800
- Fat: 22
- Saturated Fat: 8
- Carbohydrates: 27
- Fiber: 2
- Protein: 20
Keywords: sliders, sausage and peppers, sheet pan, tailgate food, game day, easy dinner, party food, Italian sausage