My neighbor’s annual Halloween block party was in three hours and I’d completely forgotten. Everyone else would be bringing those elaborate themed desserts — you know the ones, with the fondant ghosts and the painstakingly piped spiderwebs. I had a bag of popcorn kernels, some white chocolate chips I’d bought for a different project, and a growing sense of panic. I mean, I couldn’t show up empty-handed to the best party of the year. So I did what any reasonable person would do when staring down a deadline and a half-empty pantry — I started experimenting. Honestly, the first batch looked like a crime scene. The second batch looked like a slightly less concerning crime scene. But by the third try, I’d figured out the trick, and what I walked in with completely stole the show. It was messy, it was ridiculous, and everyone asked for the recipe. Maybe you’ve been there, scrambling at the last minute, convinced you’d have to show up with a sad store-bought platter. These spooky white chocolate popcorn hands are the answer to that exact problem. They look like you spent hours, they taste incredible, and they’re the kind of thing people can’t stop picking at. I’ve been making them for every Halloween gathering since, and let me tell you, they never fail to get that delighted, slightly horrified reaction that makes the whole thing worth it.
Why You’ll Love This Recipe
After years of testing and tweaking (and yes, a few kitchen disasters), I can confidently say this is the best version of this recipe. I’ve learned through trial and error exactly how to get that perfect popcorn-to-chocolate ratio and the right technique for shaping the hands so they actually hold together. Here is why this recipe works so well for your Halloween party:
- Quick & Easy : Comes together in under 30 minutes, perfect for last-minute Halloween prep or when you realize the party is tomorrow and you have nothing.
- Simple Ingredients : You probably already have popcorn and white chocolate in your kitchen. No weird specialty items or trips to three different stores.
- Perfect for Halloween Parties : These are the ultimate conversation starter. They look creepy, they taste amazing, and everyone wants to grab one.
- Crowd-Pleaser : Kids love the spooky factor, adults love the sweet and salty combo. It disappears fast.
- Unbelievably Delicious : The crunch of the popcorn with the creamy white chocolate and that pop of salt is next-level snack food.
What makes this recipe different from the rest is the technique I developed for keeping the popcorn clusters intact without them falling apart the moment someone picks one up. I also use a specific ratio of white chocolate to popcorn that gives you just enough coating without making everything soggy. This isn’t just another popcorn recipe — it’s the one that will have people asking you to bring it to every Halloween party from now on.
What Ingredients You Will Need
This recipe uses simple, accessible ingredients to create something that looks far more complicated than it actually is. Most of these are pantry staples, but I’ll share my tips for picking the best ones.
- 8 cups popped popcorn (plain, unsalted, and unbuttered — I prefer Orville Redenbacher’s Natural for the best texture)
- 12 ounces white chocolate chips or melting wafers (I recommend Ghirardelli white chocolate chips for the smoothest melt, but Wilton candy melts work great too)
- 1 tablespoon coconut oil or vegetable shortening (this is my secret for getting the chocolate to the perfect consistency for coating)
- 1/2 cup powdered sugar (for dusting — it gives the hands that eerie, ghostly look)
- 1/4 teaspoon salt (flaky sea salt is best, but regular works fine — it cuts the sweetness perfectly)
- Disposable food-grade gloves (the kind you’d use for handling food, not the latex medical ones — I get mine at the grocery store bakery section)
- Non-stick cooking spray (essential for making sure the gloves don’t stick to the chocolate)
For the popcorn base, I’ve tried using microwave popcorn, but honestly, the artificial butter flavor messes with the white chocolate. Air-popped or stovetop popcorn gives you a clean, neutral base that lets the chocolate shine. If you’re in a pinch, you can use plain microwave popcorn, just skip the butter-flavored kind.
The coconut oil is my personal trick. It thins the white chocolate just enough so it coats the popcorn evenly without clumping. If you don’t have coconut oil, vegetable shortening works perfectly fine. Don’t skip this step — I tried once without it and ended up with thick, gloppy patches of chocolate that made the hands look lumpy instead of spooky.
For the powdered sugar, you want to apply it lightly. Too much and it looks like a flour bomb went off. A fine-mesh strainer is your best friend here. I tap it gently over the hands for that perfect ghostly dusting effect.
Equipment Needed
You don’t need anything fancy for this recipe, which is part of why I love it. Here is what you’ll need:
- Large mixing bowl (big enough to toss the popcorn without it flying everywhere — I use my biggest stainless steel bowl)
- Microwave-safe bowl or double boiler (for melting the white chocolate. I use a glass measuring cup because the spout makes pouring easier)
- Spatula or wooden spoon (for stirring and coating)
- Baking sheet (lined with parchment paper or a silicone mat)
- Disposable food-grade gloves (these are non-negotiable — you need them for shaping)
- Fine-mesh strainer (for dusting the powdered sugar evenly)
- Non-stick cooking spray (to prep the gloves)
If you don’t have a microwave, a double boiler works just as well for melting the chocolate. I’ve done it both ways, and honestly, the double boiler gives you a little more control if you’re nervous about burning the chocolate. Just don’t let any water get into the chocolate, or it will seize up and turn into a grainy mess. Trust me, I learned that one the hard way.
For the baking sheet, I recommend one with a rim so nothing slides off. A silicone mat is worth the investment here — the parchment paper can sometimes stick if the chocolate leaks through. But parchment works fine if you’re careful.
Preparation Method
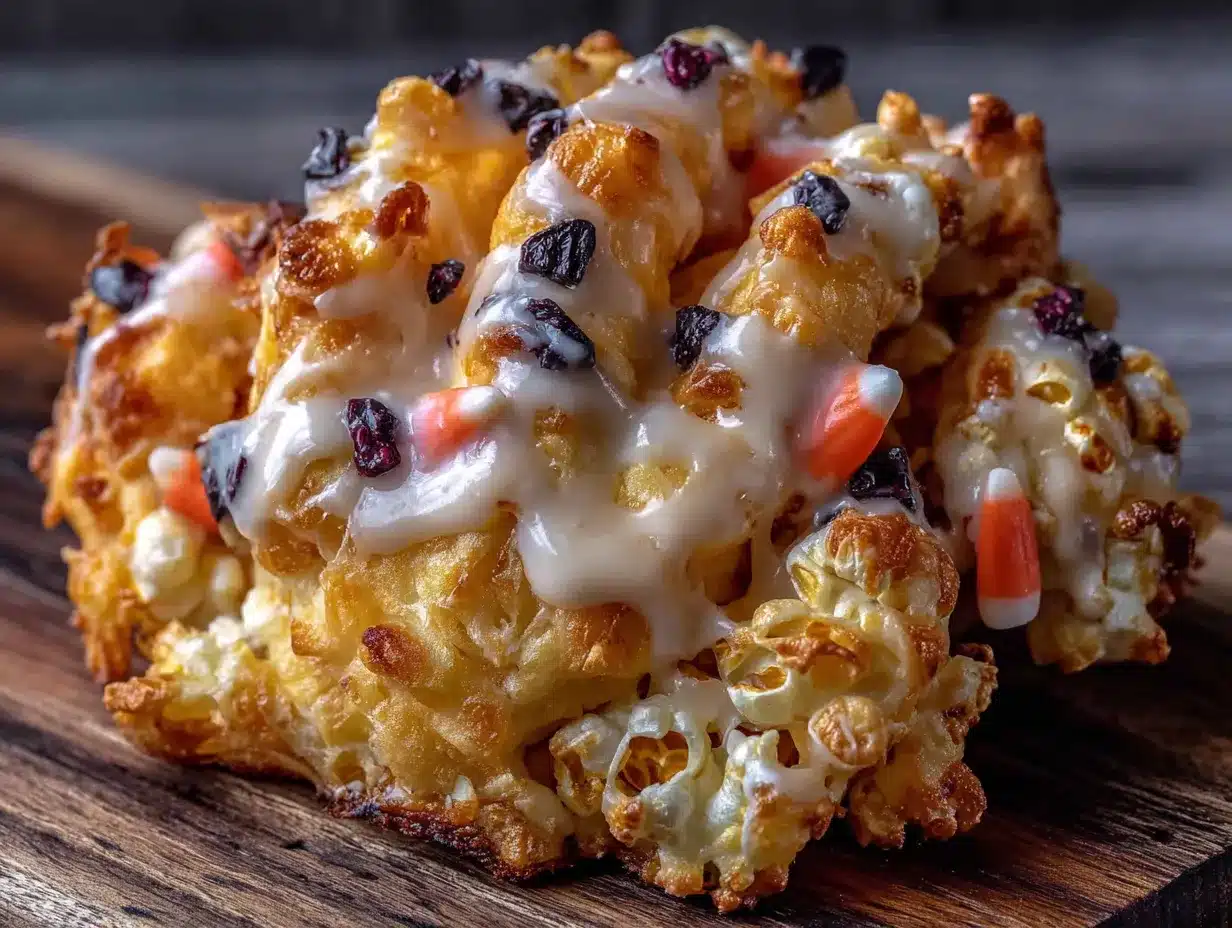
- Pop your popcorn and remove any unpopped kernels. You want 8 cups of popped popcorn. I usually pop about 1/3 cup of kernels to get this amount. Spread the popcorn out on your baking sheet and pick through it carefully. Nothing ruins the texture of these hands like biting into a hard kernel. Trust me, check twice.
- Line your baking sheet with parchment paper or a silicone mat. Set it aside for now. You’ll use it later to set the shaped hands.
- Melt the white chocolate chips and coconut oil together. Place them in a microwave-safe bowl and heat in 30-second intervals, stirring well after each interval. White chocolate burns easily, so don’t walk away. It usually takes about 2 minutes total. The mixture should be smooth and slightly runny. If it looks thick, add another teaspoon of coconut oil.
- Pour the melted white chocolate over the popcorn. Use your spatula to gently fold the popcorn and chocolate together. Work slowly and carefully — you want every piece of popcorn coated, but you don’t want to break the popcorn into pieces. This takes about 2-3 minutes of gentle folding.
- Let the mixture cool for 5 minutes. This is important. If you try to shape the hands while the chocolate is too warm, it will just slide off the gloves. You want it to be tacky but not set.
- Spray your disposable gloves with non-stick cooking spray. This is the most critical step. I cannot stress this enough. If you skip this, the chocolate will stick to the gloves and you’ll end up with a sticky mess instead of a hand shape. Spray them generously.
- Scoop about 1/2 cup of the popcorn mixture into your gloved hand. Close your fingers around it gently and squeeze to form a hand shape. You want the fingers to be distinct but not too skinny or they’ll break. I usually squeeze a little harder near the palm and lighter at the fingertips.
- Carefully place the shaped hand on your prepared baking sheet. Gently open your gloved hand and let it slide onto the parchment. If it sticks, you didn’t use enough spray. Don’t panic — just spray more and try again.
- Repeat with the remaining popcorn mixture. You should get about 6 to 8 hands depending on how big you make them. I usually aim for 7 — one always ends up a little wonky and that’s my tester.
- Let the hands set at room temperature for about 20 minutes. Or pop them in the fridge for 10 minutes if you’re in a hurry. They should be firm to the touch before you move on.
- Dust the hands with powdered sugar. Place the powdered sugar in your fine-mesh strainer and tap it gently over the hands. Focus a little more on the fingertips and palm for that creepy, ghostly effect. Don’t overdo it — you want them to look spooky, not like they fell in a bag of flour.
One thing I learned the hard way — don’t make the hands too big. I got ambitious my first time and made these massive paws that looked more like oven mitts than hands. Keep them hand-sized. People need to be able to pick them up and eat them without feeling like they’re wrestling a popcorn monster.
Cooking Tips & Techniques
I’ve made these spooky white chocolate popcorn hands more times than I care to count, and I’ve made every mistake in the book so you don’t have to. Here are the things I wish someone had told me:
The chocolate temperature matters more than you think. If your white chocolate is too hot when you try to shape the hands, it will just slide right off the glove. If it’s too cold, the popcorn won’t stick together properly. You want it warm enough to be fluid but cool enough to be tacky. I test it by touching a tiny bit to my wrist — it should feel warm, not hot.
Don’t overmix the popcorn. I know it’s tempting to keep stirring until everything looks perfectly coated, but the more you stir, the more the popcorn breaks into smaller pieces. You want those big, satisfying clusters. Fold gently and stop when about 80% of the popcorn is coated. The rest will get coated as you shape the hands.
The spray on the gloves is not optional. I tried to skip this once because I was out of cooking spray. Big mistake. The chocolate bonded to the gloves like they were meant to be together forever. I spent 20 minutes peeling chocolate off latex gloves while my popcorn cooled into an unusable lump. Just use the spray.
Work in batches if you need to. If your kitchen is warm, the chocolate might start getting too soft as you work. Pop the baking sheet in the fridge for 5 minutes to firm things up. I usually do this halfway through if I’m making a double batch.
For the best texture, serve these within a few hours. They’ll keep for a day or two, but the popcorn starts to soften after about 24 hours. I make mine the morning of the party and they’re perfect by evening.
Variations & Adaptations
One of the best things about this recipe is how easy it is to customize. Here are some variations I’ve tried and loved:
Dark Chocolate Zombie Hands — Swap the white chocolate for dark or milk chocolate. The effect is less ghostly and more “undead rising from the grave.” I use 60% cacao dark chocolate for a nice bitter-sweet balance. Dust with cocoa powder instead of powdered sugar for a dirtier, grungier look.
Bloody Popcorn Hands — After dusting with powdered sugar, drizzle red candy melts or strawberry syrup over the fingertips. It looks like they’ve been up to no good. This one gets the biggest reaction at parties, I’ll be honest.
Gluten-Free Version — This recipe is naturally gluten-free as long as you use plain popcorn and check your white chocolate label. Most white chocolate chips are gluten-free, but I always double-check. It’s a great option for guests with dietary restrictions.
Spicy Sweet Hands — Add a pinch of cayenne pepper or chili powder to the white chocolate before coating. The heat sneaks up on you and pairs surprisingly well with the sweet chocolate. I tried this on a whim one year and it became my secret weapon.
Nutty Halloween Hands — Toss in some chopped almonds or pecans with the popcorn before adding the chocolate. The crunch adds another layer of texture and makes the hands feel more substantial. Just make sure to check for nut allergies if you’re serving these at a party.
Serving & Storage Suggestions
These spooky white chocolate popcorn hands are best served at room temperature. I arrange them on a large platter with the fingers pointing outward for maximum creepiness. Sometimes I add a few fake spiders or plastic bones around the platter for extra Halloween flair. The presentation is half the fun with these.
For a Halloween party spread, I serve these alongside other finger foods like spooky pizza skulls and a bowl of blood orange punch. The sweet and salty combo of the popcorn hands balances out the savory options perfectly. They also work great as a dessert table centerpiece — just arrange them on a raised cake stand so everyone can see them.
If you have leftovers (which is rare, honestly), store them in an airtight container at room temperature. Do not refrigerate them — the moisture in the fridge will make the popcorn soft and chewy. They’ll keep for about 2 days, but the texture is best on day one. I’ve never had them last longer than that at my house.
For reheating, don’t bother. These are meant to be eaten at room temperature. If they’ve softened a bit, you can spread them on a baking sheet and pop them in a 300°F oven for 5 minutes to crisp them back up, but let them cool completely before serving again.
Nutritional Information & Benefits
Let’s be real — these are a treat, not a health food. But here’s the estimated breakdown per hand (based on 7 hands per batch):
| Nutrient | Amount per hand |
|---|---|
| Calories | 245 |
| Total Fat | 14g |
| Saturated Fat | 8g |
| Carbohydrates | 28g |
| Sugar | 18g |
| Protein | 3g |
| Sodium | 95mg |
Popcorn is actually a whole grain, so there’s a tiny bit of fiber in there. White chocolate isn’t exactly a superfood, but it does contain calcium and a small amount of antioxidants from cocoa butter. The coconut oil adds some healthy fats. Honestly, I tell myself it’s better than a candy bar because at least there’s popcorn involved.
For dietary considerations, this recipe is naturally gluten-free and nut-free if you use certified gluten-free popcorn and check your chocolate labels. It is not dairy-free due to the white chocolate, but you can find dairy-free white chocolate alternatives if needed.
Conclusion
These spooky white chocolate popcorn hands have become my signature Halloween contribution, and I’m honestly a little proud of how far they’ve come from that panicked afternoon in my kitchen. They’re fun, they’re delicious, and they always get that perfect mix of “ew” and “yum” from everyone who tries them. What I love most is that they look like you put in way more effort than you actually did — and isn’t that the dream for any party recipe?
I’d love to hear how yours turn out. Did you try a variation? Did your guests scream (in a good way)? Drop a comment below and let me know. And if you’re looking for more Halloween party inspiration, don’t miss our collection of spooky Halloween desserts that pair perfectly with these creepy creations. Happy haunting, and happy snacking!
Frequently Asked Questions
Can I make these spooky white chocolate popcorn hands ahead of time?
Yes, you can make them up to 2 days in advance. Store them in an airtight container at room temperature. Just don’t add the powdered sugar until right before serving, or it will dissolve into the chocolate and lose that ghostly effect.
Why did my white chocolate seize up?
White chocolate seizes when it comes into contact with even a tiny amount of water. Make sure your bowl and spatula are completely dry before you start melting. If it does seize, you can try adding a teaspoon of coconut oil and stirring vigorously, but sometimes it’s better to just start over.
Can I use microwave popcorn for this recipe?
You can, but I don’t recommend it. The artificial butter flavoring competes with the white chocolate and can make the hands taste greasy. If you’re in a pinch, use plain microwave popcorn and skip the butter-flavored kind.
How do I get the hand shape to hold together better?
The key is letting the chocolate cool slightly before shaping. If it’s too warm, the popcorn won’t stick together. Also, squeeze firmly but gently when shaping — you want the popcorn to compact without breaking. A little practice helps, so don’t worry if your first hand looks a bit wonky.
Can I freeze these popcorn hands?
I don’t recommend freezing them. The popcorn will absorb moisture as it thaws and become soft and chewy. These are really best enjoyed fresh. If you have leftovers, just keep them in an airtight container at room temperature for up to 2 days.
Pin This Recipe!
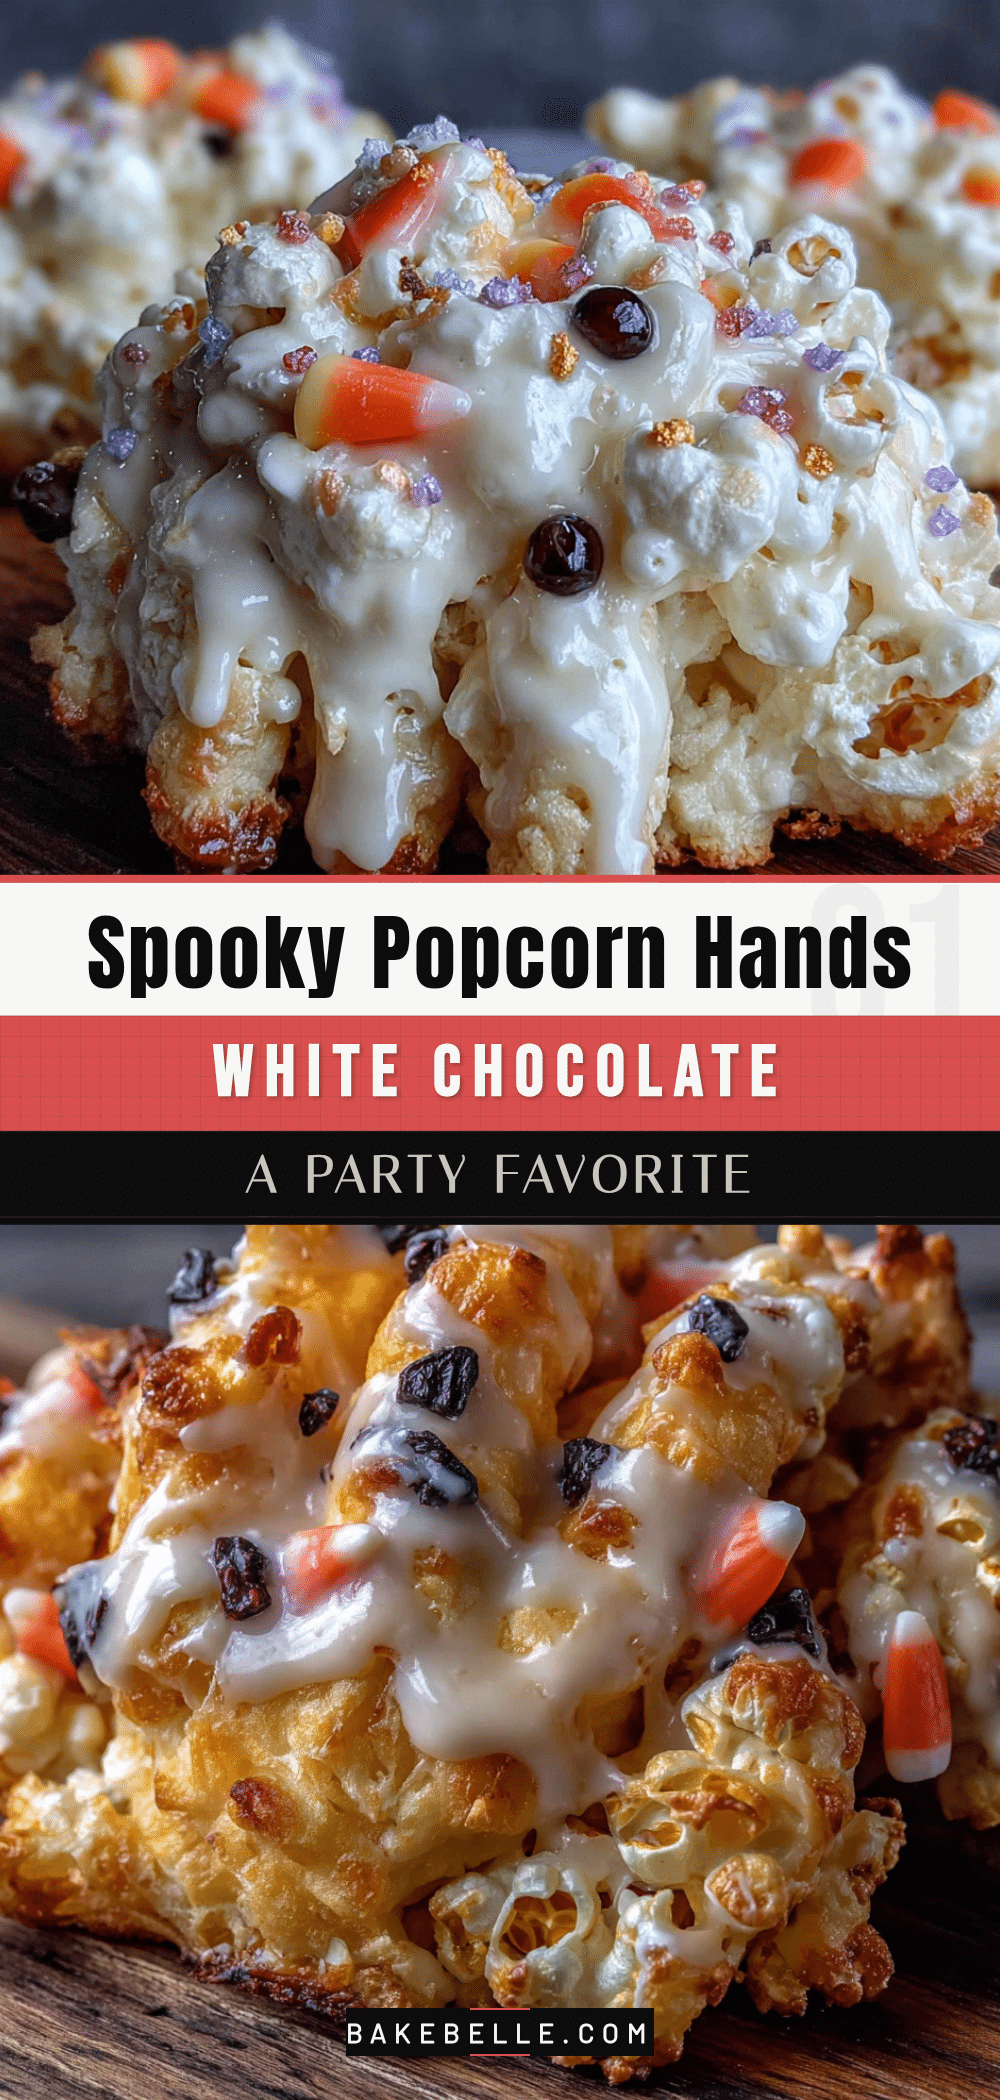
Spooky White Chocolate Popcorn Hands: Easy Halloween Party Recipe

These spooky white chocolate popcorn hands are the perfect last-minute Halloween party treat. They look like you spent hours, taste incredible, and are guaranteed to get a delighted, slightly horrified reaction from your guests.
- Prep Time: 15 minutes
- Cook Time: 5 minutes
- Total Time: 40 minutes
- Yield: 6-8 hands 1x
- Category: Dessert
- Cuisine: American
Ingredients
- 8 cups popped popcorn (plain, unsalted, unbuttered)
- 12 ounces white chocolate chips or melting wafers
- 1 tablespoon coconut oil or vegetable shortening
- 1/2 cup powdered sugar
- 1/4 teaspoon salt (flaky sea salt preferred)
- Disposable food-grade gloves
- Non-stick cooking spray
Instructions
- Pop your popcorn and remove any unpopped kernels. You want 8 cups of popped popcorn. Spread the popcorn out on your baking sheet and pick through it carefully.
- Line your baking sheet with parchment paper or a silicone mat. Set it aside for now.
- Melt the white chocolate chips and coconut oil together in a microwave-safe bowl in 30-second intervals, stirring well after each interval, until smooth and slightly runny (about 2 minutes total).
- Pour the melted white chocolate over the popcorn. Use a spatula to gently fold the popcorn and chocolate together until every piece is coated, about 2-3 minutes.
- Let the mixture cool for 5 minutes until it is tacky but not set.
- Spray your disposable gloves generously with non-stick cooking spray.
- Scoop about 1/2 cup of the popcorn mixture into your gloved hand. Close your fingers around it gently and squeeze to form a hand shape with distinct fingers.
- Carefully place the shaped hand on your prepared baking sheet by gently opening your gloved hand and letting it slide onto the parchment.
- Repeat with the remaining popcorn mixture to make 6 to 8 hands.
- Let the hands set at room temperature for about 20 minutes, or in the fridge for 10 minutes, until firm to the touch.
- Dust the hands with powdered sugar using a fine-mesh strainer, focusing on the fingertips and palm for a ghostly effect.
Notes
Do not skip spraying the gloves with non-stick cooking spray, or the chocolate will stick. Let the chocolate cool slightly before shaping for better hold. Serve within a few hours for best texture. Store leftovers in an airtight container at room temperature for up to 2 days. Do not refrigerate.
Nutrition
- Serving Size: 1 hand
- Calories: 245
- Sugar: 18
- Sodium: 95
- Fat: 14
- Saturated Fat: 8
- Carbohydrates: 28
- Fiber: 1
- Protein: 3
Keywords: Halloween popcorn, white chocolate popcorn, spooky treats, easy Halloween recipe, popcorn hands, party snack, ghostly popcorn