The holiday cookie exchange was in three hours and I’d completely forgotten. Not just forgotten—I’d confidently told my neighbor Karen I’d bring “something fun” and then promptly let the weeks of December chaos swallow me whole. Everyone else would be bringing their grandmother’s intricate shortbread or those perfectly piped meringue cookies that take all day. I had a box of gelatin, some peppermint extract, and a half-empty bag of chocolate chips. Honestly, I almost just showed up with a store-bought tin and called it a day.
But then I spotted the bottle of vodka in the back of the cabinet and had one of those desperate, slightly frantic ideas. Peppermint chocolate jello shots. They weren’t cookies, but they were festive. They weren’t fancy, but they’d be fun. And at that point, “fun” was the only category I could realistically aim for. I threw everything together in about twenty minutes, praying the layers would actually set in time. The kitchen smelled like a candy cane factory, and I’m pretty sure I got chocolate on my sweater. Maybe you’ve been there—scrambling, hoping, and just trying not to show up empty-handed.
Well, let me tell you, those peppermint chocolate jello shots were the first thing to disappear. Karen asked for the recipe before I’d even taken my coat off. Someone called them “the life of the party,” and I just stood there with my chocolate-stained sweater feeling like an accidental overachiever. That’s the thing about this recipe—it looks like you planned it, like you’re some kind of holiday genius. But really, it’s just simple ingredients and a little bit of panic. And honestly? That makes it taste even better.
Why You’ll Love This Recipe
Let’s be real for a second. A lot of jello shot recipes out there are either way too sweet, way too strong, or just plain boring. These peppermint chocolate jello shots are none of those things. They’ve got that perfect balance—creamy chocolate on the bottom, refreshing peppermint on top, and just enough kick to get the party started without knocking anyone over. I’ve tested this recipe more times than I care to admit (someone had to, right?), and it’s become my go-to for every holiday gathering.
- Quick & Easy: These come together in about 20 minutes of active time. The hardest part is waiting for them to set in the fridge, and that’s just a Netflix break waiting to happen.
- Simple Ingredients: No weird specialty items here. Gelatin, milk, chocolate, peppermint extract, and your choice of spirit. You probably have most of this stuff already.
- Perfect for Holiday Parties: Christmas, New Year’s Eve, ugly sweater parties—these fit right in. They’re festive without being fussy.
- Crowd-Pleaser: I’ve watched people who “don’t do jello shots” go back for seconds. The chocolate layer wins everyone over.
- Unbelievably Delicious: This isn’t your college party jello shot. The texture is silky, the flavors are legit, and it actually tastes like a dessert you’d want to eat.
What makes these different from every other recipe out there? It’s the two-layer approach. Most recipes just mix everything together and call it a day. But by separating the chocolate and peppermint layers, you get that beautiful visual contrast and a flavor experience that hits you in waves. Plus, I’ve dialed in the gelatin ratio so the texture is firm enough to hold its shape but still has that satisfying jiggle. It’s the little things, you know?
This is the kind of recipe that makes you look like you put in way more effort than you actually did. Perfect for impressing guests without the stress, or turning a simple holiday get-together into something memorable. And honestly, after that first bite—the way the cool peppermint melts into the rich chocolate—you’ll understand why this is the recipe I keep coming back to.
What Ingredients You Will Need
This recipe uses simple, wholesome ingredients to deliver that festive flavor without any fuss. Most of these are pantry staples, especially if you do any kind of holiday baking. Let’s break down what you’ll need and why each ingredient matters.
For the Chocolate Layer
- 1 cup whole milk (adds richness; you can use 2% but avoid skim—it won’t be as creamy)
- 1/2 cup semi-sweet chocolate chips (I prefer Ghirardelli or Guittard for that smooth melt; avoid chocolate chunks as they don’t dissolve as evenly)
- 2 tablespoons granulated sugar (just enough to balance the dark chocolate)
- 1 packet (about 2.5 teaspoons) unflavored gelatin (Knox is my go-to brand; it’s reliable and widely available)
- 1/4 cup cold water (for blooming the gelatin—this step is non-negotiable for the right texture)
- 1/4 cup vodka or your choice of spirit (vanilla vodka works beautifully here; for a non-alcoholic version, use cold water or milk)
For the Peppermint Layer
- 1 cup water (bring it to a boil, then let it cool slightly)
- 1 packet (about 2.5 teaspoons) unflavored gelatin (same as above—bloom it first)
- 1/4 cup granulated sugar (a touch sweeter than the chocolate layer to contrast nicely)
- 1/2 teaspoon peppermint extract (start with less and taste; some brands are stronger than others. I use Nielsen-Massey for a clean, natural flavor)
- Red food coloring (gel or liquid; gel gives a more vibrant color with less liquid. A few drops is all you need)
- 1/4 cup vodka or peppermint schnapps (schnapps adds extra minty sweetness; regular vodka keeps it neutral)
For Garnish (Optional but Highly Recommended)
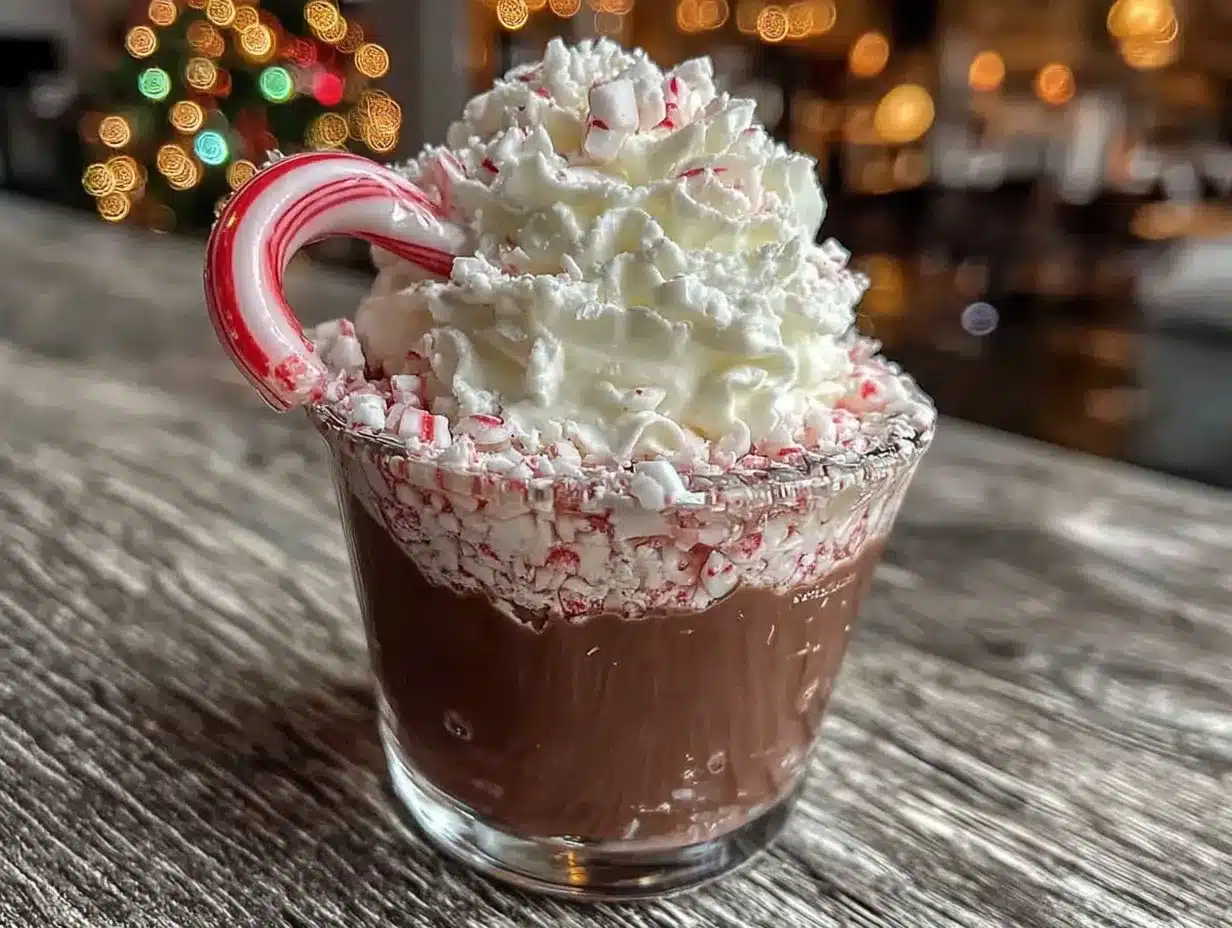
- Whipped cream (homemade or store-bought; it makes these look like little desserts)
- Crushed candy canes or peppermint candies (adds crunch and that iconic holiday look)
- Chocolate shavings (a few curls on top really sell the dessert vibe)
Ingredient Selection Tips: When choosing your chocolate, go for something you’d actually eat on its own. The quality really comes through here. For the peppermint extract, avoid the artificial stuff if you can—it tends to taste like toothpaste. A good quality extract makes all the difference. And for the gelatin, make sure it’s unflavored, not pre-sweetened dessert gelatin. You want full control over the sweetness and flavor.
Substitution Guidance: Need a dairy-free option? Use full-fat oat milk or canned coconut milk for the chocolate layer. The texture will be slightly different but still delicious. For a gluten-free version, just make sure your chocolate chips are certified gluten-free (most are, but check the label). And if you’re avoiding alcohol, replace it with cold water or milk in each layer. The shots will still taste amazing and the kids can join in too.
Equipment Needed
You don’t need a fancy kitchen to pull these off. Here’s what you’ll need and a few alternatives if you’re working with limited tools.
- Small saucepans (2): One for each layer. If you only have one, just wash it between uses—it’s fine.
- Mixing bowls: A couple of medium bowls for blooming the gelatin and combining ingredients.
- Whisk: Essential for getting that smooth, lump-free texture. A fork works in a pinch but a whisk is better.
- Measuring cups and spoons: Precision matters here, especially with the gelatin and extract.
- Plastic shot cups (2-ounce size): These are cheap and perfect for portioning. You can find them at any party supply store or online. I’ve also used small glass ramekins for a fancier presentation.
- Baking sheet or tray: To hold the filled shot cups while they set in the fridge. A flat surface helps them stay level.
- Pipette or small spoon: For carefully layering the peppermint mixture on top of the set chocolate. A steady hand works too.
- Refrigerator space: You’ll need a flat spot that won’t be disturbed for at least 4 hours. Clear a shelf ahead of time.
Budget-Friendly Tip: Don’t stress about the shot cups. You can use small paper cups, silicone molds, or even an ice cube tray if you’re in a pinch. I once used mini mason jars and they looked adorable. Just make sure whatever you use is food-safe and easy to unmold or serve from.
Preparation Method
Alright, let’s get into the nitty-gritty. This recipe has two distinct layers, so we’ll tackle them one at a time. Take your time with the first layer—it sets the foundation for everything else. And don’t worry, I’ll walk you through every step so you don’t mess it up like I did the first time (note to self: never skip blooming the gelatin).
Step 1: Bloom the Gelatin
Start with the chocolate layer. In a small bowl, sprinkle 1 packet of unflavored gelatin over 1/4 cup of cold water. Let it sit for about 5 minutes. It’ll look like a weird, spongy mess—that’s exactly what you want. This process, called blooming, ensures the gelatin dissolves evenly and gives you that smooth, jiggly texture. Do the same for the peppermint layer in a separate bowl. Set both aside while you work on the chocolate.
Step 2: Make the Chocolate Base
In a small saucepan over medium heat, warm 1 cup of whole milk until it’s steaming but not boiling. You’ll see tiny bubbles around the edges—that’s your cue. Reduce the heat to low and add the 1/2 cup of chocolate chips and 2 tablespoons of sugar. Stir constantly with your whisk until everything is melted and smooth. This should take about 2-3 minutes. The mixture will look glossy and smell incredible. Remove it from the heat.
Step 3: Incorporate the Gelatin and Spirit
Take your bloomed gelatin (the spongy stuff) and add it to the warm chocolate mixture. Whisk vigorously until it’s completely dissolved—no lumps allowed. This usually takes about a minute. Then stir in 1/4 cup of vodka. The mixture will thin out a bit, which is normal. Pour it evenly into your shot cups, filling them about halfway. You should have enough for 12-14 shots depending on cup size. Pop the tray into the fridge and let the chocolate layer set for at least 2 hours. It needs to be firm to the touch before you add the peppermint layer.
Step 4: Prepare the Peppermint Layer
While the chocolate sets, make the peppermint layer. In another small saucepan, bring 1 cup of water to a boil. Remove it from the heat and stir in 1/4 cup of sugar until dissolved. Let it cool for about 5 minutes—you don’t want it too hot when you add the gelatin. Add your second batch of bloomed gelatin and whisk until smooth. Then stir in 1/2 teaspoon of peppermint extract and a few drops of red food coloring. Start with 2-3 drops and add more until you get that cheerful candy-cane pink. Finally, mix in 1/4 cup of vodka or peppermint schnapps. Let this mixture cool to room temperature. If it’s too warm, it’ll melt the chocolate layer when you pour it on top.
Step 5: Layer the Peppermint
Once the chocolate layer is firm and the peppermint mixture is cool, carefully pour the peppermint mixture over the chocolate. Use a spoon or pipette to control the flow so you don’t disturb the chocolate layer. Fill each cup to the top. You’ll see the two layers separate beautifully—dark chocolate on the bottom, festive pink on top. Return the tray to the fridge and let everything set for at least 4 hours, but overnight is best. The longer they set, the cleaner the layers will be.
Step 6: Garnish and Serve
Right before serving, add a dollop of whipped cream to each shot. Sprinkle with crushed candy canes and a few chocolate shavings if you’re feeling fancy. The garnish isn’t just for looks—it adds texture and a little extra sweetness. Serve them chilled straight from the fridge. They’ll hold their shape for about 30 minutes at room temperature, so don’t leave them out too long.
Sensory Cue: When you bite into one, you should feel the cool, minty top layer give way to the rich, creamy chocolate underneath. The texture should be firm but tender, like a really good panna cotta. If it’s too rubbery, you used too much gelatin. If it’s too soft, you didn’t use enough or didn’t let it set long enough. Adjust next time—it’s all part of the learning curve.
Cooking Tips & Techniques
I’ve made these peppermint chocolate jello shots about a dozen times now, and let me tell you, I’ve learned a few things the hard way. Here are the tips that’ll save you from my early mistakes.
Temperature is everything. The biggest mistake people make is adding the gelatin to liquid that’s too hot. If the milk or water is boiling, it can break down the gelatin and your shots won’t set properly. Always heat your liquid until it’s steaming, not bubbling. And when you’re ready to layer the peppermint, make sure it’s cooled to room temperature. I once poured warm peppermint mixture over a perfectly set chocolate layer and watched it all melt into a muddy mess. Learn from my pain.
Patience with the layers. I know it’s tempting to rush, but the chocolate layer needs to be fully set before you add the peppermint. Give it the full 2 hours minimum. If you’re in a hurry, you can pop the tray in the freezer for 30 minutes, but watch it carefully—gelatin can get grainy if frozen too fast. The overnight set is really the gold standard here.
Multitasking strategy. While the chocolate layer is setting, make your peppermint mixture and let it cool. Then use that time to crush your candy canes and prep your garnishes. This way, when the chocolate is ready, you’re ready too. I like to set a timer for 1 hour 45 minutes so I have a few minutes to double-check everything before layering.
Consistency check. If your mixture looks grainy or separated after adding the gelatin, don’t panic. A quick whisk over low heat usually brings it back together. If it’s still lumpy, strain it through a fine-mesh sieve before pouring. Nobody wants a lumpy jello shot.
Flavor balance. Start with less peppermint extract than you think you need. You can always add more, but you can’t take it out. I once went overboard and the shots tasted like mouthwash. A half teaspoon is usually the sweet spot, but taste your mixture before pouring. If it’s too strong, add a splash more water or vodka to dilute it.
Variations & Adaptations
One of the best things about this recipe is how easy it is to tweak. Here are a few variations I’ve tried that turned out amazing.
White Chocolate Peppermint: Swap the semi-sweet chocolate chips for white chocolate. The flavor is sweeter and creamier, and the visual contrast with the red peppermint layer is stunning. Just be careful with white chocolate—it can seize if overheated. Melt it slowly over low heat and stir constantly.
Mocha Peppermint: Add 1 teaspoon of instant espresso powder to the chocolate layer along with the milk. The coffee flavor deepens the chocolate and pairs beautifully with the mint. I tried this for a New Year’s Eve party and it was a hit with the coffee lovers in the group.
Dairy-Free Version: Use full-fat oat milk or canned coconut milk for the chocolate layer. The coconut version adds a subtle tropical note that actually works with the peppermint. Just make sure your chocolate chips are dairy-free too. The texture will be slightly softer, so let them set a little longer.
Boozy Boost: For a stronger kick, use peppermint schnapps instead of vodka in both layers. It adds extra minty sweetness and bumps up the alcohol content. Just reduce the sugar slightly to balance the sweetness of the schnapps.
Layered Party Platter: Make a big batch in a 9×13 baking dish instead of individual cups. Once set, cut them into squares and serve on a platter. It’s easier for parties and looks like a fancy dessert bar. Just grease the dish lightly with cooking spray so they release easily.
Serving & Storage Suggestions
These peppermint chocolate jello shots are best served cold, straight from the fridge. The texture is perfect at around 40°F—firm but not hard, with that satisfying jiggle. I like to arrange them on a white platter or a festive tray for maximum visual impact. The red and chocolate layers really pop against a light background.
Complementary Pairings: These pair beautifully with a cup of hot cocoa or coffee. The warm drink contrasts with the cold jello shot and makes for a cozy holiday treat. For a cocktail party, serve them alongside a plate of sugar cookies or gingerbread bites. The spicy ginger notes play nicely with the mint and chocolate.
Storage: Keep these in the fridge, covered with plastic wrap or a lid, for up to 5 days. The flavors actually meld and deepen over time, so they’re even better on day two. Do not leave them at room temperature for more than 30 minutes, or they’ll start to soften and lose their shape.
Freezing: You can freeze these for up to a month, but the texture will change slightly. They’ll be a bit firmer and less jiggly when thawed. To freeze, place the tray of shots in the freezer until solid, then transfer them to a freezer bag. Thaw in the fridge overnight before serving. The garnish should be added fresh after thawing.
Reheating: Honestly, don’t. These are meant to be served cold. If you need to soften them slightly, let them sit at room temperature for 5-10 minutes before serving. That’s all they need.
Flavor Development: I’ve noticed that the peppermint flavor becomes more pronounced after a day or two in the fridge. The chocolate layer also gets richer as it sits. So if you can, make these a day ahead. Your future self will thank you.
Nutritional Information & Benefits
Let’s be honest—these are a treat, not a health food. But that doesn’t mean they can’t fit into a balanced lifestyle. Here’s the breakdown for one shot (without garnish), based on using vodka and whole milk.
| Nutrient | Amount Per Shot |
|---|---|
| Calories | 85 |
| Total Fat | 3g |
| Saturated Fat | 2g |
| Carbohydrates | 9g |
| Sugar | 8g |
| Protein | 2g |
| Sodium | 15mg |
Health Benefits of Key Ingredients: The gelatin in these shots is actually good for you—it’s a great source of collagen, which supports joint health and skin elasticity. The dark chocolate in the base layer contains antioxidants called flavonoids, which can help reduce inflammation and improve heart health. And peppermint has been shown to aid digestion and soothe headaches. So while these aren’t exactly a superfood, they’re not totally empty calories either.
Dietary Considerations: These are gluten-free as long as your chocolate chips and extracts are certified gluten-free. They’re also nut-free (check your chocolate labels). For a lower-sugar version, use sugar-free chocolate chips and reduce the sugar in the peppermint layer to 2 tablespoons. The texture will be slightly different but still tasty.
Potential Allergens: Contains dairy from the milk and chocolate. The gelatin is derived from animal collagen, so this is not vegetarian or vegan. For a plant-based version, use agar-agar instead of gelatin, but the texture will be firmer and less creamy.
My Wellness Perspective: I’m a big believer in balance. These jello shots are a fun, festive indulgence that I make for special occasions. I don’t stress about the sugar or alcohol because I’m not eating them every day. Life’s too short to skip the treats, you know? Just enjoy them mindfully and save the leftovers for a rainy day.
Conclusion
So there you have it—the peppermint chocolate jello shots that turned my holiday panic into a party triumph. These little guys are proof that you don’t need a complicated recipe or hours in the kitchen to create something memorable. With just a handful of ingredients and a little patience, you can whip up a dessert that looks like it came from a fancy bakery.
I love this recipe because it’s forgiving. Messed up the layers? It’ll still taste good. Used too much peppermint? Add more chocolate next time. It’s the kind of recipe that invites experimentation and rewards creativity. And honestly, that’s what cooking should be about—having fun and sharing something delicious with the people you care about.
Now I want to hear from you. Have you tried making these? Did you add your own twist? Drop a comment below and let me know how they turned out. And if you’re looking for more festive ideas, check out my holiday desserts collection for more easy treats. Until next time, happy cooking—and don’t forget to save room for seconds!
Frequently Asked Questions
Can I make these non-alcoholic?
Absolutely. Just replace the vodka or schnapps with an equal amount of cold water or milk. The texture will be slightly softer, so let them set a little longer. They’re perfect for kids or anyone who wants to skip the booze.
Why did my layers mix together?
This usually happens when the peppermint layer is too warm when you pour it over the chocolate. Make sure the chocolate layer is fully set (at least 2 hours in the fridge) and the peppermint mixture is cooled to room temperature. Pour it gently using a spoon or pipette.
How far in advance can I make these?
You can make them up to 5 days ahead and keep them covered in the fridge. The flavors actually get better after a day or two. Just add the garnish right before serving so it stays fresh and crunchy.
Can I use Jell-O instead of unflavored gelatin?
You can, but it’ll change the flavor and sweetness. If you use Jell-O, skip the added sugar and adjust the peppermint extract to taste. The texture will be firmer and the color will be more artificial. I prefer unflavored gelatin for better control.
What’s the best way to crush candy canes for the garnish?
Put the candy canes in a zip-top bag and smash them with a rolling pin or the bottom of a heavy pan. Leave some bigger pieces for texture. You can also pulse them in a food processor, but be careful not to turn them into powder. A little crunch is what you’re after.
Pin This Recipe!
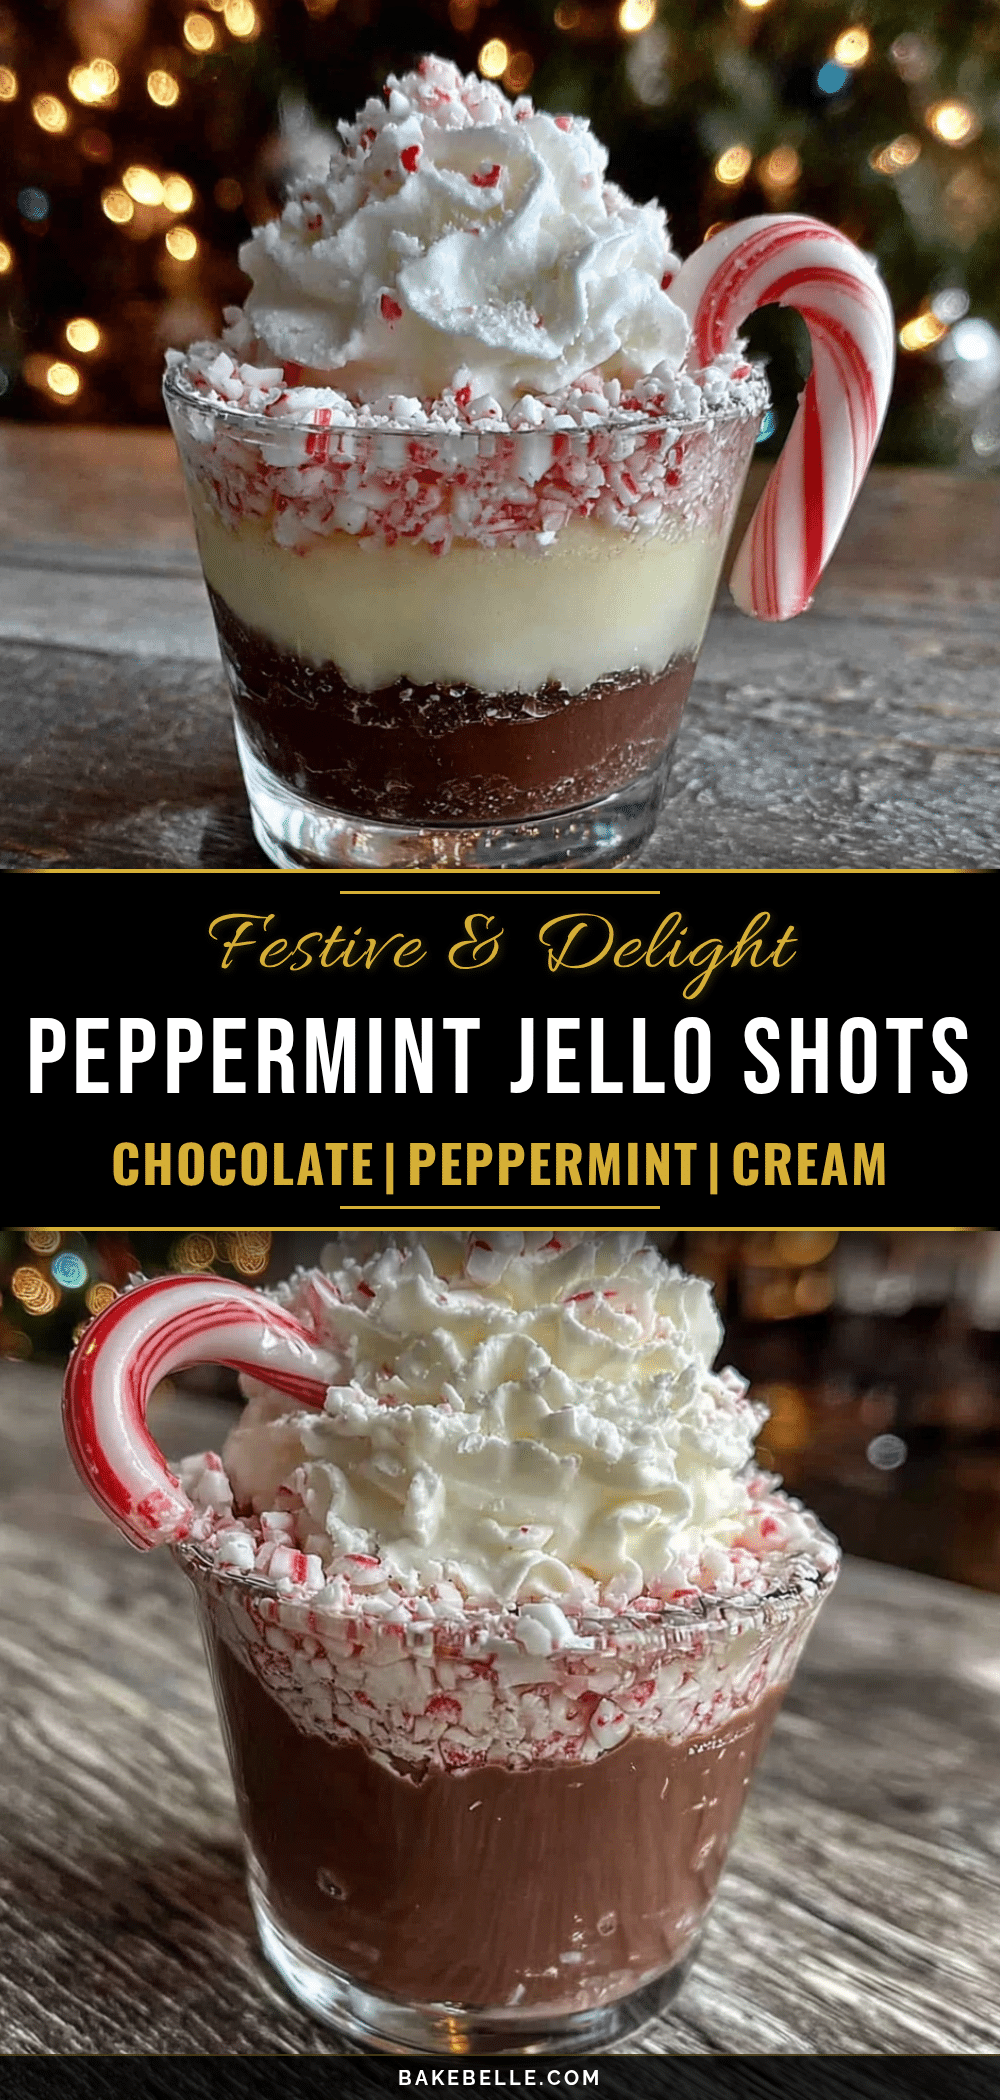
Peppermint Chocolate Jello Shots: Easy Party Dessert

These peppermint chocolate jello shots are a festive, two-layered dessert that combines rich chocolate with refreshing peppermint. Perfect for holiday parties, they’re quick to make and always a crowd-pleaser.
- Prep Time: 20 minutes
- Cook Time: 10 minutes
- Total Time: 4 hours 30 minutes (includes setting time)
- Yield: 12-14 servings 1x
- Category: Dessert
- Cuisine: American
Ingredients
- 1 cup whole milk
- 1/2 cup semi-sweet chocolate chips
- 2 tablespoons granulated sugar
- 1 packet (about 2.5 teaspoons) unflavored gelatin
- 1/4 cup cold water
- 1/4 cup vodka or your choice of spirit
- 1 cup water
- 1 packet (about 2.5 teaspoons) unflavored gelatin
- 1/4 cup granulated sugar
- 1/2 teaspoon peppermint extract
- Red food coloring
- 1/4 cup vodka or peppermint schnapps
- Whipped cream (for garnish)
- Crushed candy canes or peppermint candies (for garnish)
- Chocolate shavings (for garnish)
Instructions
- Bloom the gelatin: In a small bowl, sprinkle 1 packet of unflavored gelatin over 1/4 cup of cold water. Let it sit for about 5 minutes until spongy. Repeat for the peppermint layer in a separate bowl.
- Make the chocolate base: In a small saucepan over medium heat, warm 1 cup of whole milk until steaming but not boiling. Reduce heat to low, add 1/2 cup chocolate chips and 2 tablespoons sugar. Stir constantly until melted and smooth, about 2-3 minutes. Remove from heat.
- Incorporate the gelatin and spirit: Add the bloomed gelatin to the warm chocolate mixture and whisk until completely dissolved. Stir in 1/4 cup vodka. Pour evenly into shot cups, filling halfway. Refrigerate for at least 2 hours until firm.
- Prepare the peppermint layer: In another small saucepan, bring 1 cup water to a boil. Remove from heat, stir in 1/4 cup sugar until dissolved. Let cool for 5 minutes. Add the second batch of bloomed gelatin and whisk until smooth. Stir in 1/2 teaspoon peppermint extract and a few drops red food coloring. Mix in 1/4 cup vodka or peppermint schnapps. Let cool to room temperature.
- Layer the peppermint: Once chocolate layer is firm and peppermint mixture is cool, carefully pour peppermint mixture over chocolate using a spoon or pipette. Fill each cup to the top. Refrigerate for at least 4 hours, preferably overnight.
- Garnish and serve: Just before serving, add a dollop of whipped cream to each shot. Sprinkle with crushed candy canes and chocolate shavings. Serve chilled.
Notes
Temperature is key: avoid adding gelatin to boiling liquid. Ensure chocolate layer is fully set before adding peppermint layer. For best results, let set overnight. Start with less peppermint extract and adjust to taste.
Nutrition
- Serving Size: 1 shot
- Calories: 85
- Sugar: 8
- Sodium: 15
- Fat: 3
- Saturated Fat: 2
- Carbohydrates: 9
- Protein: 2
Keywords: peppermint chocolate jello shots, holiday dessert, party dessert, jello shots, peppermint, chocolate, easy dessert