My sister-in-law had refused to touch sourdough discard for three years. Three years of me mentioning the jar in my fridge, the weekly feedings, the little bit of starter I’d scrape off before adding fresh flour. She’d nod politely and change the subject. Then last Thanksgiving, I caught her standing at my kitchen counter, pulling off pieces of this focaccia with her bare hands, saying nothing, just eating. The rosemary was still warm, the olive oil glistening on her fingers. She didn’t even try to explain herself. She just looked at me with bread in her mouth and shrugged like, okay, you got me.
That moment stayed with me. Not because I won some imaginary bread argument, but because it proved what I’d suspected all along—sourdough discard isn’t a problem you have to solve. It’s a gift you haven’t figured out how to open yet. And this focaccia, honestly, is the key. It’s the thing that turns kitchen skeptics into quiet converts. It’s the bread you make when you want something that feels impressive but takes almost no real effort. The dough does the work. You just have to trust it.
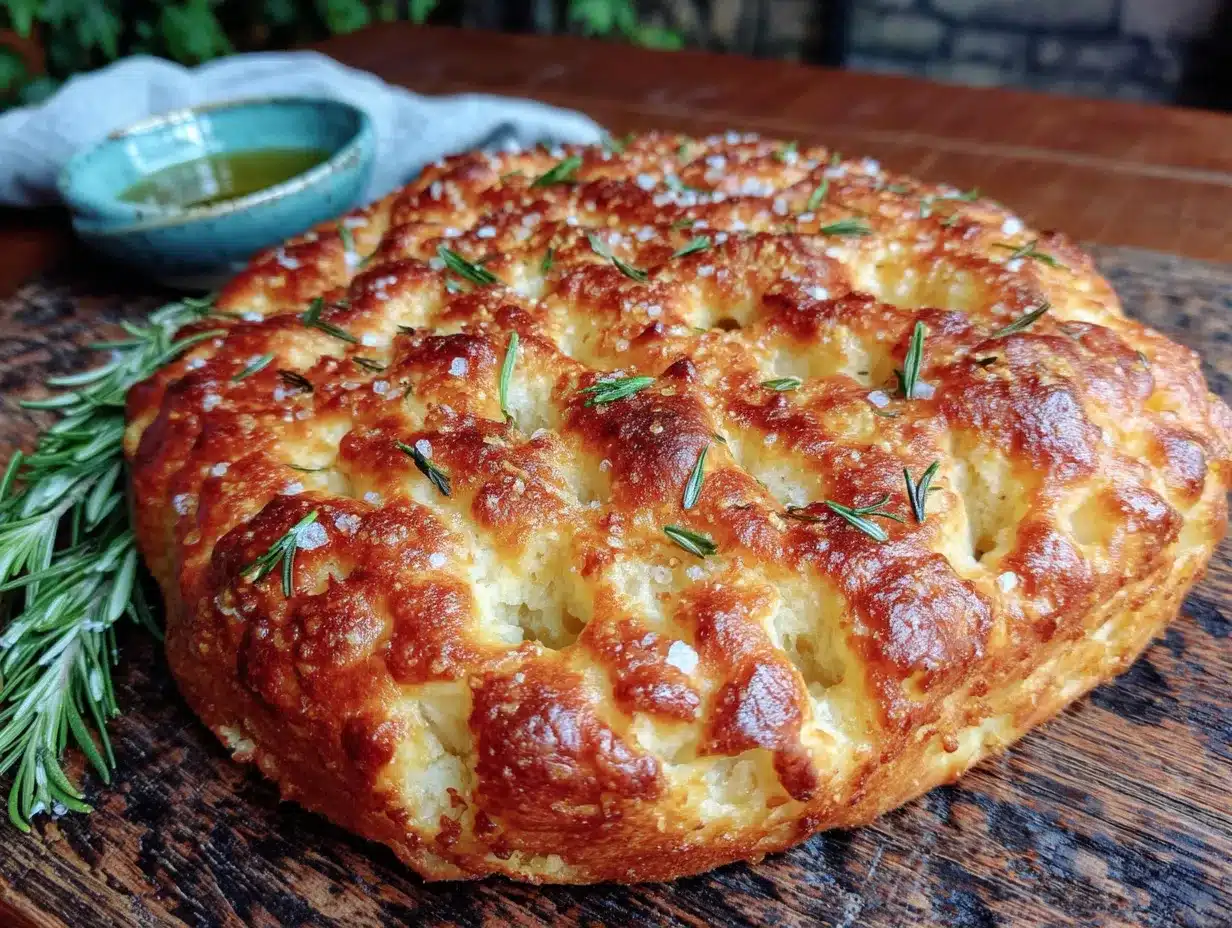
I’ve been baking with sourdough for about six years now, and I’ve learned that discard recipes fall into two camps: the ones that taste like an afterthought, and the ones that make you wonder why you ever bothered with commercial yeast at all. This focaccia belongs in the second camp. It’s soft and chewy on the inside, crackly and golden on the outside, with those signature dimples that catch pools of olive oil and flecks of rosemary. It’s the kind of bread that makes a simple dinner feel like an occasion. And maybe you’ve been there—staring at a jar of discard, wondering what to do with it, not quite ready to commit to a complicated sourdough loaf. This is your answer. Trust me on this.
Why You’ll Love This Recipe
Let me tell you why this particular focaccia has earned a permanent spot in my weekly baking rotation. It’s not just about using up discard—though that’s a nice bonus. It’s about the way this bread makes you feel when you pull it out of the oven. The smell alone is enough to reset a bad day.
- No Yeast Required : The sourdough discard provides all the lift and flavor you need. No fussing with active dry yeast or wondering if your water temperature killed it.
- Minimal Hands-On Time : The dough does a long, slow rise in the fridge, which means you mix it one day and bake it the next. Active work is maybe 15 minutes total.
- Pantry-Friendly Ingredients : Flour, olive oil, salt, rosemary, and your discard. That’s it. You probably have everything already.
- Forgiving Dough : This is not a finicky recipe. You can stretch the rise time, forget about it for an extra hour, or poke it a little too aggressively. It still turns out beautiful.
- Perfect for Beginners : If you’ve been intimidated by sourdough bread, this is where you start. No shaping, no scoring, no steam pans. Just stretch, dimple, and bake.
- Deep, Tangy Flavor : The long fermentation gives this focaccia a complexity that instant yeast breads just can’t match. It’s subtle but unmistakable.
This isn’t just another discard recipe you’ll try once and forget. It’s the one you’ll come back to again and again, the one you’ll text your friends about, the one that makes you look forward to feeding your starter just so you’ll have discard to use. It’s comfort in bread form—warm, fragrant, and exactly what you need on a quiet evening at home.
What Ingredients You Will Need
This recipe uses simple, wholesome ingredients that work together to create something genuinely greater than the sum of their parts. The magic is in the fermentation, not in fancy additions.
- Bread flour, 3 cups (360 grams) : I prefer King Arthur for its consistent protein content, but any good bread flour works. The higher protein gives the focaccia its chewy, airy structure. All-purpose will work in a pinch, but the texture won’t be quite as satisfying.
- Sourdough discard, 1 cup (240 grams), unfed and straight from the fridge : This is the heart of the recipe. Use it cold—no need to bring it to room temperature. If your discard has been sitting for a while and has a layer of liquid on top, just stir it back in before measuring.
- Warm water, 1 cup (240 ml) : Aim for about 80°F (27°C). It should feel like warm bath water. Too hot and you’ll kill the beneficial bacteria in the discard; too cold and the fermentation will be sluggish.
- Olive oil, 1/4 cup (60 ml), plus more for the pan and topping : Use a good-quality extra virgin olive oil here. It’s not just for cooking—it’s a flavor ingredient. I use California Olive Ranch for everyday baking and save my fancy bottle for drizzling at the end.
- Fine sea salt, 2 teaspoons (10 grams) : I use Morton’s fine sea salt for the dough. If you’re using Diamond Crystal, increase to 2 1/2 teaspoons. The salt isn’t just for flavor—it also helps control fermentation.
- Fresh rosemary, 2 tablespoons, finely chopped : Dried rosemary won’t give you the same aromatic experience. Fresh is non-negotiable here. I grow a small plant on my windowsill specifically for this recipe.
- Flaky sea salt, for finishing : Maldon or another flaky salt. This is optional but highly recommended. Those little bursts of salt against the olive oil and rosemary are what make this bread memorable.
Ingredient Selection Tips : If you’re new to sourdough and your discard is young (less than two weeks old), the focaccia might not rise as dramatically. Give it a little extra time in the fridge. Older, well-established discard produces better flavor and rise. Also, don’t be tempted to use whole wheat flour exclusively—it makes the focaccia dense. A 50/50 blend with bread flour works nicely if you want more whole grain flavor.
Equipment Needed
You don’t need much for this recipe, which is part of its charm. Here’s what I use:
- 10×15-inch baking sheet or 9×13-inch metal pan : Metal pans conduct heat better than glass or ceramic, giving you a crisper bottom crust. I have a well-seasoned Nordic Ware half-sheet pan that I use for everything.
- Large mixing bowl : Any bowl big enough to hold the dough as it rises. I use a ceramic bowl because it doesn’t retain heat, but glass or stainless steel works fine.
- Bench scraper or rubber spatula : For mixing the dough and scraping down the sides. A bench scraper is also great for cutting the baked focaccia.
- Plastic wrap or a reusable bowl cover : To cover the dough during its long rise. A damp kitchen towel works too, but plastic wrap creates a better seal.
- Measuring cups and kitchen scale : I strongly recommend weighing your flour and discard. Volume measurements can vary wildly, and this dough benefits from precision. A scale costs about $15 and will improve every baked good you make.
- Cooling rack : Essential for keeping the bottom crust crisp. If you let the focaccia cool in the pan, steam will soften the bottom.
If you don’t have a baking sheet, a cast iron skillet works beautifully. The focaccia will be round and slightly thicker, but the crust will be amazing. Just reduce the bake time by a few minutes and keep an eye on it.
Preparation Method
- Mix the dough : In your large bowl, combine the bread flour and fine sea salt. Whisk them together to distribute the salt evenly. Add the sourdough discard and warm water. Use your hand or a rubber spatula to mix until a shaggy, sticky dough forms. It will look rough and uneven—that’s exactly right. Cover the bowl with plastic wrap and let it rest for 30 minutes. This autolyse step lets the flour absorb the water and makes the dough easier to handle later.
- Stretch and fold : After the rest, uncover the bowl. Wet your hand slightly to prevent sticking. Grab one side of the dough, stretch it up, and fold it over the center. Rotate the bowl a quarter turn and repeat. Do this four times total, working your way around the dough. The dough will start to feel smoother and more elastic. Cover and let it rest for 30 minutes. Repeat this stretch-and-fold process two more times, for a total of three rounds. This builds strength in the dough without kneading.
- Cold fermentation : After the final stretch and fold, cover the bowl tightly with plastic wrap and place it in the refrigerator. Let it ferment for at least 12 hours and up to 48 hours. The longer it sits, the more complex the flavor becomes. I usually aim for 24 hours—it’s the sweet spot between tangy and mild. The dough will puff up noticeably, even in the cold.
- Prepare the pan : About 3 hours before you want to bake, remove the dough from the fridge. Pour 2 tablespoons of olive oil into your baking sheet and spread it evenly. Use your fingers to make sure the entire bottom surface is coated. Transfer the cold dough to the oiled pan. Don’t worry if it’s stiff and irregular—it will relax as it warms up.
- Stretch and proof : Let the dough sit at room temperature for 30 minutes. Then, using oiled fingertips, gently stretch the dough toward the edges of the pan. It will resist at first. If it springs back, let it rest for another 15 minutes and try again. Repeat this process until the dough fills the pan evenly. It might not reach the corners completely, and that’s fine. Cover loosely with plastic wrap and let it proof for 2 to 3 hours, until the dough is puffy and pillowy and has doubled in thickness.
- Dimple and top : About 20 minutes before the dough is ready, preheat your oven to 425°F (218°C) with a rack in the middle position. Once the dough has proofed, drizzle another tablespoon of olive oil over the top. Dip your fingertips in the oil and press straight down into the dough, creating deep dimples all the way to the bottom of the pan. Don’t be shy—the dimples are what make focaccia focaccia. Sprinkle the chopped rosemary evenly over the surface, pressing some into the dimples. Finish with a generous pinch of flaky sea salt.
- Bake : Place the pan in the preheated oven and bake for 25 to 30 minutes, rotating the pan halfway through. The focaccia is done when the top is deep golden brown and the bottom sounds hollow when tapped. If the top is browning too quickly but the bottom isn’t done, tent loosely with foil for the last 5 minutes.
- Cool and serve : Remove the pan from the oven and let the focaccia cool in the pan for 5 minutes. Then transfer it to a cooling rack. Brush or drizzle with a little more olive oil while it’s still warm—this gives it that gorgeous sheen. Let it cool for at least 15 minutes before cutting, or the interior will be gummy. I know it’s hard to wait, but it’s worth it.
Cooking Tips & Techniques
I’ve made this focaccia more times than I can count, and I’ve learned a few things the hard way. Let me save you some trouble.
The dough will be sticky . That’s not a mistake. Wet doughs produce open, airy crumbs. Resist the urge to add more flour. Use wet hands or oiled tools to handle it. The stickiness is your friend.
Don’t rush the cold fermentation . I once tried to speed things up by letting the dough rise at room temperature instead of the fridge. The focaccia was flat and had none of that sourdough tang. The cold fermentation does two things: it develops flavor and it makes the dough easier to handle. Give it the full 24 hours if you can.
Watch your oven temperature . Every oven runs differently. If your focaccia is browning too fast on top but still pale on the bottom, your oven might run hot. Drop the temperature to 400°F (204°C) and bake a few minutes longer. If the bottom is burning before the top is golden, move the rack up a notch.
Use your senses . The visual cues are important, but don’t ignore what you hear and smell. When the focaccia is done, it should sound hollow when you tap the bottom. And the smell—rosemary and olive oil and toasted bread—will fill your kitchen. That’s how you know you’re close.
Let it cool properly . I’ve cut into focaccia too early out of impatience, and the inside was doughy and sad. The carryover cooking continues as it cools, and the structure needs time to set. Fifteen minutes of patience saves you an hour of disappointment.
Variations & Adaptations
Once you’ve mastered the basic recipe, feel free to play around. Here are some variations I’ve tried and loved:
- Garlic and Herb : Add 3 cloves of minced garlic to the olive oil before drizzling it over the proofed dough. Swap the rosemary for a mix of thyme, oregano, and chives. The garlic roasts into sweet, mellow pockets of flavor.
- Everything Bagel : After dimpling, sprinkle the dough with everything bagel seasoning (sesame seeds, poppy seeds, dried garlic, dried onion, and salt). This version disappears fastest at my house. I’ve made it for brunch and watched people eat half a pan standing up.
- Caramelized Onion and Gruyère : While the dough is doing its cold ferment, caramelize 2 large onions in butter and olive oil until they’re deep brown and jammy. Spread them over the proofed dough before dimpling, then scatter shredded Gruyère on top for the last 5 minutes of baking. This is my go-to for holiday gatherings.
- Olive and Sun-Dried Tomato : Press halved Kalamata olives and chopped sun-dried tomatoes into the dimples before baking. The salty, tangy pops of flavor pair beautifully with the rosemary. Use oil-packed sun-dried tomatoes for the best texture.
- Gluten-Free Option : I’ve had success using a 1:1 gluten-free flour blend with xanthan gum. The texture is slightly more delicate, so handle the dough gently. Reduce the cold fermentation to 8 hours, as gluten-free doughs don’t benefit from long rests the same way.
My personal favorite variation is the garlic and herb version with a handful of grated Parmesan sprinkled on top during the last 5 minutes. It’s the kind of bread you eat straight from the pan, no butter needed, no judgment allowed.
Serving & Storage Suggestions
This focaccia is best served warm, within an hour of baking. The crust is at its crispiest, the interior at its softest, and the rosemary is still fragrant. I like to serve it alongside a bowl of tomato soup or a big Italian salad. It’s also fantastic with a spread of ricotta and a drizzle of honey for a simple appetizer.
If you’re planning a dinner party, bake the focaccia earlier in the day and reheat it in a 350°F (177°C) oven for 5 to 7 minutes before serving. It comes back to life beautifully. Don’t use the microwave—it turns the crust rubbery.
Storage : Leftover focaccia keeps well at room temperature for up to 2 days. Store it in a paper bag or wrapped loosely in a kitchen towel. Avoid plastic wrap or airtight containers, which trap moisture and make the crust soggy. If your kitchen is humid, you might need to refresh it in the oven for a few minutes before eating.
Freezing : This focaccia freezes surprisingly well. Let it cool completely, then wrap it tightly in plastic wrap and foil. Freeze for up to 3 months. To serve, thaw at room temperature and reheat in a 350°F (177°C) oven for 8 to 10 minutes. You can also freeze the unbaked, proofed dough. After the second proof, freeze the dough in the pan, then transfer to a freezer bag. Bake directly from frozen, adding 10 to 15 minutes to the bake time.
One thing I’ve noticed: the focaccia actually tastes better on day two if you toast it. The flavors meld and deepen overnight. Try it sliced in half and grilled with a little olive oil for the best grilled cheese sandwich of your life.
Nutritional Information & Benefits
While I wouldn’t call focaccia a health food, there are some nutritional bright spots worth mentioning. The sourdough fermentation process breaks down phytic acid, making the minerals in the flour more bioavailable. Some people with mild gluten sensitivities find sourdough easier to digest than conventional bread, though this is not a substitute for a gluten-free diet if you have celiac disease.
Estimated per serving (1/8 of the recipe) : Calories: 220, Fat: 9g, Carbohydrates: 30g, Protein: 5g, Fiber: 1g, Sodium: 380mg. These values are approximate and will vary based on your specific ingredients.
The olive oil provides heart-healthy monounsaturated fats and antioxidants. Rosemary is rich in compounds with anti-inflammatory properties. And the slow fermentation process may support gut health by introducing beneficial bacteria. Is it a superfood? No. But it’s a whole food made with real ingredients, and that counts for something.
For those watching their sodium, reduce the flaky salt topping or omit it entirely. The dough itself has enough salt to be flavorful. You can also experiment with a light olive oil drizzle instead of the generous amount I call for—though I think the oil is essential to the texture and taste.
Conclusion
This sourdough discard focaccia has become my most-requested recipe, and I understand why. It takes something that many home bakers see as a burden—discard—and turns it into a triumph. It’s the kind of bread that makes you feel like you’ve really accomplished something, even though the dough did most of the work. The crackly crust, the soft interior, the way the rosemary perfumes your whole kitchen—it’s hard to beat.
I hope you give this recipe a try, especially if you’ve been sitting on a jar of discard without quite knowing what to do with it. Play with the toppings, adjust the salt to your taste, and don’t stress about perfection. The beauty of focaccia is that it’s meant to be rustic. Every dimple, every irregular edge, every slightly burnt bit of rosemary is part of its charm.
When you make it—and I hope you do—come back and tell me how it turned out. Drop a comment below or tag me in your photos. I genuinely love hearing about your baking adventures, especially the ones that start with a little skepticism and end with someone eating bread straight from the pan with their bare hands. That’s what this recipe is all about.
Frequently Asked Questions
Can I use all-purpose flour instead of bread flour?
Yes, you can. The focaccia will be slightly less chewy and may not rise as high, but it will still be delicious. Bread flour gives the best texture because of its higher protein content, so use it if you have it.
My discard is very young. Will this recipe still work?
It will work, but the rise might be less dramatic and the flavor less tangy. Young discard (under two weeks old) hasn’t developed the full population of wild yeast and bacteria yet. Give the dough extra time in the fridge—up to 48 hours—to compensate.
Can I skip the cold fermentation and bake the same day?
You can, but you’ll lose the sourdough flavor and the texture won’t be as complex. The cold fermentation is where the magic happens. If you’re in a hurry, let the dough rise at room temperature for 4 to 6 hours instead, but expect a milder result.
Why did my focaccia turn out dense and flat?
Several possibilities: your discard might have been too weak (not active enough), the dough might not have proofed long enough, or you might have added too much flour during mixing. Next time, make sure your discard is at least a few weeks old and give the dough a full 2 to 3 hour proof at room temperature after it comes out of the fridge.
How do I get those deep, beautiful dimples without the dough sticking to my fingers?
Dip your fingertips in olive oil before pressing into the dough. The oil acts as a barrier and also adds flavor. Press straight down with confidence—hesitation leads to shallow dimples that fill in during baking.
Pin This Recipe!
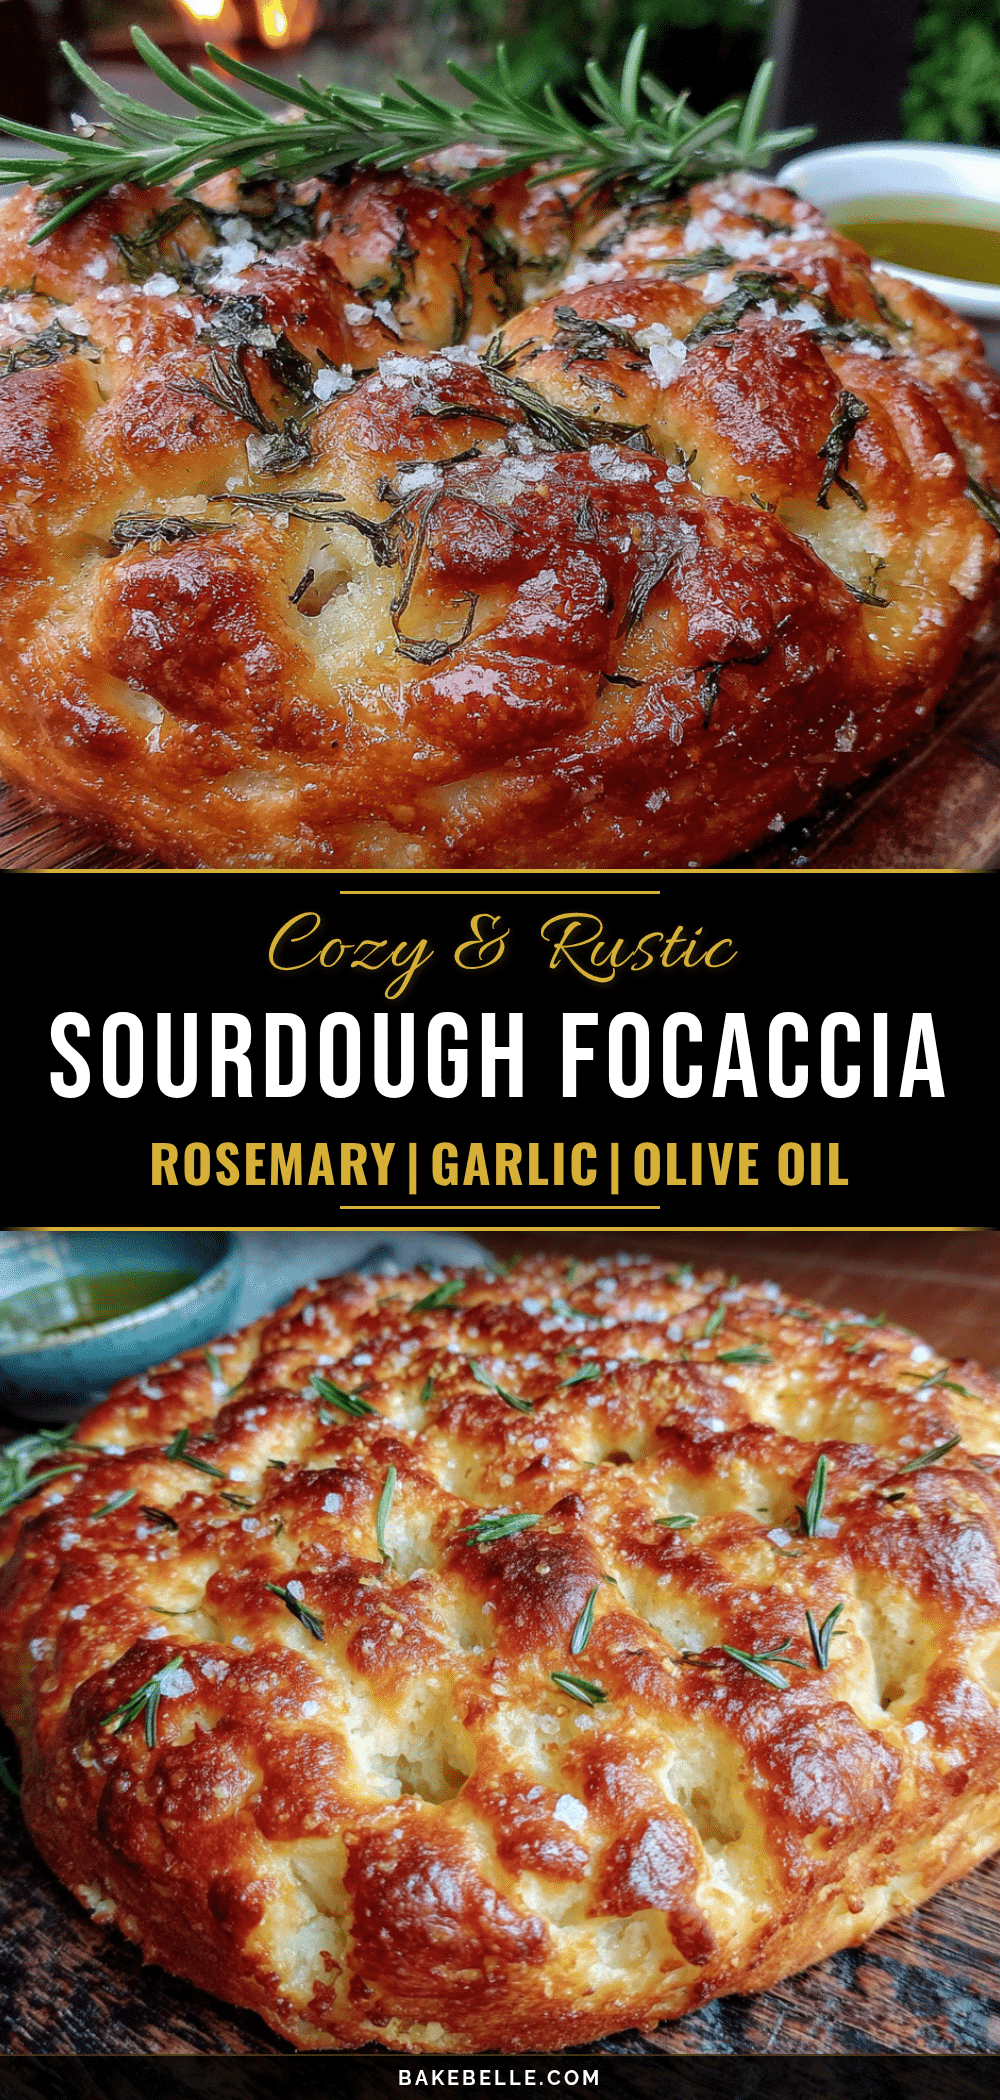
Cozy Sourdough Discard Focaccia with Rosemary

This sourdough discard focaccia is soft and chewy on the inside, crackly and golden on the outside, with signature dimples that catch pools of olive oil and flecks of rosemary. It’s the perfect way to use up sourdough discard with minimal hands-on time and pantry-friendly ingredients.
- Prep Time: 15 minutes
- Cook Time: 30 minutes
- Total Time: 24 hours 45 minutes (includes cold fermentation)
- Yield: 8 servings 1x
- Category: Bread
- Cuisine: Italian
Ingredients
- 3 cups (360 grams) bread flour
- 1 cup (240 grams) sourdough discard, unfed and straight from the fridge
- 1 cup (240 ml) warm water (about 80°F / 27°C)
- 1/4 cup (60 ml) olive oil, plus more for the pan and topping
- 2 teaspoons (10 grams) fine sea salt
- 2 tablespoons fresh rosemary, finely chopped
- Flaky sea salt, for finishing (optional)
Instructions
- Mix the dough: In a large bowl, combine the bread flour and fine sea salt. Whisk together. Add the sourdough discard and warm water. Mix with your hand or a rubber spatula until a shaggy, sticky dough forms. Cover with plastic wrap and let rest for 30 minutes.
- Stretch and fold: After the rest, uncover the bowl. Wet your hand slightly. Grab one side of the dough, stretch it up, and fold it over the center. Rotate the bowl a quarter turn and repeat. Do this four times total. Cover and let rest for 30 minutes. Repeat the stretch-and-fold process two more times (three rounds total).
- Cold fermentation: Cover the bowl tightly with plastic wrap and refrigerate for at least 12 hours and up to 48 hours.
- Prepare the pan: About 3 hours before baking, remove dough from fridge. Pour 2 tablespoons olive oil into a 10×15-inch baking sheet or 9×13-inch metal pan and spread evenly. Transfer cold dough to the oiled pan.
- Stretch and proof: Let dough sit at room temperature for 30 minutes. Using oiled fingertips, gently stretch dough toward edges of pan. If it springs back, let rest 15 minutes and try again. Repeat until dough fills pan evenly. Cover loosely with plastic wrap and proof for 2 to 3 hours until puffy and doubled in thickness.
- Dimple and top: About 20 minutes before dough is ready, preheat oven to 425°F (218°C). Drizzle another tablespoon of olive oil over the dough. Dip fingertips in oil and press straight down to create deep dimples. Sprinkle chopped rosemary evenly over surface, pressing some into dimples. Finish with flaky sea salt.
- Bake: Place pan in preheated oven and bake for 25 to 30 minutes, rotating halfway through. Focaccia is done when top is deep golden brown and bottom sounds hollow when tapped.
- Cool and serve: Remove from oven and let cool in pan for 5 minutes. Transfer to a cooling rack. Brush or drizzle with more olive oil while warm. Let cool at least 15 minutes before cutting.
Notes
The dough will be sticky—resist adding more flour. Use wet hands or oiled tools. Cold fermentation is essential for flavor and texture; aim for 24 hours. Let focaccia cool properly before cutting to avoid a gummy interior. For variations, try garlic and herb, everything bagel, caramelized onion and Gruyère, or olive and sun-dried tomato.
Nutrition
- Serving Size: 1/8 of recipe
- Calories: 220
- Sodium: 380
- Fat: 9
- Saturated Fat: 1.5
- Carbohydrates: 30
- Fiber: 1
- Protein: 5
Keywords: sourdough discard, focaccia, rosemary, no yeast, easy bread, fermented bread