The company potluck was in six hours and I’d completely forgotten. Everyone else would be bringing something impressive—I’d overheard talk of a slow-braised short rib and some kind of layered dessert that took two days. I had a couple of chicken breasts defrosting on the counter and a brand-new air fryer I’d barely touched. Honestly, I almost just grabbed takeout on the way. But stubbornness kicked in. I figured, how bad could air fryer chicken be? Worst case, I’d grab a pizza on the corner and blame traffic.
Turns out, that accidental experiment turned into the dish everyone asked about. People actually came up to me, mid-bite, asking for the recipe. I had to scribble it on a napkin. I mean, I was embarrassed. It was so simple—barely any effort, no fancy technique. Just a little seasoning and a hot air fryer. But the chicken was genuinely crispy on the outside and almost absurdly juicy inside. It didn’t make sense. I kept waiting for it to dry out, but it never did.
Maybe you’ve been there—needing a quick, reliable dinner that doesn’t taste like a compromise. This crispy air fryer chicken breast recipe is that. It’s the one I make when I’m tired, when I’m in a hurry, or when I just want something that works without a fuss. And honestly, it’s the one that keeps me from ordering takeout on busy weeknights. I keep making it because it’s proof that you don’t need a complicated recipe to get a perfect result. Sometimes the simplest thing wins.
Why You’ll Love This Recipe
This isn’t just another air fryer chicken recipe. After testing this method about a dozen times—with different seasonings, different cooking times, and even different brands of air fryers—I can say with confidence that this version delivers the best balance of crispy exterior and tender, juicy meat. I’ve had friends who swore they couldn’t cook chicken without drying it out finally make a successful dinner with this method. That’s the kind of win that makes me love sharing it.
- Quick & Easy: From fridge to plate in under 25 minutes. Perfect for those nights when you’re staring at the fridge wondering what’s for dinner.
- Simple Ingredients: You probably have everything in your kitchen right now. No obscure spices or special marinades needed.
- Perfect for Meal Prep: This chicken stays juicy for days, making it ideal for salads, sandwiches, or quick lunches throughout the week.
- Crowd-Pleaser: I’ve served this to picky eaters, health-conscious friends, and serious foodies—everyone agrees it’s delicious.
- Unbelievably Crispy: The texture is what gets people. It’s genuinely crunchy on the outside without being greasy, which is rare for chicken breast.
What makes this recipe different from all the others? It’s the technique. Most air fryer chicken recipes either overcook the outside to get the inside done, or they end up with pale, sad-looking chicken. My method uses a simple trick—a light coating of oil and a specific temperature curve—that ensures the outside gets golden and crispy while the inside stays perfectly cooked. It’s not magic, but it sure feels like it when you take that first bite.
This recipe is for those moments when you want a comforting dinner that doesn’t require a lot of effort. It’s the kind of meal that makes you close your eyes after the first bite, not because it’s fancy, but because it’s just so satisfying. It’s comfort food reimagined—healthier, faster, but with the same soul-soothing quality.
What Ingredients You Will Need
This recipe uses simple, wholesome ingredients to deliver bold flavor and satisfying texture without the fuss. Most of these are pantry staples, which is exactly why this recipe works so well for busy weeknights.
For the Chicken
- Boneless, skinless chicken breasts – 2 medium (about 6-8 ounces each), pounded to even thickness (about 1 inch thick). Look for breasts that are similar in size so they cook evenly.
- Olive oil – 1 tablespoon (use avocado oil if you prefer a higher smoke point). I personally use extra virgin olive oil for flavor, but regular works fine too.
- Salt – 1 teaspoon kosher salt (use ¾ teaspoon if using table salt). Don’t skip this—it’s crucial for flavor and texture.
- Black pepper – ½ teaspoon, freshly ground.
- Garlic powder – 1 teaspoon (not garlic salt—big difference here).
- Paprika – 1 teaspoon (smoked paprika adds a lovely depth, but sweet works too).
- Onion powder – ½ teaspoon.
- Dried thyme or oregano – ½ teaspoon (optional, but adds a nice herbal note).
For the Coating (Optional but Recommended)
- Panko breadcrumbs – ¼ cup (adds extra crunch). You can skip this for a lower-carb option, but it really does make a difference in texture.
- Grated Parmesan cheese – 2 tablespoons (adds umami and helps the crust brown). I recommend the real stuff, not the powdery kind in a can.
Ingredient Tips: For the best results, use chicken breasts that are fresh, not frozen. If using frozen, thaw completely and pat very dry with paper towels—excess moisture is the enemy of crispiness. I’ve tried this with organic and conventional chicken, and both work well, though organic tends to be slightly more tender. For a gluten-free version, swap the panko for crushed pork rinds or almond flour mixed with Parmesan.
If you don’t have an air fryer, you can still make this recipe—check the variations section for oven instructions. But honestly, the air fryer is what makes the texture so special.
Equipment Needed
You don’t need a lot of fancy tools for this recipe, which is part of its charm. Here’s what you’ll need:
- Air fryer – Any brand works. I use a 5.8-quart model, but smaller or larger ones will work—just adjust cooking time slightly if needed.
- Meat mallet or rolling pin – For pounding the chicken to even thickness. If you don’t have one, just use a heavy skillet or even your fist (I’ve done that in a pinch).
- Paper towels – Essential for drying the chicken. Don’t skip this step.
- Mixing bowl – For combining the seasoning and coating.
- Tongs – For flipping the chicken in the air fryer basket.
- Instant-read thermometer – This is honestly the most important tool. It takes the guesswork out of cooking chicken and guarantees perfect results every time. A good one costs about $10-15.
- Cutting board and knife – For prepping and serving.
Budget-Friendly Tip: If you don’t have an air fryer yet, check secondhand stores or online marketplaces—I found mine for $20 and it’s been going strong for two years. A meat thermometer is worth every penny and will save you from dry chicken forever.
Preparation Method
- Prep the chicken (5 minutes): Place chicken breasts between two sheets of plastic wrap or parchment paper. Using a meat mallet or rolling pin, gently pound to an even thickness of about 1 inch. This ensures they cook evenly—no thin, overcooked edges and thick, undercooked centers. Season both sides generously with salt and let sit for 10 minutes at room temperature. This helps the salt penetrate the meat.
- Mix the seasoning (2 minutes): In a small bowl, combine the black pepper, garlic powder, paprika, onion powder, and dried herbs if using. Stir to combine. This is your all-purpose seasoning blend—I often make double and keep it in a jar.
- Coat the chicken (3 minutes): Pat the chicken very dry with paper towels—this is non-negotiable for crispy skin. Brush both sides with olive oil. Sprinkle the seasoning mixture evenly over both sides, pressing gently to adhere. If using the panko-Parmesan coating, mix them together in a shallow dish and press the seasoned chicken into the mixture, coating all sides.
- Preheat the air fryer (3 minutes): Set your air fryer to 400°F (200°C) and let it preheat for 3 minutes. Preheating ensures the chicken starts cooking immediately, which helps create that crispy exterior.
- Arrange in the basket (2 minutes): Place the chicken breasts in the air fryer basket in a single layer. Don’t overcrowd—leave at least 1 inch of space around each piece for air circulation. If your air fryer is small, cook in batches. I’ve made the mistake of cramming them in before, and the result was steamed, not crispy chicken.
- Cook the chicken (12-15 minutes): Cook at 400°F (200°C) for 6 minutes. Flip the chicken using tongs, then cook for another 6-8 minutes. The exact time depends on the thickness of your chicken. The internal temperature should reach 165°F (74°C) when measured with an instant-read thermometer inserted into the thickest part. If you’re using panko coating, check at 12 minutes—it browns faster.
- Rest the chicken (5 minutes): This step is crucial. Remove the chicken from the air fryer and let it rest on a cutting board for 5 minutes before slicing. This allows the juices to redistribute throughout the meat. If you cut into it immediately, all those lovely juices will run out onto the board, leaving you with dry chicken. Trust me, I learned this the hard way.
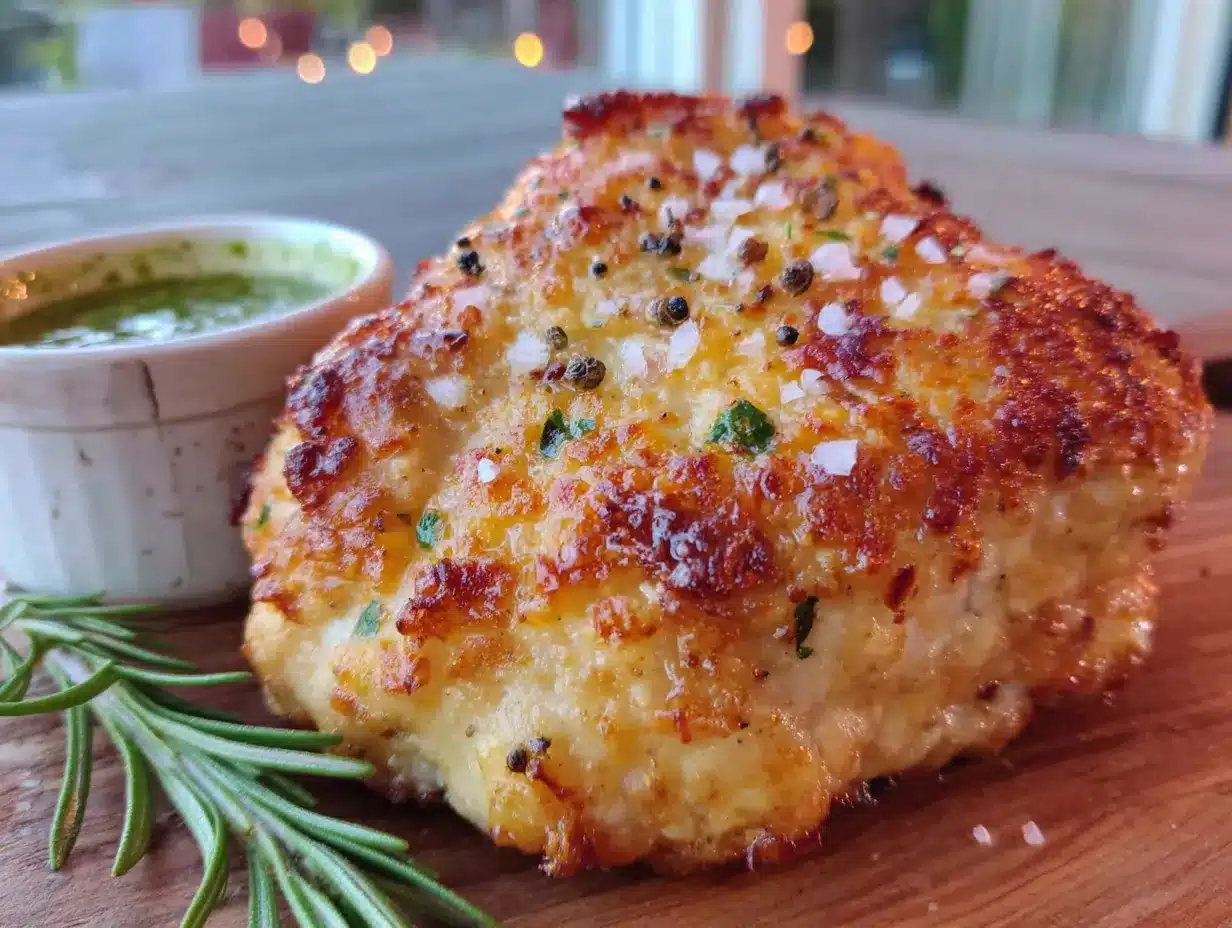
- Slice and serve (2 minutes): Slice against the grain into strips or serve whole. The chicken should be golden brown on the outside and perfectly white and juicy on the inside.
Sensory Cues: At the 6-minute mark, the chicken should be starting to brown on the bottom. When you flip it, you should hear a slight sizzle. The panko coating should feel dry and crispy to the touch. When done, the chicken will feel firm but still have a slight give when pressed—it shouldn’t be rock hard. The smell of garlic and paprika will fill your kitchen, and trust me, it’s hard to wait through those last 5 minutes of resting.
Cooking Tips & Techniques
I’ve made this recipe more times than I can count, and I’ve definitely made my share of mistakes along the way. Here are the lessons I learned so you don’t have to repeat them:
The Biggest Mistake: Not Drying the Chicken. The first time I made air fryer chicken, I skipped patting it dry. Big mistake. The moisture created steam, which prevented the exterior from crisping up. I ended up with sad, pale chicken that tasted fine but looked nothing like the golden-brown photos I’d seen. Now I’m obsessive about drying—I use at least three paper towels per breast.
Temperature Matters. I’ve tried cooking at lower temperatures (350°F) thinking it would be more forgiving, but it just takes longer and the exterior doesn’t crisp as well. 400°F is the sweet spot. If your air fryer runs hot (some do), check the chicken a couple minutes early the first time.
Don’t Skip the Resting Time. I know it’s tempting to dig in immediately, especially when the kitchen smells amazing. But those 5 minutes of resting are what separate good chicken from great chicken. The juices need time to settle. Slice too soon, and you’ll have a puddle on your plate and dry meat on your fork.
Multitasking Strategy: While the chicken rests, I usually throw together a quick side—steamed broccoli, a simple salad, or some roasted potatoes. The timing works out perfectly: the chicken rests while the sides finish, and everything is ready at the same time.
Consistency Tip: For the most consistent results, pound your chicken to exactly the same thickness every time. I actually mark my cutting board with a sharpie line at 1 inch—silly, but it works. When all pieces are the same thickness, they finish cooking at the same time.
Variations & Adaptations
This recipe is incredibly versatile. Here are some ways I’ve adapted it over the years:
1. Spicy Version: Add ½ teaspoon cayenne pepper and 1 teaspoon chili powder to the seasoning mix. For extra heat, brush the cooked chicken with a mixture of hot sauce and melted butter before serving. My brother-in-law requests this version every time he visits.
2. Lemon Herb: Replace the paprika with 1 tablespoon dried parsley and add the zest of one lemon to the seasoning mix. Squeeze fresh lemon juice over the chicken right before serving. This is my go-to for spring dinners—it feels lighter and brighter.
3. Low-Carb/Keto: Skip the panko coating entirely. Instead, mix ¼ cup almond flour with 2 tablespoons grated Parmesan and the seasonings. The almond flour gets surprisingly crispy in the air fryer. I’ve tested this several times, and honestly, I barely miss the breadcrumbs.
4. Oven Method: If you don’t have an air fryer, bake the chicken at 425°F (220°C) on a wire rack set over a baking sheet. Cook for 15-18 minutes, flipping halfway through. The wire rack is key—it allows air to circulate underneath, helping the bottom crisp up. The texture won’t be quite as crispy as the air fryer version, but it’s still delicious.
5. Italian-Inspired: Add 1 teaspoon dried basil and 1 teaspoon dried oregano to the seasoning mix. After cooking, top with a spoonful of marinara sauce and shredded mozzarella, then return to the air fryer for 2 minutes to melt the cheese. It’s like chicken Parmesan without the deep frying.
Serving & Storage Suggestions
Serving: Serve the chicken immediately after resting for the best texture. Slice it against the grain into strips and fan them out on a plate for a beautiful presentation. This chicken pairs beautifully with roasted vegetables, a fresh green salad, rice pilaf, or mashed potatoes. For a lighter meal, slice it over a bed of mixed greens with cherry tomatoes and a simple vinaigrette.
Temperature: Serve warm, not piping hot. Letting it rest brings it to the perfect eating temperature where the flavors are most pronounced.
Storage: Leftover chicken keeps well in an airtight container in the refrigerator for up to 4 days. The texture will soften slightly, but it’s still delicious. For best results, store the chicken whole (not sliced) to retain moisture.
Reheating: The air fryer is actually the best way to reheat this chicken and restore some crispiness. Reheat at 350°F (175°C) for 3-4 minutes. The microwave works in a pinch but will make the coating soggy. If using the microwave, only heat for 30-45 seconds to avoid drying it out.
Freezing: Cooked chicken freezes well for up to 3 months. Wrap each breast individually in plastic wrap, then place in a freezer bag. Thaw overnight in the refrigerator before reheating. I often make a double batch and freeze half for busy weeks.
Flavor Development: Interestingly, the flavors in this chicken actually deepen after a day in the fridge. The garlic and paprika meld together, creating an even more complex taste. I sometimes prefer the leftovers for this reason—they’re perfect for slicing cold onto salads or sandwiches.
Nutritional Information & Benefits
Here’s the approximate nutritional breakdown for one serving (one chicken breast with panko coating, without sides):
- Calories: 285
- Protein: 35g
- Fat: 12g
- Carbohydrates: 8g
- Fiber: 1g
- Sugar: 1g
Health Benefits: Chicken breast is an excellent source of lean protein, which is essential for muscle repair and satiety. It’s also rich in B vitamins, particularly B6 and B12, which support energy metabolism. Using the air fryer instead of deep frying significantly reduces the fat content while still delivering a satisfying crispy texture. The olive oil provides healthy monounsaturated fats, and the garlic and paprika offer antioxidant properties.
Dietary Considerations: This recipe is naturally low-carb and can be made gluten-free by using almond flour or crushed pork rinds instead of panko. It’s also suitable for dairy-free diets if you skip the Parmesan or use a dairy-free alternative. For a lower-sodium version, reduce the salt to ½ teaspoon.
Personal Note: I love that this recipe fits into a balanced lifestyle without feeling like a compromise. It’s satisfying enough for a comfort food craving but light enough that I don’t feel weighed down afterward. That’s rare in the world of crispy chicken.
Frequently Asked Questions
Can I use frozen chicken breasts in the air fryer?
Technically yes, but I don’t recommend it. Frozen chicken releases a lot of moisture as it cooks, which prevents the exterior from getting crispy. If you’re in a pinch, thaw the chicken completely and pat it very dry before seasoning. The cooking time will also need to increase by about 5-8 minutes, and the texture won’t be as good.
Why is my air fryer chicken dry?
The most common reasons are overcooking and not resting the meat. Use an instant-read thermometer to ensure you’re not cooking past 165°F (74°C). Also, make sure you’re letting the chicken rest for a full 5 minutes after cooking—this allows the juices to redistribute. Finally, check that your chicken breasts are pounded to even thickness so thin parts don’t overcook while thick parts finish.
Can I make this recipe without panko breadcrumbs?
Absolutely. The panko adds extra crunch, but the chicken is still delicious without it. Simply season the chicken and cook it directly in the air fryer. The exterior will be less crispy but still nicely browned. For a low-carb option, try crushed pork rinds or almond flour mixed with Parmesan.
How do I prevent the coating from falling off?
Make sure your chicken is patted very dry before adding oil and seasoning. The coating needs a dry surface to adhere properly. Also, press the coating firmly into the chicken and let it sit for a couple minutes before cooking. Finally, avoid flipping the chicken too aggressively—use tongs and be gentle.
Can I double this recipe for a crowd?
Yes, but you’ll need to cook in batches. Overcrowding the air fryer basket prevents proper air circulation, which leads to uneven cooking and less crispy results. Cook the chicken in a single layer with space between each piece. You can keep the first batch warm in a 200°F (93°C) oven while the second batch cooks.
Conclusion
This crispy air fryer chicken breast recipe has become a staple in my kitchen for good reason. It’s simple enough for a rushed Tuesday night but impressive enough to serve company. The combination of juicy meat and crispy exterior feels almost like a cheat code—how can something this easy taste this good?
I encourage you to make this recipe your own. Play with the seasonings, try different coatings, and find the version that makes you excited to cook dinner. That’s the beauty of a solid base recipe—it’s a starting point, not a rulebook. Maybe you’ll discover a spice blend that becomes your signature, or a dipping sauce that takes it over the top.
If you give this recipe a try, I’d love to hear how it goes. Drop a comment below and let me know what variations you tried, or share a photo of your crispy chicken. There’s nothing quite like the feeling of pulling perfectly cooked chicken out of the air fryer and knowing you made something genuinely delicious with almost no effort. Happy cooking!
Pin This Recipe!
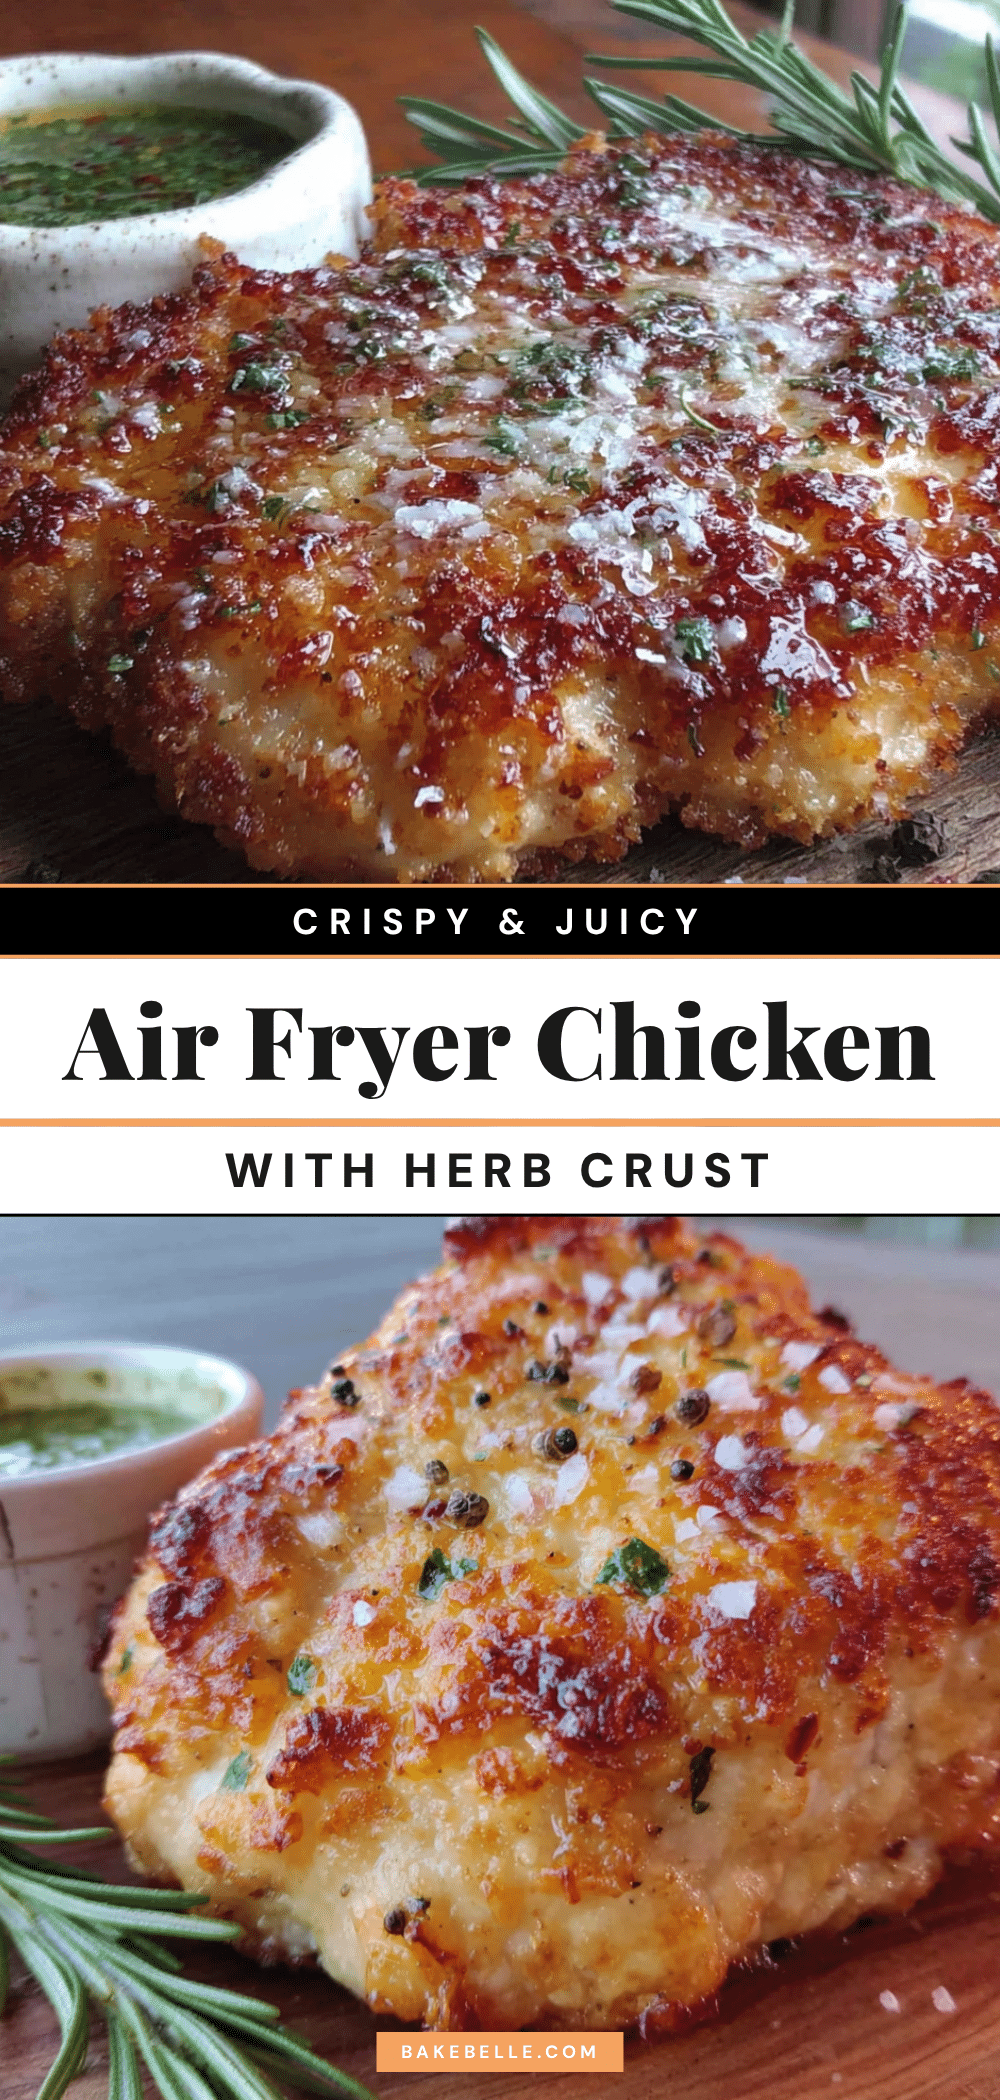
Crispy Air Fryer Chicken Breast: Easy Juicy Recipe

This crispy air fryer chicken breast recipe delivers a perfectly golden, crunchy exterior and tender, juicy meat in under 25 minutes. Made with simple pantry ingredients, it’s a quick and reliable dinner that’s perfect for busy weeknights and meal prep.
- Prep Time: 10 minutes
- Cook Time: 12-15 minutes
- Total Time: 25 minutes
- Yield: 2 servings 1x
- Category: Main Course
- Cuisine: American
Ingredients
- 2 medium boneless, skinless chicken breasts (6–8 ounces each), pounded to 1-inch thickness
- 1 tablespoon olive oil (or avocado oil)
- 1 teaspoon kosher salt (or ¾ teaspoon table salt)
- ½ teaspoon freshly ground black pepper
- 1 teaspoon garlic powder
- 1 teaspoon paprika (smoked or sweet)
- ½ teaspoon onion powder
- ½ teaspoon dried thyme or oregano (optional)
- ¼ cup panko breadcrumbs (optional, for extra crunch)
- 2 tablespoons grated Parmesan cheese (optional, for coating)
Instructions
- Prep the chicken: Place chicken breasts between two sheets of plastic wrap or parchment paper. Using a meat mallet or rolling pin, gently pound to an even thickness of about 1 inch. Season both sides generously with salt and let sit for 10 minutes at room temperature.
- Mix the seasoning: In a small bowl, combine black pepper, garlic powder, paprika, onion powder, and dried herbs if using. Stir to combine.
- Coat the chicken: Pat the chicken very dry with paper towels. Brush both sides with olive oil. Sprinkle the seasoning mixture evenly over both sides, pressing gently to adhere. If using panko-Parmesan coating, mix them together in a shallow dish and press the seasoned chicken into the mixture, coating all sides.
- Preheat the air fryer: Set your air fryer to 400°F (200°C) and let it preheat for 3 minutes.
- Arrange in the basket: Place the chicken breasts in the air fryer basket in a single layer, leaving at least 1 inch of space around each piece. Do not overcrowd.
- Cook the chicken: Cook at 400°F (200°C) for 6 minutes. Flip the chicken using tongs, then cook for another 6-8 minutes. The internal temperature should reach 165°F (74°C) when measured with an instant-read thermometer inserted into the thickest part.
- Rest the chicken: Remove the chicken from the air fryer and let it rest on a cutting board for 5 minutes before slicing. This allows the juices to redistribute.
- Slice and serve: Slice against the grain into strips or serve whole. The chicken should be golden brown on the outside and perfectly white and juicy on the inside.
Notes
For best results, use fresh chicken breasts and pat them very dry before seasoning. Do not overcrowd the air fryer basket. Let the chicken rest for 5 minutes after cooking to retain juices. For a gluten-free version, substitute panko with crushed pork rinds or almond flour mixed with Parmesan. Reheat leftovers in the air fryer at 350°F for 3-4 minutes to restore crispiness.
Nutrition
- Serving Size: 1 chicken breast
- Calories: 285
- Sugar: 1
- Sodium: 600
- Fat: 12
- Saturated Fat: 3
- Carbohydrates: 8
- Fiber: 1
- Protein: 35
Keywords: air fryer chicken breast, crispy chicken, juicy chicken, quick dinner, easy chicken recipe, healthy chicken, meal prep chicken