My niece Lily asked why we couldn’t just trace our hands instead of using cookie cutters. I was pulling out my collection of turkey-shaped cutters, the ones I’d spent years collecting from every craft store within fifty miles. I started to explain why that wouldn’t work—the shapes would be uneven, the fingers would bake at different thicknesses, the whole thing would look like a kindergarten art project. Then I stopped. She was six. She didn’t care about perfect symmetry or professional-looking cookies. She wanted to make something with her actual handprint on it.
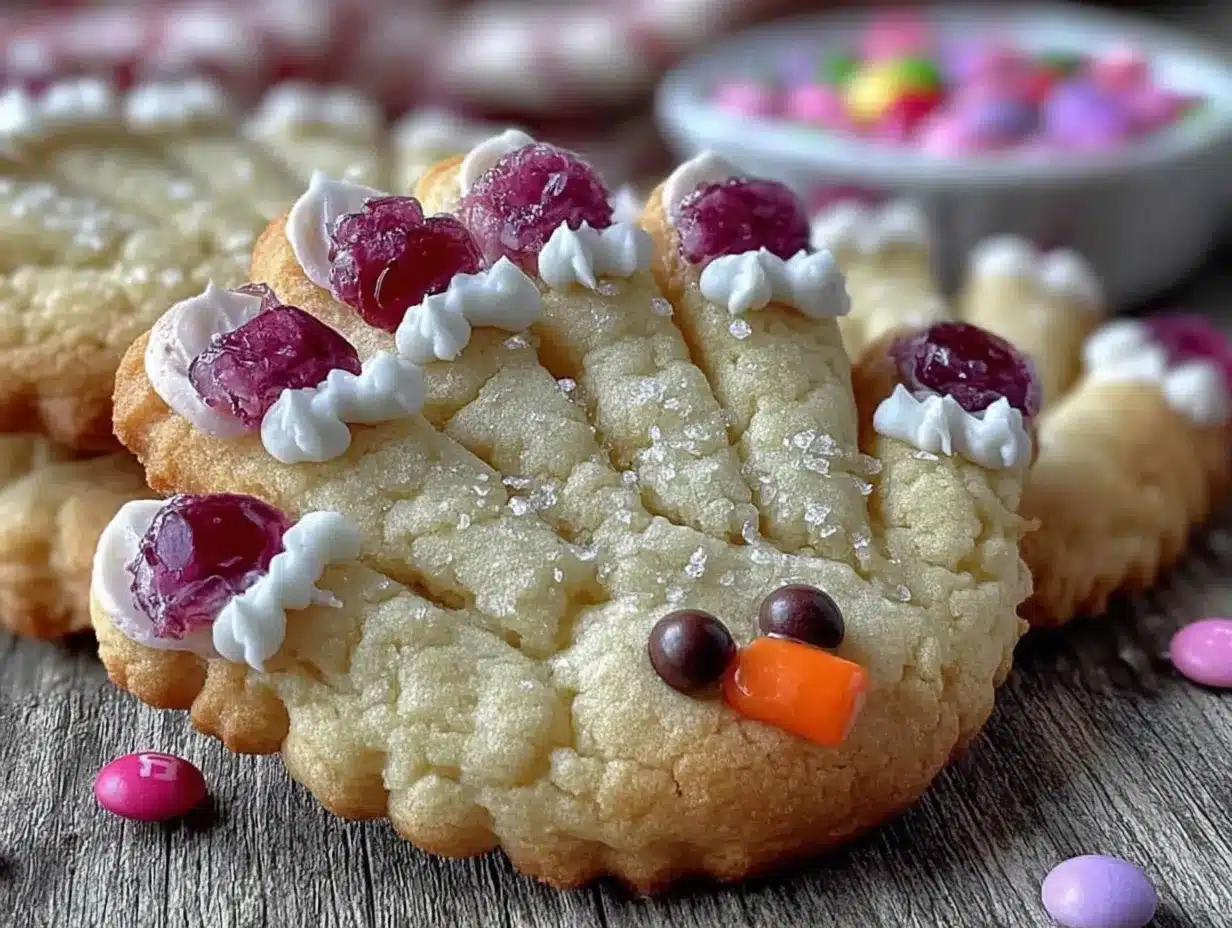
So I let her trace her hand on parchment paper, cut out the shape, and press it into sugar cookie dough. Honestly? I was ready to toss the whole tray in the trash before they went in the oven. But I kept my mouth shut and let her decorate. And when those cookies came out—with her little fingers becoming turkey feathers and her thumb becoming the head—I had to admit something I don’t say often: I was completely wrong. They were adorable. Better than any cookie cutter version I’d ever made.
That was three Thanksgivings ago, and these turkey hand sugar cookies have become our official family tradition. Every year, the kids trace their hands, and we compare how much they’ve grown. Last year my nephew’s hand was almost as big as mine, and I may have gotten a little misty-eyed over butter and flour. It’s funny how a simple cookie can hold so much memory. Maybe you’ve been there—watching a kid discover they can actually make something themselves, something that gets genuine oohs and ahhs from the grown-ups. That’s the magic of these cookies. They’re not just treats; they’re tiny time capsules of little hands that won’t stay little forever.
Why You’ll Love This Recipe
Let me tell you why these turkey hand sugar cookies have become the most requested thing I bring to every Thanksgiving gathering. First off, there’s zero special equipment needed. No cookie cutters to hunt down, no specialty pans to buy. You just need your hands, some dough, and a little patience. I’ve tested this with kids as young as three and as old as thirteen, and every single one of them nailed it on the first try.
- Kid-Friendly from Start to Finish : The whole process is designed for little hands. Rolling, tracing, cutting, decorating—every step feels like play, not work. My six-year-old niece can do almost the entire thing by herself now.
- No Fancy Ingredients : You probably have everything in your pantry right now. Butter, sugar, flour, eggs, vanilla. That’s it. No trips to specialty stores or hunting down obscure extracts.
- Perfect for Thanksgiving Gatherings : These are the cookies that make everyone at the table smile. Grandparents, cousins, that one uncle who never seems impressed by anything—they all love seeing the handprint cookies.
- Naturally Customizable : Every hand is different, so every cookie is unique. You can use different frosting colors, different candy decorations, different feather patterns. No two cookies ever look the same.
- Builds Confidence in Young Bakers : There’s something about seeing your own handprint turned into a cookie that makes kids feel like real bakers. My nephew walked around showing everyone his cookie for an hour after we finished decorating.
What makes this recipe different from every other sugar cookie out there is the personal touch. These aren’t just cookies you make—they’re cookies you make with someone. The handprint becomes the centerpiece, and the decorating becomes a shared activity that brings people together. I’ve made these for classroom parties, family reunions, and even a friend’s wedding shower (we used the bride and groom’s hands, and everyone cried).
These are the cookies that make you close your eyes after that first bite—not because the flavor is mind-blowing (though it is pretty great), but because you remember the moment you made them with someone you love. It’s comfort food reimagined as a memory-making activity, and honestly, that’s the best kind of recipe there is.
What Ingredients You Will Need
This recipe uses simple, wholesome ingredients that come together to create a buttery, tender sugar cookie that holds its shape perfectly during baking. The dough needs to be sturdy enough to hold the handprint shape without spreading too much, and these ingredients deliver exactly that.
For the Sugar Cookie Dough
- 1 cup (226g) unsalted butter, softened to room temperature (I prefer Kerrygold for its rich flavor, but any good-quality butter works)
- 1 cup (200g) granulated sugar (regular white sugar, nothing fancy)
- 1 large egg, room temperature (cold eggs can make the dough seize up)
- 1 teaspoon vanilla extract (use pure vanilla extract, not imitation—it makes a real difference in flavor)
- 2 ½ cups (312g) all-purpose flour (spoon and level your flour—don’t scoop directly from the bag or you’ll get too much)
- ½ teaspoon baking powder (helps the cookies rise just enough without losing their shape)
- ¼ teaspoon salt (balances the sweetness and enhances the butter flavor)
For the Royal Icing
- 2 cups (240g) powdered sugar, sifted (sifting prevents lumps in your icing)
- 2 tablespoons meringue powder (I use Wilton brand—it gives the icing the perfect consistency for decorating)
- 3-4 tablespoons warm water (add slowly—you might not need all of it)
- ½ teaspoon vanilla extract (or almond extract for a different flavor profile)
For Decorating
- Orange and red food coloring (gel colors work best—they don’t thin out the icing like liquid drops do)
- Candy corn (for the turkey beak—trust me on this one)
- Candy eyes (the little white and black ones you find in the baking aisle)
- Brown sprinkles or sanding sugar (for the turkey body)
- Assorted fall-colored sprinkles (orange, yellow, red, brown—whatever you have on hand)
Ingredient Selection Tips: For the butter, make sure it’s truly softened—you should be able to press your finger into it and leave an indent without it feeling greasy. If you forgot to take it out of the fridge, cut it into small cubes and let it sit for 15 minutes. Don’t microwave it unless you want flat, greasy cookies. I learned that the hard way my first year making these.
Substitution Guidance: If you need a dairy-free version, use vegan butter sticks (not tub margarine—too much water content). For gluten-free, substitute with a 1:1 gluten-free flour blend that contains xanthan gum. I’ve tested this with Bob’s Red Mill 1:1 Baking Flour and it worked beautifully. The cookies were slightly more tender, but they still held their handprint shape perfectly.
Brand Recommendations: For the vanilla extract, I swear by Nielsen-Massey. It’s pricier, but one bottle lasts forever and the flavor is noticeably better. For food coloring, AmeriColor gel colors are my go-to—they’re concentrated, so a little goes a long way, and they don’t alter the consistency of your icing.
Equipment Needed
You don’t need much for this recipe, which is part of why I love it so much. Here’s what you’ll need:
- Mixing bowls (one large, one medium—I use glass because it doesn’t hold onto grease)
- Electric hand mixer or stand mixer (a hand mixer works fine, but a stand mixer with the paddle attachment makes the dough come together faster)
- Rolling pin (I prefer a French rolling pin without handles—it gives you more control over the thickness)
- Parchment paper (absolutely essential—the dough won’t stick, and it makes cleanup a breeze)
- Sharp knife or pizza cutter (for cutting around the handprint shape)
- Baking sheets (heavy-duty ones work best—thin sheets can warp in the oven)
- Cooling rack (wire rack for letting cookies cool completely before decorating)
- Piping bags or zip-top bags (for the royal icing—I use disposable piping bags with a #2 tip)
- Small bowls or cups (for dividing and coloring the icing)
Alternative Suggestions: If you don’t have a rolling pin, a wine bottle works in a pinch—just make sure it’s clean and label-free. No piping bags? Snip a tiny corner off a zip-top bag and use that instead. It won’t be as precise, but for kids’ cookies, that’s actually a feature, not a bug.
Maintenance Tips: If you’re using a stand mixer, make sure the paddle attachment is clean and dry before starting. Any residual grease from previous baking can affect how your dough comes together. And for your baking sheets, avoid putting them in the dishwasher—hand washing preserves the non-stick surface and prevents warping.
Preparation Method
Let me walk you through this step by step. I’ve made these cookies probably fifty times now, so I’ve figured out all the little tricks that make the process smoother.
- Make the dough. In a large mixing bowl, cream together the softened butter and granulated sugar until light and fluffy—about 3-4 minutes with a hand mixer on medium speed. You want it to look pale and almost whipped. Scrape down the sides of the bowl halfway through. Add the egg and vanilla extract, then beat until combined. It might look a little curdled at this point—that’s normal, don’t panic.
- Mix the dry ingredients. In a separate bowl, whisk together the flour, baking powder, and salt. Add this to the wet mixture in two additions, mixing on low speed after each addition until just combined. The dough should come together into a soft, slightly crumbly ball. If it feels too sticky, add another tablespoon of flour. If it’s too dry, add a teaspoon of milk.
- Chill the dough. Divide the dough into two discs, wrap each in plastic wrap, and refrigerate for at least 30 minutes. This is non-negotiable—chilled dough is much easier to roll out and holds its shape better during baking. I usually chill mine for an hour if I have the time.
- Preheat and prep. Preheat your oven to 350°F (175°C). Line two baking sheets with parchment paper. While the oven is heating, take one disc of dough out of the fridge and let it sit at room temperature for 5 minutes—it’ll be easier to roll without cracking.
- Roll out the dough. On a lightly floured surface, roll the dough to about ¼-inch thickness. I use ¼-inch wooden dowels as guides to keep the thickness even. If the dough starts sticking, dust the top with a little more flour and flip it over.
- Trace and cut the handprints. Here’s the fun part. Have your little helper place their hand flat on the rolled-out dough. Using a sharp knife or pizza cutter, carefully trace around their hand, leaving about ¼ inch of space around their fingers. Lift the handprint shape gently with a spatula and transfer it to the prepared baking sheet, spacing them about 2 inches apart. You can usually fit 2-3 handprints per sheet depending on hand size.
- Bake the cookies. Bake for 8-10 minutes, or until the edges are just barely golden. The centers should look set but not brown. Every oven runs differently, so start checking at 8 minutes. My oven takes exactly 9 minutes for perfect cookies.
- Cool completely. Let the cookies cool on the baking sheet for 5 minutes, then transfer them to a wire rack to cool completely. This is crucial—if you try to decorate them while they’re even slightly warm, the icing will melt and slide right off.
- Make the royal icing. While the cookies cool, make the icing. In a medium bowl, combine the powdered sugar and meringue powder. Add 3 tablespoons of warm water and the vanilla extract, then beat with a hand mixer on low speed until combined. Increase to medium-high speed and beat for 3-4 minutes until the icing is thick and glossy. Add more water, one teaspoon at a time, until the icing reaches a “15-second consistency”—when you drizzle it back into the bowl, the surface should smooth out in about 15 seconds.
- Color and decorate. Divide the icing into three bowls. Color one bowl orange (for the turkey feathers), one bowl red (for the wattle), and leave the third bowl white (for the body). Transfer each color to separate piping bags or zip-top bags. Snip a tiny corner off each bag. Pipe the orange icing onto the fingers (the feathers), the white icing onto the palm and thumb (the turkey body and head), and a small red dot for the wattle. While the icing is still wet, attach candy eyes and a candy corn beak. Add brown sprinkles to the body area for texture.
- Let the icing set. Allow the decorated cookies to sit at room temperature for 2-3 hours, or until the icing is completely hard to the touch. This is the hardest part—waiting. But trust me, if you stack them too soon, you’ll end up with a sticky mess.
Sensory Cues: When you’re creaming the butter and sugar, listen for the sound to change from a sloshy noise to a lighter, fluffier sound. That’s how you know it’s ready. When the dough is properly chilled, it should feel firm but not rock-hard—like a cold stick of butter. The baked cookies should smell like vanilla and butter, and the edges should be just barely golden—not brown.
Troubleshooting Tip: If your dough cracks when you’re rolling it out, it’s too cold. Let it sit at room temperature for another 5 minutes. If your cookies spread too much during baking, your dough wasn’t chilled enough or your butter was too soft. Next time, chill the shaped cookies on the baking sheet for 10 minutes before baking.
Cooking Tips & Techniques
I’ve messed up these cookies in every way imaginable, so let me save you the trouble. Here’s what I’ve learned through trial and error:
The Dough Temperature is Everything. The first time I made these, I was in a hurry and skipped the chilling step. The handprints spread into blobby, unrecognizable shapes that looked more like mutant potatoes than turkeys. Now I chill the dough for at least 30 minutes, and I even pop the cut-out handprints in the freezer for 10 minutes before baking if the kitchen is warm. Cold dough holds its shape. Warm dough turns into puddles.
Don’t Overwork the Dough. When you’re rolling out the scraps to make more handprints, be gentle. The more you handle the dough, the tougher the cookies get. I can usually get 4-5 handprints from the first rolling, then I gently gather the scraps, pat them together, and roll once more. After that, I give up and bake the remaining dough as regular sugar cookies.
The 15-Second Icing Test. This was a game-changer for me. When you’re making royal icing, the consistency matters more than you think. Too thick, and it won’t smooth out. Too thin, and it’ll drip off the cookies. The 15-second test is foolproof: lift your spatula and let the icing drizzle back into the bowl. Count how long it takes for the surface to smooth out. If it takes exactly 15 seconds, you’re golden. If it takes longer, add more water. If it smooths out faster, add more powdered sugar.
Let the Kids Go Wild. Here’s the thing I had to learn the hard way: these cookies are supposed to look like a kid made them. The wonky icing, the sprinkles in weird places, the candy corn beak that’s slightly crooked—that’s the charm. My first batch, I tried to make them look perfect and Pinterest-worthy. They were beautiful, but they didn’t have any soul. Now I let the kids do all the decorating, and the cookies are infinitely better for it.
Timing Strategy: Make the dough the night before. It actually tastes better after resting overnight, and it saves you a ton of stress on the day you’re decorating. I usually bake the cookies in the morning, let them cool while the kids eat lunch, then decorate in the afternoon. By dinner time, the icing is set and ready to serve.
Variations & Adaptations
One of the best things about this recipe is how adaptable it is. Here are some variations I’ve tried over the years:
Dietary Adaptations: For a gluten-free version, I’ve used King Arthur’s Measure for Measure gluten-free flour with excellent results. The dough is a bit more delicate, so be extra gentle when transferring the handprints to the baking sheet. For dairy-free, use vegan butter sticks—I like Miyoko’s or Country Crock Plant Butter. The cookies won’t be quite as tender, but they’ll still taste great.
Flavor Variations: Try adding ½ teaspoon of almond extract along with the vanilla for a different flavor profile. Or add the zest of one orange to the dough for a citrusy twist that pairs beautifully with the sweet icing. Last year, I made a batch with ¼ cup of cocoa powder added to the flour mixture, and the chocolate handprints were a huge hit with the older kids.
Seasonal Adaptations: While these are perfect for Thanksgiving, you can adapt the concept for any holiday. For Christmas, use green and red icing and turn the handprints into reindeer. For Easter, use pastel colors and turn them into bunnies. For Halloween, use orange and black icing and turn them into monsters. The handprint shape is endlessly versatile.
Different Icing Options: If royal icing feels too fussy, use a simple powdered sugar glaze instead. Mix 1 cup powdered sugar with 2 tablespoons milk and ½ teaspoon vanilla. It won’t be as firm when set, but it’s faster and easier. For a completely no-fuss option, skip the icing altogether and sprinkle the handprints with colored sugar before baking.
My Personal Variation: My favorite version uses a cream cheese sugar cookie dough instead of the traditional one. Replace ¼ cup of the butter with ¼ cup of cream cheese. The cookies come out slightly tangy and incredibly tender. They’re a little harder to work with (the dough is stickier), but the flavor is absolutely worth it.
Serving & Storage Suggestions
These cookies are best served at room temperature, which means you can make them a day or two ahead and they’ll be perfect for your Thanksgiving gathering. Here’s how to handle serving and storage:
Presentation Tips: Arrange the cookies on a large platter with the handprints facing different directions, like a flock of turkeys. I like to add a few fall leaves or small pumpkins around the edges for a festive look. If you’re bringing these to a potluck, arrange them in a single layer in a decorative tin or on a disposable platter covered with plastic wrap.
Complementary Dishes: These cookies pair beautifully with a hot cup of apple cider or a warm mug of spiced tea. For a dessert table, serve them alongside pumpkin pie, pecan bars, and apple crisp. They’re also wonderful with a scoop of vanilla ice cream or a dollop of whipped cream.
Storage Instructions: Store the decorated cookies in an airtight container at room temperature for up to one week. Layer them between sheets of parchment paper to prevent the icing from sticking together. Do not refrigerate them—the cold can cause condensation that makes the icing sticky and the cookies soggy.
Freezer Instructions: You can freeze the undecorated cookies for up to three months. Place them in a single layer on a baking sheet and freeze until solid, then transfer to a freezer-safe bag or container. When you’re ready to decorate, thaw them at room temperature for about 30 minutes, then ice and decorate as usual. The flavor is just as good as fresh.
Reheating Tips: These cookies don’t need reheating, but if you want that just-baked warmth, pop them in a 300°F (150°C) oven for 3-4 minutes. Let them cool for 5 minutes before serving. The icing will soften slightly but won’t melt completely.
Flavor Development: Honestly, these cookies taste even better the next day. The flavors meld together, and the texture becomes perfectly tender. I always try to make them at least a day ahead for the best flavor.
Nutritional Information & Benefits
Let’s be real—these are sugar cookies with icing and candy decorations. They’re a treat, not a health food. But here’s the nutritional information so you can plan accordingly:
Estimated Nutritional Values (per cookie, based on 12 cookies):
- Calories: 285
- Total Fat: 12g
- Saturated Fat: 7g
- Cholesterol: 45mg
- Sodium: 95mg
- Total Carbohydrates: 42g
- Sugars: 28g
- Protein: 3g
Health Benefits of Key Ingredients: The butter provides vitamin A and healthy fats (in moderation, of course). The eggs add protein and essential amino acids. And while the sugar isn’t doing you any favors, the joy of making these cookies with loved ones has genuine mental health benefits. Baking together creates connection, builds memories, and reduces stress. That counts for something.
Dietary Considerations: This recipe contains gluten, dairy, and eggs. For allergen-friendly versions, see the variations section above. The cookies are nut-free as written, but check your ingredients if you’re serving someone with nut allergies.
My Personal Take: I don’t make these cookies for their nutritional value. I make them because they bring people together. There’s something about the process—the tracing, the cutting, the decorating—that makes everyone feel included. In a world where we’re all so busy and distracted, taking an hour to make cookies with someone you love is a gift. And that’s worth every single calorie.
Conclusion
These turkey hand sugar cookies have become more than just a recipe in my kitchen. They’re a tradition, a memory-maker, and a reminder that sometimes the best things come from letting go of perfection and embracing the messy, joyful process of creating something with the people you love.
I still think about that day with Lily, when she taught me that a kid’s simple idea could be better than all my carefully planned cookie cutter designs. Every year when we make these cookies, I see how much her hands have grown, and I’m grateful for that moment when I stopped explaining why something wouldn’t work and just let her try.
So here’s my challenge to you: make these cookies with someone you love. Don’t worry if the icing is messy or the candy eyes are crooked. Don’t stress about making them Instagram-perfect. Just enjoy the process, laugh at the mistakes, and savor the sweet, buttery results. Because at the end of the day, these cookies aren’t about being perfect—they’re about being together.
I’d love to hear how your turkey hand sugar cookies turn out! Drop a comment below and tell me about your experience. Did your kids come up with their own decorating ideas? Did you try a fun variation? Share your photos and stories—I can’t wait to see what you create. And if you loved this recipe, don’t forget to pin it for later and share it with your friends. Happy baking, and happy Thanksgiving!
Frequently Asked Questions
Can I make the dough ahead of time?
Absolutely! You can make the dough up to 3 days in advance and keep it wrapped tightly in the refrigerator. Let it sit at room temperature for about 10 minutes before rolling out so it’s easier to work with. You can also freeze the dough for up to 3 months—just thaw it overnight in the fridge before using.
Why did my handprint cookies spread in the oven?
This usually happens when the dough isn’t chilled enough before baking. Make sure you refrigerate the cut-out handprints for at least 10 minutes before they go in the oven. Also, check that your butter was properly softened—if it was too soft, the dough will spread more. Finally, make sure your baking sheets are cool before putting the next batch on them.
Can I use a different type of icing?
Yes! Royal icing is great because it dries hard and doesn’t smudge, but you can use any icing you like. A simple powdered sugar glaze works well, or you can use store-bought frosting in a pinch. Just keep in mind that softer icings won’t hold their shape as well and may smudge if you stack the cookies.
How do I get clean handprint shapes?
The key is using a sharp knife or pizza cutter and cutting about ¼ inch outside the traced line. Don’t press too hard—you want to cut through the dough without compressing it. If the edges look rough, you can smooth them gently with your fingers before baking. And remember, imperfect handprints are part of the charm!
Can I make these cookies with toddlers?
Absolutely! Toddlers can help with tracing their hands (with adult assistance), sprinkling decorations, and placing candy eyes. Just be prepared for a mess and embrace it. I recommend making extra dough so the little ones can practice without stress. The cookies might not look perfect, but the memories will be priceless.
Pin This Recipe!
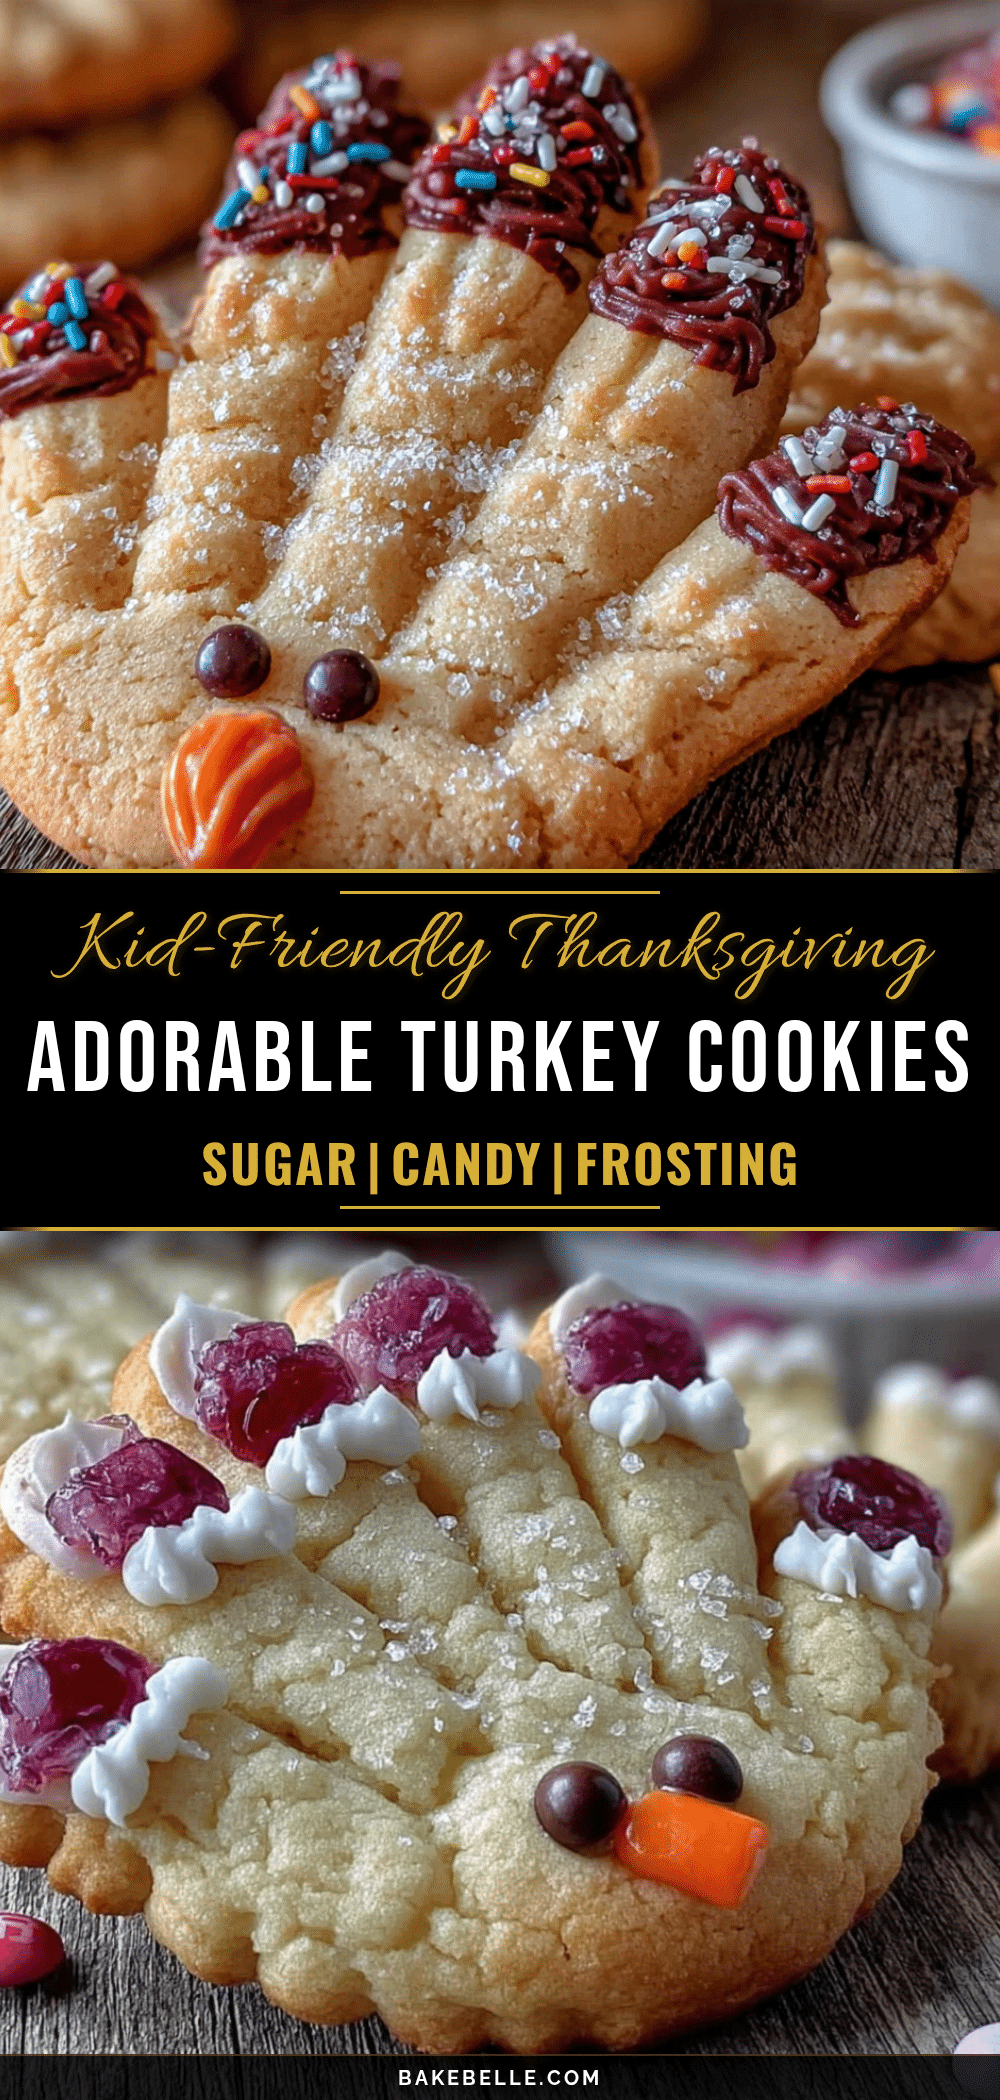
Easy Adorable Turkey Hand Sugar Cookies Recipe

These adorable turkey hand sugar cookies are a fun and heartwarming Thanksgiving tradition. Made without special cookie cutters, kids can trace their own hands to create unique, personalized turkey cookies that are as memorable as they are delicious.
- Prep Time: 30 minutes
- Cook Time: 10 minutes
- Total Time: 45 minutes (plus 30 minutes chilling and 2-3 hours icing setting time)
- Yield: 12 servings 1x
- Category: Dessert
- Cuisine: American
Ingredients
- 1 cup (226g) unsalted butter, softened to room temperature
- 1 cup (200g) granulated sugar
- 1 large egg, room temperature
- 1 teaspoon vanilla extract
- 2 ½ cups (312g) all-purpose flour, spooned and leveled
- ½ teaspoon baking powder
- ¼ teaspoon salt
- 2 cups (240g) powdered sugar, sifted
- 2 tablespoons meringue powder
- 3–4 tablespoons warm water
- ½ teaspoon vanilla extract (or almond extract)
- Orange and red food coloring (gel colors preferred)
- Candy corn (for turkey beak)
- Candy eyes
- Brown sprinkles or sanding sugar (for turkey body)
- Assorted fall-colored sprinkles (orange, yellow, red, brown)
Instructions
- Make the dough: In a large mixing bowl, cream together the softened butter and granulated sugar until light and fluffy (about 3-4 minutes with a hand mixer on medium speed). Scrape down the sides of the bowl halfway through. Add the egg and vanilla extract, then beat until combined.
- Mix the dry ingredients: In a separate bowl, whisk together the flour, baking powder, and salt. Add this to the wet mixture in two additions, mixing on low speed after each addition until just combined. The dough should come together into a soft, slightly crumbly ball. If it feels too sticky, add another tablespoon of flour. If it’s too dry, add a teaspoon of milk.
- Chill the dough: Divide the dough into two discs, wrap each in plastic wrap, and refrigerate for at least 30 minutes (1 hour preferred).
- Preheat and prep: Preheat your oven to 350°F (175°C). Line two baking sheets with parchment paper. Take one disc of dough out of the fridge and let it sit at room temperature for 5 minutes.
- Roll out the dough: On a lightly floured surface, roll the dough to about ¼-inch thickness. Use ¼-inch wooden dowels as guides to keep the thickness even.
- Trace and cut the handprints: Have your little helper place their hand flat on the rolled-out dough. Using a sharp knife or pizza cutter, carefully trace around their hand, leaving about ¼ inch of space around their fingers. Lift the handprint shape gently with a spatula and transfer it to the prepared baking sheet, spacing them about 2 inches apart. You can usually fit 2-3 handprints per sheet depending on hand size.
- Bake the cookies: Bake for 8-10 minutes, or until the edges are just barely golden. The centers should look set but not brown. Start checking at 8 minutes.
- Cool completely: Let the cookies cool on the baking sheet for 5 minutes, then transfer them to a wire rack to cool completely.
- Make the royal icing: In a medium bowl, combine the powdered sugar and meringue powder. Add 3 tablespoons of warm water and the vanilla extract, then beat with a hand mixer on low speed until combined. Increase to medium-high speed and beat for 3-4 minutes until the icing is thick and glossy. Add more water, one teaspoon at a time, until the icing reaches a ’15-second consistency’—when you drizzle it back into the bowl, the surface should smooth out in about 15 seconds.
- Color and decorate: Divide the icing into three bowls. Color one bowl orange (for the turkey feathers), one bowl red (for the wattle), and leave the third bowl white (for the body). Transfer each color to separate piping bags or zip-top bags. Snip a tiny corner off each bag. Pipe the orange icing onto the fingers (the feathers), the white icing onto the palm and thumb (the turkey body and head), and a small red dot for the wattle. While the icing is still wet, attach candy eyes and a candy corn …
- Let the icing set: Allow the decorated cookies to sit at room temperature for 2-3 hours, or until the icing is completely hard to the touch.
Notes
Chill the dough for at least 30 minutes to prevent spreading. For best results, chill the cut-out handprints on the baking sheet for 10 minutes before baking. The 15-second icing test is crucial: lift your spatula and let the icing drizzle back into the bowl; if the surface smooths out in exactly 15 seconds, the consistency is perfect. Let kids decorate freely—wonky icing and crooked candy eyes add charm. Make the dough the night before for better flavor and less stress. Store decorated cookies in an airtight container at room temperature for up to one week. Do not refrigerate. Freeze undecorated cookies for up to 3 months.
Nutrition
- Serving Size: 1 cookie
- Calories: 285
- Sugar: 28
- Sodium: 95
- Fat: 12
- Saturated Fat: 7
- Carbohydrates: 42
- Protein: 3
Keywords: turkey cookies, handprint cookies, Thanksgiving cookies, sugar cookies, kid-friendly cookies, no cookie cutter cookies, hand turkey cookies