There used to be a little sports bar called The End Zone on the corner of Elm and 4th that made these incredible cheese bites shaped exactly like footballs. When they suddenly closed last spring—turned into a vape shop of all things—I honestly felt a little lost. I mean, where was I supposed to get that perfect combination of melty, stretchy cheese wrapped in a super crispy, golden-brown coating? After twelve tries—some of them were truly sad, hockey-puck-looking disasters—I finally got it. The crunch is spot-on, the cheese pulls apart just like I remembered, and they even look like tiny footballs.
I still remember the first time I bit into one at The End Zone. The power had gone out during a playoff game, and the owner brought out a platter of these warm, crispy bites to keep everyone happy. That first bite had this unexpected crunch that gave way to the most incredible, gooey cheese pull. The warmth spreading through the kitchen that night was something else. Maybe you’ve been there—that feeling when a snack becomes part of the memory. These crispy baked football-shaped cheese bites are my little tribute to that place. I keep making them because every batch brings back that night, and honestly, they’re just too good not to share.
Why You’ll Love This Recipe
Let me tell you why these crispy football cheese bites have become my go-to game day recipe. I’ve tested this more times than I care to admit, and every single batch has taught me something new about getting that perfect crunch without deep frying.
- Quick & Easy: Comes together in under 30 minutes, perfect for those last-minute snack attacks when you’re hosting a watch party.
- Simple Ingredients: No fancy grocery trips needed; you likely already have everything in your kitchen right now.
- Perfect for Game Day: Great for Super Bowl parties, tailgates, or any football-themed gathering where you want to impress without stress.
- Crowd-Pleaser: Always gets rave reviews from kids and adults alike. I’ve never brought a platter home with leftovers.
- Unbelievably Delicious: The texture combo is next-level comfort food—crispy on the outside, melty and stretchy on the inside.
What makes these different from the rest? It’s the double-coating technique I finally figured out after those first few failed attempts. Instead of just breading the cheese once, I give it a light flour dusting first, then egg wash, then seasoned breadcrumbs. This creates a shell that stays crispy even after baking. It’s comfort food reimagined—healthier than deep-fried versions, faster than traditional recipes, but with the same soul-soothing satisfaction. Perfect for impressing guests without breaking a sweat, or turning a simple snack into something memorable.
What Ingredients You Will Need
This recipe uses simple, mostly pantry-staple ingredients to deliver bold flavor and satisfying texture without the fuss. Here’s what you’ll need to grab:
For the Cheese Bites
- Block mozzarella cheese, 8 ounces (225g) – Look for low-moisture mozzarella, not fresh. It melts better and holds its shape. I prefer Galbani or Sargento for consistent results.
- Block cheddar cheese, 8 ounces (225g) – Sharp or medium works great. The orange color makes the football shape more visible.
- All-purpose flour, ½ cup (60g) – Creates the first layer that helps the egg wash stick.
- Large eggs, 2 – Beaten well. They act as the glue for the breadcrumb coating.
- Milk, 2 tablespoons (30ml) – Thins the egg wash slightly for even coating.
- Panko breadcrumbs, 1 cup (100g) – These are non-negotiable for that extra crispy texture. Regular breadcrumbs won’t give you the same crunch.
- Italian seasoned breadcrumbs, ½ cup (50g) – Adds flavor depth. You can use plain if you prefer, but I love the herb notes.
- Grated Parmesan cheese, ¼ cup (25g) – Adds savory umami and helps the coating brown beautifully.
- Garlic powder, 1 teaspoon – Don’t skip this, it adds so much flavor.
- Onion powder, ½ teaspoon – Rounds out the savory profile.
- Dried oregano, ½ teaspoon – Gives that Italian-inspired kick.
- Salt, ½ teaspoon – Enhances all the flavors.
- Black pepper, ¼ teaspoon – Freshly ground if possible.
- Cooking spray or olive oil – For spraying the bites before baking to help them crisp up.
For Serving (Optional but Recommended)
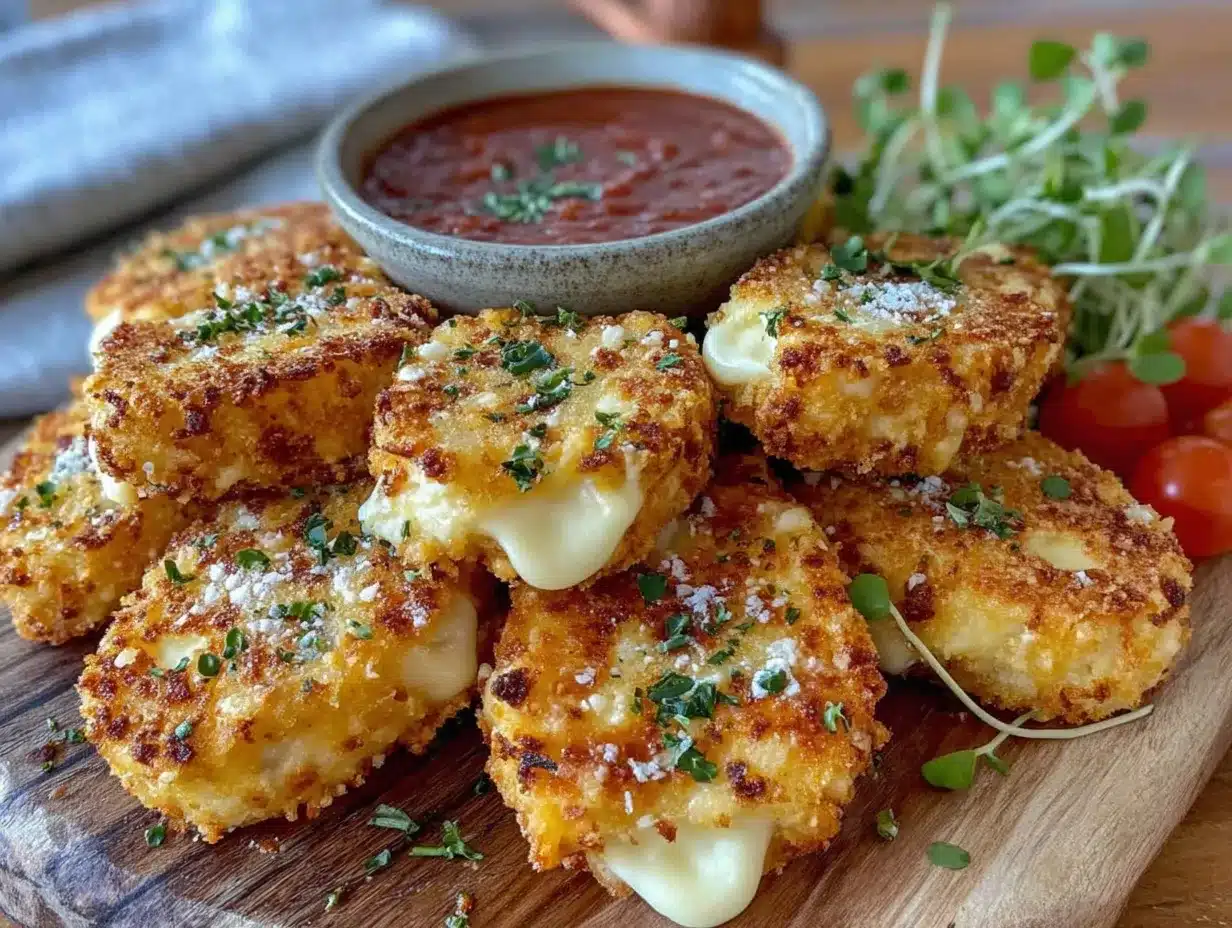
- Marinara sauce, for dipping – Classic choice.
- Ranch dressing, for dipping – My personal favorite.
- Fresh parsley, chopped – For garnish, makes them look extra festive.
Substitution Guidance: Use gluten-free flour and gluten-free panko for a gluten-free version. For dairy-free, use vegan mozzarella and cheddar blocks—just note the melt will be slightly different. You can swap the cheddar for pepper jack if you want a spicy kick.
Equipment Needed
- Sharp knife and cutting board – For cubing the cheese blocks.
- Three shallow bowls – For the flour, egg wash, and breadcrumb mixture. I use pie plates—they’re the perfect size.
- Baking sheet – A rimmed sheet pan works best.
- Parchment paper or silicone baking mat – Prevents sticking and makes cleanup a breeze.
- Small football-shaped cookie cutter (about 2 inches long) – This is key for the shape. I found mine at a kitchen supply store for $4. You can also use a tiny oval cutter or shape them by hand if you’re patient.
- Whisk or fork – For beating the eggs.
- Tongs – For handling the cheese without making a mess of your fingers.
- Wire cooling rack – Optional but helps keep the bites crispy if you’re making a big batch.
Budget-Friendly Tip: If you don’t have a football cutter, use a small knife to trim the cheese cubes into rough football shapes. It takes a little longer but works perfectly fine. I’ve done it both ways and honestly, the hand-shaped ones have more character.
Preparation Method
- Preheat your oven to 400°F (200°C). Line a baking sheet with parchment paper or a silicone mat. Getting the oven hot is crucial—this high heat is what creates that crispy exterior before the cheese has a chance to melt too much.
- Cut the cheese blocks into ½-inch (1.25cm) thick slices. Then use your football-shaped cutter to press out shapes. You should get about 20-24 footballs total from both blocks combined. Press firmly and wiggle the cutter slightly to release the shapes. If the cheese sticks, dip the cutter in cold water between cuts.
- Set up your breading station. In the first shallow bowl, add the flour. In the second bowl, whisk together the eggs and milk until completely combined and slightly frothy. In the third bowl, mix the panko, Italian breadcrumbs, Parmesan, garlic powder, onion powder, oregano, salt, and pepper. Stir until everything is evenly distributed.
- Coat each cheese football. Working with one piece at a time, first roll it in the flour until completely coated. Shake off any excess—you want a thin, even layer. Then dip it into the egg wash, letting any excess drip off. Finally, press it into the breadcrumb mixture, making sure every surface is covered. I like to use my fingers to gently press the crumbs into the sides.
- Place the coated cheese bites on the prepared baking sheet. Leave about an inch of space between each one. Don’t crowd them—they need room for the hot air to circulate and crisp them evenly.
- Lightly spray the tops with cooking spray. This is the secret to that golden-brown, crispy finish. Don’t soak them, just a quick mist from about 6 inches away.
- Bake for 8-10 minutes. Check them at the 6-minute mark—you want them golden brown and just starting to soften. The cheese should be warm and melty inside but not oozing out. Every oven runs a little different, so keep an eye on them. When you see the edges turning a deep golden color, they’re ready.
- Let them rest on the baking sheet for 2 minutes. This is important—they need a moment to set so the coating stays intact when you pick them up. Transfer to a serving platter and garnish with fresh parsley if you like.
Sensory Cue: When done, the bites should feel firm to the touch but give slightly when pressed. You’ll smell the toasted breadcrumbs and melted cheese—it’s an incredible aroma. The cheese pull should be stretchy but not liquid.
Cooking Tips & Techniques
I’ve made more mistakes with these than I’d like to admit, so let me save you some trouble. The first time I tried, I used pre-shredded cheese. Don’t do it. Pre-shredded cheese has anti-caking agents that prevent it from melting properly—it gets greasy instead of gooey. Always buy blocks and cut them yourself.
Another thing I learned the hard way: freeze the cut cheese shapes for 15 minutes before breading. This keeps them from melting too fast in the oven. I forgot this step once and ended up with flat, melted cheese puddles on my baking sheet. Not pretty. A quick freeze firms them up just enough to survive the high heat.
For the crispiest results, use panko breadcrumbs mixed with regular breadcrumbs. Panko alone can be too light and might burn, while regular breadcrumbs alone don’t get crunchy enough. The combination is magic. Also, don’t skip the Parmesan in the coating—it adds flavor and helps with browning.
If you’re making a big batch for a party, here’s my multitasking strategy: bread all the bites first, then freeze them on the baking sheet for 15 minutes. While they’re chilling, preheat the oven and set out your dipping sauces. Then bake them right before serving. This way, they come out hot and crispy exactly when your guests are ready to eat.
One more tip: if you have leftovers (unlikely, but possible), don’t microwave them. It makes the coating soggy. Reheat them in a 350°F oven for 3-4 minutes, and they’ll crisp right back up.
Variations & Adaptations
One of my favorite things about this recipe is how easy it is to switch up. Here are some variations I’ve tried and loved:
- Spicy Jalapeño Popper Version: Mix ¼ cup of finely chopped pickled jalapeños into the cream cheese (if using) or add a teaspoon of cayenne pepper to the breadcrumb mixture. The heat pairs beautifully with the cool cheese.
- Mediterranean Twist: Use feta and mozzarella instead of cheddar. Add dried mint and oregano to the breadcrumbs. Serve with tzatziki sauce for dipping. I made these for a Greek-themed party and they disappeared in minutes.
- Gluten-Free Adaptation: Swap the all-purpose flour for almond flour or a gluten-free all-purpose blend. Use gluten-free panko and gluten-free breadcrumbs. The texture is slightly different but still deliciously crispy.
- Air Fryer Method: Cook at 375°F (190°C) for 6-8 minutes, shaking the basket halfway through. No need to spray with oil—the air fryer’s circulating heat does the work. They come out even crispier than oven-baked.
- Herb & Garlic Version: Add 2 tablespoons of fresh chopped basil and 1 teaspoon of minced garlic to the breadcrumb mixture. It gives the bites a fresh, aromatic flavor that’s perfect for summer gatherings.
Serving & Storage Suggestions
These crispy football cheese bites are best served warm, right out of the oven. I like to arrange them on a wooden board or a platter lined with a paper towel to catch any excess oil. Serve them with small bowls of marinara, ranch, or even a spicy sriracha mayo for dipping.
For a complete game day spread, pair them with other finger foods like chicken wings, loaded nachos, or a veggie platter with hummus. They also go great with cold beers or a crisp lemonade for the non-drinkers.
Storage: If you somehow have leftovers, store them in an airtight container in the refrigerator for up to 3 days. The coating will soften slightly, but they’re still tasty. To reheat, place them on a baking sheet in a 350°F oven for 5-7 minutes. Avoid the microwave—it turns the coating into a sad, soggy mess.
Freezer Instructions: You can freeze the unbreaded cheese footballs for up to 2 months. Just place them in a single layer on a baking sheet, freeze until solid, then transfer to a freezer bag. When you’re ready to bake, bread them while still frozen and add 2-3 minutes to the baking time. The flavor actually develops nicely after freezing—I’ve done this for last-minute parties and it works like a charm.
Nutritional Information & Benefits
Here’s an estimated nutritional breakdown per serving (about 4 cheese bites):
- Calories: 280
- Protein: 16g
- Carbohydrates: 18g
- Fat: 16g
- Saturated Fat: 9g
- Cholesterol: 65mg
- Sodium: 520mg
- Calcium: 320mg (25% DV)
These bites are a good source of calcium and protein, thanks to the cheese. The mozzarella provides about 25% of your daily calcium needs per serving, which is great for bone health. The Parmesan adds a boost of umami flavor with minimal extra calories. While they’re definitely an indulgent snack, baking instead of frying cuts down on oil significantly. I see them as a satisfying treat that fits into a balanced diet—especially when paired with a side of veggies or a fresh salad.
Dietary Considerations: This recipe contains dairy, gluten, and eggs. For a dairy-free version, use vegan cheese alternatives. For gluten-free, use the substitutions mentioned above. Always check labels if you’re cooking for someone with allergies.
Conclusion
These crispy baked football-shaped cheese bites are more than just a snack—they’re a little piece of game day magic. Whether you’re recreating a memory from your favorite sports bar or just looking for something fun and delicious to serve at your next party, this recipe delivers every time. The crunchy coating, the melty cheese center, the adorable football shape—it’s hard to beat that combination.
I’d love to hear how yours turn out! Did you try any of the variations? Did you shape them by hand or use a cutter? Drop a comment below and let me know—your feedback helps other readers too. And if you loved these, share this post with your fellow football fans. Trust me, they’ll thank you when they bite into one of these golden, crispy beauties. Happy cooking, and here’s to great snacks and even better memories!
Frequently Asked Questions
Can I make these ahead of time for a party?
Absolutely! You can bread the cheese bites up to 24 hours in advance and keep them in the refrigerator. Just bake them right before serving for the best texture. You can also freeze them unbreaded for up to 2 months.
Why did my cheese leak out during baking?
This usually happens if the cheese wasn’t cold enough when it went into the oven. Make sure to freeze the cut shapes for 15 minutes before breading. Also, avoid over-baking—8-10 minutes is usually perfect. If your oven runs hot, check them at 7 minutes.
Can I use different types of cheese?
Yes! While mozzarella and cheddar are my go-to, you can experiment with provolone, gouda, or even pepper jack for a spicy kick. Just avoid very soft cheeses like brie or goat cheese—they’ll melt too quickly.
How do I get the football shape without a cutter?
No problem! Cut the cheese blocks into small rectangles, then use a sharp knife to trim the corners and round the edges into an oval shape. Pinch the ends slightly to create the pointed football look. It takes a little practice, but it’s totally doable.
Can I air fry these instead of baking?
Definitely! Air fry at 375°F (190°C) for 6-8 minutes, shaking the basket halfway through. You don’t need to spray with oil if your air fryer has a non-stick basket. They come out incredibly crispy—sometimes even better than oven-baked!
Pin This Recipe!
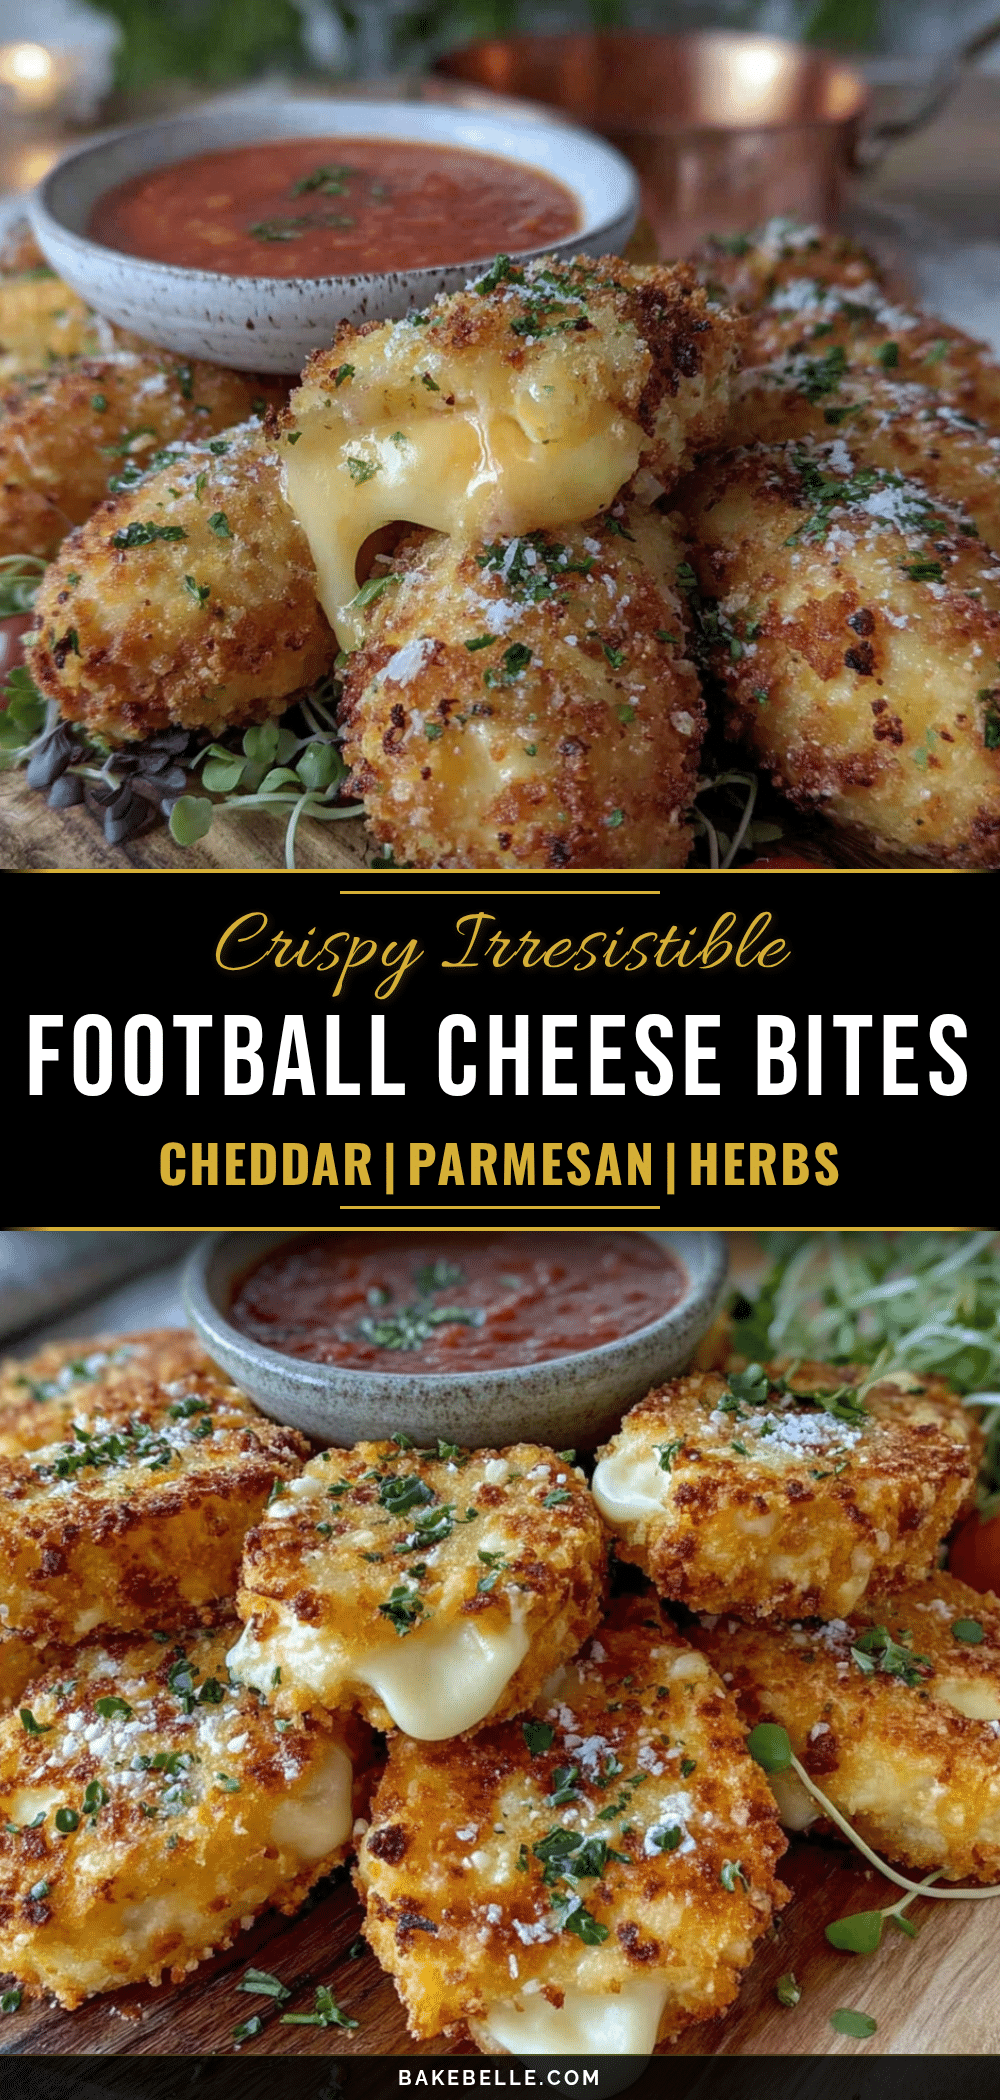
Easy Crispy Football Cheese Bites: Perfect Game Day Snack

These crispy baked football-shaped cheese bites are a tribute to a beloved sports bar snack. With a crunchy coating and melty cheese center, they’re perfect for game day gatherings and come together in under 30 minutes.
- Prep Time: 15 minutes
- Cook Time: 10 minutes
- Total Time: 25 minutes
- Yield: 4 servings 1x
- Category: Appetizer
- Cuisine: American
Ingredients
- 8 ounces (225g) block mozzarella cheese, low-moisture
- 8 ounces (225g) block cheddar cheese, sharp or medium
- ½ cup (60g) all-purpose flour
- 2 large eggs
- 2 tablespoons (30ml) milk
- 1 cup (100g) panko breadcrumbs
- ½ cup (50g) Italian seasoned breadcrumbs
- ¼ cup (25g) grated Parmesan cheese
- 1 teaspoon garlic powder
- ½ teaspoon onion powder
- ½ teaspoon dried oregano
- ½ teaspoon salt
- ¼ teaspoon black pepper
- Cooking spray or olive oil, for spraying
- Marinara sauce, for dipping (optional)
- Ranch dressing, for dipping (optional)
- Fresh parsley, chopped, for garnish (optional)
Instructions
- Preheat your oven to 400°F (200°C). Line a baking sheet with parchment paper or a silicone mat.
- Cut the cheese blocks into ½-inch (1.25cm) thick slices. Use a football-shaped cutter (about 2 inches long) to press out shapes. You should get about 20-24 footballs total. If the cheese sticks, dip the cutter in cold water between cuts.
- Set up your breading station: In the first shallow bowl, add the flour. In the second bowl, whisk together the eggs and milk until combined and slightly frothy. In the third bowl, mix the panko, Italian breadcrumbs, Parmesan, garlic powder, onion powder, oregano, salt, and pepper.
- Coat each cheese football: First roll in flour until completely coated, shaking off excess. Then dip into the egg wash, letting excess drip off. Finally, press into the breadcrumb mixture, ensuring every surface is covered.
- Place the coated cheese bites on the prepared baking sheet, leaving about an inch of space between each one.
- Lightly spray the tops with cooking spray from about 6 inches away.
- Bake for 8-10 minutes, checking at the 6-minute mark. The bites should be golden brown and just starting to soften. The cheese should be warm and melty inside but not oozing out.
- Let them rest on the baking sheet for 2 minutes before transferring to a serving platter. Garnish with fresh parsley if desired.
Notes
For best results, freeze the cut cheese shapes for 15 minutes before breading to prevent melting too fast. Use low-moisture mozzarella, not fresh. Do not use pre-shredded cheese as it contains anti-caking agents that affect melting. For leftovers, reheat in a 350°F oven for 3-4 minutes, not the microwave.
Nutrition
- Serving Size: 4 cheese bites
- Calories: 280
- Sugar: 2
- Sodium: 520
- Fat: 16
- Saturated Fat: 9
- Carbohydrates: 18
- Fiber: 1
- Protein: 16
Keywords: cheese bites, football shaped, game day snack, crispy, baked, mozzarella, cheddar, party appetizer