My nephew had sworn off anything Halloween-themed for three solid years. Three years. He claimed it was “for little kids” and that he was “way too old for that stuff.” Then last October, I threw together a batch of these quick graveyard dirt cups with gummy worms on a random Tuesday night—just because I had leftover pudding cups and a bag of Oreos that needed using up. I left them on the counter to set and went to answer the phone. When I came back, there he was, standing over the tray with chocolate smeared across his cheek and a gummy worm dangling from his lips. He froze, looked at me, and said, “These are actually pretty good.” I didn’t even say anything. I just handed him a spoon.
Honestly, that moment stuck with me. Not because I caught him red-handed, but because these little dirt cups have this weird power over people. They’re silly, sure. They’re a little messy. But they also make you feel like a kid again, you know? There’s something about crushing cookies into fake dirt and sticking gummy worms into it that just hits different. Maybe you’ve been there—standing in the grocery store aisle, grabbing pudding and Oreos, wondering if you’re being ridiculous. Let me tell you, you’re not. You’re being smart.
This version is the quickest one I’ve ever made. No baking, no complicated layers, no fancy piping bags. Just a few ingredients, about ten minutes of hands-on time, and you’ve got a dessert that looks like a tiny graveyard scene. I keep coming back to this recipe because it’s the kind of thing that saves you on a busy weeknight when you promised to bring something to the school party and completely forgot until an hour before. It’s also the kind of thing that makes people smile. And honestly, that’s worth a lot more than a fancy French pastry.
Why You’ll Love This Recipe
Let’s be real for a second. You’re busy. You’re tired. You’ve got a million things on your plate, and now you need a dessert that looks like it took effort without actually taking any. These quick graveyard dirt cups with gummy worms are exactly that. They’re the kind of recipe that makes you look like a hero with almost zero work.
- Quick & Easy : From start to finish, we’re talking about 15 minutes of actual work. The rest is just chilling in the fridge. Perfect for those “oh no, I need something for tomorrow” moments.
- Simple Ingredients : You probably already have most of this stuff in your pantry. Oreos, instant pudding, milk, gummy worms. That’s it. No special trips to the store.
- Perfect for Halloween Parties : Whether it’s a classroom party, a potluck, or just a fun family movie night, these dirt cups fit right in. They’re festive without being over-the-top.
- Crowd-Pleaser : Kids absolutely lose their minds over these. Adults pretend to be too cool, then eat three of them. I’ve seen it happen.
- Unbelievably Delicious : The combination of creamy chocolate pudding, crunchy cookie crumbs, and chewy gummy worms is honestly perfect. It’s comfort food in a cup.
What makes this recipe different from all the other dirt cup recipes out there? It’s the texture. I’ve tested this about a dozen times to get the pudding-to-crumb ratio just right. Too much cookie and it’s dry. Too much pudding and it’s soupy. This version hits that sweet spot where every spoonful has a little bit of everything. Plus, I add a tiny trick—a pinch of salt in the pudding—that makes the chocolate flavor pop in a way you won’t expect.
This isn’t just good. It’s the kind of dessert that makes you close your eyes after the first bite. It’s nostalgia in a cup, but faster and easier than you remember.
What Ingredients You Will Need
This recipe uses simple, everyday ingredients to create something that looks way more impressive than it actually is. Most of these are pantry staples, which is exactly what you want on a busy weeknight.
- 1 package (3.9 oz) instant chocolate pudding mix – I recommend Jell-O brand for the smoothest texture. Don’t use cook-and-serve; it takes too long and the texture isn’t as creamy.
- 2 cups cold milk – Whole milk gives the richest pudding, but 2% works fine too. For a dairy-free version, use oat milk or almond milk. Just know it won’t set quite as firmly.
- 1 package (14.3 oz) Oreo cookies – Regular Oreos work best. Double Stuf is fine too, but you’ll get slightly less “dirt” color. Avoid the thin ones; they don’t crush into the right texture.
- 1 package gummy worms – Get the sour ones if you want a tangy contrast to the sweet pudding. I like the Trolli brand best because they’re extra chewy and colorful.
- Pinch of salt – This is my secret weapon. A tiny pinch of flaky salt in the pudding mix makes the chocolate taste deeper and richer. Trust me on this one.
- Optional: 8 small clear cups or mason jars – Clear cups let you see the layers, which is half the fun. I use 8-ounce plastic cups from the party store, but any small glass jar works.
- Optional: 8 gummy pumpkins or candy tombstones – For extra graveyard vibes. These are totally optional but make the presentation next-level.
Here’s a quick tip about the Oreos: you don’t need to remove the cream filling. I know some recipes tell you to scrape it out, but honestly, that’s a waste of time and flavor. Just crush the whole cookie, cream and all. The white flecks in the “dirt” actually make it look more realistic, like little bits of rock or bone. It sounds weird, but it works.
For the gummy worms, I like to use a mix of colors—red, green, yellow, orange. It makes the cups look more vibrant when you first assemble them. If you’re making these ahead, wait to add the worms until just before serving, otherwise they’ll bleed their color into the pudding and turn everything a weird pinkish-brown. Ask me how I know.
Equipment Needed
You don’t need any fancy gadgets for this recipe. That’s kind of the whole point. Here’s what you’ll need:
- Large mixing bowl – For the pudding. Any size works, but bigger is better to avoid splashing.
- Whisk – A hand whisk is fine. An electric mixer works too, but honestly, it’s pudding. It’s not that serious.
- Food processor or zip-top bag – For crushing the Oreos. A food processor gives you the finest, most even crumbs. But if you don’t have one, put the cookies in a zip-top bag and smash them with a rolling pin. It’s louder but oddly satisfying.
- 8 small cups or jars – Clear plastic cups, mason jars, or even small glass bowls. The size should be about 6 to 8 ounces each.
- Spatula – For scraping every last bit of pudding into the cups. Waste not, want not.
- Measuring cups and spoons – For the milk and the pinch of salt. Eyeballing is fine for the salt, but measure the milk for consistent pudding.
If you’re using a food processor, here’s a maintenance tip: don’t overfill it. Work in batches if needed. Overloading can cause the cookies to turn into paste instead of crumbs. And clean the bowl immediately after use, because dried pudding is a nightmare to scrub off.
Preparation Method
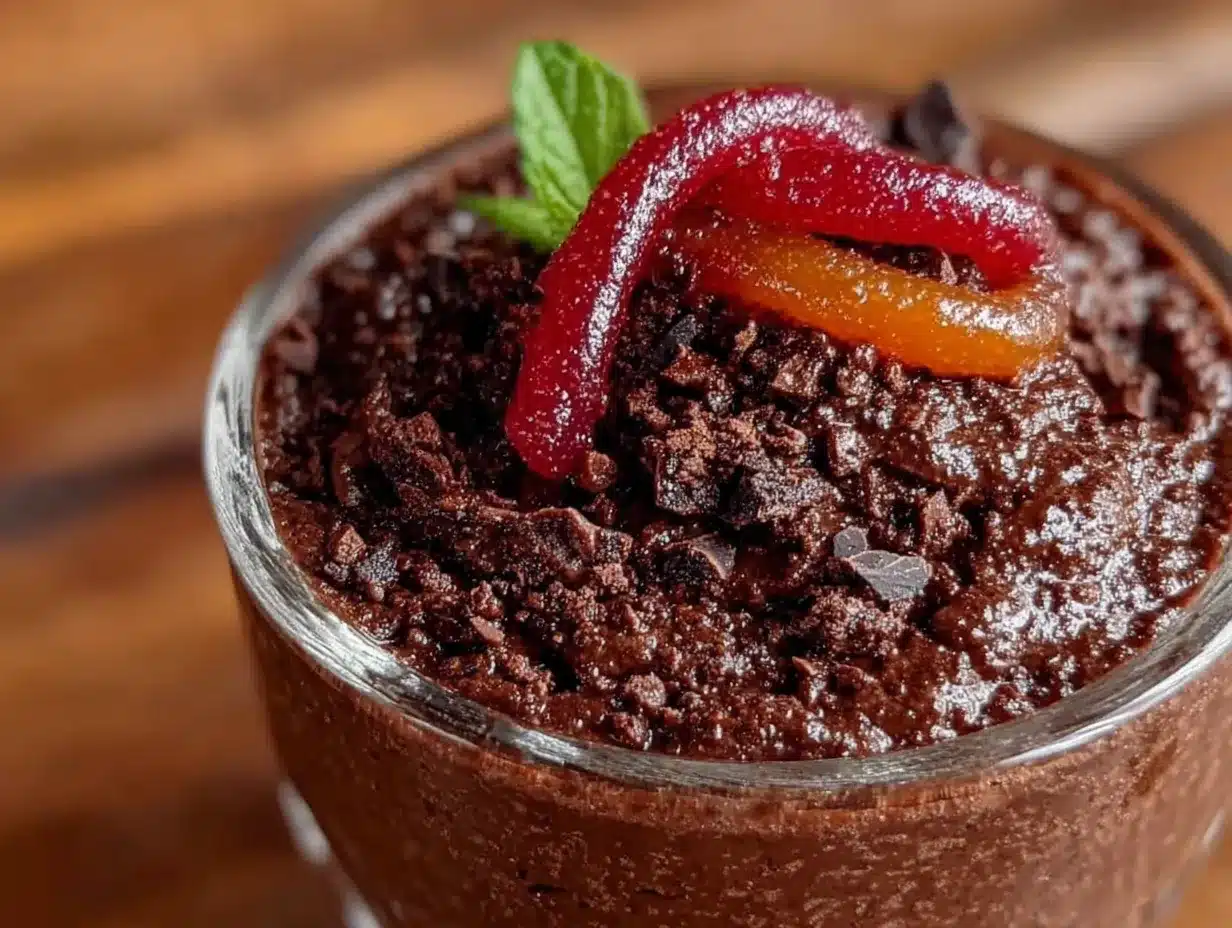
Let’s get into it. This whole process takes about 15 minutes of active time, plus at least 30 minutes of chilling. Plan accordingly.
- Make the pudding. In a large mixing bowl, combine the instant chocolate pudding mix with 2 cups of cold milk. Whisk vigorously for about 2 minutes, or until the mixture starts to thicken. You’ll feel it get heavier as you whisk. Add that pinch of salt and whisk once more. Let it sit for 5 minutes to fully set. Don’t rush this step—the pudding needs time to firm up or your dirt cups will be soupy.
- Crush the Oreos. While the pudding sets, crush the entire package of Oreos. If using a food processor, pulse in batches until you get fine crumbs with a few slightly larger pieces for texture. If using a bag and rolling pin, go to town on those cookies. You want mostly fine crumbs with some small chunks—it looks more like real dirt that way.
- Layer the cups. Spoon about 2 tablespoons of crushed Oreos into the bottom of each cup. Press down lightly with the back of a spoon to create a firm base layer. This keeps the dirt from mixing into the pudding too quickly.
- Add the pudding. Divide the pudding evenly among the 8 cups. I use about 1/4 cup per cup, but you can eyeball it. Smooth the top with the back of a spoon. Don’t worry about being perfect—you’re covering it with dirt anyway.
- Top with dirt. Sprinkle the remaining crushed Oreos over the pudding layer. Use enough to completely cover the surface. You want it to look like a little patch of soil. I usually use about 3 tablespoons per cup.
- Add the gummy worms. Gently poke 2 or 3 gummy worms into each cup, positioning them so they look like they’re crawling out of the dirt. Some should be half-buried, some fully visible. Get creative with the placement—it makes the final result way more fun.
- Chill. Refrigerate the cups for at least 30 minutes before serving. This lets the pudding set completely and the cookie crumbs soften slightly. If you’re making them a day ahead, cover each cup with plastic wrap and refrigerate. Add the gummy worms just before serving to keep them from bleeding color.
A couple of notes: if your pudding doesn’t set after 5 minutes, your milk might have been too warm. Cold milk is crucial here. Also, if you’re using a dairy-free milk, expect a softer set. That’s fine—just chill them a little longer, maybe 45 minutes to an hour.
One more thing: when you poke the gummy worms in, do it gently. If you shove them in too hard, they’ll sink to the bottom and disappear. You want them peeking out, not buried alive.
Cooking Tips & Techniques
I’ve made these quick graveyard dirt cups with gummy worms about twenty times now, and I’ve learned a few things the hard way. Let me save you some trouble.
The biggest mistake people make is overmixing the pudding. I know, it sounds backwards. But if you whisk too vigorously or too long, you’ll incorporate too much air and the pudding will be foamy instead of creamy. You want it smooth and thick, not bubbly. Stop whisking as soon as it starts to thicken—about 2 minutes is plenty.
Another common issue is the cookie crumbs getting soggy too fast. The fix is simple: don’t add the gummy worms until just before serving. The worms release moisture as they sit, which seeps into the cookie layer and turns it into mush. If you’re making these a day ahead, keep the worms separate and add them right before you serve.
Here’s a pro trick for the dirt layer: reserve about a tablespoon of crushed Oreos per cup. After you add the gummy worms, sprinkle that extra bit of “dirt” over the top to cover any exposed pudding. It makes the whole thing look more cohesive and realistic.
Timing is everything. I like to make the pudding first, then crush the cookies while it sets. That way, I’m not standing around waiting. Multitask where you can. This recipe is forgiving, so don’t stress about perfect timing.
One thing I learned the hard way: don’t use the double-stuffed Oreos for the dirt layer. I tried it once thinking more cream would be better. It wasn’t. The extra cream made the crumbs clump together and they didn’t look like dirt at all. Stick with regular Oreos.
If you’re serving these at a party, assemble them in clear cups so people can see the layers. It adds to the drama. And if you’re really going for it, add a candy tombstone or a gummy pumpkin on top. It’s a small touch that makes a big impression.
Variations & Adaptations
This recipe is super flexible. Here are a few ways to switch it up:
Dairy-Free Version: Use oat milk or coconut milk for the pudding. I’ve tested both, and oat milk gives the creamiest result. Use dairy-free chocolate cookies if you can find them—K-Toos brand works great. The texture will be slightly softer, so chill for an extra 15 minutes.
Gluten-Free Option: Use gluten-free chocolate sandwich cookies. Glutino makes a good one. Everything else in the recipe is naturally gluten-free, so this is an easy swap. Just check your gummy worms—some brands use wheat starch.
Flavor Twist: Try using vanilla or butterscotch pudding instead of chocolate. It changes the whole vibe but still tastes amazing. I made a batch with vanilla pudding and used crushed graham crackers instead of Oreos. Called them “beach cups” with gummy sharks. The kids went nuts.
Extra Spooky Version: Add a few drops of green food coloring to the pudding to make it look like slime. It sounds gross, but kids love it. Use spider rings instead of gummy worms for a different creepy-crawly effect.
Portion Sizes: If you’re serving adults, use smaller cups—4 ounces instead of 8. The sweetness is intense, and a little goes a long way. For a party, I like to use shot glasses for mini versions. They’re adorable and perfect for grazing.
I once made a batch with crushed chocolate graham crackers instead of Oreos because I ran out. It worked fine! The texture was a little grittier, but the flavor was still great. Don’t be afraid to experiment with what you have on hand.
Serving & Storage Suggestions
These quick graveyard dirt cups with gummy worms are best served cold, straight from the fridge. The contrast between the chilled pudding and the slightly softened cookie crumbs is where the magic happens.
For serving: Arrange the cups on a platter or tray. If you’re going for a graveyard theme, scatter a few extra gummy worms and candy pumpkins around the base. Add a small sign that says “Rest in Pieces” for maximum effect. Serve with spoons and napkins—things get messy.
Storage: Cover each cup tightly with plastic wrap or transfer to an airtight container. They’ll keep in the refrigerator for up to 3 days. But honestly, they’re best within the first 24 hours. The cookie layer stays firmer and the gummy worms haven’t bled their color yet.
Freezing: I don’t recommend freezing these. The pudding gets icy and the texture falls apart. If you need to make them way ahead, freeze just the pudding in the cups (without the cookie topping) and add the dirt and worms after thawing.
Reheating: You don’t reheat these. They’re a cold dessert. But if you accidentally leave them out too long and the pudding gets runny, pop them back in the fridge for 20 minutes. They’ll firm right up.
One thing I’ve noticed: the flavors actually get better after a few hours in the fridge. The cookie crumbs absorb a little moisture from the pudding and soften into something almost cake-like. It’s a different texture than fresh, but still delicious. Just don’t wait more than a day, or the worms start to get weird.
Nutritional Information & Benefits
Let’s be honest—these are a treat, not a health food. But here’s the breakdown so you know what you’re getting into:
Per serving (1 cup): approximately 320 calories, 12g fat, 52g carbohydrates, 4g protein, 2g fiber, 28g sugar. These numbers vary based on the exact brands you use.
Health highlights: The Oreos contain a small amount of iron from enriched flour. The milk provides calcium and vitamin D. The gummy worms? Well, they have a little gelatin, which is a source of protein. I’m reaching here, I know.
Dietary considerations: This recipe contains dairy and gluten. It can be made dairy-free and gluten-free with the substitutions mentioned above. It is not vegan (pudding mix contains milk derivatives, and gummy worms contain gelatin). For a vegan version, use vegan chocolate pudding mix, plant milk, and vegan gummy worms.
Potential allergens: Milk, wheat, soy (in Oreos). Check your gummy worm labels for additional allergens like corn syrup or artificial colors if that’s a concern.
Look, this isn’t the dessert you turn to for nutritional value. It’s the dessert you turn to for joy. And honestly? Sometimes that’s just as important. A little bit of sugar and a lot of fun can do wonders for a stressful week.
FAQs
Can I make these dirt cups the night before?
Yes, absolutely. Assemble everything except the gummy worms. Cover and refrigerate overnight. Add the worms just before serving to keep them from bleeding color into the pudding.
Why is my pudding not setting?
Your milk might be too warm. Instant pudding needs cold milk to set properly. Also, make sure you’re using instant pudding, not cook-and-serve. They look similar but behave very differently.
Can I use sugar-free pudding mix?
Yes, sugar-free pudding works fine. The texture might be slightly less creamy, but the flavor is still good. Use sugar-free Oreos if you want to cut the sugar even more.
How do I keep the gummy worms from sinking?
Wait until the pudding has fully set before adding the worms. If you add them while the pudding is still soft, they’ll sink to the bottom. Chill the cups for at least 30 minutes first, then gently poke the worms in.
Can I use a different type of cookie?
Absolutely. Chocolate graham crackers, gluten-free chocolate cookies, or even crushed brownies work well. Just avoid anything too soft or cakey—you want crumbs that mimic dirt, not mud.
Conclusion
These quick graveyard dirt cups with gummy worms are the kind of recipe that saves your bacon when you need something fast, fun, and festive. They take almost no time, use ingredients you probably already have, and make everyone who eats them smile. What more could you ask for on a busy weeknight?
I love this recipe because it reminds me that dessert doesn’t have to be complicated to be good. Sometimes the simplest things are the ones that bring the most joy. Whether you’re making these for a Halloween party, a classroom treat, or just because you’re feeling a little silly, they deliver every single time.
Go ahead and customize them to your heart’s content. Swap the pudding flavor, change up the candy, use different cups. Make them your own. And when you do, come back and tell me about it. I’d love to hear how they turned out. Leave a comment below, share a photo, or tag me in your creations. Happy Halloween, and happy eating!
Pin This Recipe!
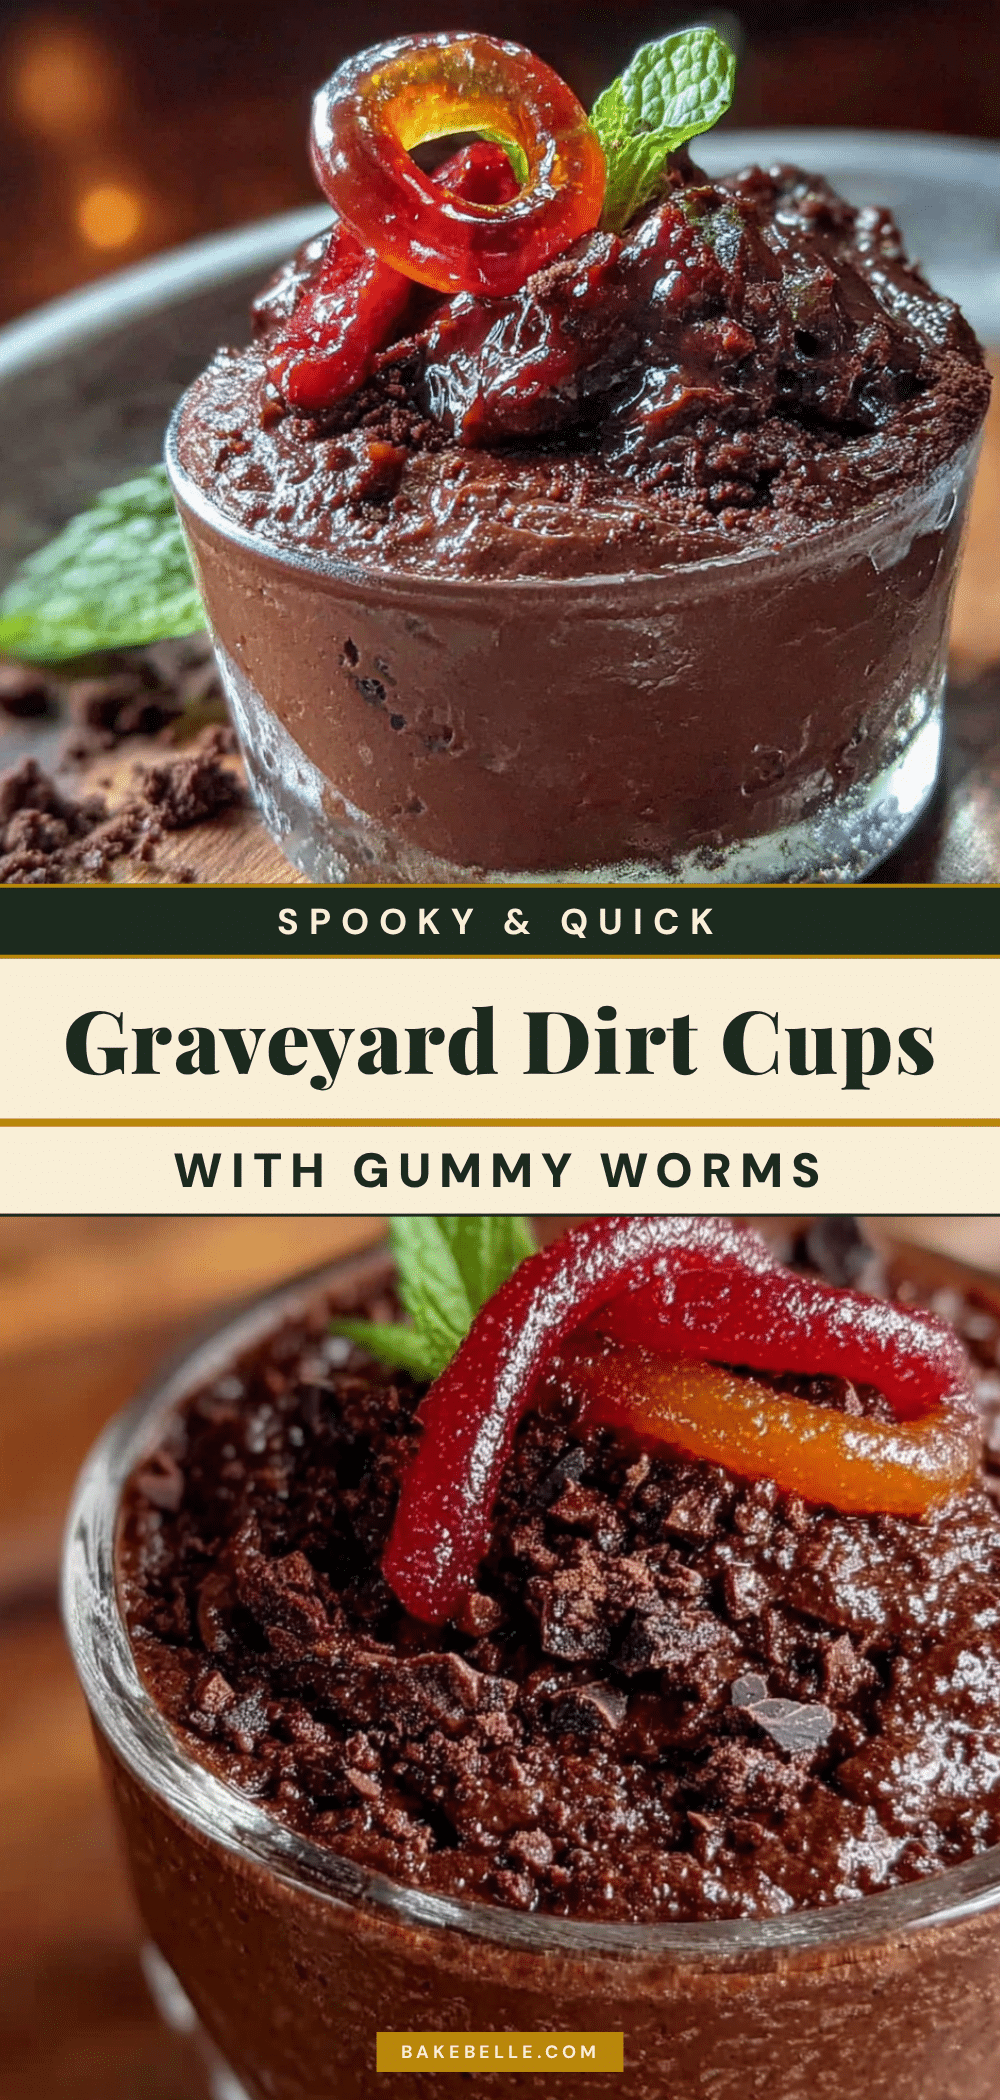
Easy Graveyard Dirt Cups with Gummy Worms
These quick and easy graveyard dirt cups with gummy worms are a fun, no-bake Halloween dessert made with creamy chocolate pudding, crushed Oreos, and chewy gummy worms. Ready in just 15 minutes of hands-on time, they’re perfect for parties, school events, or a spooky family treat.
- Prep Time: 15 minutes
- Cook Time: 0 minutes
- Total Time: 45 minutes (includes 30 minutes chilling)
- Yield: 8 servings 1x
- Category: Dessert
- Cuisine: American
Ingredients
- 1 package (3.9 oz) instant chocolate pudding mix
- 2 cups cold milk
- 1 package (14.3 oz) Oreo cookies
- 1 package gummy worms
- Pinch of salt
- Optional: 8 small clear cups or mason jars
- Optional: 8 gummy pumpkins or candy tombstones
Instructions
- Make the pudding. In a large mixing bowl, combine the instant chocolate pudding mix with 2 cups of cold milk. Whisk vigorously for about 2 minutes, or until the mixture starts to thicken. Add a pinch of salt and whisk once more. Let it sit for 5 minutes to fully set.
- Crush the Oreos. While the pudding sets, crush the entire package of Oreos. If using a food processor, pulse in batches until you get fine crumbs with a few slightly larger pieces for texture. If using a bag and rolling pin, crush until you have mostly fine crumbs with some small chunks.
- Layer the cups. Spoon about 2 tablespoons of crushed Oreos into the bottom of each cup. Press down lightly with the back of a spoon to create a firm base layer.
- Add the pudding. Divide the pudding evenly among the 8 cups (about 1/4 cup per cup). Smooth the top with the back of a spoon.
- Top with dirt. Sprinkle the remaining crushed Oreos over the pudding layer, using enough to completely cover the surface (about 3 tablespoons per cup).
- Add the gummy worms. Gently poke 2 or 3 gummy worms into each cup, positioning them so they look like they’re crawling out of the dirt. Some should be half-buried, some fully visible.
- Chill. Refrigerate the cups for at least 30 minutes before serving. If making a day ahead, cover each cup with plastic wrap and refrigerate. Add the gummy worms just before serving to keep them from bleeding color.
Notes
For best results, use cold milk and instant pudding (not cook-and-serve). Add gummy worms just before serving to prevent color bleeding. Reserve a tablespoon of crushed Oreos per cup to sprinkle over the worms for a more realistic dirt look. For dairy-free version, use oat milk and dairy-free cookies. For gluten-free, use gluten-free chocolate sandwich cookies.
Nutrition
- Serving Size: 1 cup
- Calories: 320
- Sugar: 28
- Sodium: 380
- Fat: 12
- Saturated Fat: 4
- Carbohydrates: 52
- Fiber: 2
- Protein: 4
Keywords: graveyard dirt cups, Halloween dessert, no-bake dessert, chocolate pudding cups, gummy worms, easy Halloween treat, kids dessert, Oreo dirt cups