Last Tuesday, I was staring into the fridge at a half-used bag of frozen peas, a single chicken breast, and some heavy cream that was a day past its sell-by date. I had a hungry six-year-old tugging at my apron and a husband who was about to walk through the door after a long day. I needed a miracle, not a complicated recipe. That’s when I remembered the way my neighbor, an older woman named Carol from down the street, had described her weeknight chicken pot pie. She didn’t give me a formal recipe card—she just stood in my kitchen doorway, gestured with her hands, and said, “You just throw it all in one pan, honey. The less mess, the more time you have to sit down.”
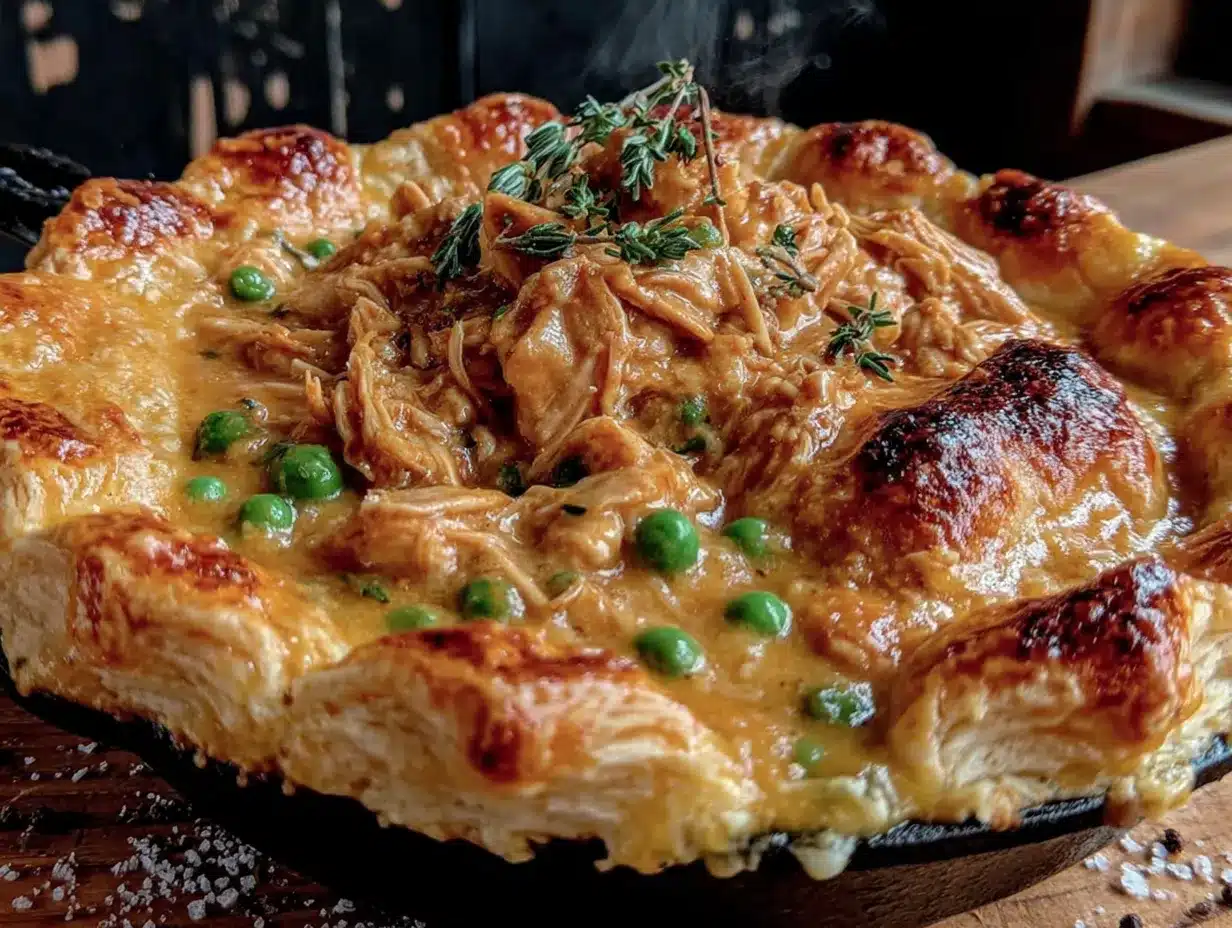
I didn’t really believe her at first. Chicken pot pie always felt like a Sunday project—rolling out pastry, washing a dozen dishes, and watching the clock. But I was desperate, so I gave it a shot. I grabbed my trusty cast iron skillet, chopped that single chicken breast, and started building layers of flavor right there on the stovetop. Honestly, the first attempt was a little messy—I forgot to thaw the peas, so they went in frozen and made the filling a bit watery. But the crust? I used a store-bought puff pastry sheet, cut it into rough squares, and laid them right on top of the simmering filling before popping the whole pan into the oven. Twenty minutes later, we were eating dinner out of the same pan I cooked it in. My kid ate every single pea. That, my friend, was the moment I became a believer.
This Easy One-Pan Chicken Pot Pie is that same kind of kitchen miracle. It’s the recipe you turn to when you need something warm, comforting, and fast—without sacrificing that rich, creamy, soul-soothing flavor we all crave. Let me show you how to make it your own.
Why You’ll Love This Recipe
Let’s be honest—most chicken pot pie recipes are a labor of love. They require a separate pot for the filling, a rolling pin for the crust, and a casserole dish that takes up half your sink. This one? It’s a game-changer. I’ve tested this version at least a dozen times, tweaking the ratio of cream to broth, the thickness of the gravy, and the exact moment to add the puff pastry. It’s been approved by my picky-eater nephew, my gluten-free sister-in-law (she used a GF pie crust), and my dad, who claims he “doesn’t like casseroles.”
- Quick & Easy: From start to finish, this dish comes together in under 40 minutes. That’s faster than ordering takeout in my neighborhood.
- Simple Ingredients: You probably have most of these in your pantry right now—chicken, frozen veggies, butter, flour, and cream. No fancy trips to the specialty store.
- Perfect for Busy Weeknights: This is the meal you make on a Tuesday when you have soccer practice, homework, and a dog that needs walking. It’s forgiving, flexible, and always satisfying.
- Crowd-Pleaser: I’ve served this to kids, grandparents, and friends who “don’t like creamy stuff.” They all went back for seconds.
- Unbelievably Delicious: The secret is in the technique—searing the chicken first creates a deep, savory base, and the puff pastry gets perfectly golden and flaky right on top of the filling.
This isn’t just another chicken pot pie recipe. It’s the one that uses one pan, one spoon, and one oven trip. It’s comfort food that doesn’t leave you with a mountain of dishes. And honestly, that’s the kind of cooking I want to share with you.
What Ingredients You Will Need
This recipe relies on simple, humble ingredients that work together to create something truly special. The beauty is in the balance—rich cream, savory chicken, and tender vegetables all held together by a luscious, not-too-thick gravy. Here’s what you’ll need:
For the Filling
- 1 tablespoon olive oil (or avocado oil—use what you have)
- 1 pound boneless, skinless chicken breasts or thighs, cut into bite-sized pieces (thighs are more forgiving and stay juicier)
- 1 medium yellow onion, diced (about 1 cup)
- 2 medium carrots, peeled and diced (about 1 cup)
- 2 celery stalks, diced (about ½ cup)
- 3 cloves garlic, minced (or 1 teaspoon garlic powder in a pinch)
- 4 tablespoons unsalted butter
- ⅓ cup all-purpose flour (use a gluten-free blend if needed)
- 1 ½ cups low-sodium chicken broth (I like Kitchen Basics for flavor)
- 1 cup whole milk or heavy cream (half-and-half works too, but cream gives that velvety texture)
- 1 cup frozen peas and carrots mix (no need to thaw—just toss them in)
- ½ teaspoon dried thyme (or 1 teaspoon fresh thyme leaves)
- ½ teaspoon dried rosemary (crush it between your fingers to release the oils)
- Salt and freshly ground black pepper, to taste
For the Topping
- 1 sheet frozen puff pastry, thawed (I use Pepperidge Farm—it’s reliable and widely available)
- 1 large egg, beaten with 1 tablespoon water (for an egg wash that gives a gorgeous golden sheen)
- Flaky sea salt, for sprinkling (optional, but I love the tiny crunch)
Substitution Tips: If you’re dairy-free, use a good quality plant-based butter and unsweetened oat milk or canned coconut milk (the full-fat kind). For a lower-carb version, swap the puff pastry for a layer of shredded cheese and almond flour biscuits. And if you don’t have frozen peas and carrots, any frozen vegetable medley will work—just avoid anything with bell peppers, as they can get watery.
Equipment Needed
The best part about this recipe? You only need a few tools, and you probably already own them. Here’s what to grab:
- A 12-inch oven-safe skillet or cast-iron pan. This is non-negotiable—you need something that can go from stovetop to oven. A cast-iron skillet is my go-to because it holds heat beautifully and gives the crust a crispy bottom. If you don’t have one, any oven-safe nonstick pan will work, just make sure the handle is metal, not plastic.
- A sharp chef’s knife and cutting board for dicing the vegetables and chicken.
- A wooden spoon or silicone spatula for stirring the filling without scratching your pan.
- A small bowl for the egg wash.
- A pastry brush (or just use the back of a spoon) for applying the egg wash.
I’ve made this recipe in a stainless steel skillet, and it worked fine, but the clean-up was a little more stubborn. If you’re on a budget, a Lodge cast-iron skillet is affordable and will last you a lifetime. Just remember to season it properly, and it’ll be your best friend for one-pan dinners.
Preparation Method
Let’s get cooking! This method is designed to be straightforward, but I’ve included all my little tricks so you don’t make the same mistakes I did. Trust me, my first attempt involved a smoking pan and a slightly burnt roux—we learn by doing!
- Preheat your oven to 400°F (200°C). Position the rack in the center. While the oven heats, get your ingredients prepped—dice the onion, carrots, celery, and chicken. This is the perfect time to let the kids help with the veggie chopping (using a kid-safe knife, of course).
- Heat the olive oil in your 12-inch oven-safe skillet over medium-high heat. Once it shimmers, add the chicken pieces in a single layer. Don’t overcrowd the pan—if you have more than a pound, cook in batches. Sear the chicken for 3-4 minutes per side, until golden brown but not fully cooked through. The browning is where the flavor lives! Transfer the chicken to a plate and set aside.
- Reduce the heat to medium and add the butter. Let it melt, then toss in the diced onion, carrots, and celery. Cook for 5-6 minutes, stirring occasionally, until the vegetables soften and the onions turn translucent. You’ll smell that sweet, savory aroma—that’s the base of your pot pie.
- Add the minced garlic and cook for 30 seconds until fragrant. Be careful not to burn it—garlic turns bitter quickly. Stir constantly.
- Sprinkle the flour evenly over the vegetables. Stir with your wooden spoon for about 1 minute. This cooks the raw flour taste out and creates a roux that will thicken your gravy. It should look like a pasty, clumpy mixture—that’s perfect.
- Slowly pour in the chicken broth while whisking continuously. I use a whisk here to break up any lumps. Then add the milk or cream, still whisking. Bring the mixture to a gentle simmer—you’ll see it start to bubble around the edges. Let it cook for 2-3 minutes, stirring occasionally, until it thickens enough to coat the back of a spoon. If it’s too thick, add a splash more broth. Too thin? Let it simmer another minute.
- Stir in the frozen peas and carrots, dried thyme, rosemary, and the seared chicken (along with any juices on the plate). Season with salt and pepper—start with ½ teaspoon salt and ¼ teaspoon pepper, then taste and adjust. The filling should be well-seasoned because the puff pastry will absorb some of the saltiness.
- Remove the skillet from the heat. Now, it’s time for the star of the show: the puff pastry. On a lightly floured surface, roll out the thawed pastry sheet just slightly to fit your skillet (about 10 inches in diameter). Carefully lay the pastry over the filling, letting the edges hang over the sides a bit. It doesn’t have to be perfect—rustic is charming!
- Brush the top of the pastry with the egg wash. This gives it that beautiful golden-brown color. Sprinkle with a pinch of flaky sea salt if you’re feeling fancy. Cut 3-4 small slits in the center to let steam escape—this prevents a soggy bottom.
- Transfer the skillet to the preheated oven. Bake for 18-22 minutes, until the pastry is puffed, golden, and flaky, and the filling is bubbling up around the edges. Let it cool on a wire rack for 5 minutes before serving. This resting time lets the gravy set so it doesn’t run all over your plate.
Cooking Tips & Techniques
I’ve made this recipe more times than I can count, and I’ve definitely learned a few things the hard way. Here are my best tips to guarantee success:
- Don’t skip the sear. That golden crust on the chicken adds a deep, savory flavor that you just can’t get from boiling the meat. It’s the difference between a good pot pie and a great one.
- Watch your heat when making the roux. If the flour burns, it will taste bitter and you’ll have to start over. Keep the heat at medium and stir constantly. If you see any dark brown specks, you’ve gone too far.
- Use cold butter for the roux. I know it sounds weird, but if your butter is too warm, the flour won’t incorporate evenly. Cut it into small cubes and keep it in the fridge until you’re ready.
- Thaw your puff pastry properly. Take it out of the freezer and let it sit in the fridge overnight, or on the counter for 30 minutes. If it’s still cold and stiff when you try to roll it, it will crack. If it’s too warm, it will be sticky and hard to handle.
- Don’t overfill the skillet. Leave about ½ inch of space between the filling and the rim of the pan, or the bubbling gravy might overflow and make a mess in your oven. Trust me, I’ve cleaned that mess up more than once.
- Let it rest. I know it’s tempting to dig in right away, but those 5 minutes of cooling are crucial. The gravy continues to thicken, and the pastry sets. You’ll get cleaner slices and happier taste buds.
Variations & Adaptations
One of the best things about this recipe is how flexible it is. You can make it your own without losing that comforting, creamy soul. Here are a few ways I’ve adapted it over the years:
- Vegetarian Version: Swap the chicken for 2 cups of chopped mushrooms (cremini or portobello work great) and add a can of drained chickpeas for protein. Use vegetable broth instead of chicken broth. The mushrooms give that same earthy, savory depth.
- Gluten-Free Adaptation: Use a gluten-free all-purpose flour blend (like Bob’s Red Mill 1-to-1) for the roux, and top with a gluten-free pie crust or even crushed gluten-free crackers mixed with butter. It won’t puff as much, but it’s still delicious.
- Herb Swap: If you don’t have thyme and rosemary, try 1 teaspoon of dried sage or ½ teaspoon of dried tarragon. Tarragon pairs beautifully with chicken and adds a slight anise note that’s lovely.
- Dairy-Free Option: Use a plant-based butter (like Miyoko’s) and unsweetened oat milk or canned coconut cream. The coconut cream will add a subtle sweetness, but it works surprisingly well with the savory filling.
- Spicy Kick: Add ½ teaspoon of red pepper flakes or a pinch of cayenne pepper to the filling. It gives a gentle warmth without overpowering the dish.
I once made a version with leftover Thanksgiving turkey and added a splash of white wine to the broth. It was so good, I nearly cried. Don’t be afraid to experiment—this recipe is forgiving.
Serving & Storage Suggestions
This pot pie is a complete meal in itself, but a few simple sides can round it out beautifully. Here’s how I like to serve and store it:
- Serving Temperature: Serve warm, straight from the skillet. The contrast between the hot, creamy filling and the cool air is pure comfort. I like to place the skillet on a trivet in the center of the table and let everyone dig in family-style.
- What to Serve With It: A simple green salad with a tangy vinaigrette (the acidity cuts through the richness), or steamed green beans with a squeeze of lemon. For a heartier meal, serve with crusty bread to soak up every last drop of gravy.
- Storage: Let any leftovers cool completely, then transfer to an airtight container. Store in the refrigerator for up to 3 days. The puff pastry will soften, but the flavor only gets better.
- Reheating: The best way to reheat is in a 350°F (175°C) oven for 10-15 minutes, until warmed through. The microwave works in a pinch (about 2 minutes on high), but the pastry will be soggy. To restore some crispness, pop it under the broiler for 1-2 minutes after microwaving.
- Freezing: You can freeze the unbaked pot pie (without the egg wash) for up to 2 months. Assemble everything in the skillet, let it cool, wrap tightly in plastic wrap and foil, then freeze. To bake, thaw in the fridge overnight, brush with egg wash, and bake as directed, adding 5-10 minutes to the cooking time.
Nutritional Information & Benefits
While this is certainly a comfort food, it does offer some nutritional perks. Here’s a rough estimate per serving (based on 6 servings):
- Calories: ~420
- Protein: 28g
- Fat: 22g
- Carbohydrates: 30g
- Fiber: 4g
- Sugar: 6g
- Sodium: 680mg
Chicken provides lean protein for muscle repair, while carrots and peas offer vitamin A and fiber. The butter and cream add fat, which helps absorb fat-soluble vitamins from the vegetables. If you’re watching your sodium, use low-sodium broth and skip the added salt until the end. For a lighter version, use milk instead of cream and reduce the butter to 2 tablespoons. This dish is not low-carb, but it is a balanced meal when paired with a vegetable side.
Conclusion
This Easy One-Pan Chicken Pot Pie has become a staple in my kitchen for all the right reasons. It’s quick, it’s forgiving, and it delivers that deep, homey comfort we all need after a long day. I love how it brings my family to the table—my husband always says it smells like Sunday, even when it’s Tuesday. And honestly, that’s the kind of magic I want you to have in your kitchen too.
I’d love to hear how this recipe turns out for you! Did you add your own twist? Did the kids gobble it up? Drop a comment below and let me know—your stories are what make this community so special. And if you share a photo on Pinterest, tag me so I can see your beautiful creation. Happy cooking, friend!
Frequently Asked Questions
Can I use a different type of pastry?
Absolutely! While puff pastry gives that light, flaky texture, you can use a traditional pie crust (rolled out to fit the skillet), crescent roll dough, or even canned biscuit dough cut into pieces. Each will give a different texture, but all are delicious.
Can I make this ahead of time?
Yes, you can prepare the filling up to 2 days in advance. Store it in the refrigerator, then reheat it on the stovetop before adding the pastry and baking. You can also assemble the entire dish (without the egg wash) and refrigerate for up to 24 hours before baking. Just add 5-10 minutes to the baking time.
Why is my filling too thin or too thick?
If your filling is too thin, let it simmer a few extra minutes to reduce. If it’s too thick, add a splash of broth or milk until it reaches your desired consistency. The filling should be thick enough to coat the back of a spoon but still pourable.
Can I use leftover rotisserie chicken?
Definitely! Skip the searing step and add 2-3 cups of shredded rotisserie chicken to the filling after the gravy has thickened. Just warm it through before adding the pastry. This saves even more time.
How do I prevent the puff pastry from getting soggy?
Make sure your filling is thick and not watery before adding the pastry. Also, cutting slits in the top allows steam to escape, which keeps the pastry crispy. Baking at a high temperature (400°F) also helps the pastry puff up quickly before the moisture from the filling can soak in.
Pin This Recipe!

Easy One-Pan Chicken Pot Pie

This Easy One-Pan Chicken Pot Pie is a quick, comforting family dinner made entirely in one skillet. With a creamy filling, tender chicken, and flaky puff pastry, it’s the perfect weeknight meal that minimizes cleanup.
- Prep Time: 15 minutes
- Cook Time: 30 minutes
- Total Time: 45 minutes
- Yield: 6 servings 1x
- Category: Main Course
- Cuisine: American
Ingredients
- 1 tablespoon olive oil
- 1 pound boneless, skinless chicken breasts or thighs, cut into bite-sized pieces
- 1 medium yellow onion, diced (about 1 cup)
- 2 medium carrots, peeled and diced (about 1 cup)
- 2 celery stalks, diced (about ½ cup)
- 3 cloves garlic, minced
- 4 tablespoons unsalted butter
- ⅓ cup all-purpose flour
- 1 ½ cups low-sodium chicken broth
- 1 cup whole milk or heavy cream
- 1 cup frozen peas and carrots mix
- ½ teaspoon dried thyme
- ½ teaspoon dried rosemary
- Salt and freshly ground black pepper, to taste
- 1 sheet frozen puff pastry, thawed
- 1 large egg, beaten with 1 tablespoon water
- Flaky sea salt, for sprinkling (optional)
Instructions
- Preheat your oven to 400°F (200°C). Position the rack in the center.
- Heat the olive oil in a 12-inch oven-safe skillet over medium-high heat. Add the chicken pieces in a single layer and sear for 3-4 minutes per side until golden brown but not fully cooked. Transfer to a plate and set aside.
- Reduce heat to medium and add the butter. Once melted, add the diced onion, carrots, and celery. Cook for 5-6 minutes, stirring occasionally, until softened and onions are translucent.
- Add the minced garlic and cook for 30 seconds until fragrant, stirring constantly.
- Sprinkle the flour evenly over the vegetables and stir for about 1 minute to cook the raw flour taste.
- Slowly pour in the chicken broth while whisking continuously to break up lumps. Add the milk or cream, still whisking. Bring to a gentle simmer and cook for 2-3 minutes until thickened enough to coat the back of a spoon.
- Stir in the frozen peas and carrots, dried thyme, rosemary, and the seared chicken along with any juices. Season with salt and pepper to taste.
- Remove the skillet from the heat. On a lightly floured surface, roll out the thawed puff pastry sheet to about 10 inches in diameter. Lay the pastry over the filling, letting the edges hang over slightly.
- Brush the top of the pastry with the egg wash. Sprinkle with flaky sea salt if desired. Cut 3-4 small slits in the center to let steam escape.
- Transfer the skillet to the preheated oven and bake for 18-22 minutes, until the pastry is puffed, golden, and flaky, and the filling is bubbling around the edges.
- Let cool on a wire rack for 5 minutes before serving.
Notes
For a dairy-free version, use plant-based butter and unsweetened oat milk or canned coconut milk. For a gluten-free adaptation, use a gluten-free all-purpose flour blend and a gluten-free pie crust. Let the pot pie rest for 5 minutes after baking to allow the gravy to set.
Nutrition
- Serving Size: 1 serving
- Calories: 420
- Sugar: 6
- Sodium: 680
- Fat: 22
- Saturated Fat: 10
- Carbohydrates: 30
- Fiber: 4
- Protein: 28
Keywords: chicken pot pie, one-pan dinner, easy weeknight meal, comfort food, puff pastry chicken pot pie